F5 Distributed Cloud > F5 Distributed Cloud: Policy Optimization in a Multicloud World > Module 1: Multi-Cloud Network Connect with Segments Source | Edit on
Lab 2: Configuring Network Connect with Segments (L3/L4 Routing Firewall)
Objective:
Understand Network Segments and their isolation characteristics
Attach a pre-configured segment to your CE site interface
Test connectivity to AWS workloads before and after segment attachment
Review routing information and understand route propagation
Review Enhanced Firewall policies and their enforcement
Verify firewall policy effectiveness through testing
In this lab, you will attach a pre-configured network segment to your CE site interface to enable connectivity to AWS workloads. You will then test connectivity and observe how Enhanced Firewall policies control traffic between segments.
Note
Network segments provide isolation by default (“ships in the night”). Attaching a segment to your CE interface enables connectivity while maintaining security boundaries between different environments.

Prerequisite
Note
You should already be logged into your lab’s Distributed Cloud Tenant and have completed Lab 1.
Warning
If you are experiencing issues accessing the Distributed Cloud Tenant, please alert one of the Lab Assistants.
Task 1: Understanding the Lab Environment
Narrative:
You need to configure connectivity to meet ACME Corp’s requirement: connect your Data Center network to the AWS network. Only HTTP traffic to the node in AWS should be allowed from your Data Center, with all other traffic controlled by firewall policies.
Lab Environment Overview:
An Ubuntu Server in your UDF (Data Center) environment
The AWS Ubuntu workload is shared across all lab attendees at 10.0.5.253
A pre-configured AWS segment (appworld-aws-segment) will be attached to your site
Enhanced Firewall policies will control traffic between segments
Note
The Data Center has a pre-configured route to 10.0.5.0/24 pointing to the Data Center CE Node. The AWS workload has a route to 10.1.10.0/24 pointing to the AWS CE Node.
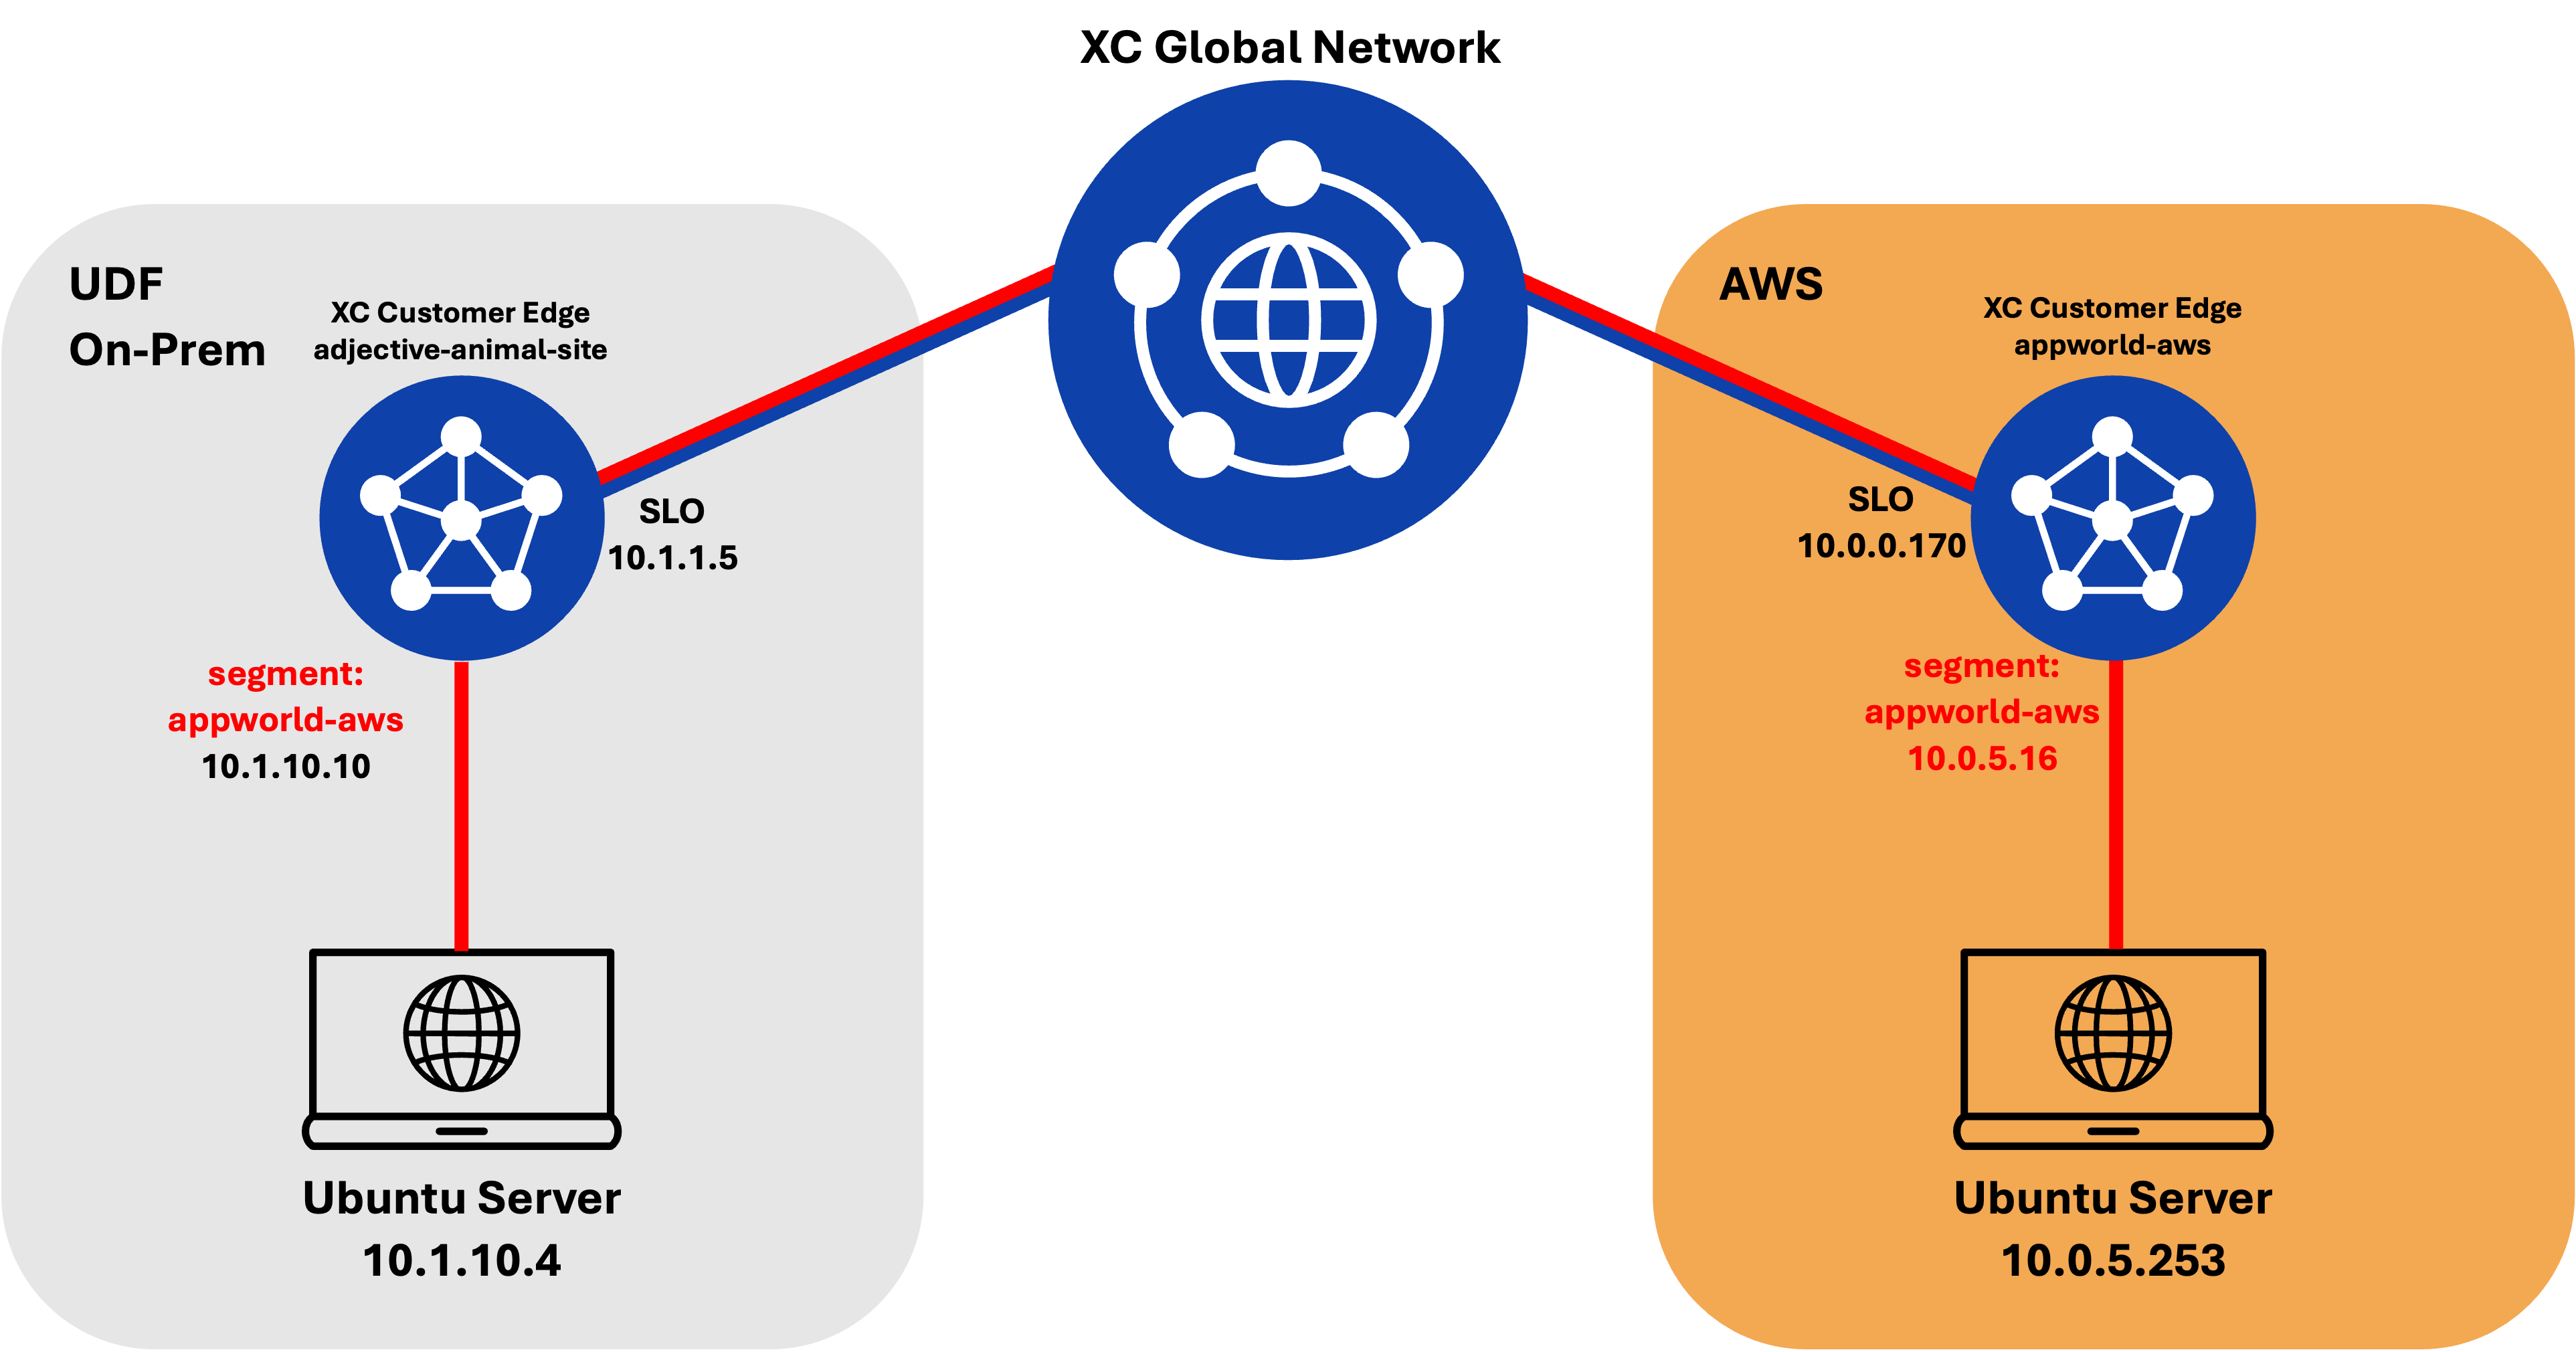
Your goal is to attach the AWS segment to your CE site interface to enable connectivity between your UDF environment and the AWS workload.
All traffic between networks will be routed through auto-provisioned, self-healing and encrypted tunnels between the Customer Edges and F5 Regional Edges.
Task 2: Understanding Network Segments
What are Network Segments?
Network segments are isolated Layer 3 network domains that provide:
Isolation: Segments are isolated by default - traffic cannot flow between segments without explicit configuration (“ships in the night”)
Flexibility: Segments can span multiple sites and cloud environments
Security: Each segment can have its own security policies and access controls
Key Concepts:
Segment: An isolated network domain (e.g., “prod-segment”, “dev-segment”)
Segment Attachment: Assigning a segment to a CE interface enables connectivity to that segment
Route Propagation: Routes are automatically exchanged through Regional Edges when segments are attached
Enhanced Firewall: Provides stateful firewall capabilities to control traffic between segments
Task 3: Test Connectivity to AWS Before Segment Attachment
Before attaching the segment, let’s verify that there is no connectivity to the AWS workload.
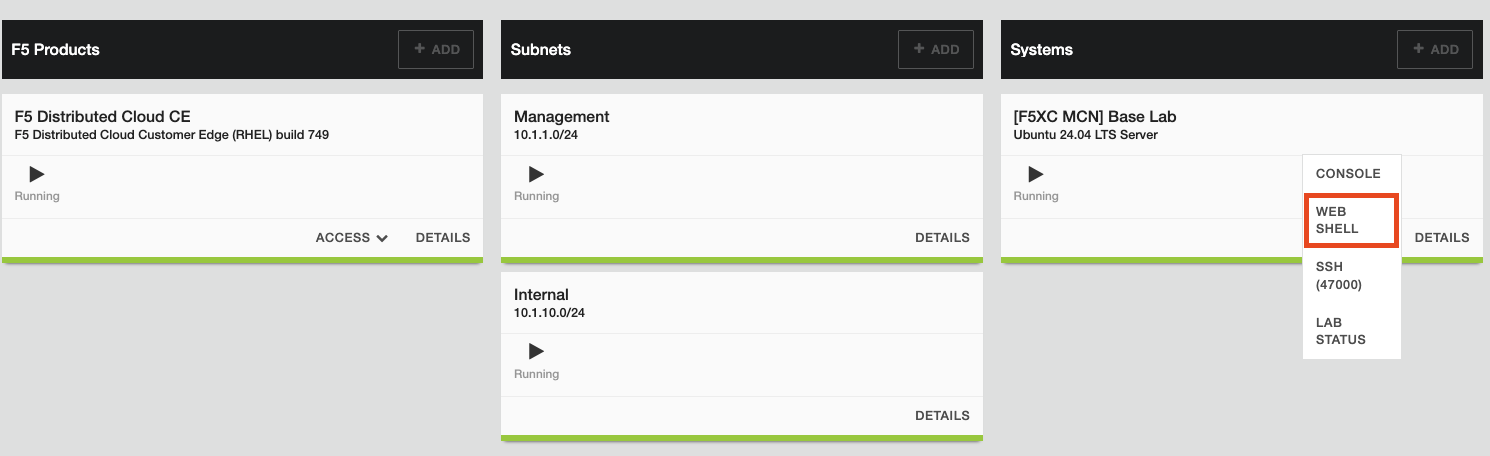
From your UDF environment browser tab, click on Access >> Web Shell on the Ubuntu Client. This opens a new tab with a Web Shell.
The Ubuntu server in AWS has IP address 10.0.5.253
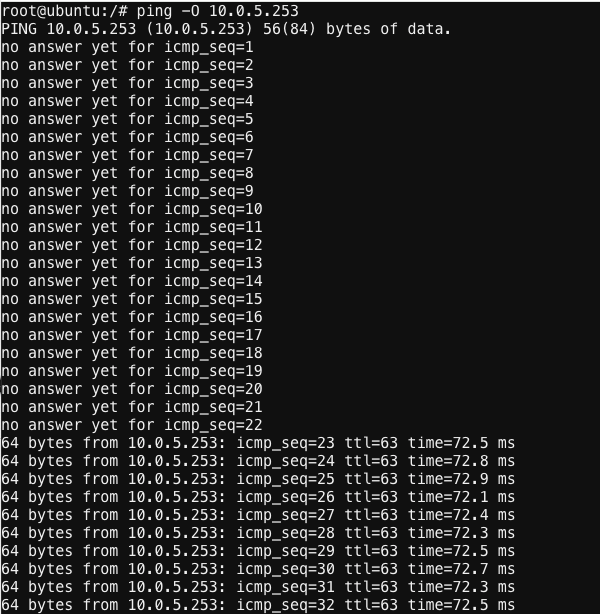
Type ping -O 10.0.5.253 and press Enter. You WILL NOT get a response.
Note
-O is the uppercase letter “O”
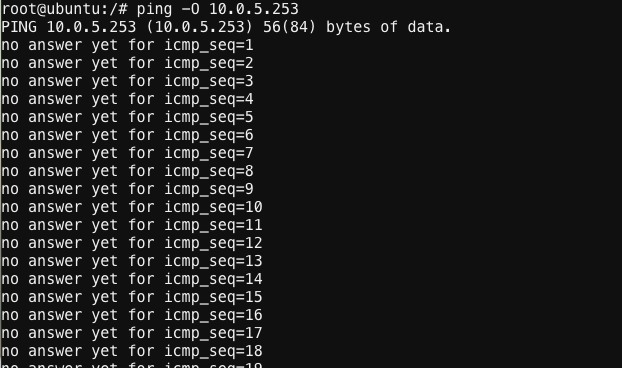
Leave this ping running - we’ll check back after attaching the segment to your CE (Customer Edge) site.
Task 4: Review Routing Information Before Attaching Segment to Your CE Site
Let’s examine the routing information before we attach the segment to the interface.
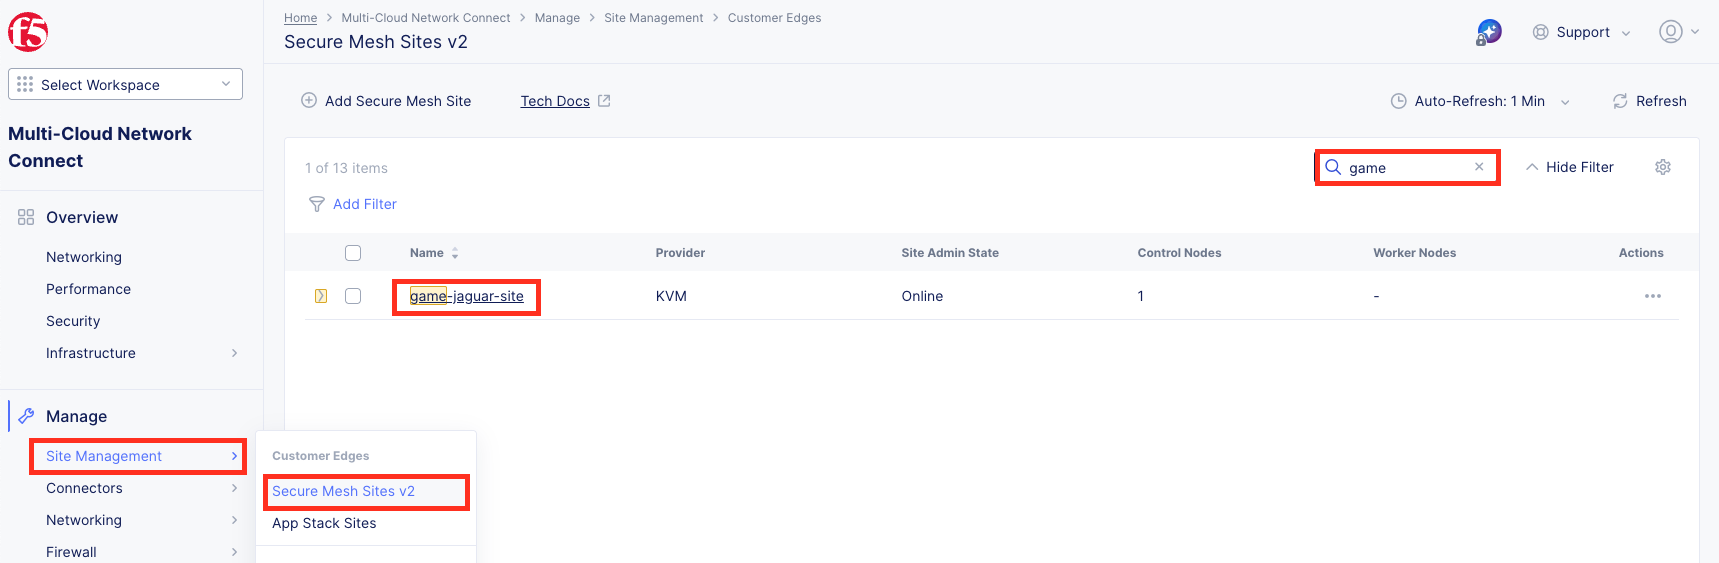
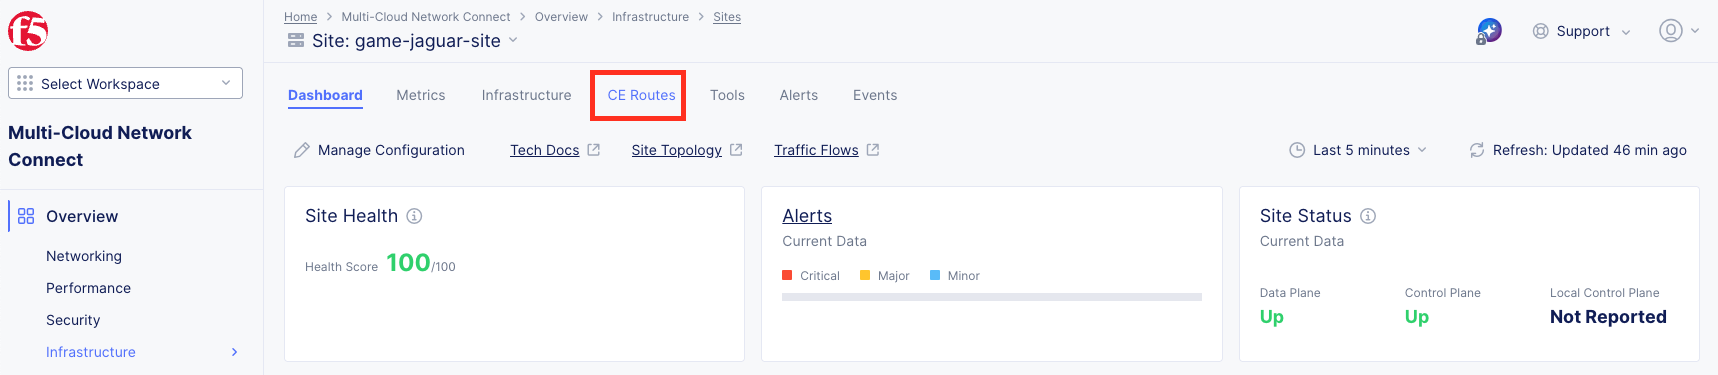
Navigate to Multi-Cloud Network Connect >> Manage >> Site Management >> Secure Mesh Site v2 and click on your <your-namespace>-site.
Click on the CE Routes menu on the top, in the middle.
On the right side of the screen, Select Data by choosing your node and review both VIRTUAL_NETWORK_SITE_LOCAL and VIRTUAL_NETWORK_SITE_LOCAL_INSIDE one at a time. After choosing the Segment click Apply bottom right of page
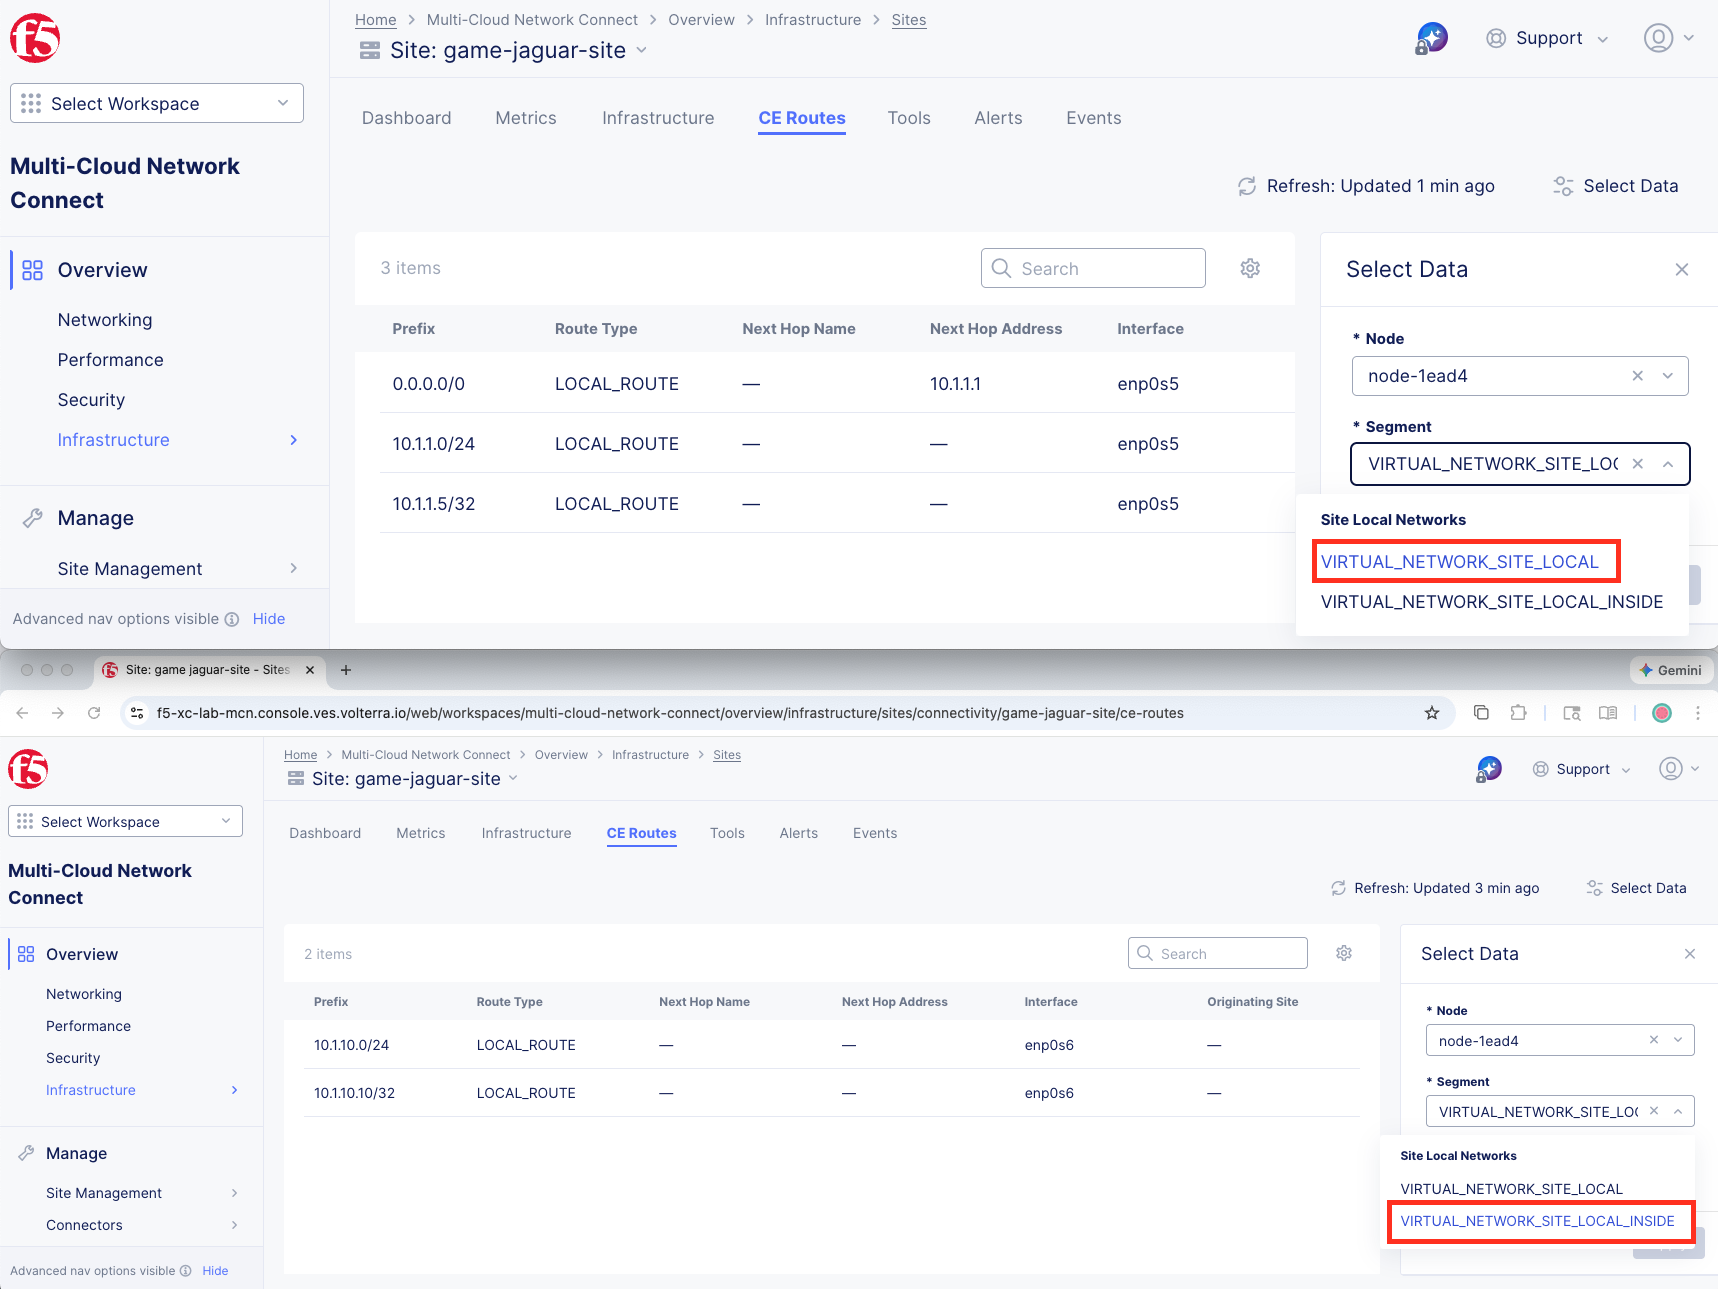
Observe there isn’t any route to 10.0.5.0/24 via enp0s5 nor enp0s6.
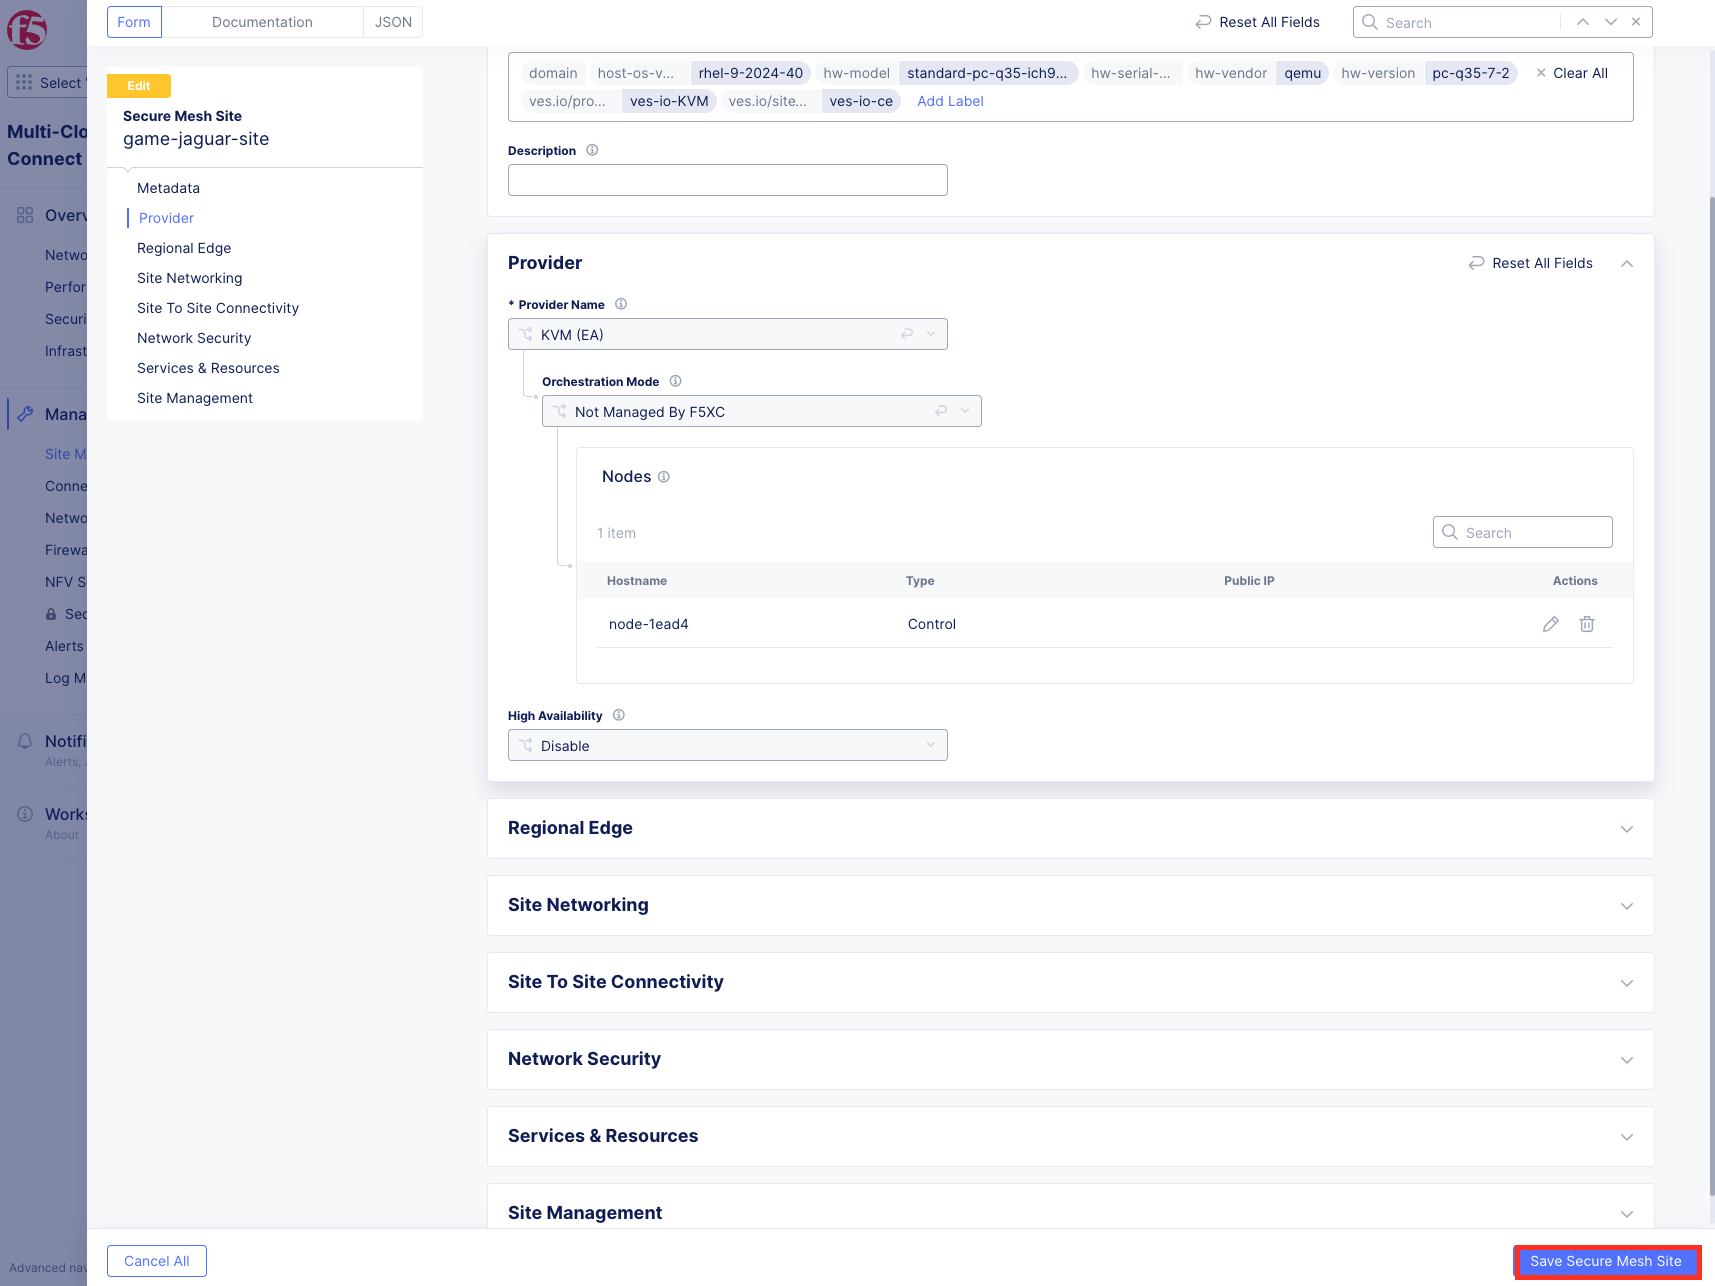
Task 5: Attach Segment to Your CE Site
You will now attach the pre-configured AWS segment to your CE site’s interface.
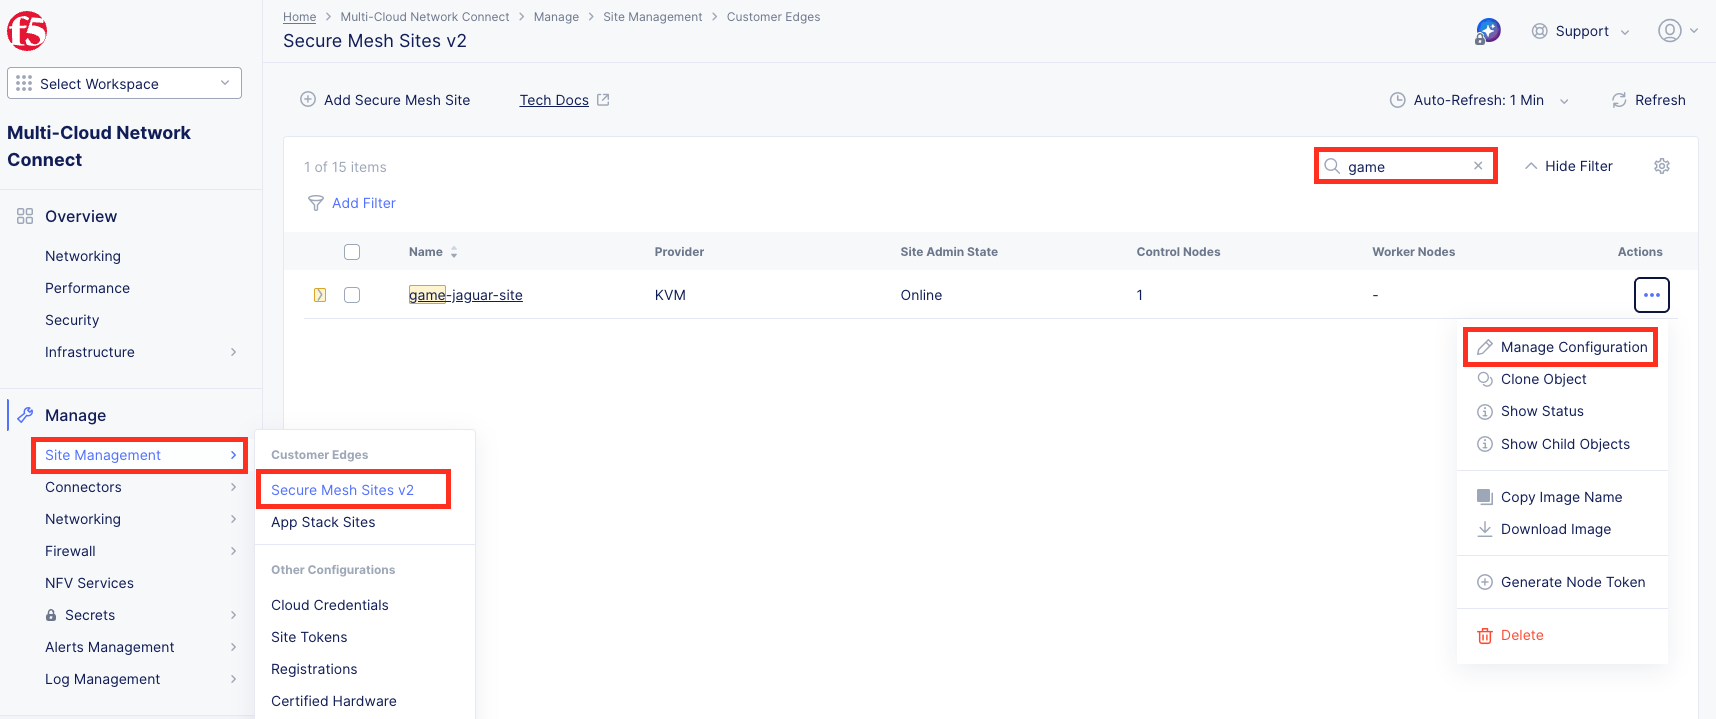
Navigate back to the list of all Secure Mesh Sites v2 Manage >> Site Management >> Secure Mesh Sites v2.
Locate your UDF site (<your-namespace>-site) and click the three dots under Actions.
Select Manage Configuration.
Click Edit Configuration on the top right.
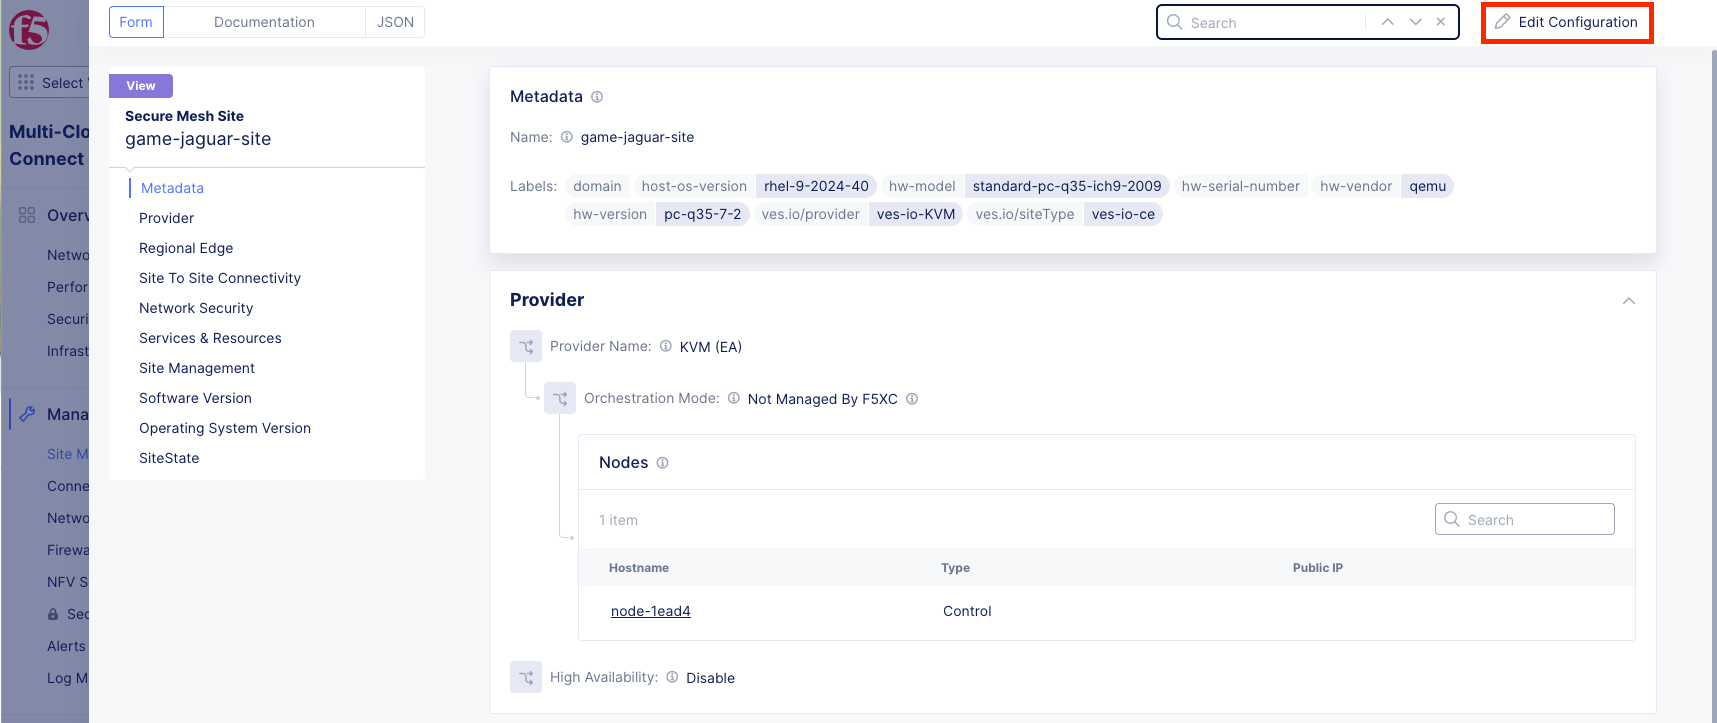
Click Edit (the pencil icon) to edit the CE node.
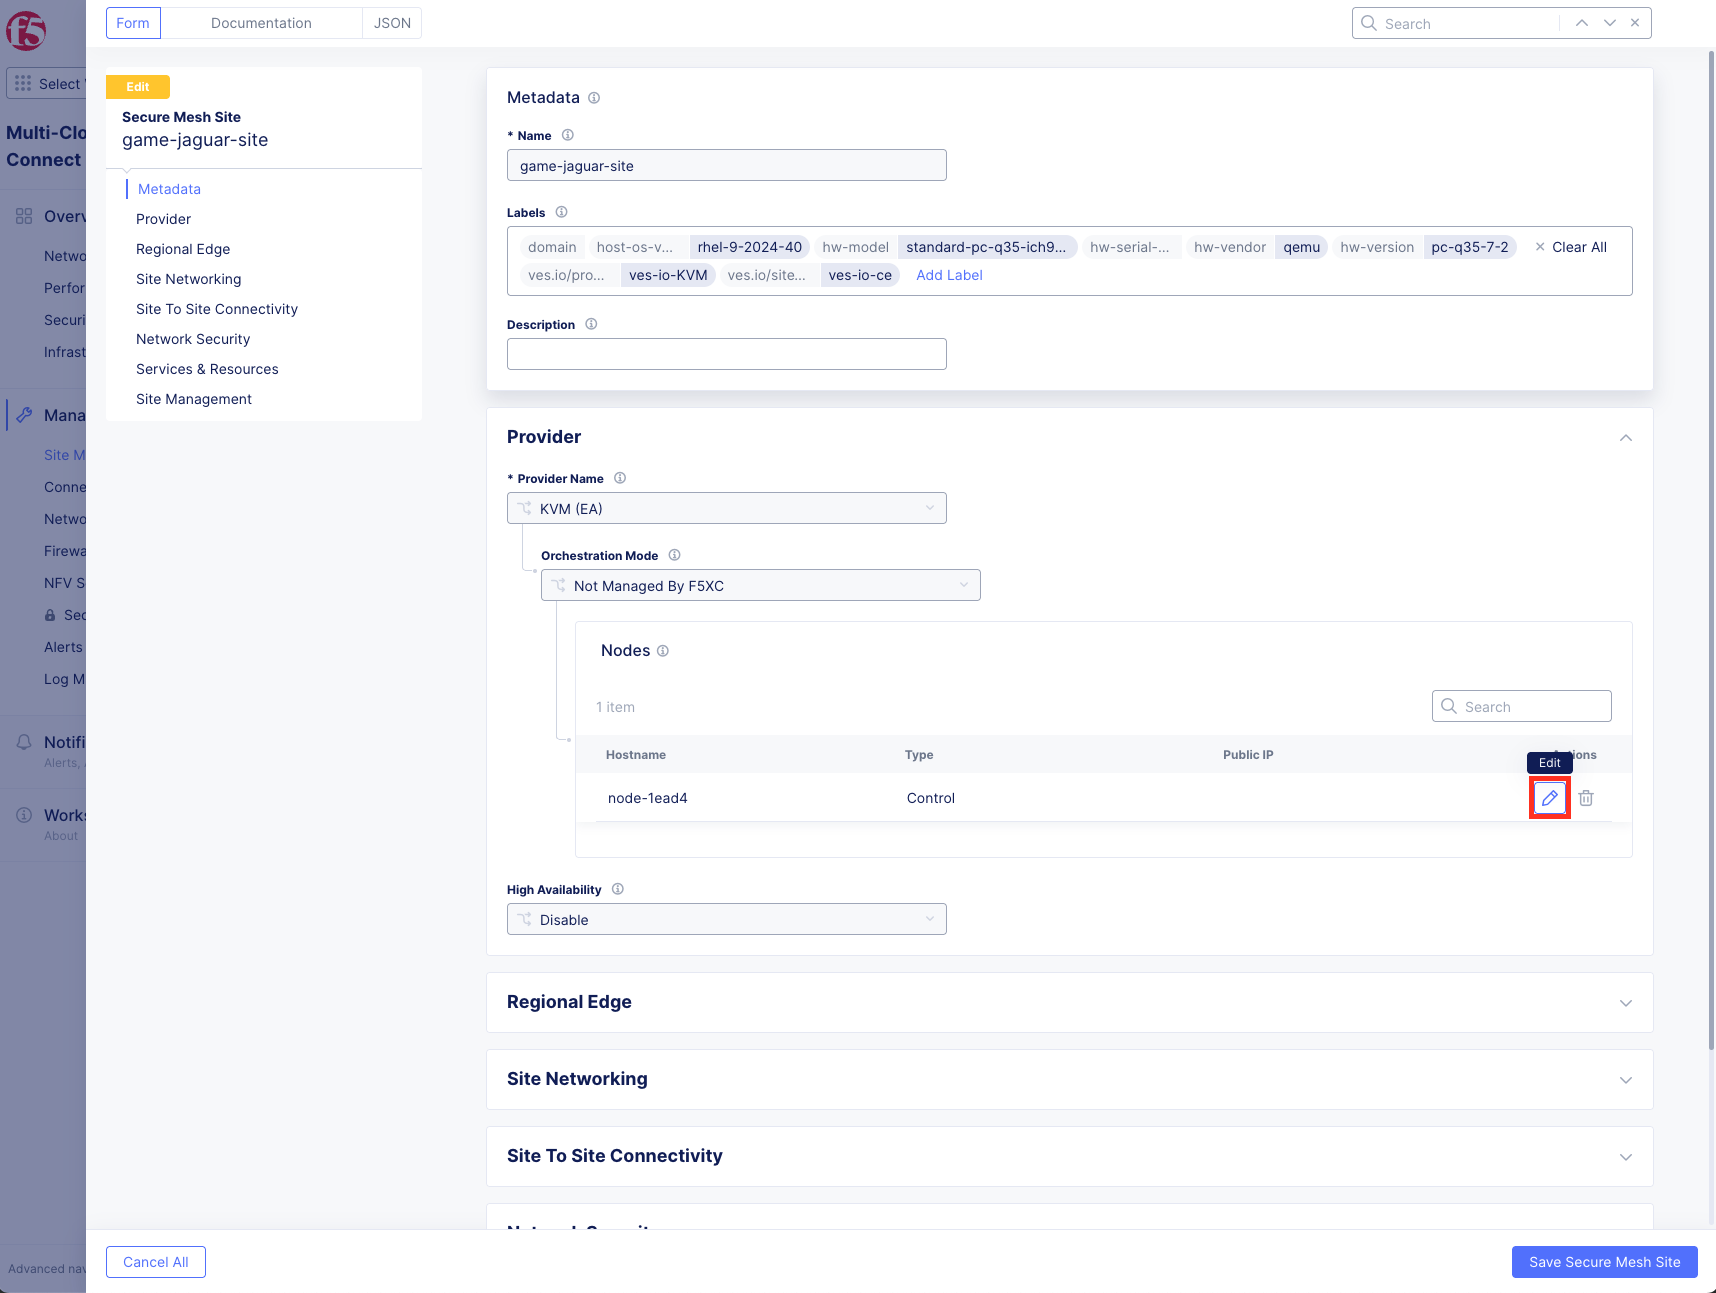
Find the enp0s6 interface and click Edit (the pencil icon).
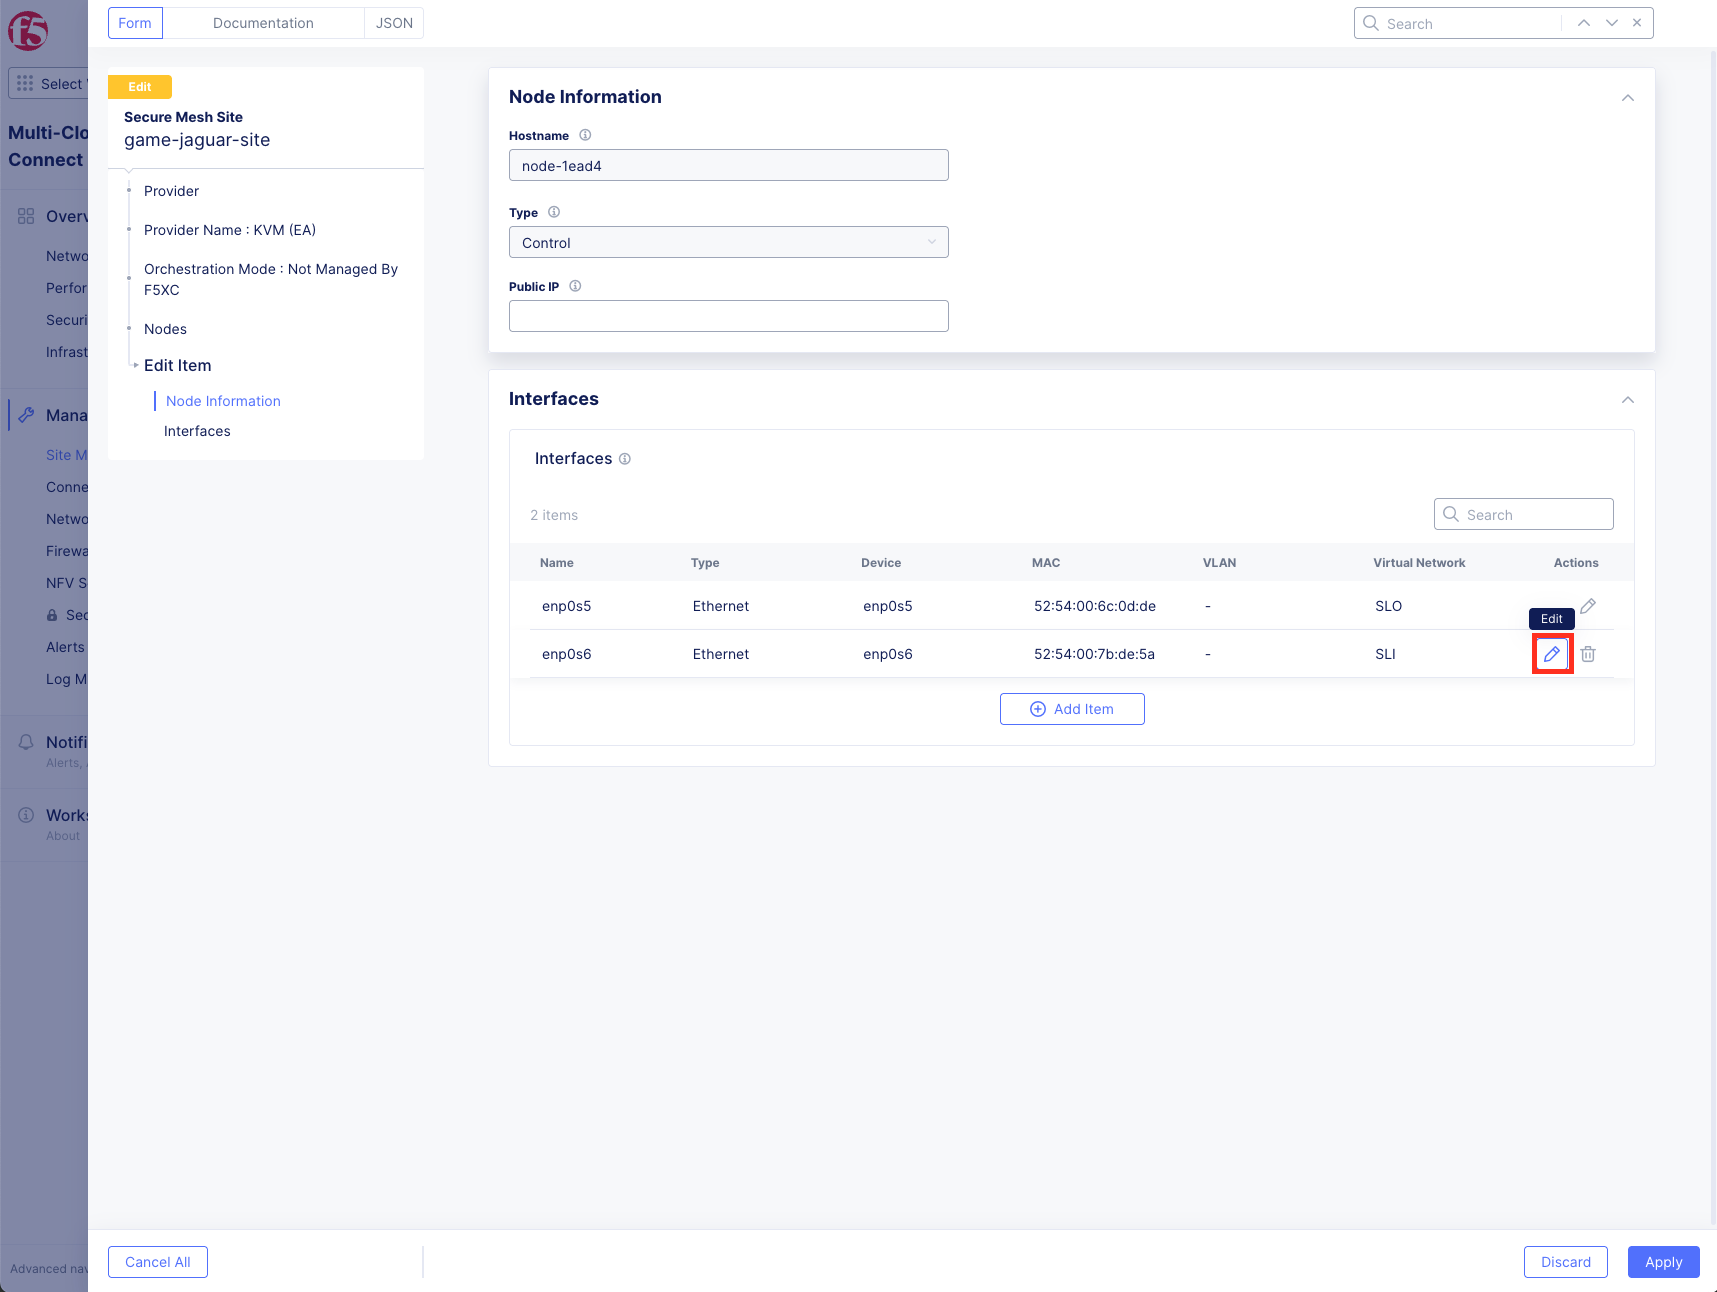
Configure your interface then click Apply:
IP Configuration:
Variable
Value
IPv4 Interface Address Method
Static IP
IP address/Prefix Length
10.1.10.10/24
Default Gateway
10.1.10.1
Interface Settings:
Variable
Value
Select VRF
Segment (Global VRF)
Segment (Global VRF)
appworld-aws-segment
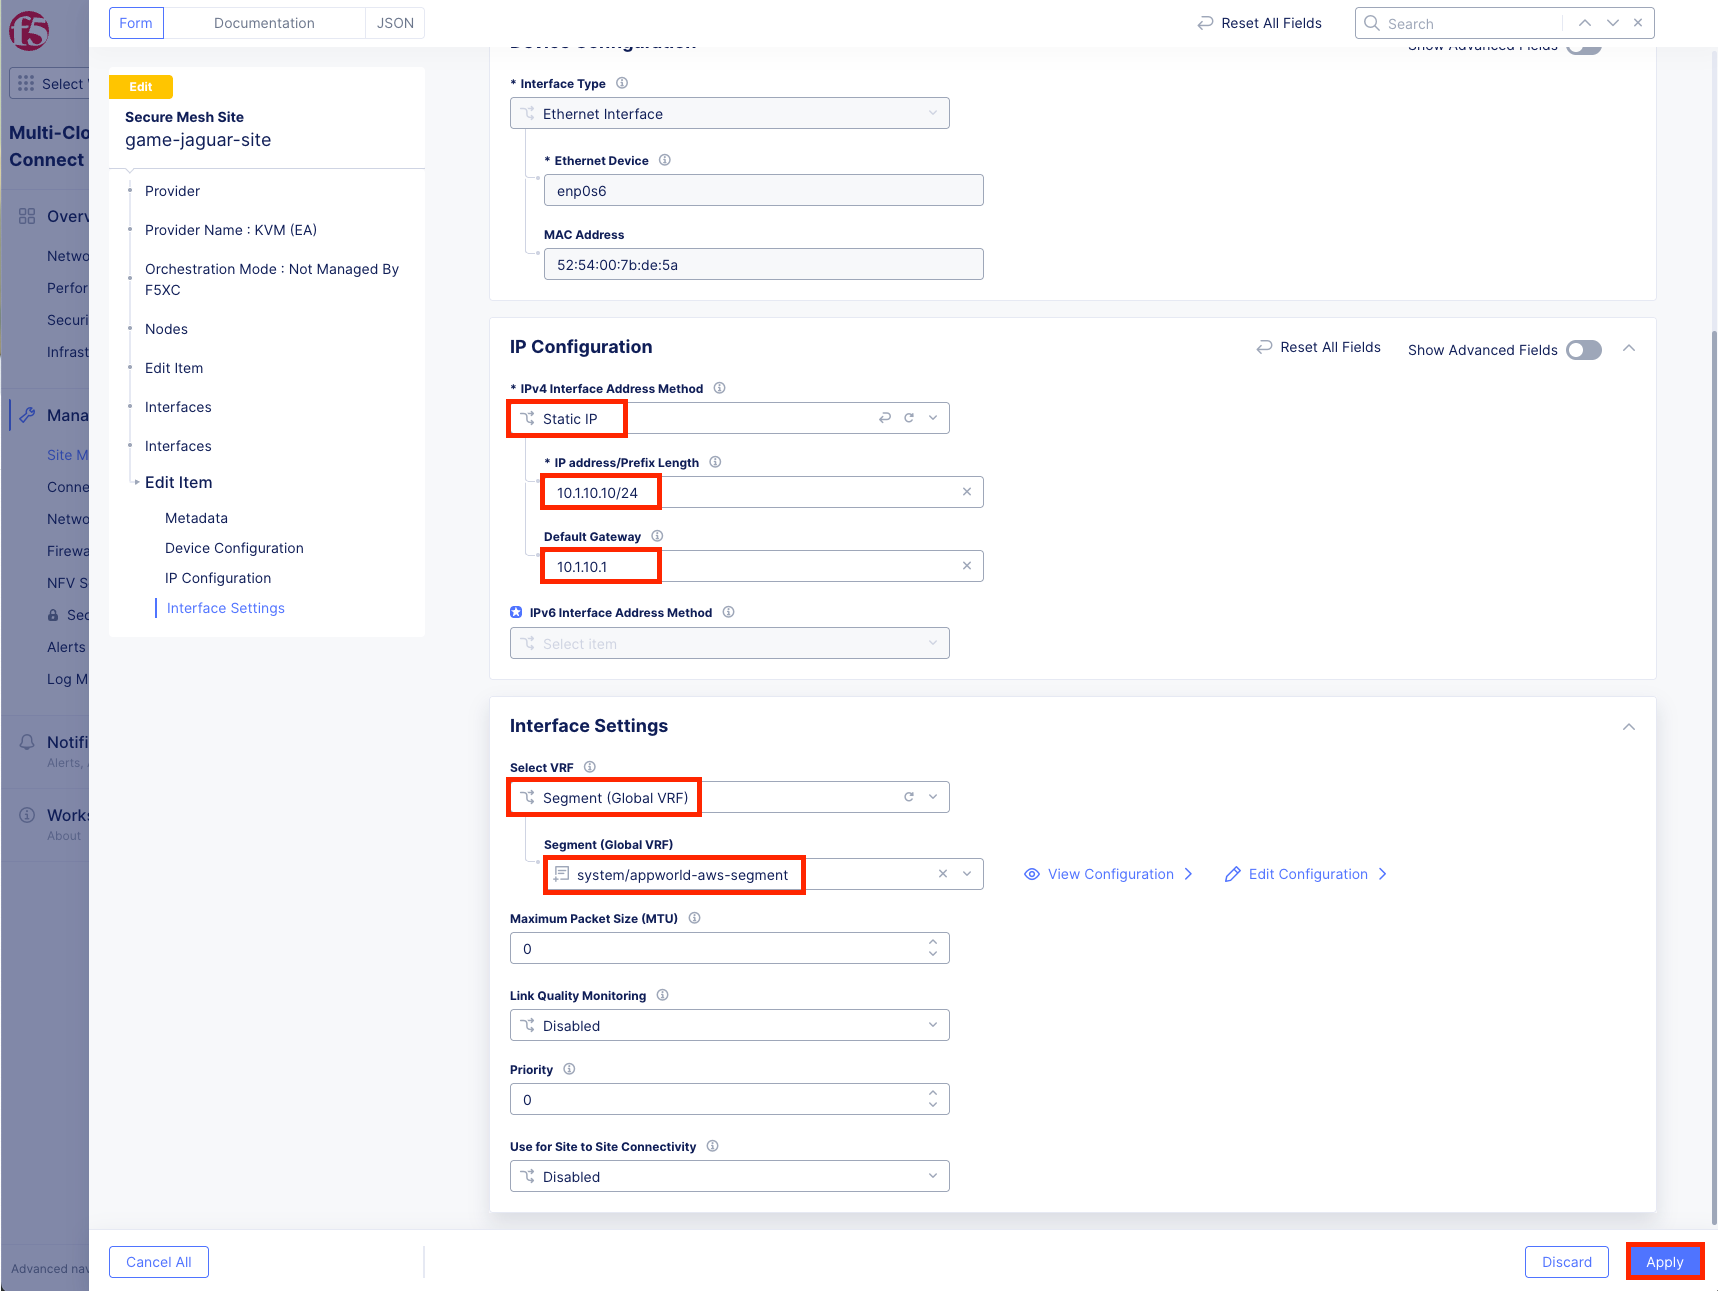
Click Apply to save node interface changes.
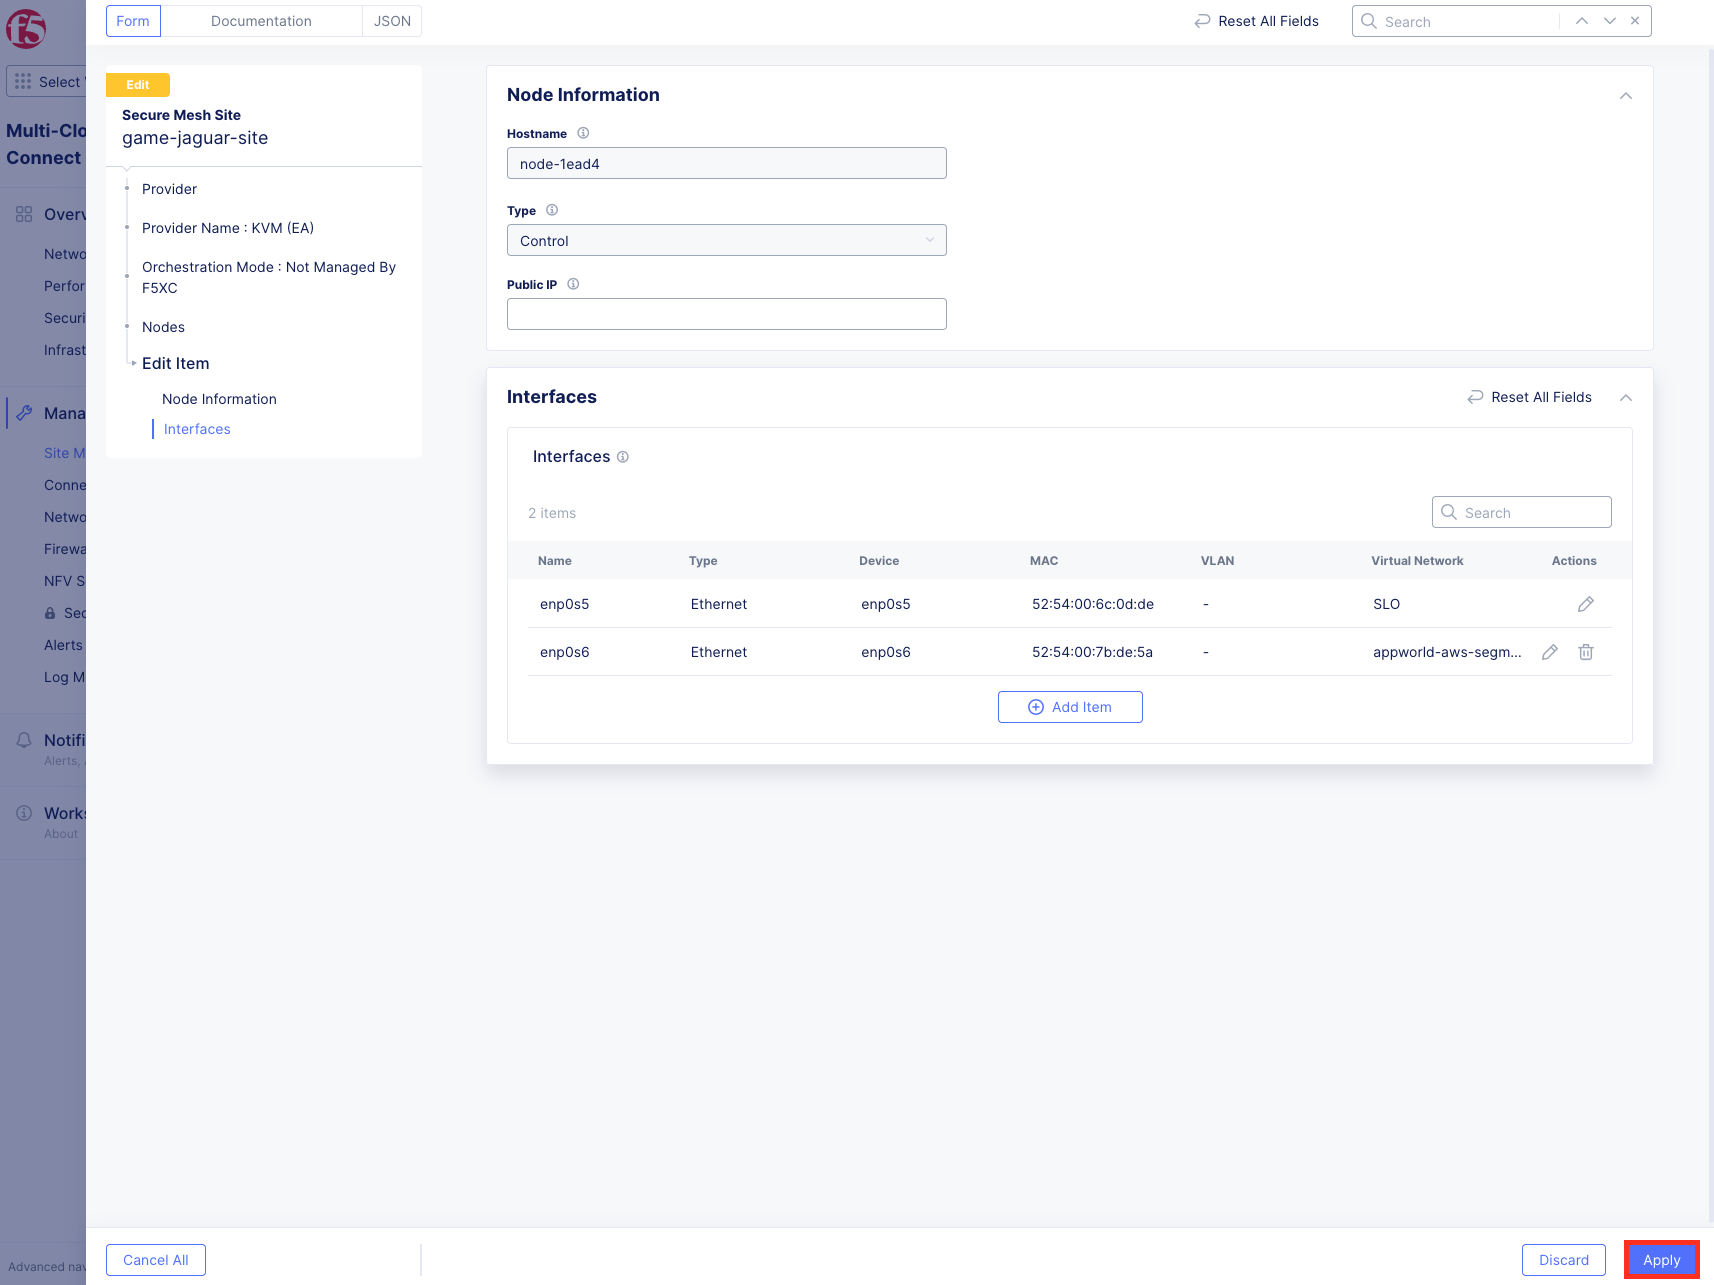
Click Save Secure Mesh Site to save your site configuration.
Task 6: Test Connectivity to AWS After Segment Attachment
Let’s verify the connectivity to the AWS Ubuntu now.
Navigate back to the Ubuntu Web Shell tab.
You should be getting responses now!!
Test the HTTP service. In the web shell type:
curl –head http://10.0.5.253
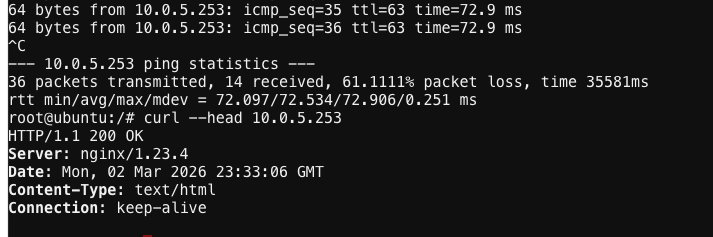
You should receive a 200 OK response from the nginx web server.
Important
If you are not getting a 200 OK response or ping fails, please see a lab assistant before moving on.
Task 7: Review Routing Information
Let’s examine the routing established by attaching the segment to the interface.
Navigate back to the list of all Secure Mesh Sites v2 Manage >> Site Management >> Secure Mesh Sites v2 and click on your <your-namespace>-site.
Click on the CE Routes menu again.
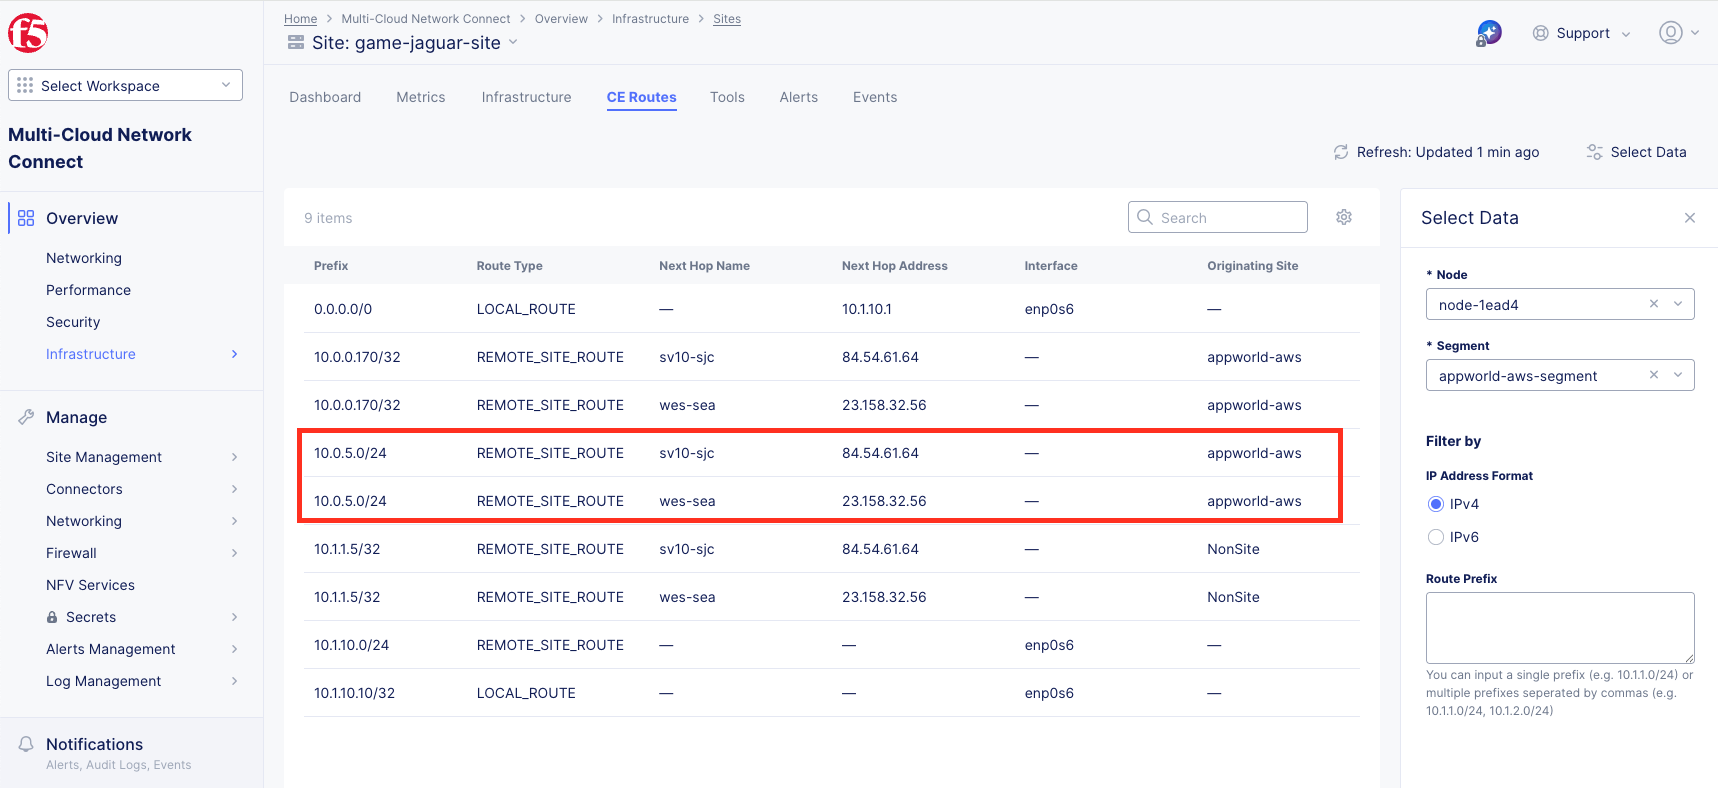
Select Data by choosing your node and then select appworld-aws-segment this time, then click Apply.
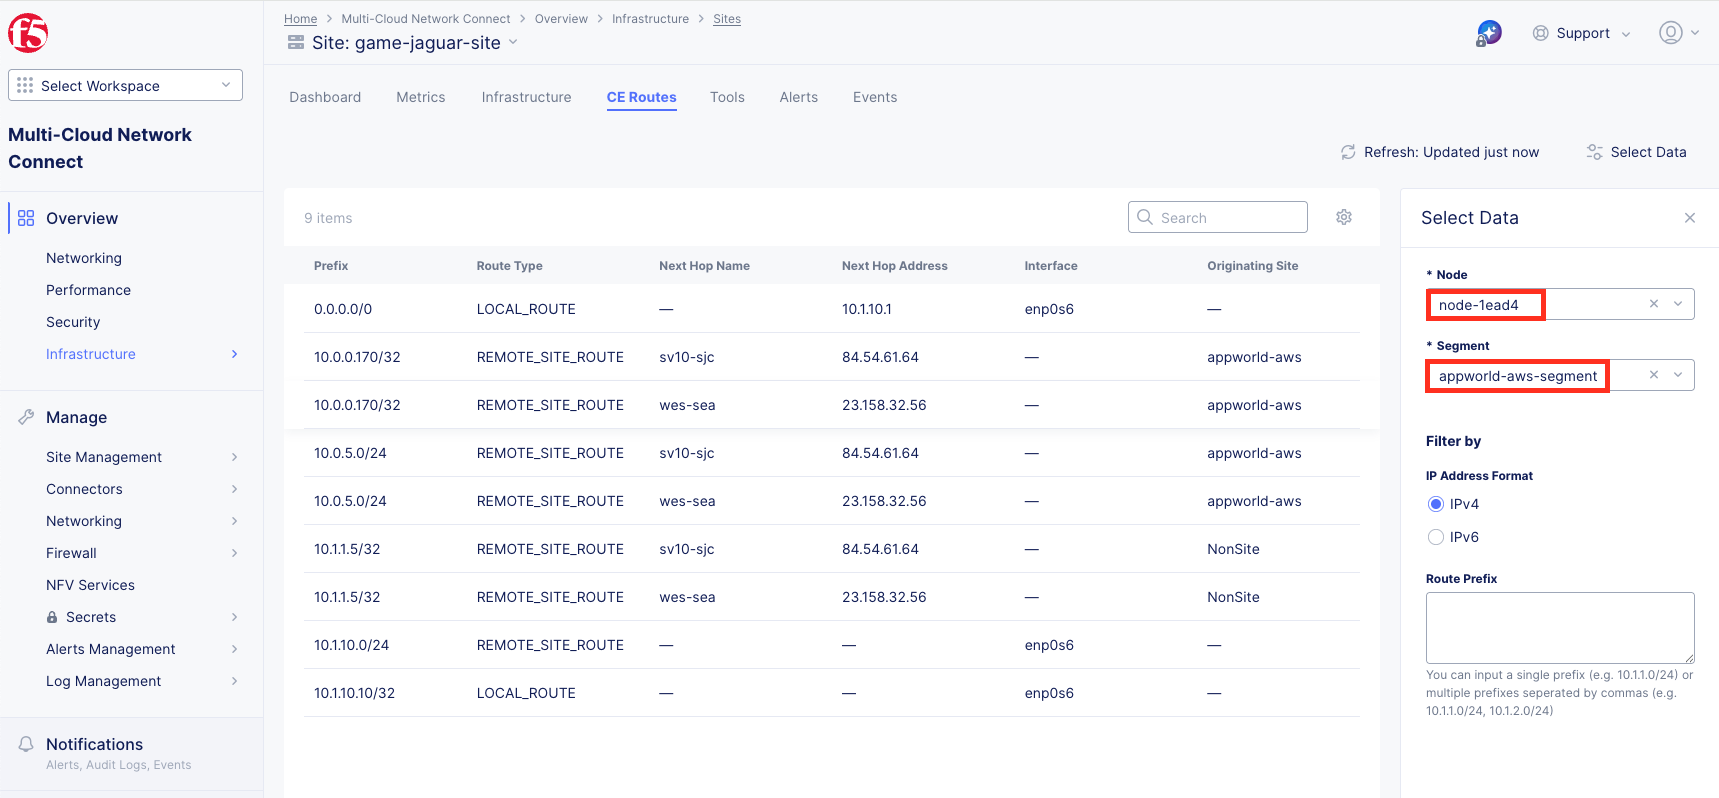
Observe the routes including the route to 10.0.5.0/24 via two REs (Regional Edges) that’s closest to your CE node with appworld-aws site as Originating Site.
Task 8: Understanding Enhanced Firewall Policies
Enhanced Firewall policies provide granular security controls that can be applied to sites to control traffic between segments.
Key Concepts:
Enhanced Firewall: Provides stateful firewall capabilities at the CE site
Traffic Filters: Define source and destination criteria for firewall rules
Protocol Matching: Allow or deny specific protocols (ICMP, TCP, UDP, etc.)
Default Deny: Implicit deny ensures only explicitly allowed traffic passes
Task 9:Review Pre-Configured Firewall Policy (No Action Required)
Important
Please do NOT edit the pre-configured firewall policy for this lab. This task is just to review the existing firewall policy that has been configured for the AWS site.
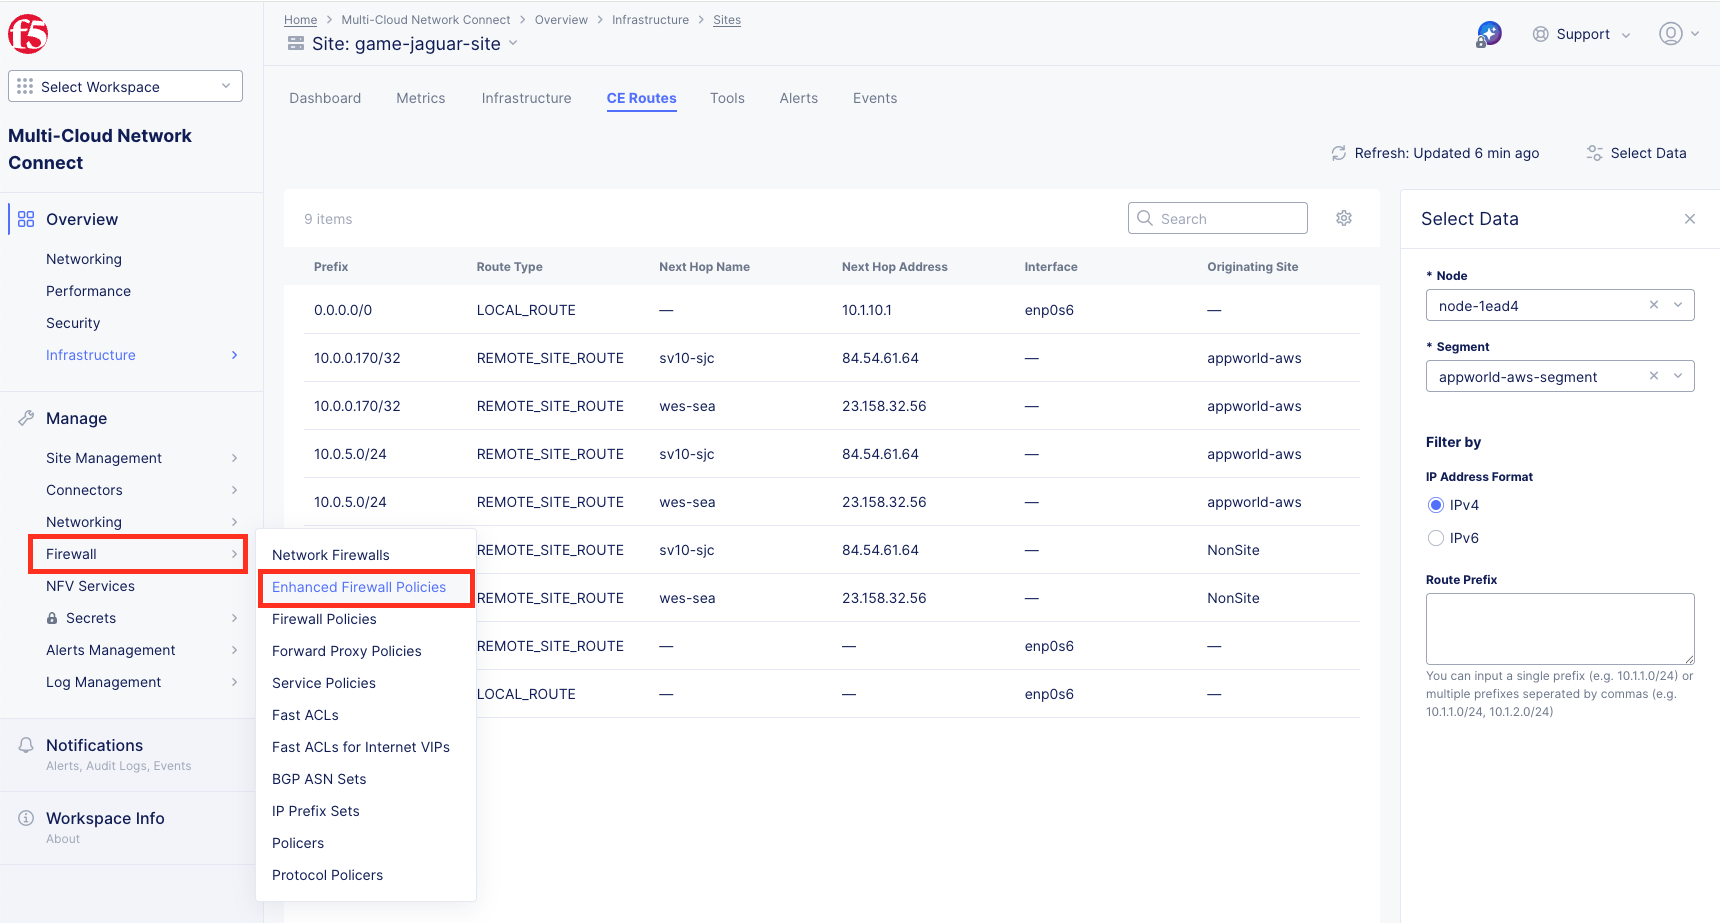
Navigate to Multi-Cloud Network Connect >> Manage >> Firewall >> Enhanced Firewall Policies.
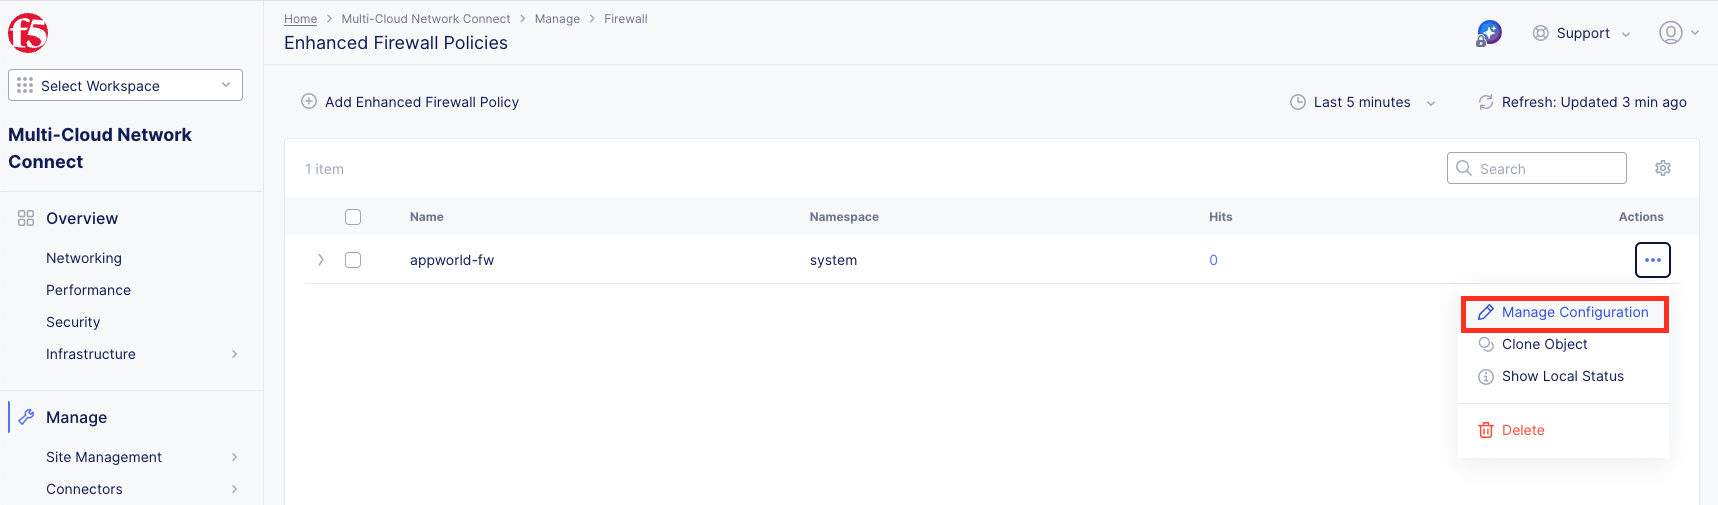
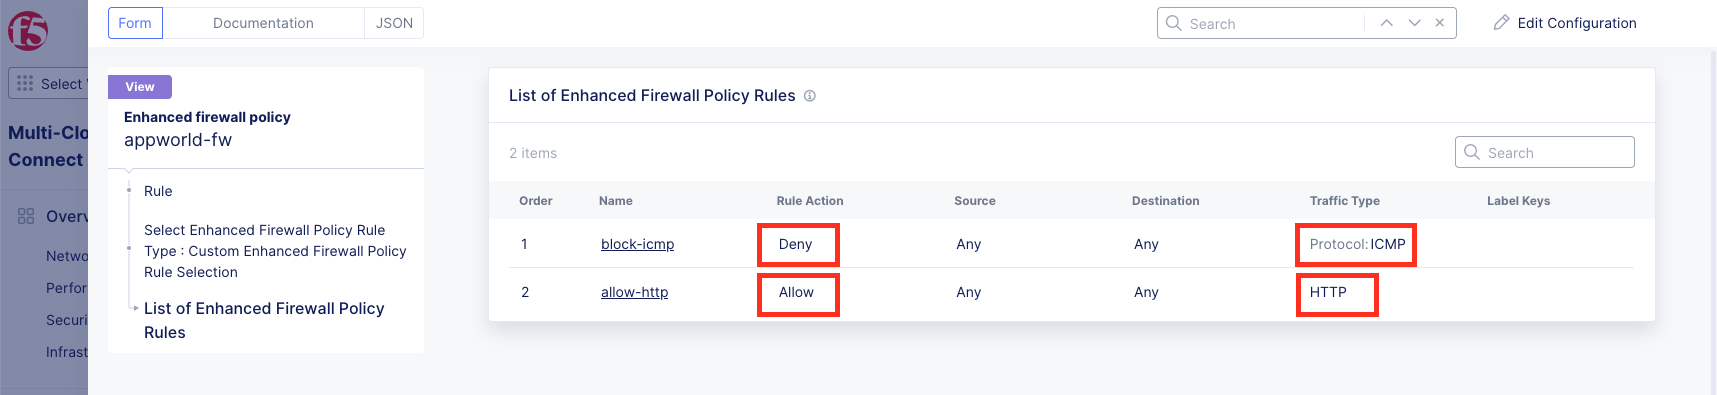
Click on Manage Configuration from Action for the appworld-fw to review the Firewall Policy.
Click on the View Configuration to review the configured rules in the firewall policy.
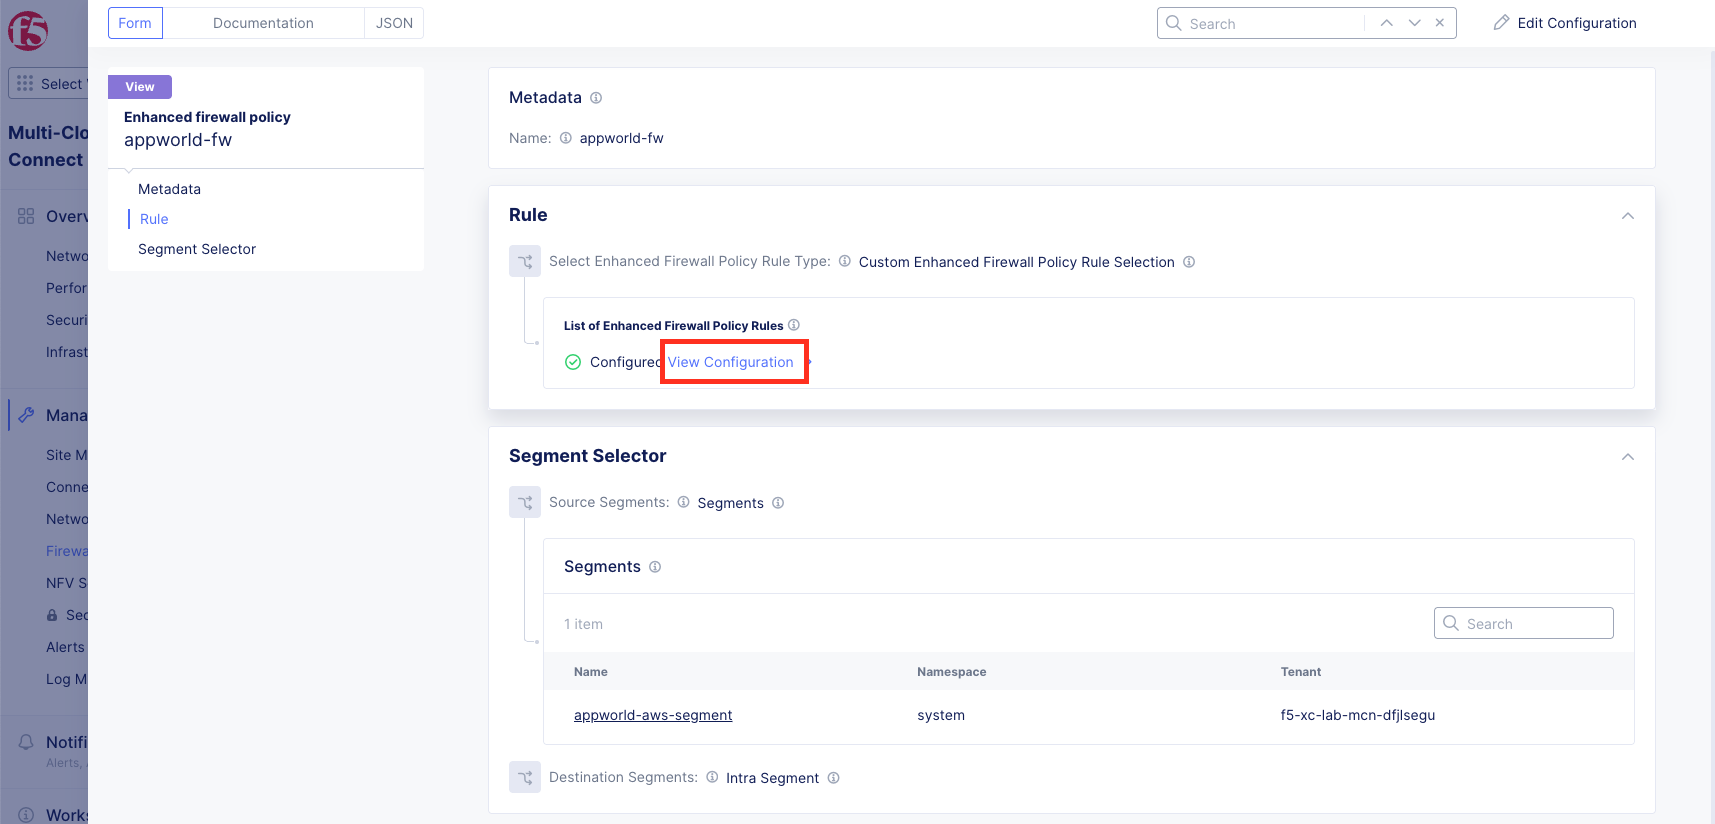
Review the rules’ order that ICMP traffic is set to be Deny and HTTP traffic is set to be Allow.
Task 9: Apply Enhanced Firewall Policy (Instructor-Led)
Your instructor will now apply an Enhanced Firewall policy to the AWS site to demonstrate security controls.
Note
This task will be performed by the instructor. The reason is that the AWS site of our lab environment is shared and we only want to have one person perform this action.
The instructor will edit the configuration of the AWS site and attach the appworld-fw firewall policy to the appworld-aws site.
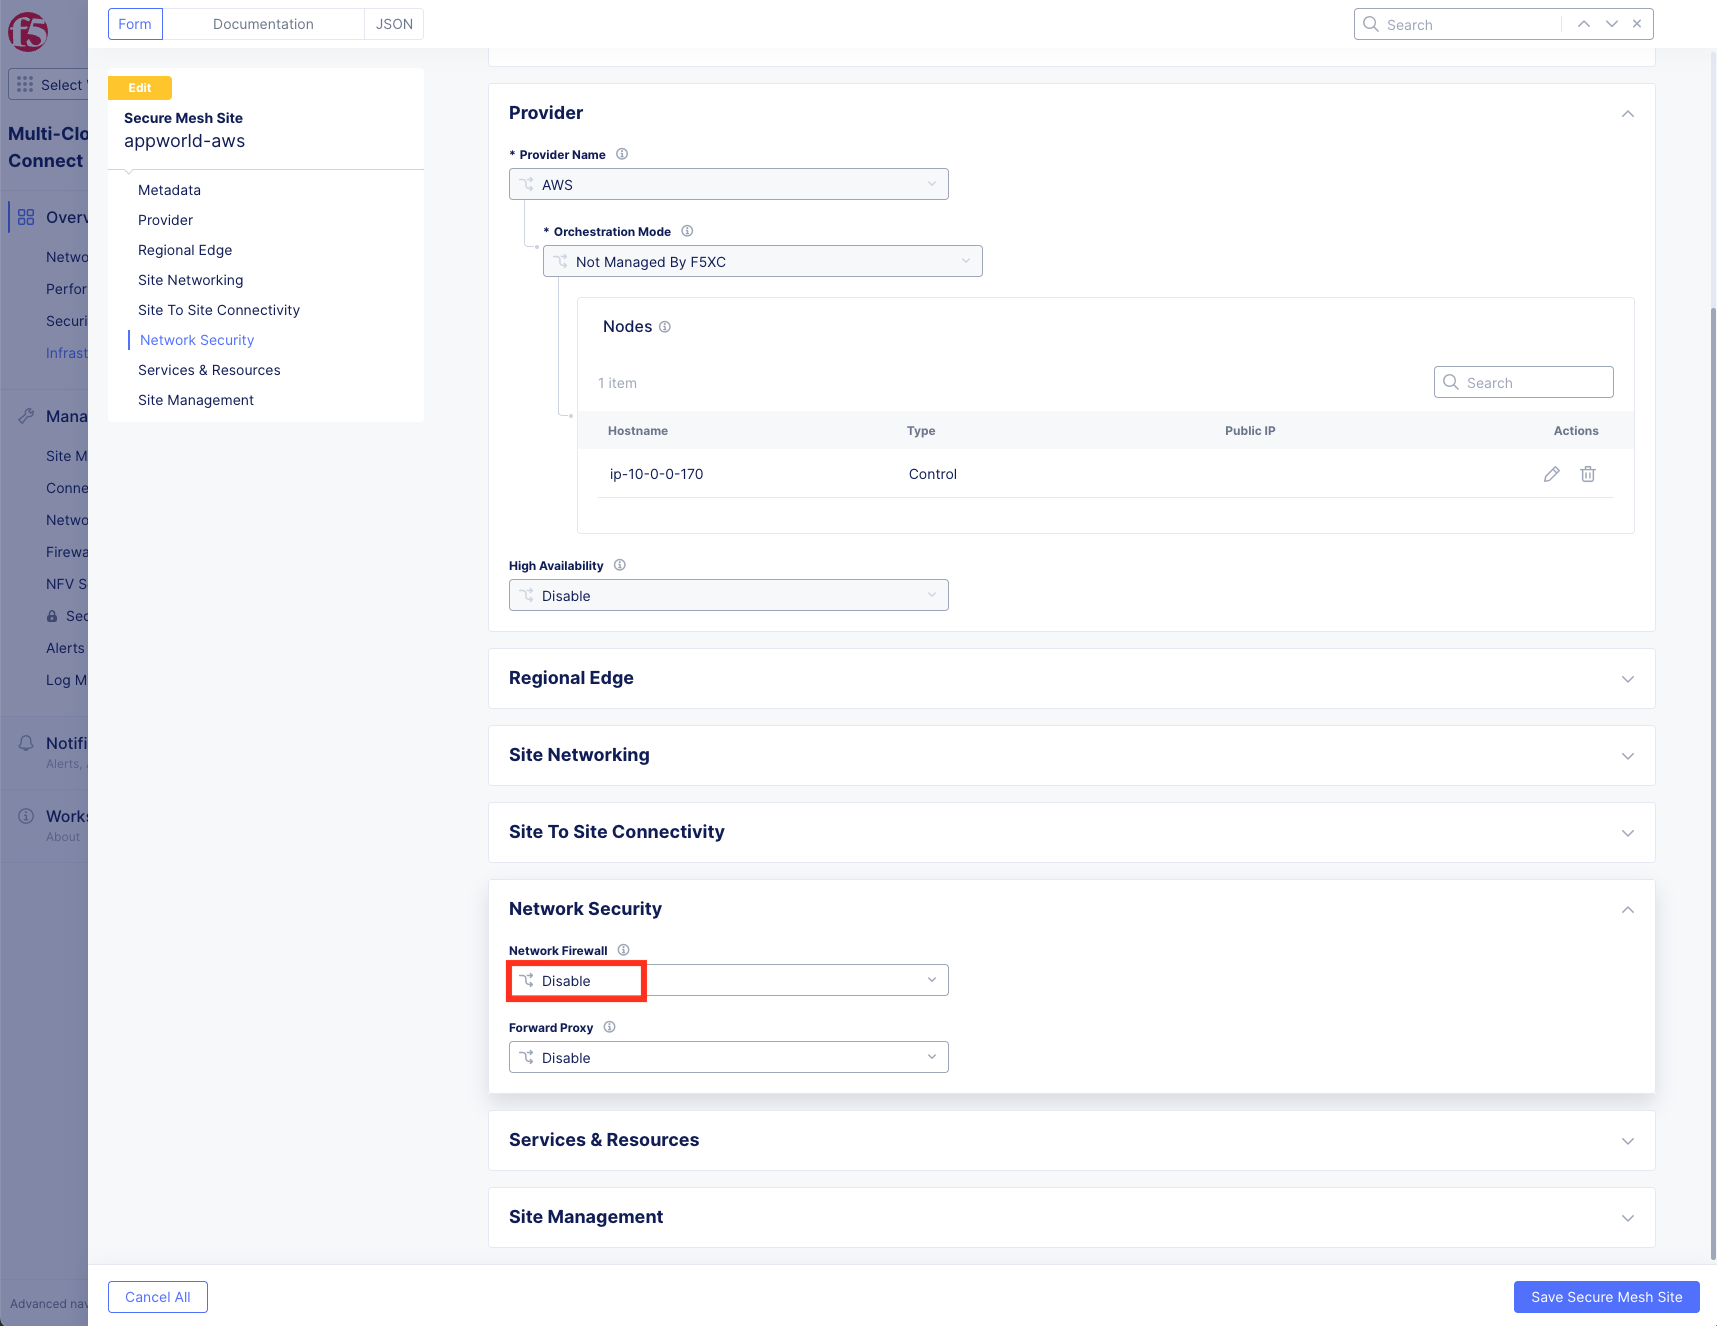
before applying the Network Firewall policy:
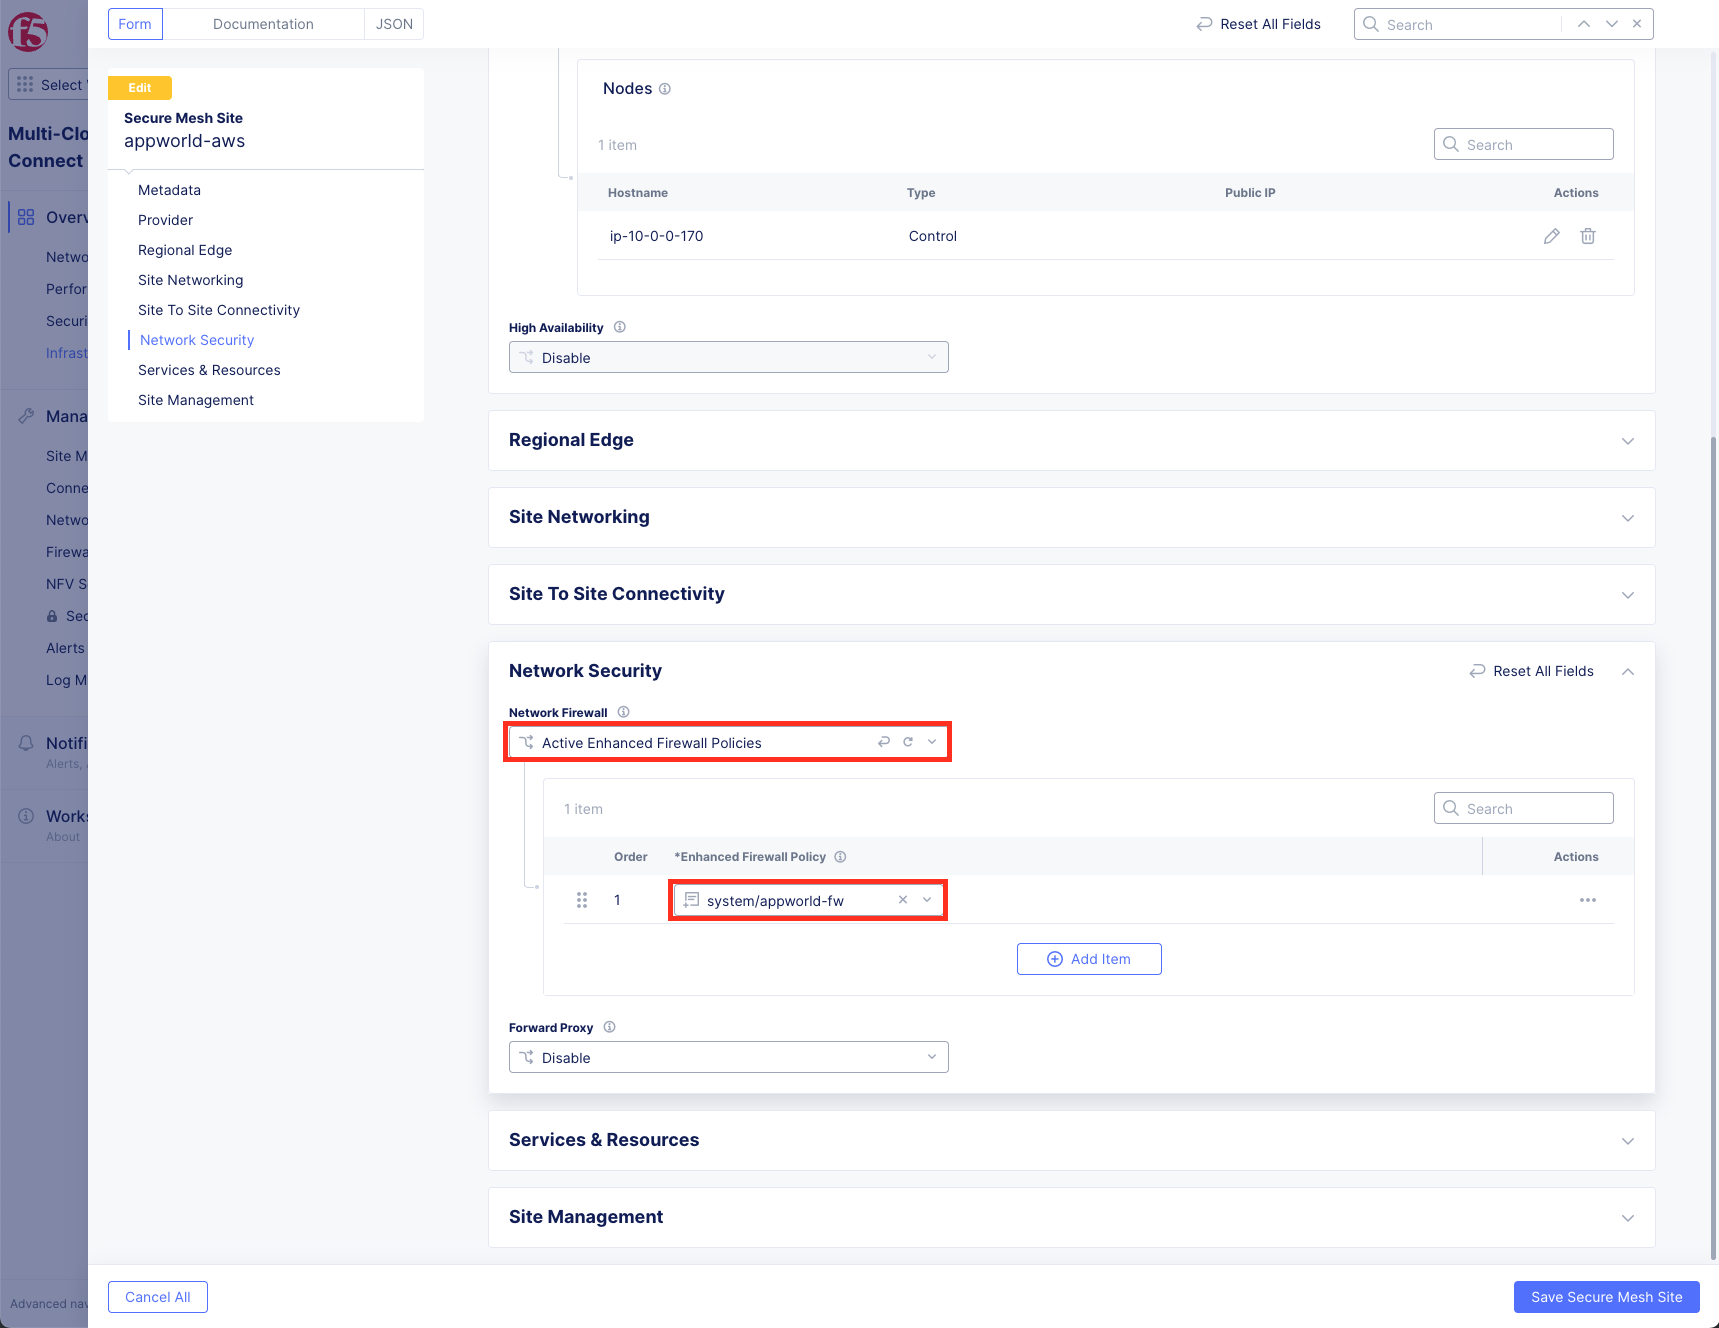
after applying the Network Firewall policy:
After the instructor applies the firewall policy, wait approximately 30-60 seconds for the policy to propagate.
Task 10: Verify Firewall Policy Enforcement
Let’s verify that the firewall policy is working correctly.
Go back to your web shell.
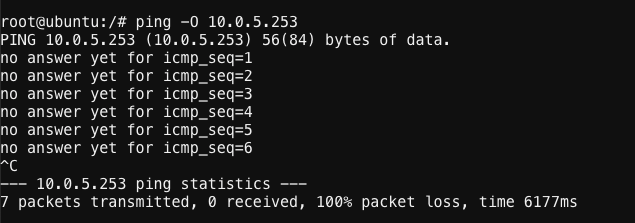
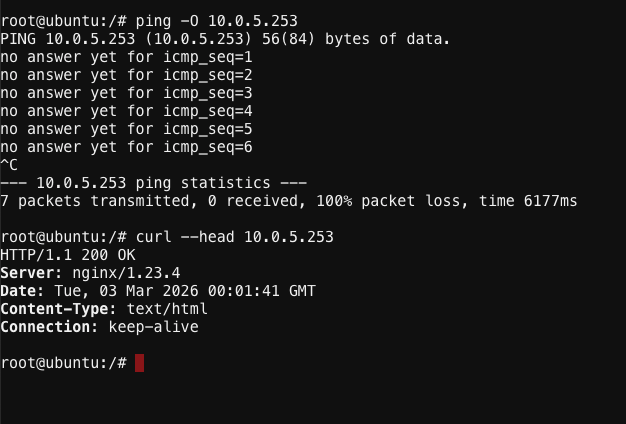
Test ping again and you should not see any response because ICMP traffic is now being blocked:
ping -O 10.0.5.253
Test HTTP again (you should still receive a 200 OK response because we allowed only HTTP in the firewall policy):
curl –head http://10.0.5.253
Tip
The Enhanced Firewall policy is now enforcing that only HTTP traffic is allowed to the AWS site. All ICMP traffic is denied.
Task 11: Review Firewall Events
Let’s review the firewall logs to see blocked and allowed traffic.
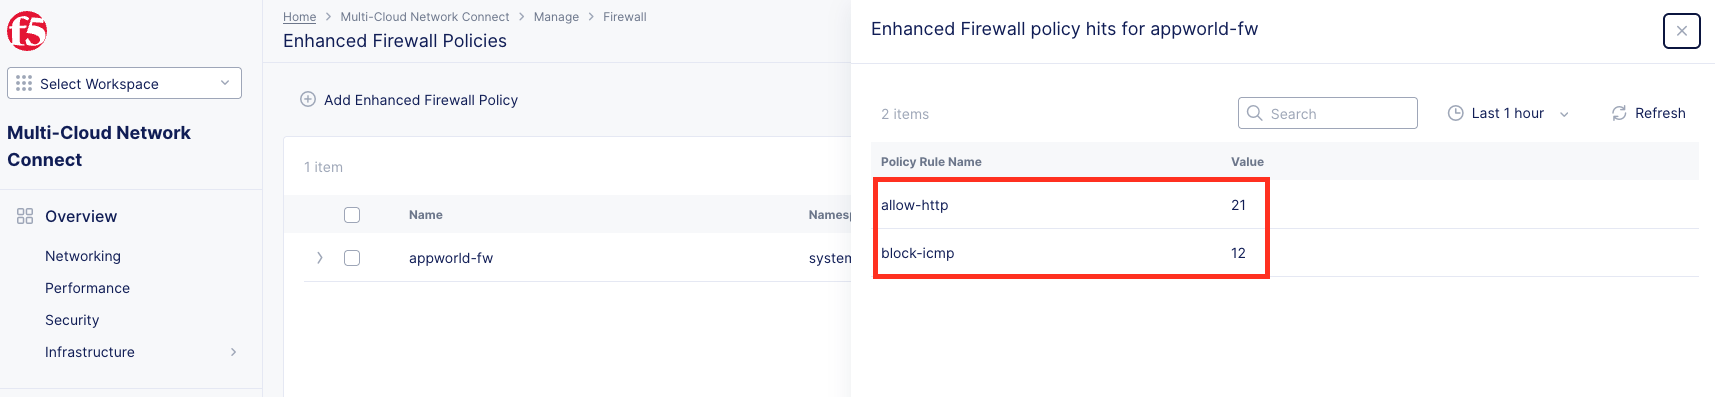
Navigate back to Multi-Cloud Network Connect >> Manage >> Firewall >> Enhanced Firewall Policies and click on the numbers under Hits.
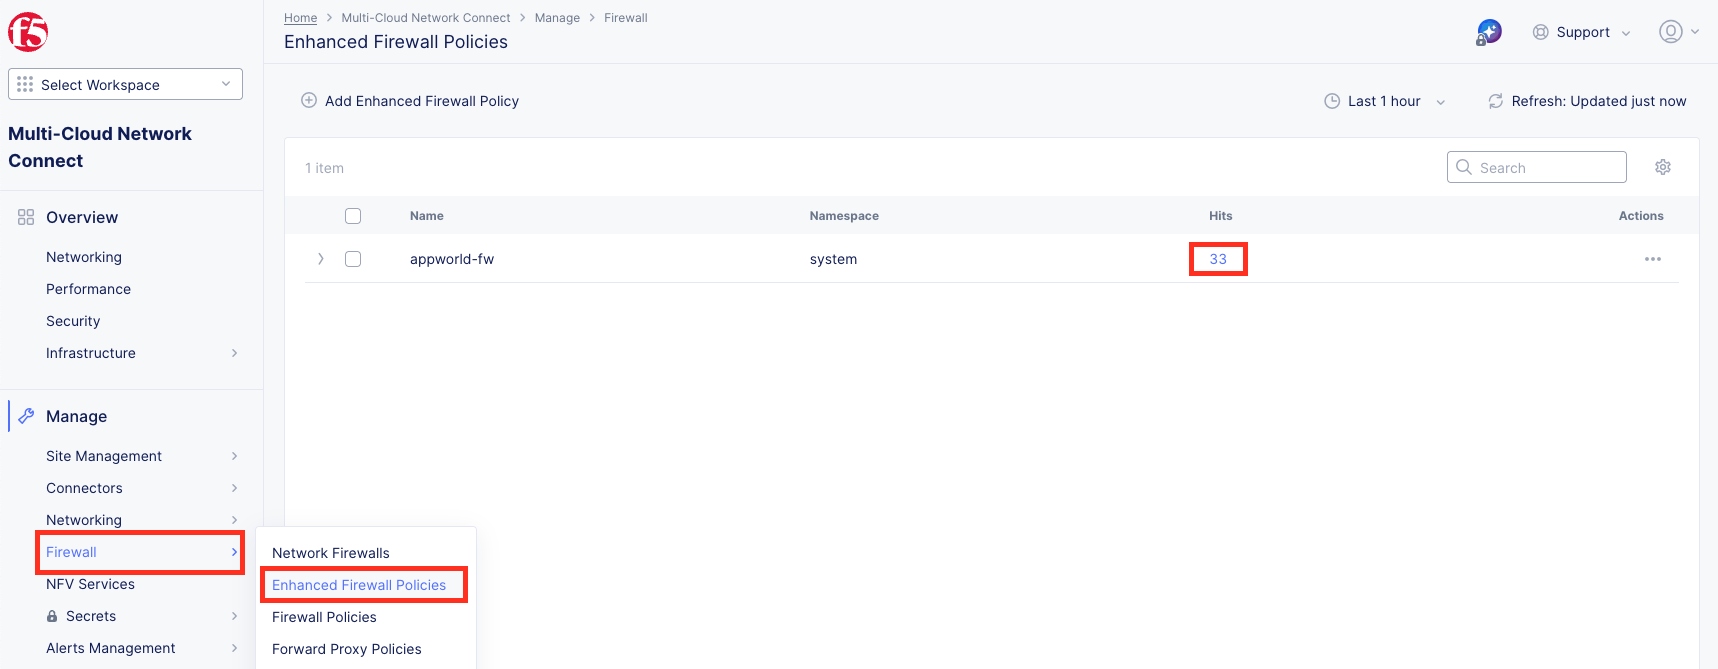
This will show you all the traffic that has been allowed or denied by the enhancedfirewall policy (may take a few minutes to populate).
Lab Summary
What You’ve Learned:
How network segments provide default isolation between environments
How to attach pre-configured segments to CE site interfaces
How to verify connectivity before and after segment attachment
How to review routing information and understand route propagation through Regional Edges
How Enhanced Firewall policies control traffic at the protocol level
How to verify firewall policy enforcement through testing
How to review firewall events and logs
Key Takeaways:
Segments provide isolated network domains by default (“ships in the night”)
Attaching segments to CE interfaces enables connectivity while maintaining security boundaries
Route propagation occurs automatically through Regional Edges when segments are attached
Enhanced Firewall policies provide granular security control at the protocol and port level
Firewall events provide visibility into allowed and denied traffic flows
Your Environment:
You now have connectivity between:
On-Premises: UDF data center (10.1.10.0/24)
AWS Cloud: AWS Ubuntu workload (10.0.5.0/24)
With Enhanced Firewall policies enforcing that only HTTP traffic is allowed to the AWS site, while ICMP traffic is denied.
In the next lab, you’ll explore App Connect for application-level connectivity using Regional Edges.
Important
Verify that HTTP connectivity works and ICMP is blocked before proceeding to Lab 3.
End of Lab 2