F5 Distributed Cloud > F5 Distributed Cloud: Policy Optimization in a Multicloud World > Module 2: Multi-Cloud App Connect Source | Edit on
Lab 3: Globally Available Frontend with App Connect
Objective:
Understand F5 Distributed Cloud App Connect and Regional Edges
Create origin pools for AWS and Azure workloads
Configure an HTTP load balancer for global application delivery
Test failover between origin pools
Review performance monitoring and analytics
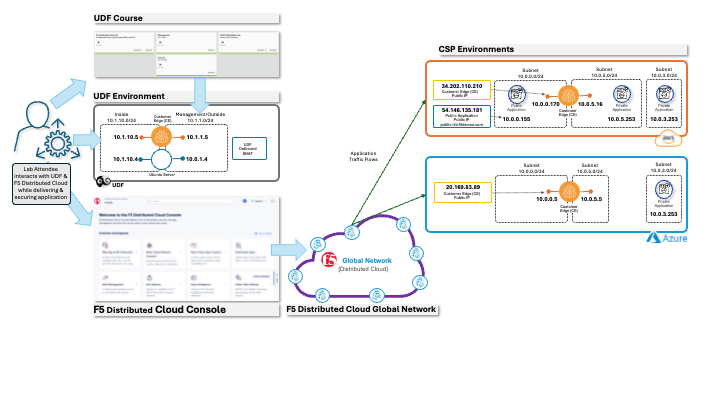
ACME Corp needs a globally available frontend that can load balance between AWS and Azure workloads, with AWS as the preferred destination. The Azure workload is private (no public IP) and both environments will be exposed through F5 Distributed Cloud Regional Edges.
Note
App Connect uses CE Nodes and Regional Edges as Software-Defined Proxies (Layer 7), unlike Network Connect which uses them as Software-Defined Routers (Layer 3/4).
Prerequisite
Note
You should already be logged into your lab’s Distributed Cloud Tenant and have completed Lab 1 and Lab 2.
Warning
If you are experiencing issues accessing the Distributed Cloud Tenant, please alert one of the Lab Assistants.
Detach AWS Segment from Your CE:
We are going to detach the AWS segment that we attached to our CE in Lab 2, because we now need connectivity to both AWS and Azure sites.
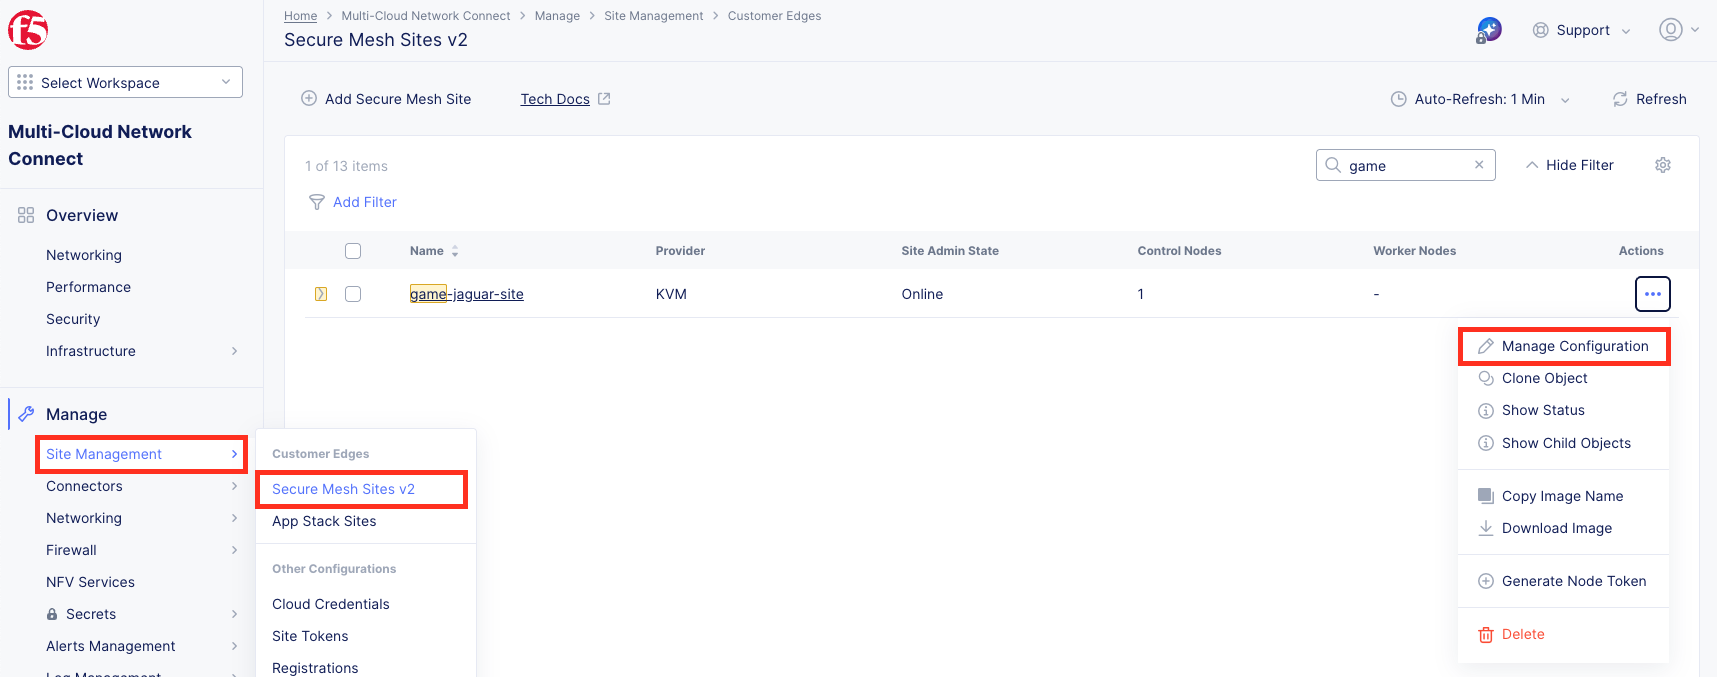
Navigate to Multi-Cloud Network Connect >> Manage >> Site Management >> Secure Mesh Site v2.
Click on Manage Configuration for the <your-namespace>-site.
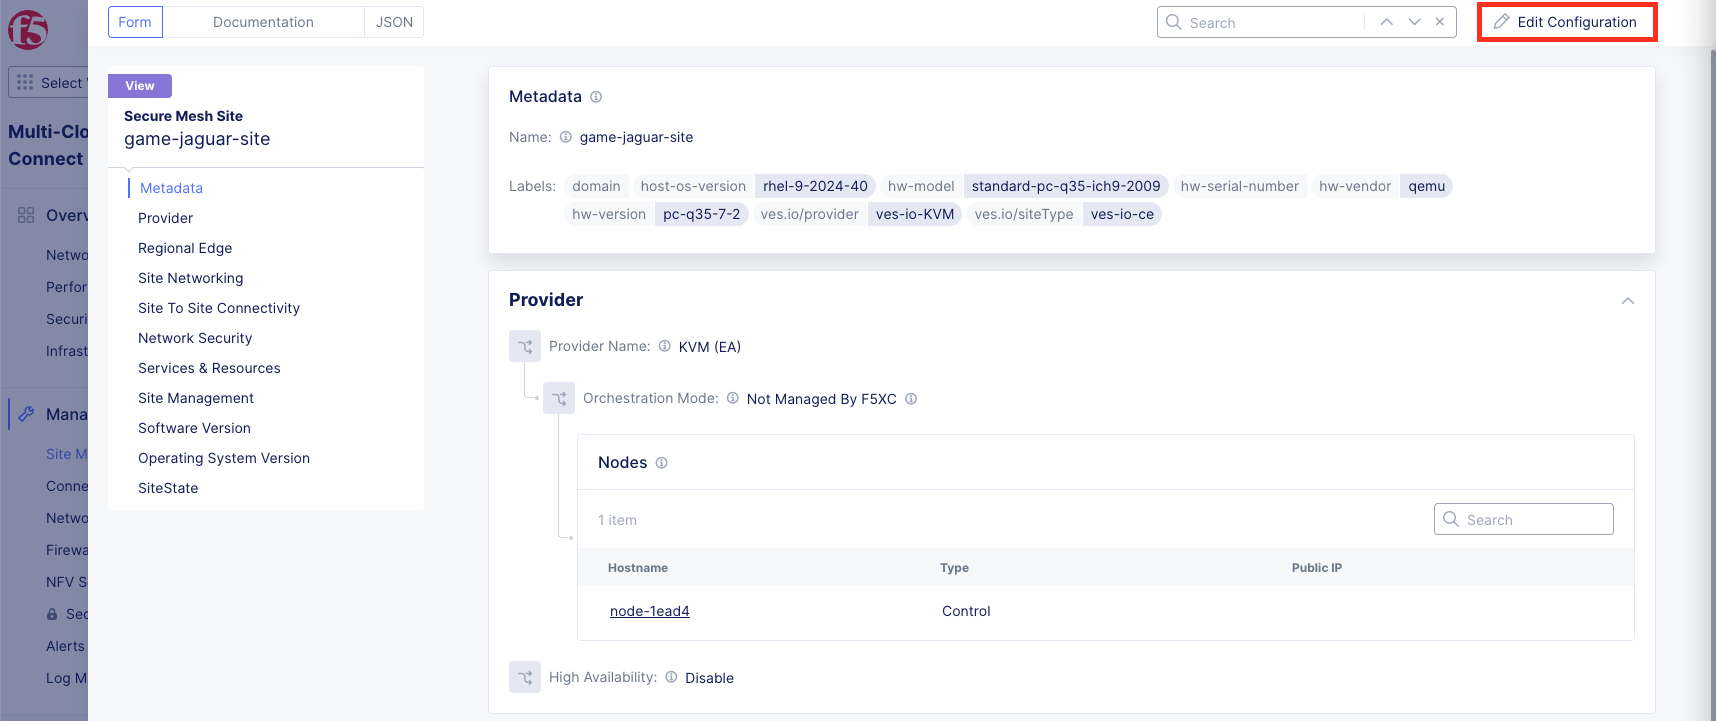
Click Edit Configuration on the top right.
Click Edit (the pencil icon) for your Control node.
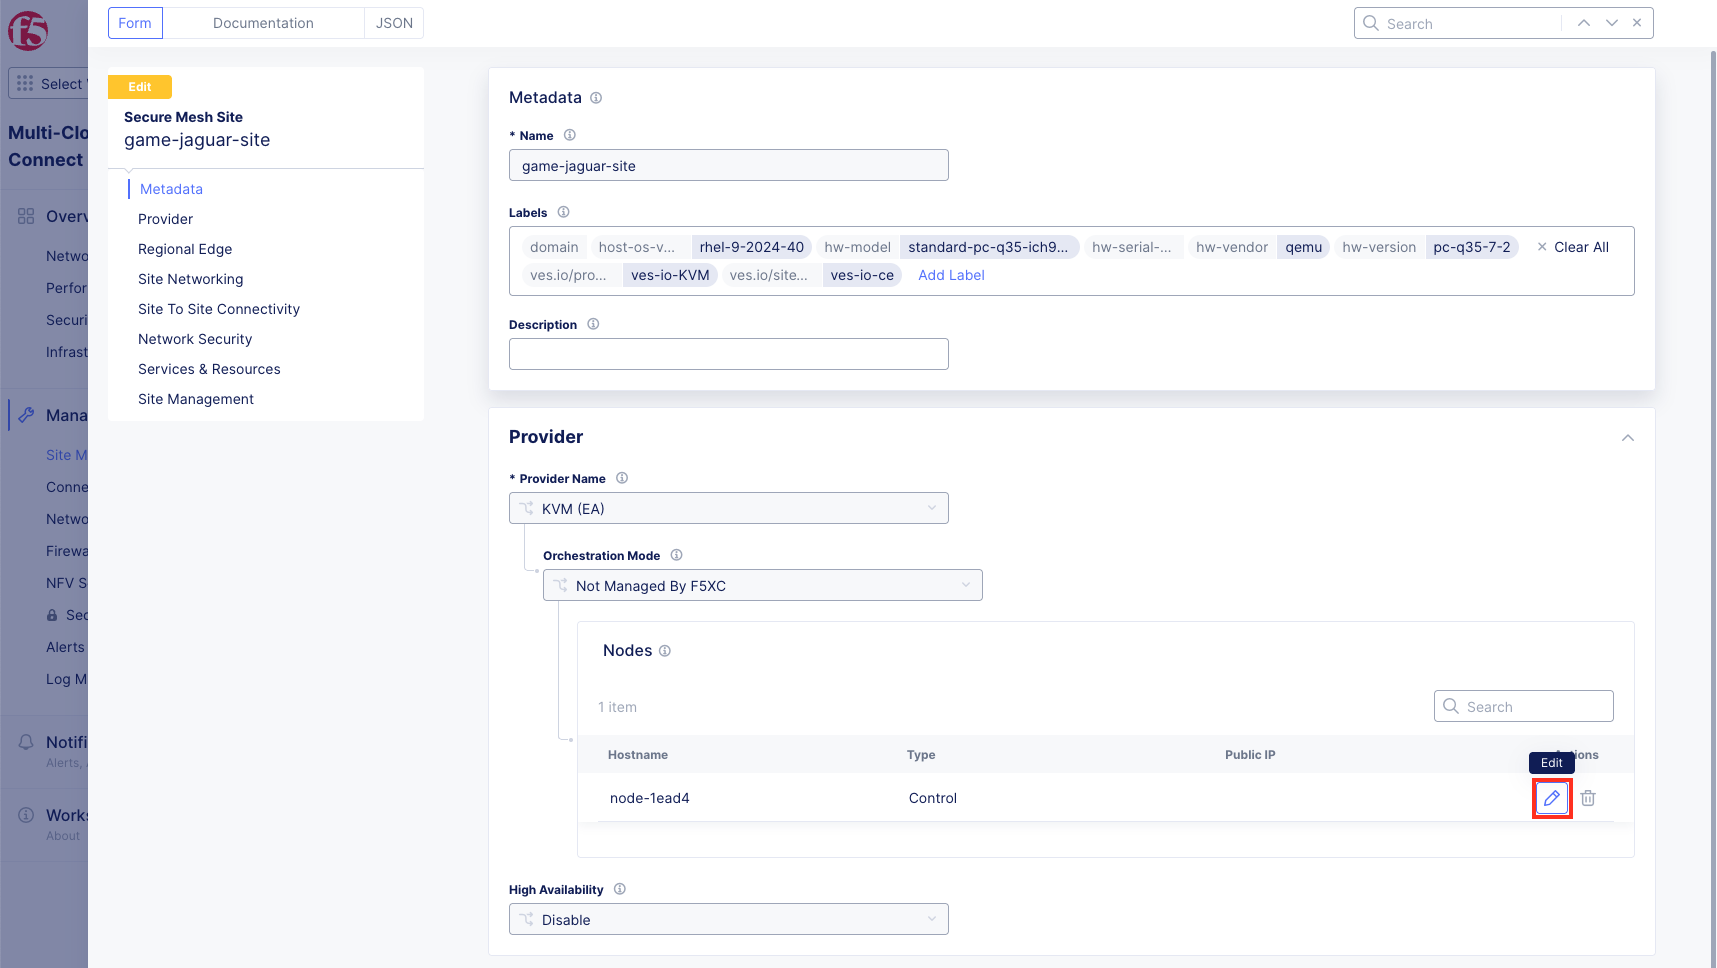
Click Edit (the pencil icon) for the enp0s6 interface.
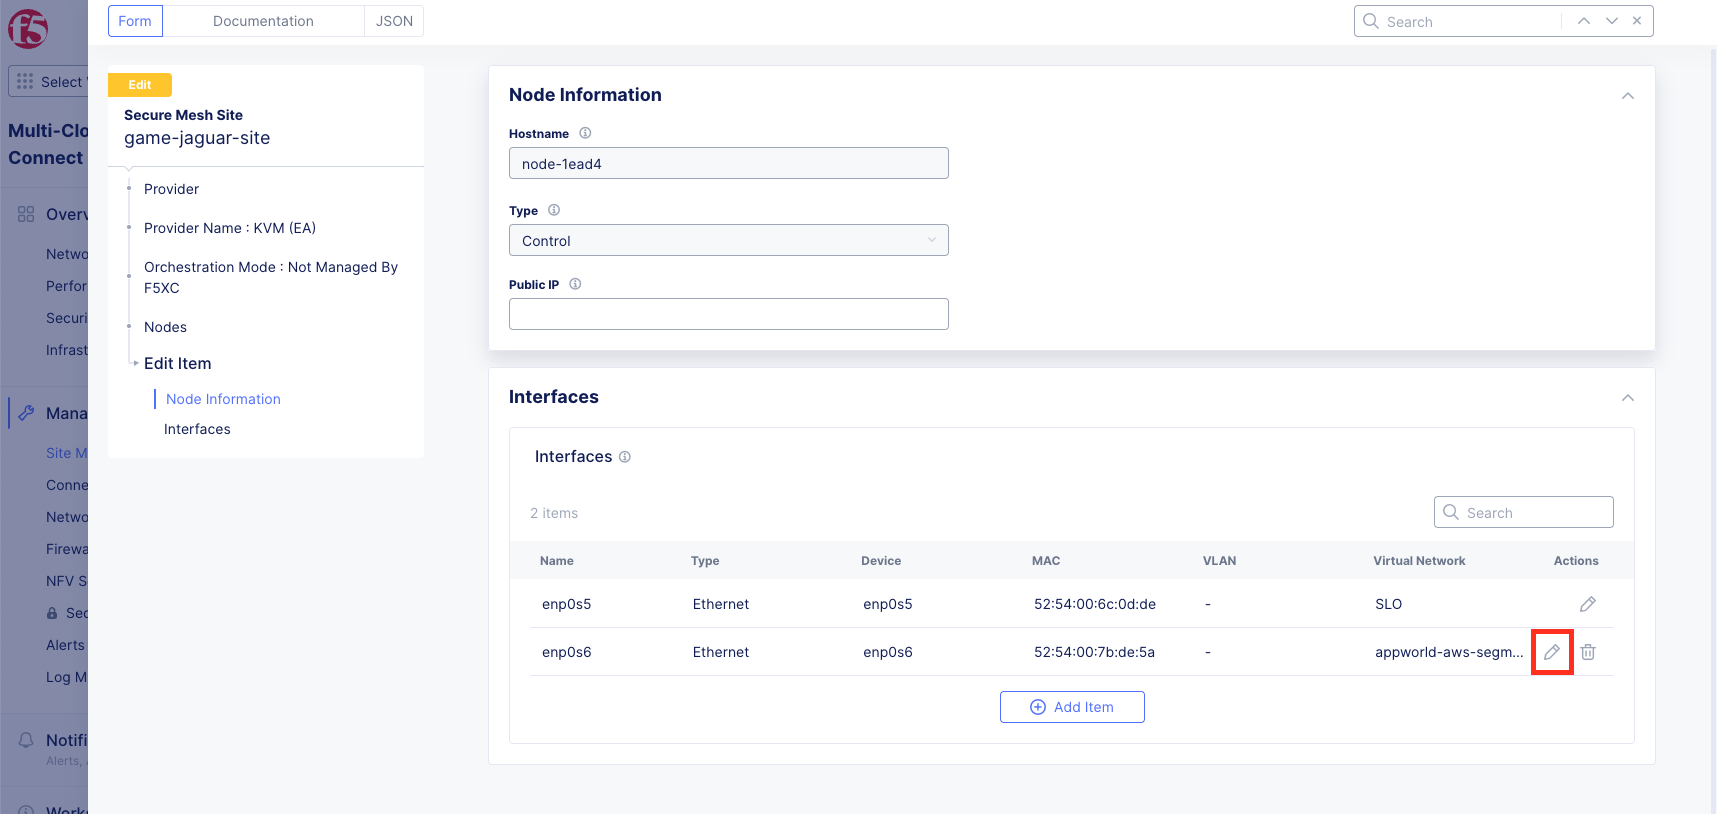
Configure your interface then click Apply:
IP Configuration:
Variable
Value
IPv4 Interface Address Method
Static IP
IP Address/Prefix Length
10.1.10.10/24
Default Gateway
10.1.10.1
Interface Settings:
Variable
Value
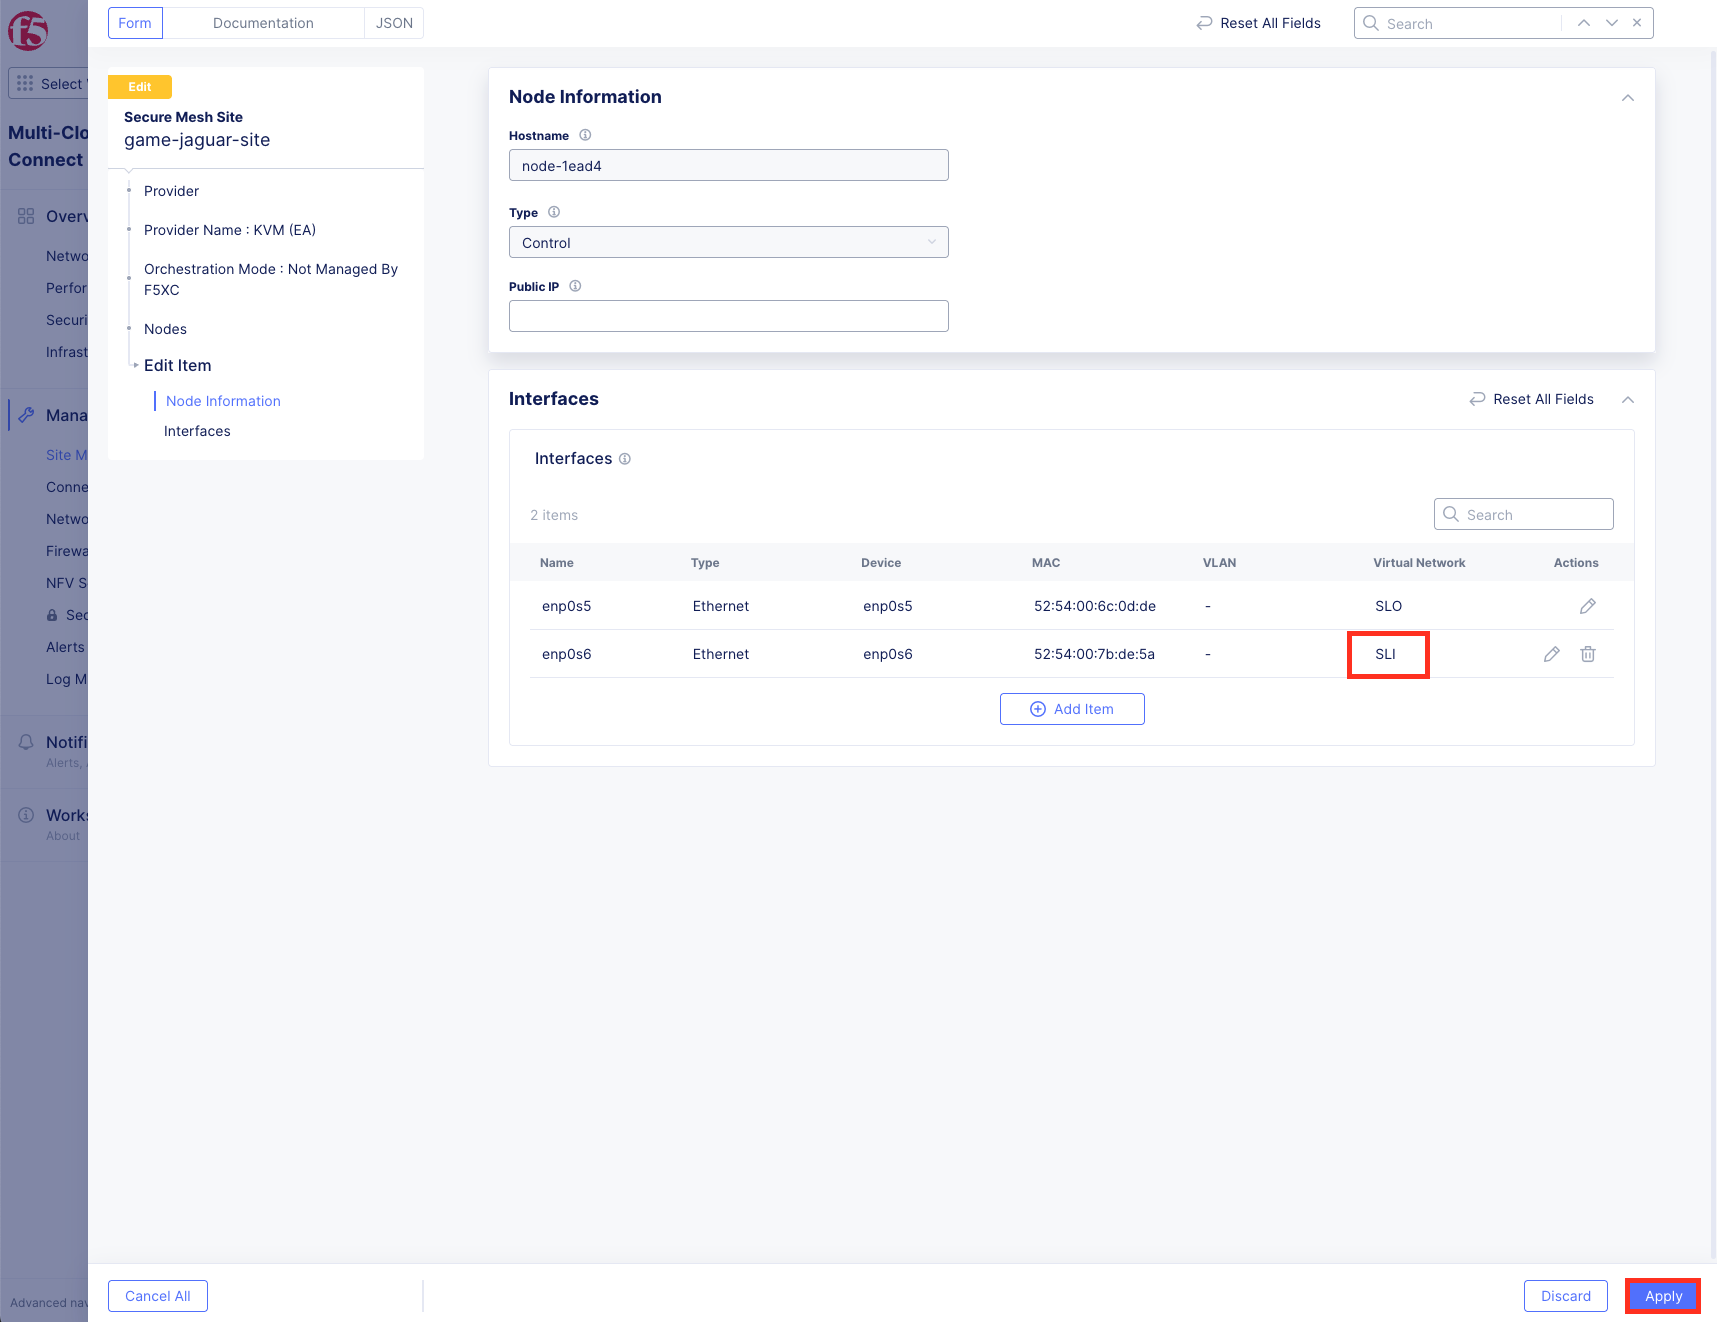
Select VRF
Site Local Inside (Local VRF)

Click Apply to save interface changes for your Control Node.
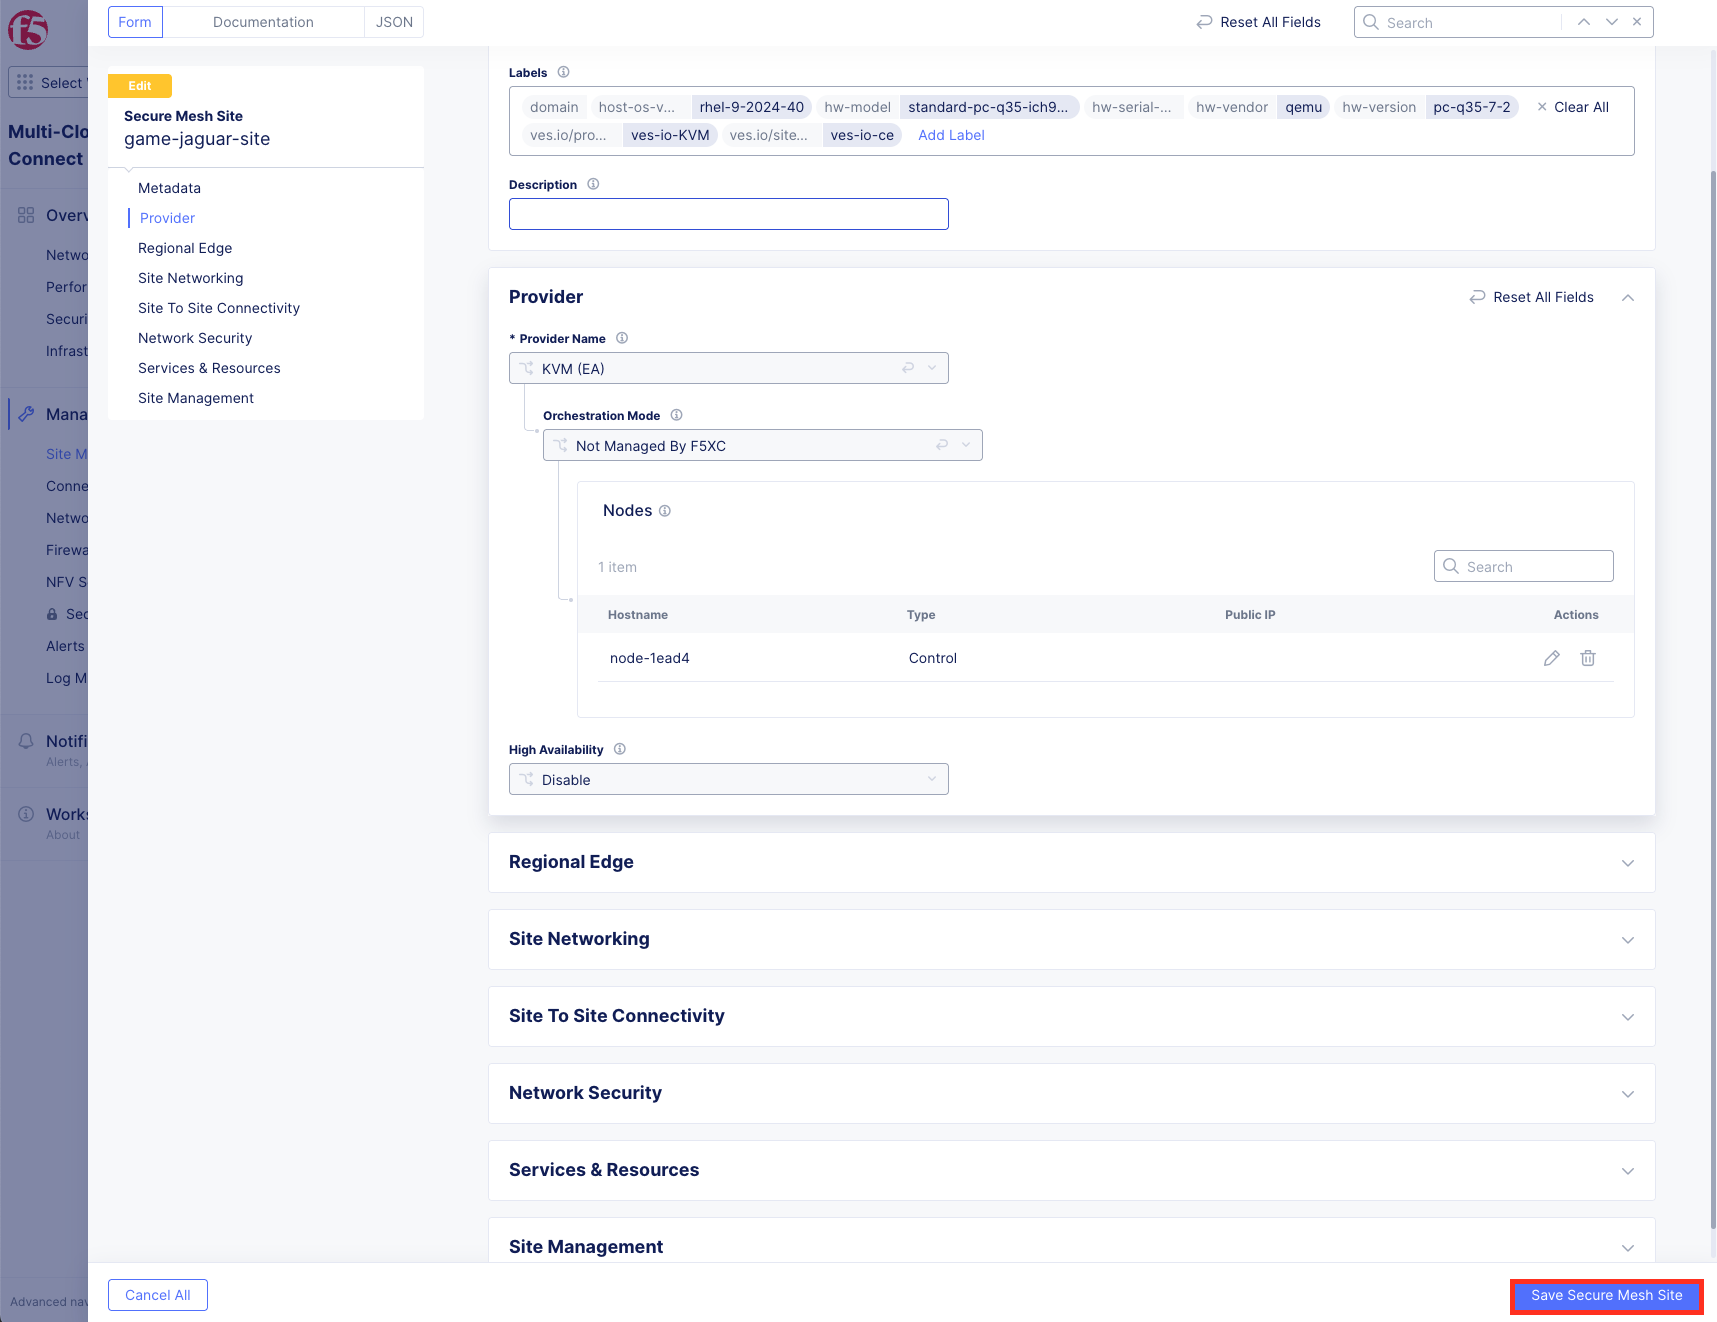
Click Save Secure Mesh Site at the bottom of the page to apply changes to the site and CE node.
[Instructor’s Action Item] Set the AWS CE interface that’s currently attached to appworld-aws segment to SLI (Site Local Inside). Addtionally remove the Network Firewall/Enhanced Firewall Policy assigned to the appworld-aws site.
Task 1: Understanding App Connect
What is App Connect?
App Connect provides application-level (Layer 7) connectivity using load balancers and proxies:
Software-Defined Proxies: CE Nodes and Regional Edges act as application proxies
Default Deny Architecture: Only configured ports and domains accept traffic
IP Overlap Solution: Workloads can have overlapping IP addresses across sites
Global Load Balancing: Regional Edges provide globally distributed application delivery
Enhanced Security: Full proxy security, visibility, and analytics for client traffic
Key Concepts:
Origin Pool: A group of backend servers (origin servers) for an application
Origin Server: The actual backend application server (can be public DNS or private IP)
HTTP Load Balancer: Distributes traffic across origin pools using Regional Edges
Health Checks: Monitors to verify origin server availability
Regional Edges (RE): F5’s globally distributed points of presence for application delivery
Task 2: Navigate to Multi-Cloud App Connect
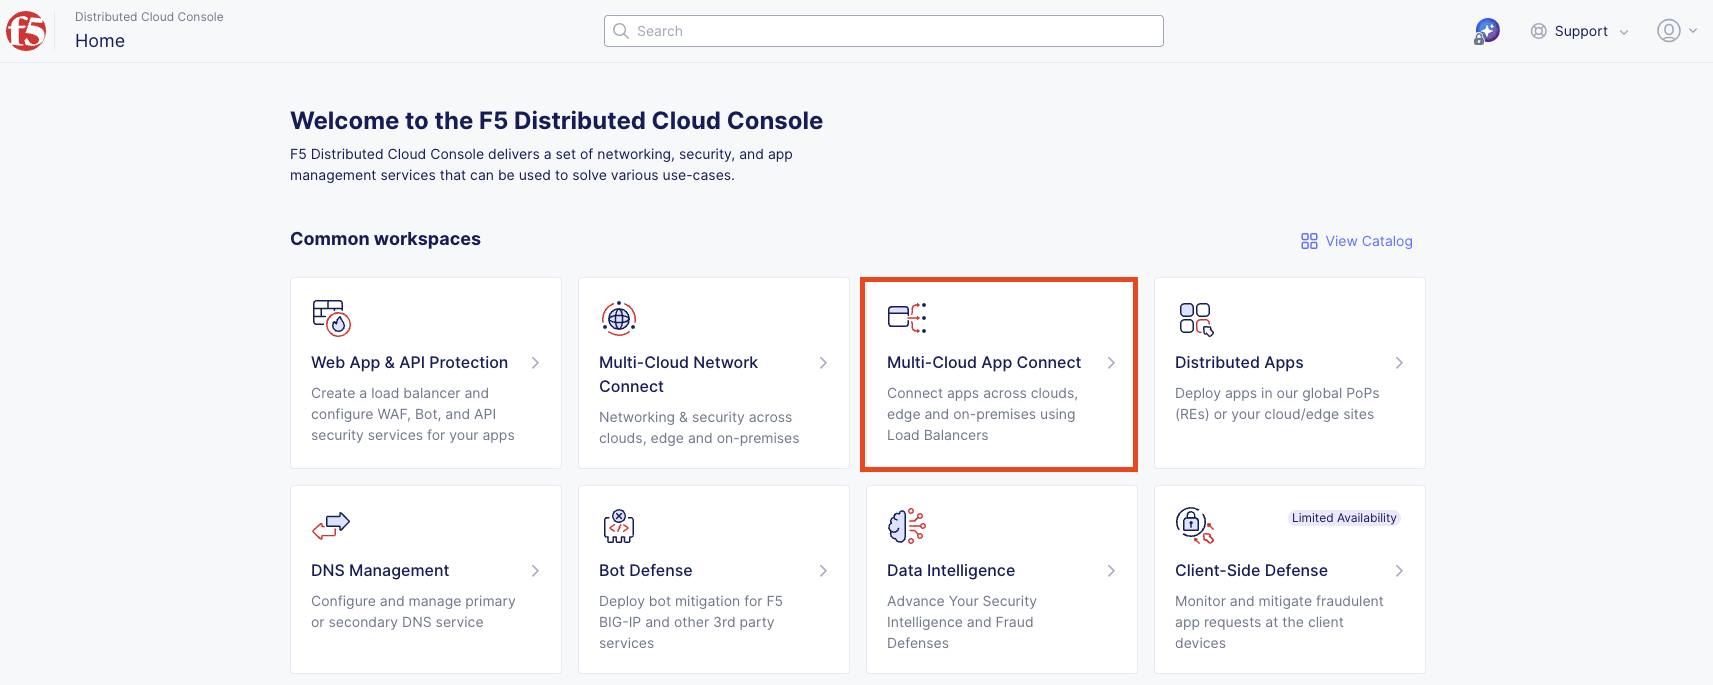
From the F5 Distributed Cloud Console homepage, select Multi-Cloud App Connect.
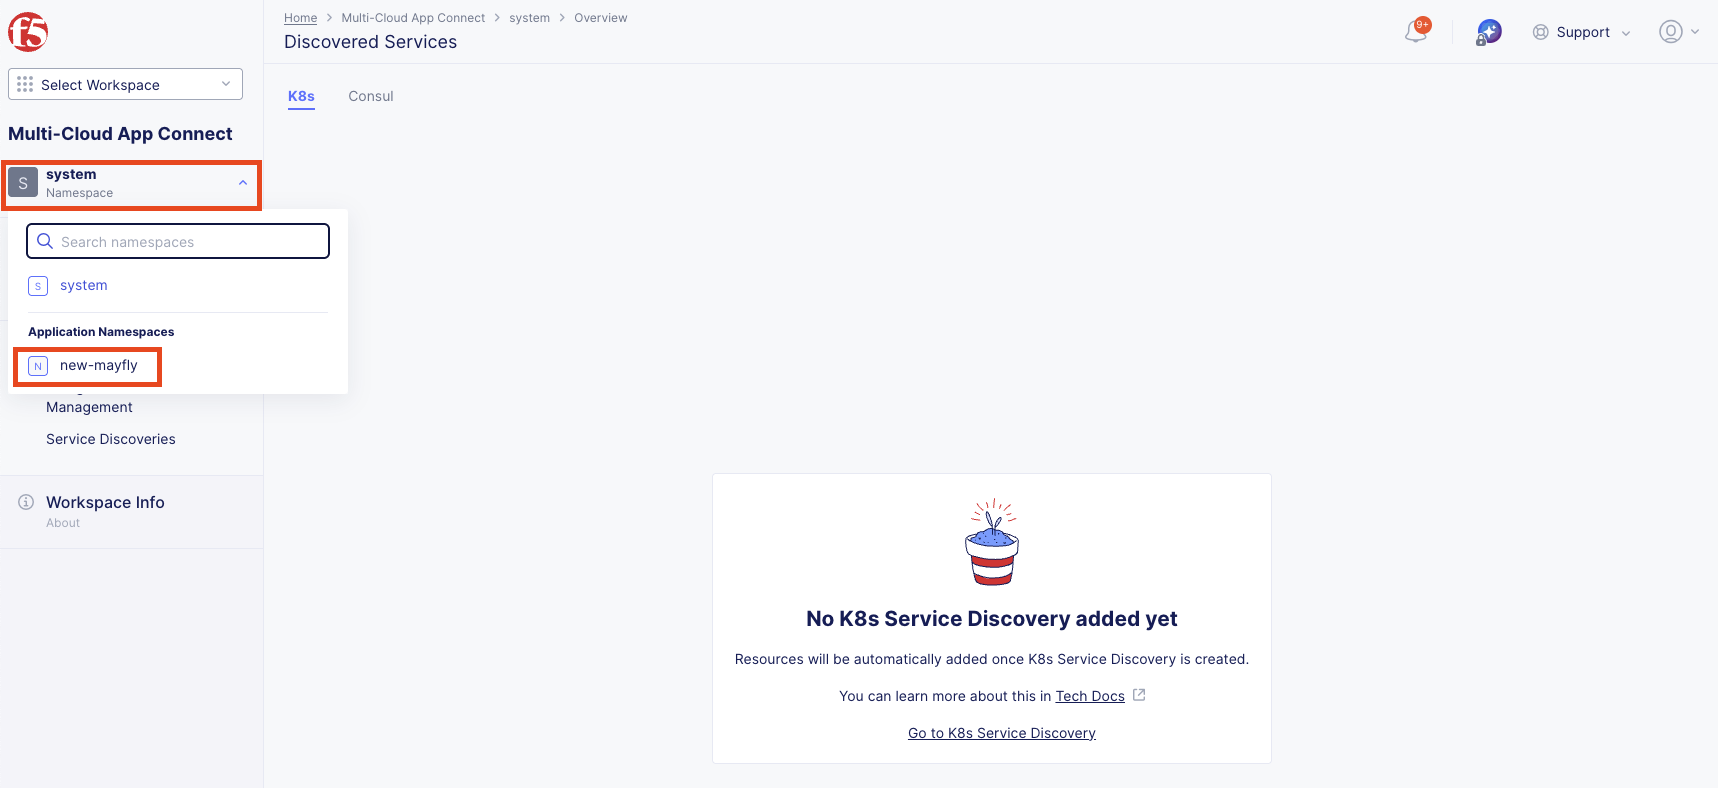
On the left-hand side, switch to your namespace by selecting <your-namespace> from the dropdown.
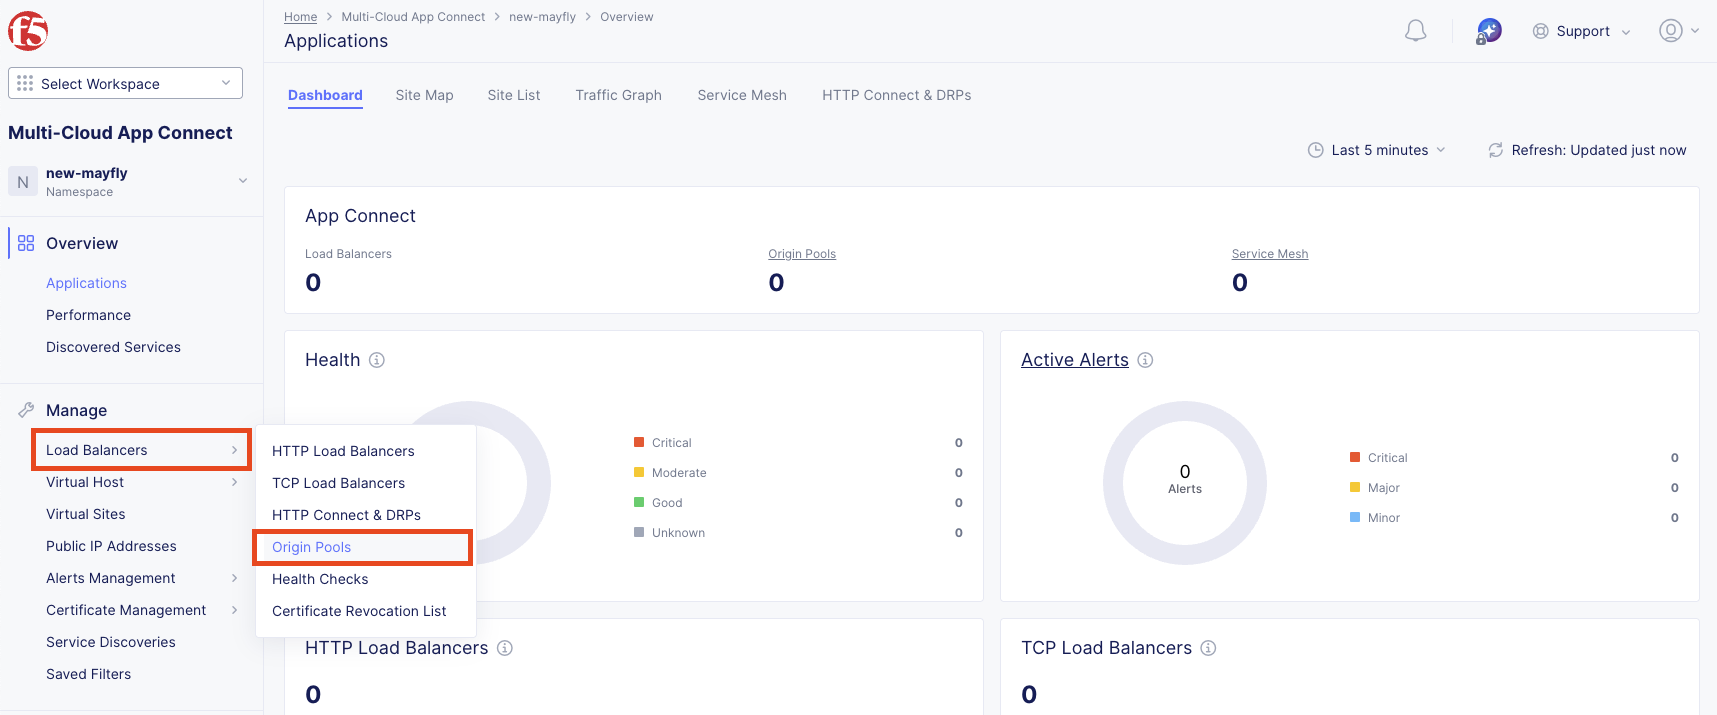
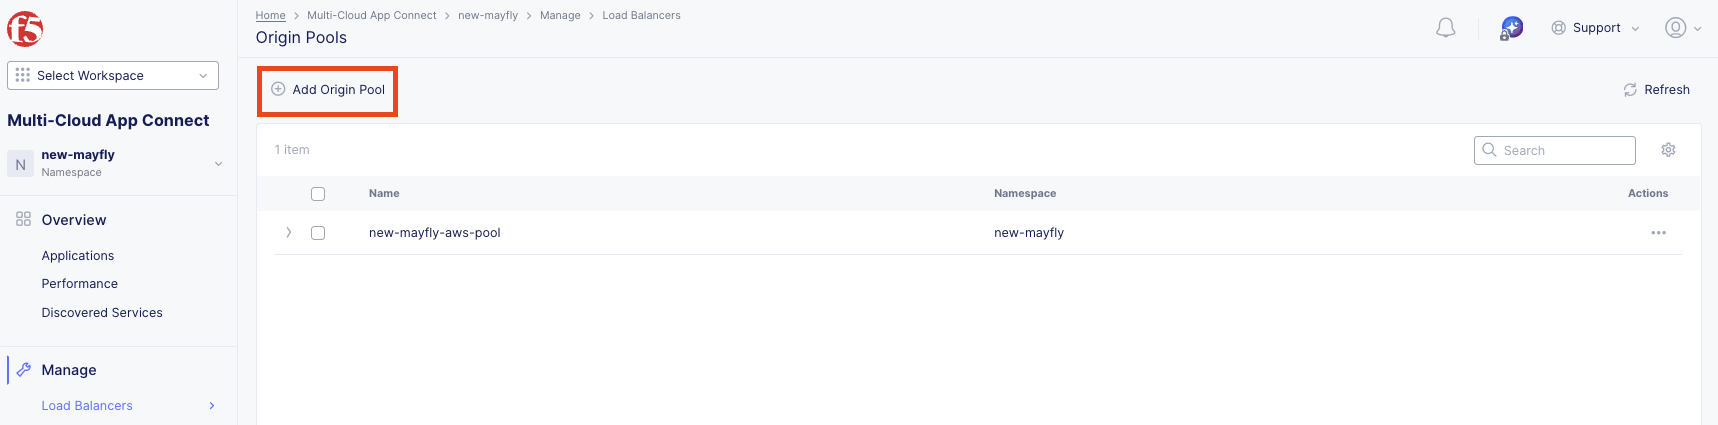
Navigate to Manage >> Load Balancers >> Origin Pools.
Task 3: Create AWS Origin Pool
You will now create an origin pool for the AWS workload using a public DNS name.
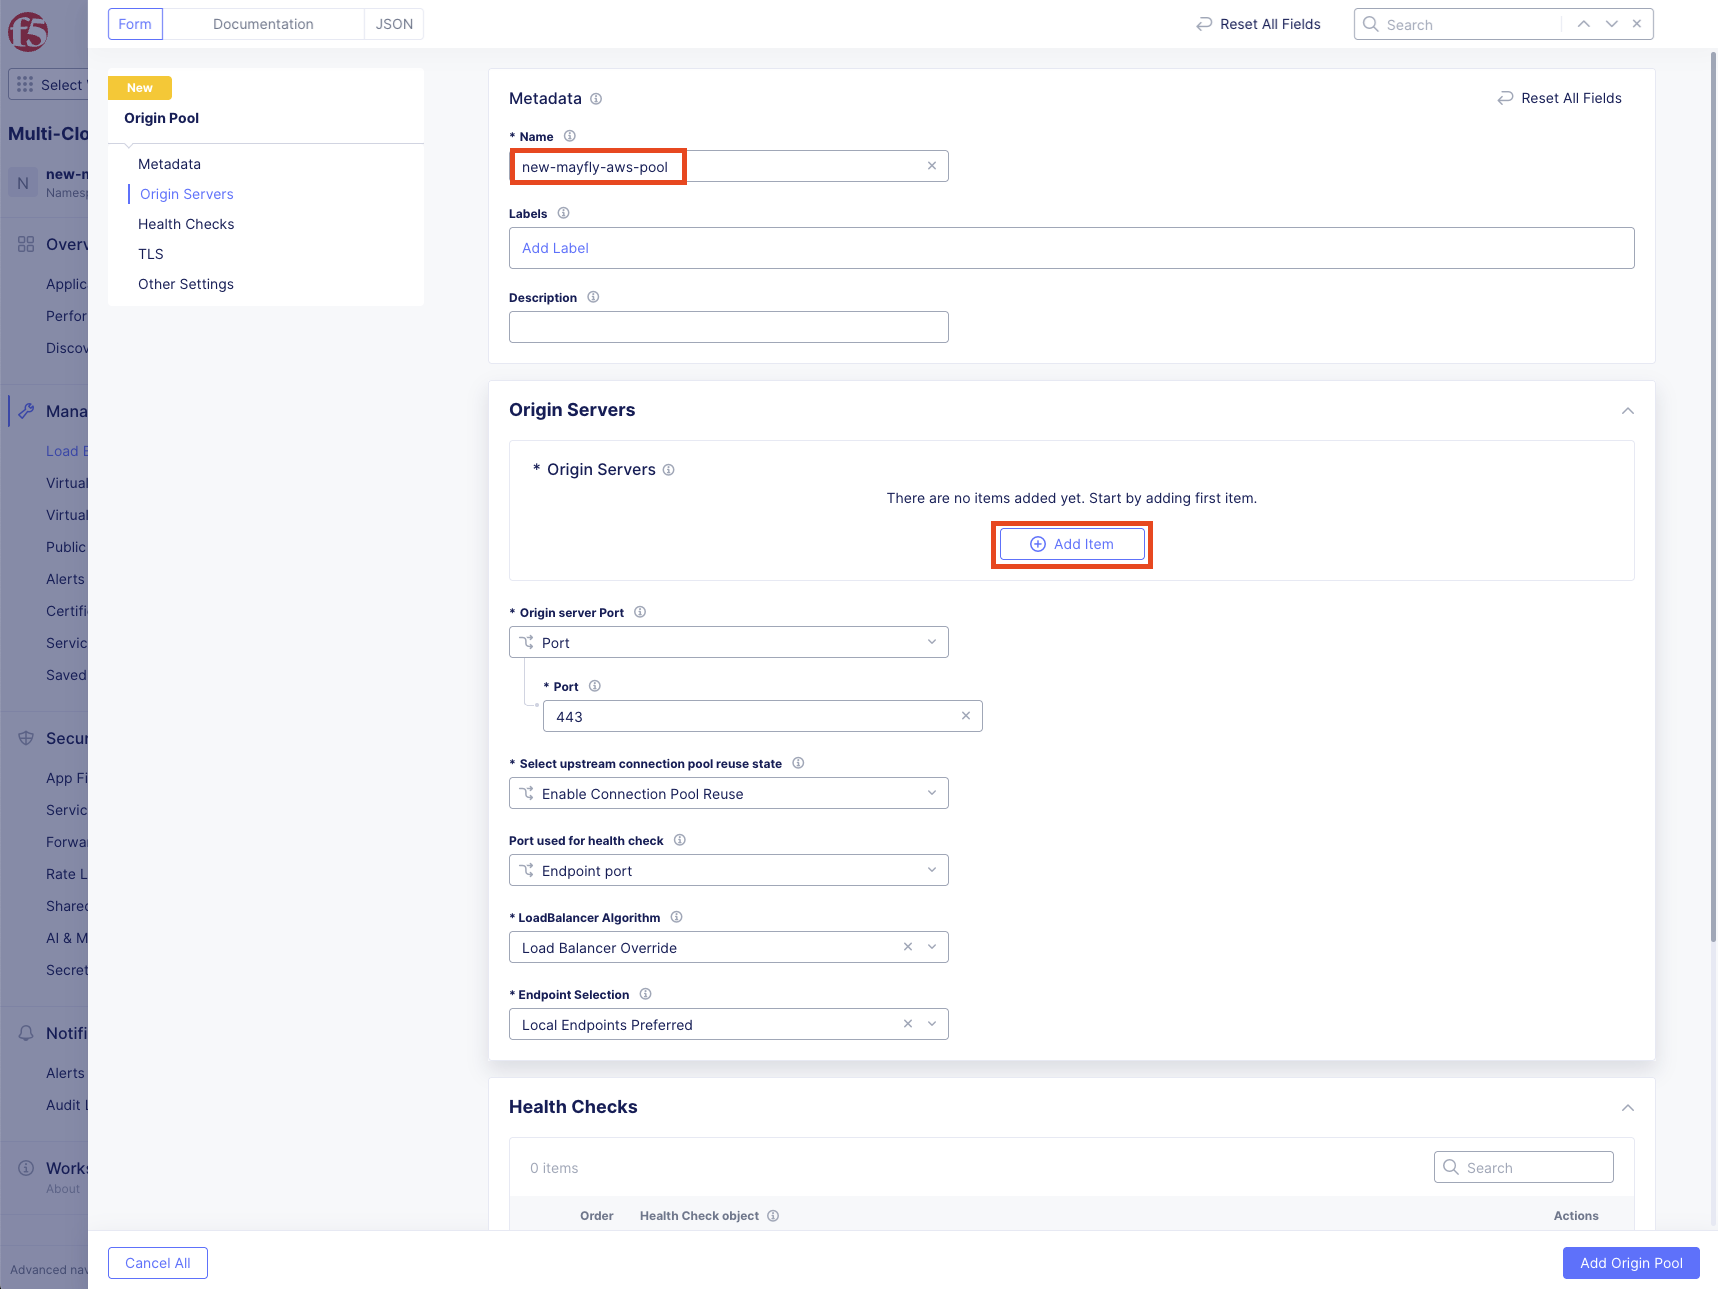
Click Add Origin Pool.
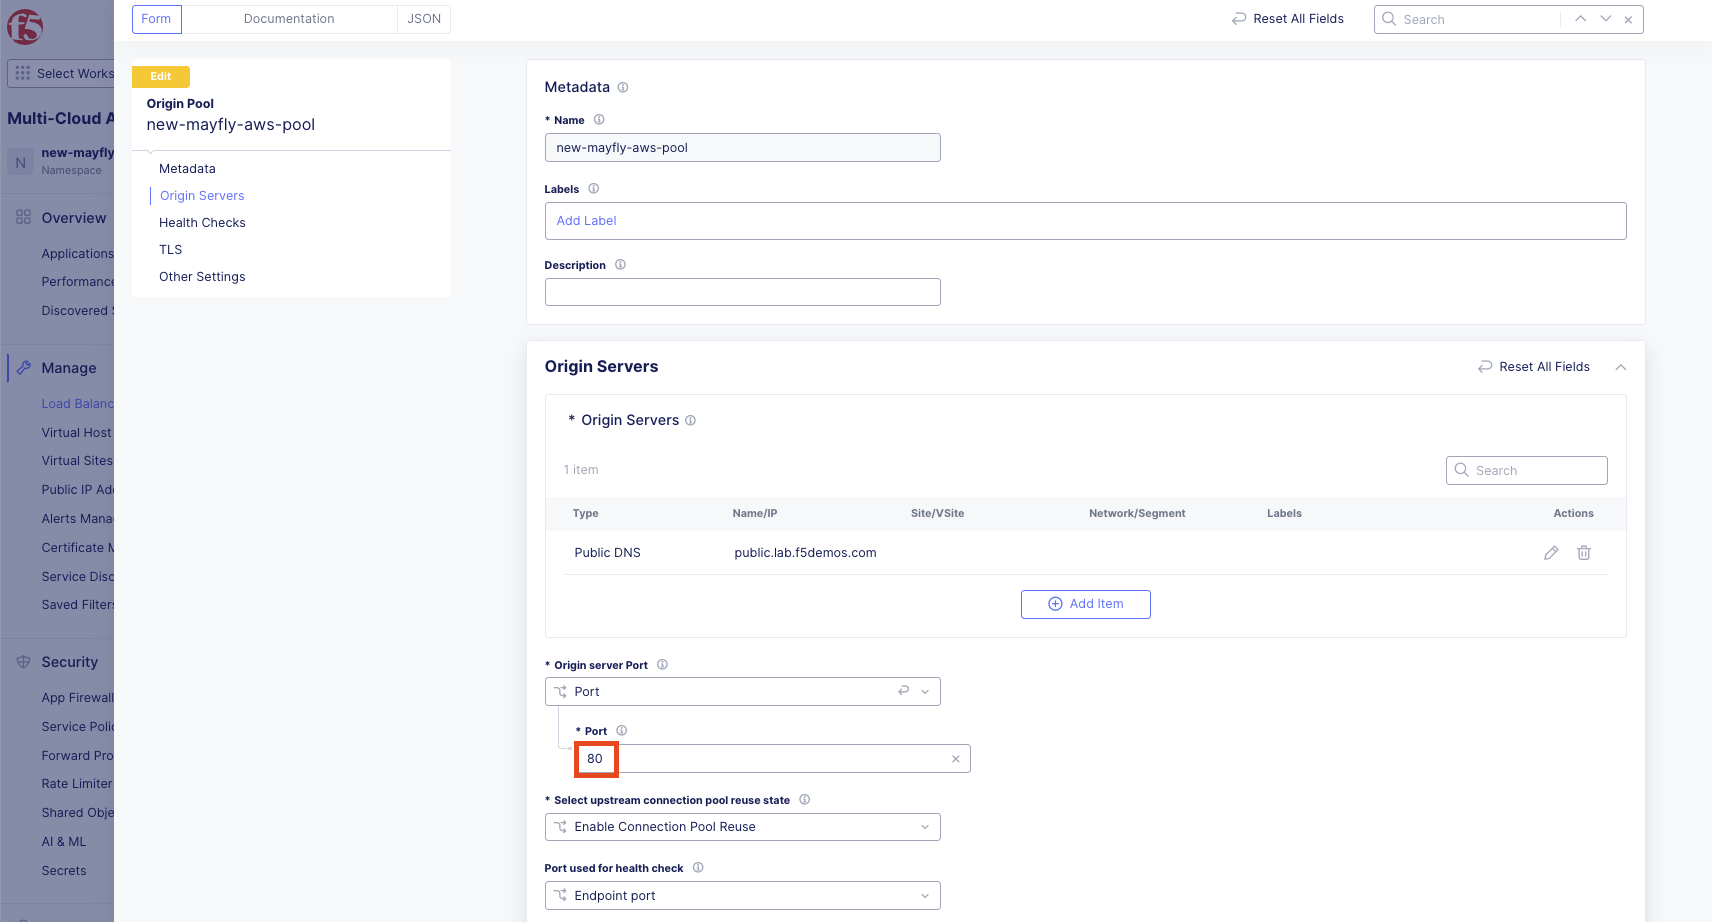
Configure the AWS origin pool:
Variable
Value
Name
<your-namespace>-aws-pool
Configure Origin Servers:
Under Origin Servers, click Add Item.
Keep the default Public DNS Name of Origin Server.
Enter DNS name: public.lab.f5demos.com then click Apply.

Change the Origin Server Port to 80.
Configure Health Checks:
Under Health Checks, click Add Item in the Health Check object dropdown.
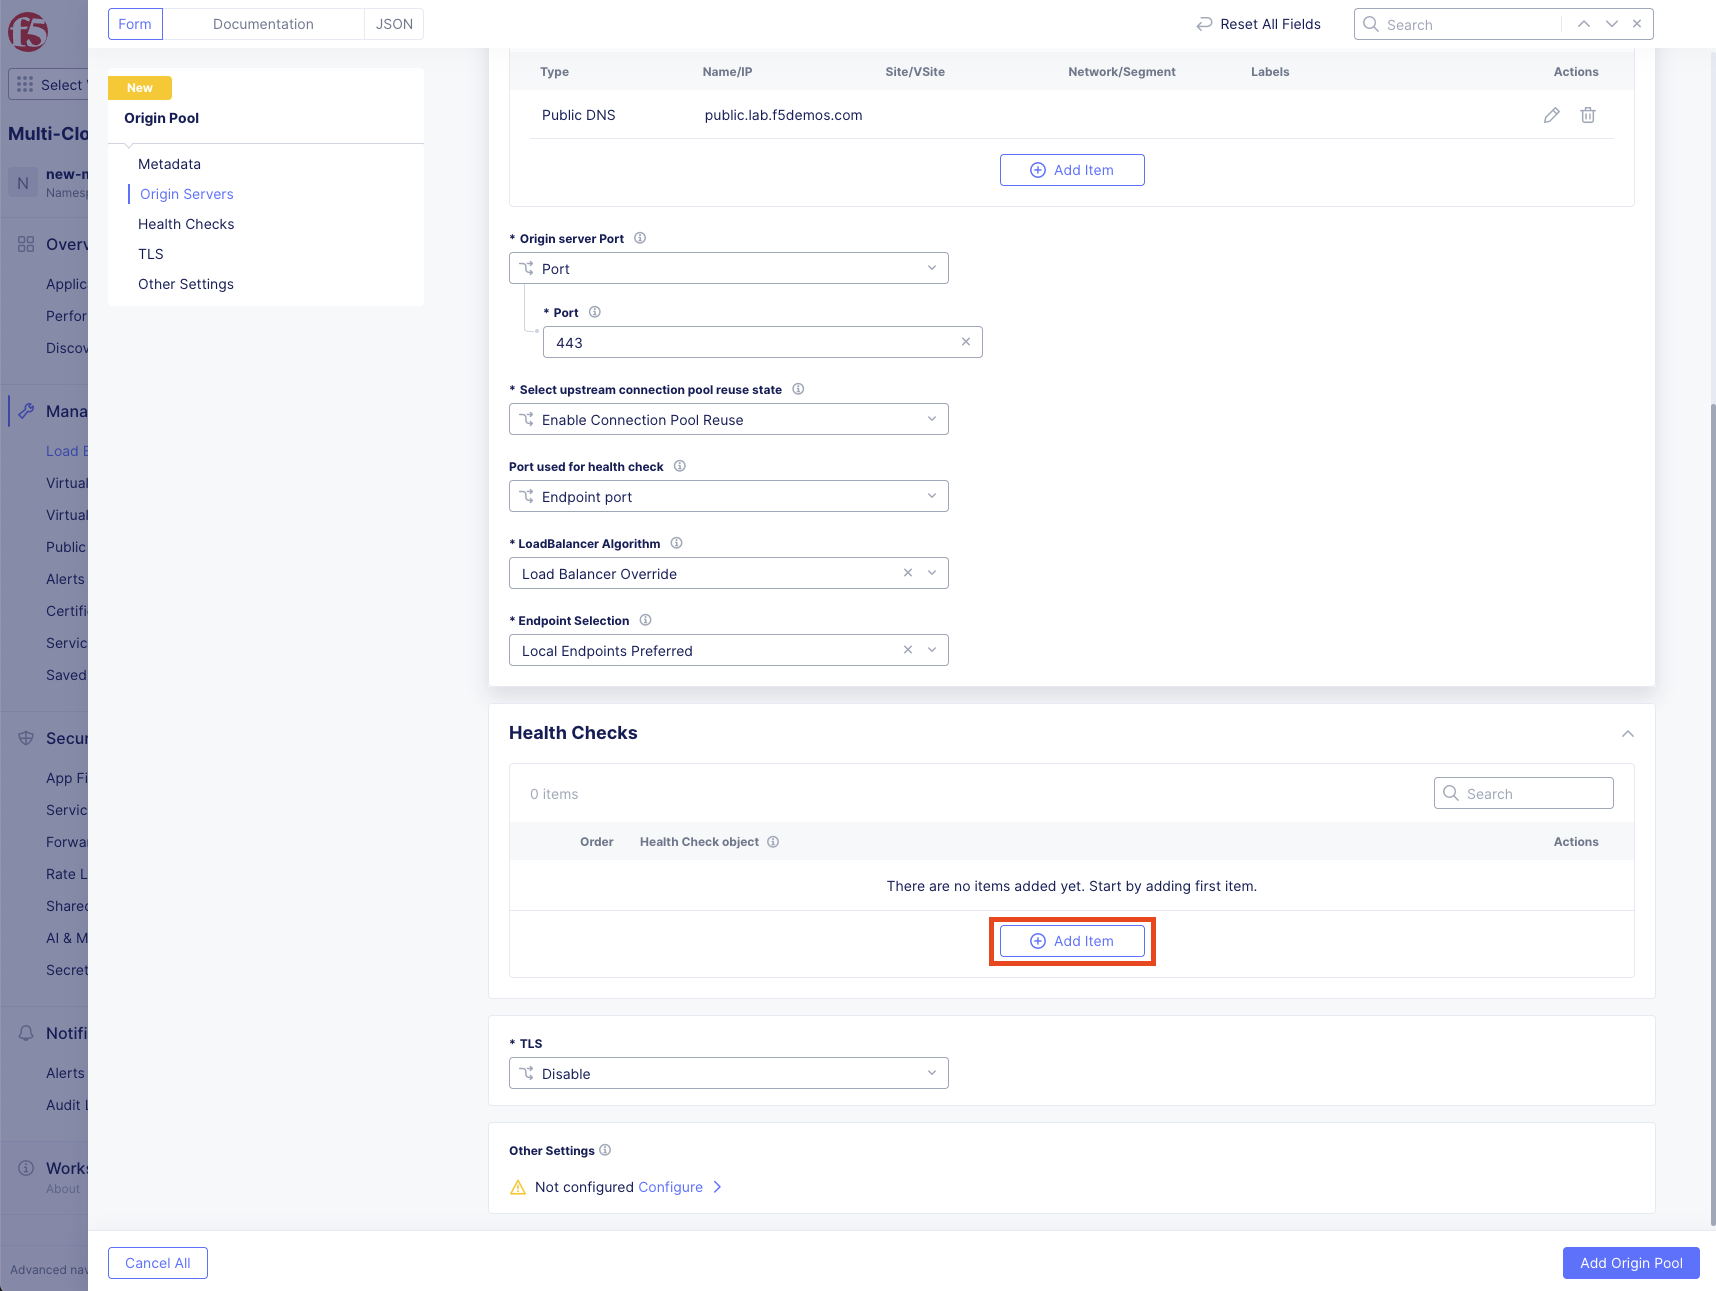
Click Add Item to add the health check.

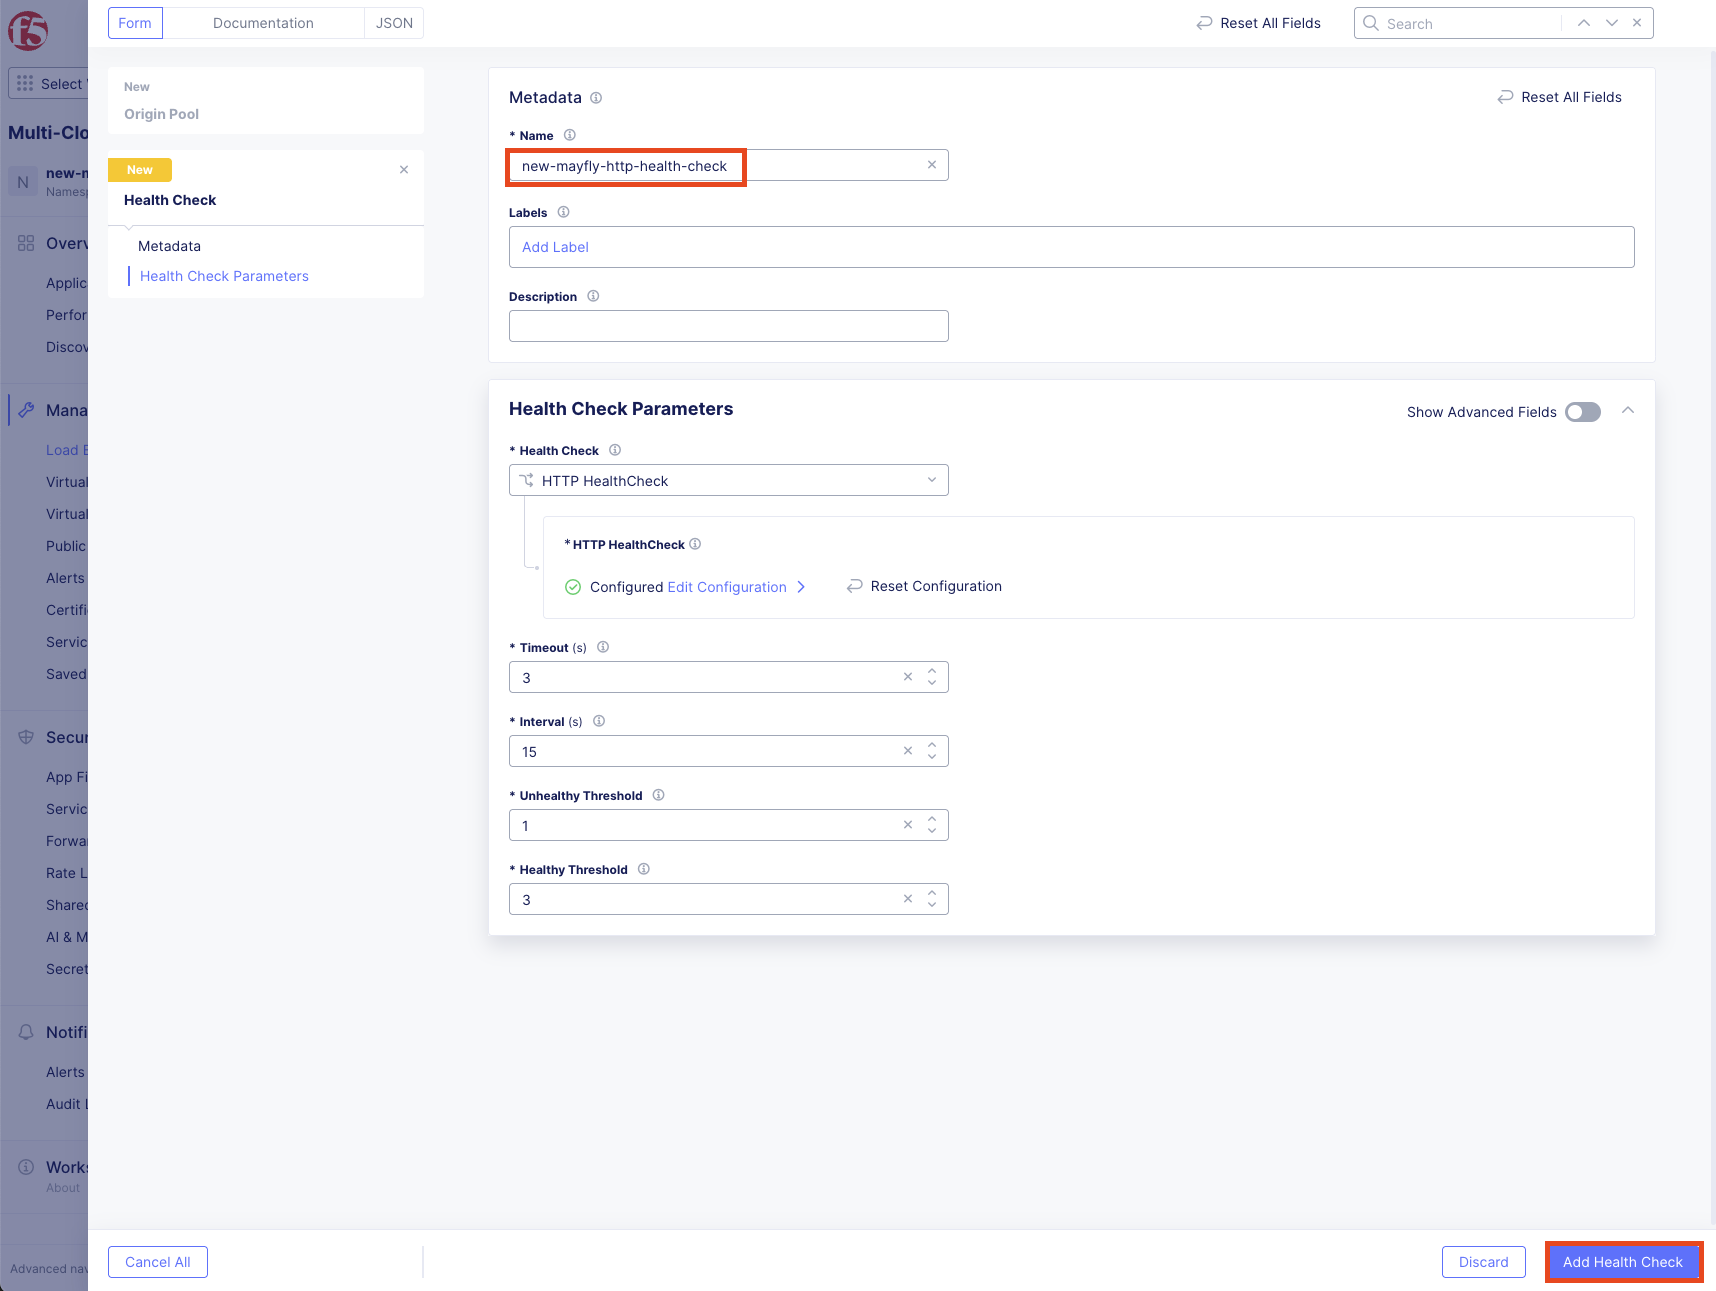
Configure the health check:
Variable
Value
Name
<your-namespace>-http-health-check
Leave all other settings as default and click Add Health Check.
Verify your AWS origin pool configuration matches the expected settings.
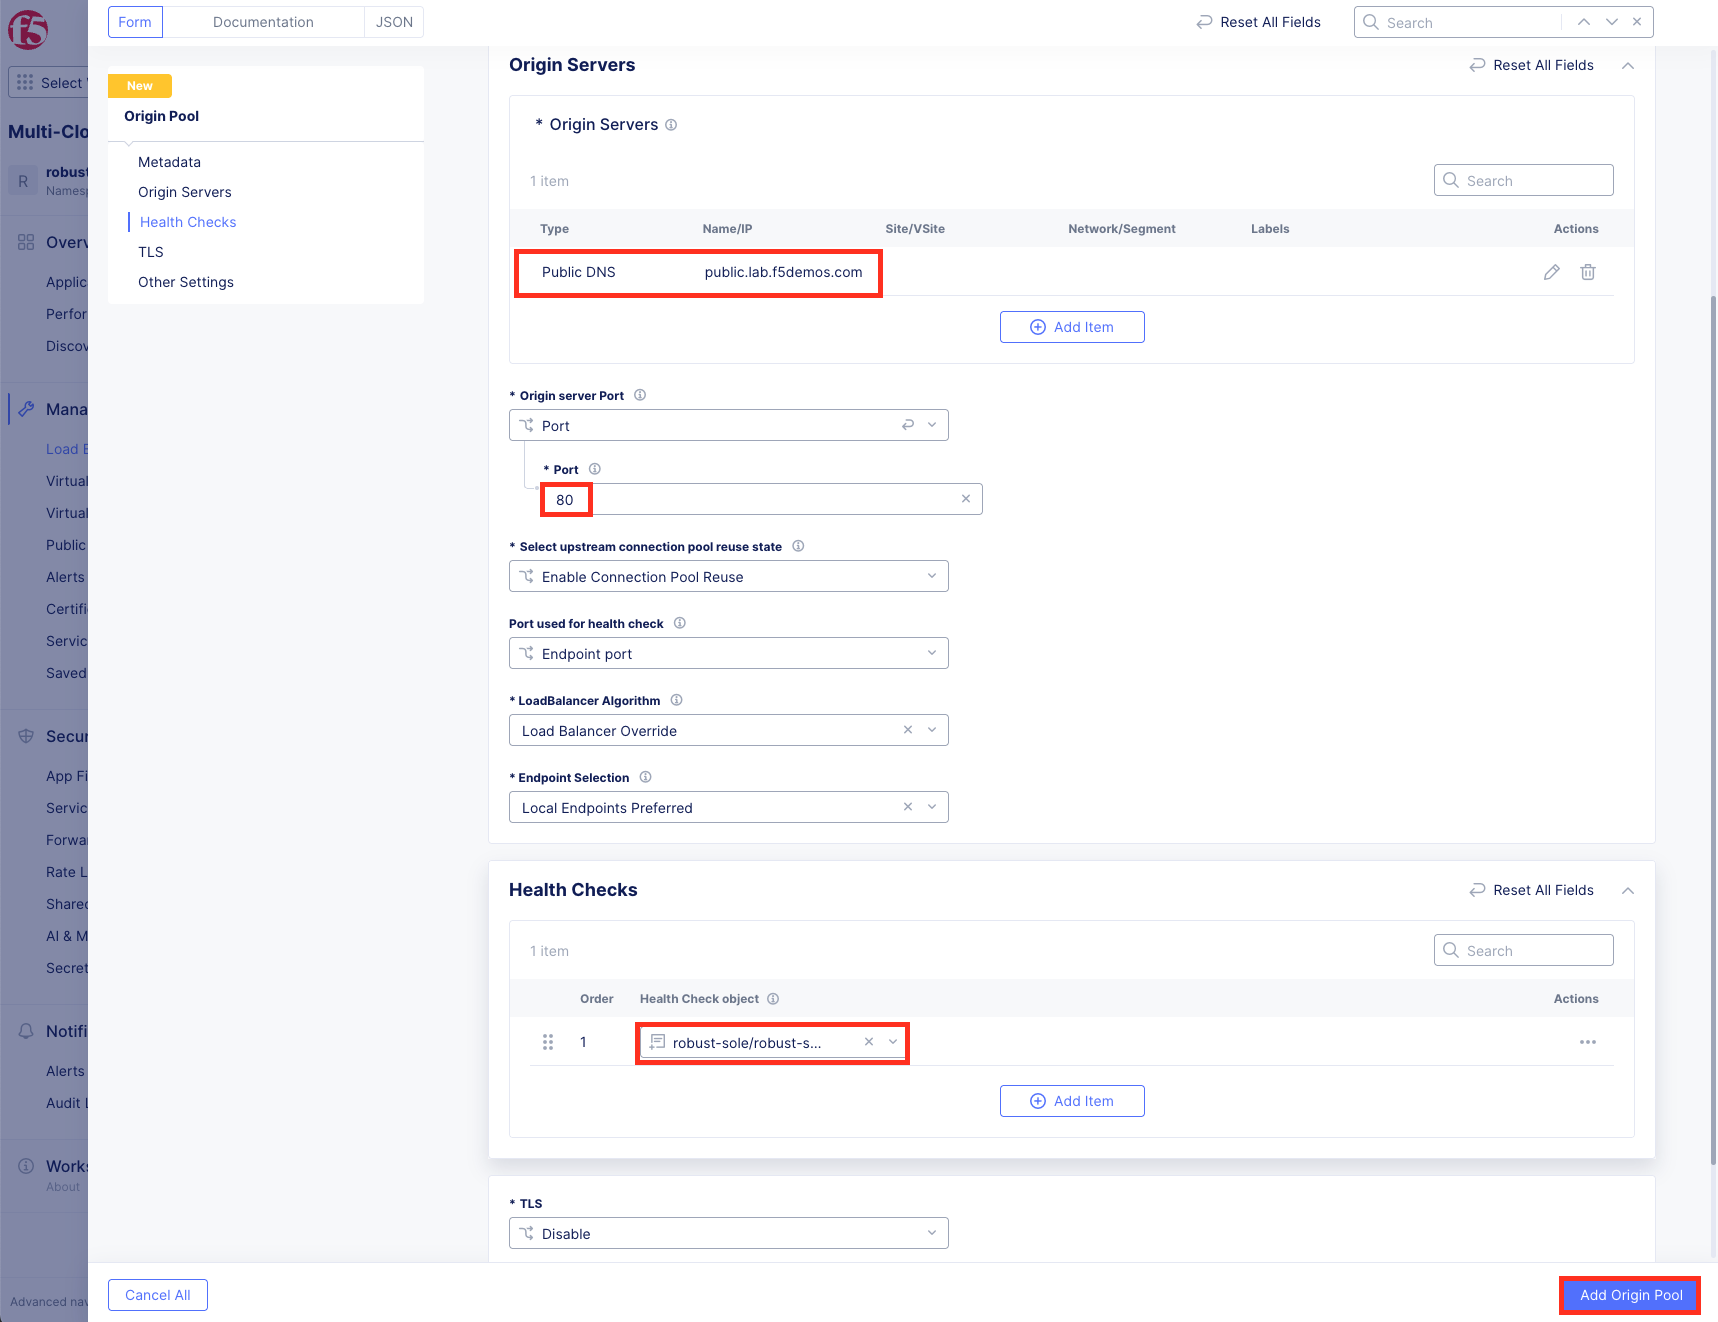
Click Add Origin Pool.
Task 4: Create Azure Origin Pool
You will now create an origin pool for the Azure workload using a private IP address.
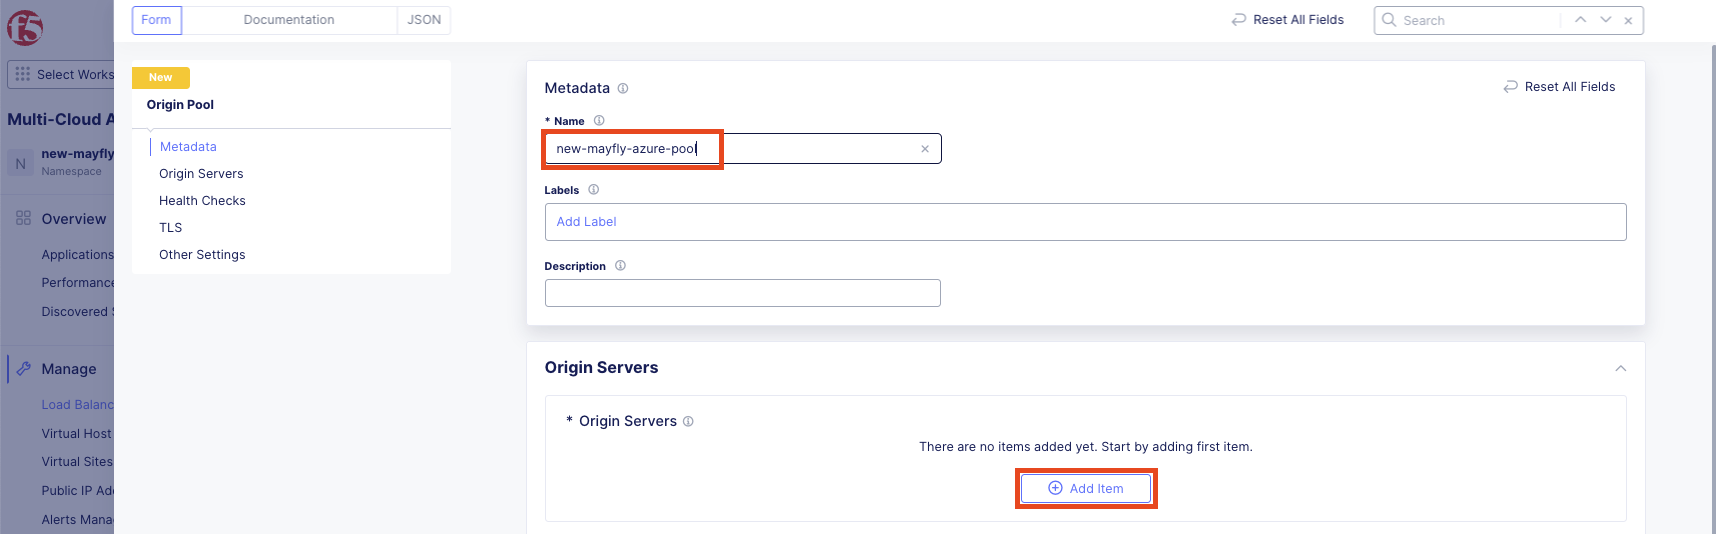
Click Add Origin Pool.
Configure the Azure origin pool:
Variable
Value
Name
<your-namespace>-azure-pool
Configure Origin Servers:
Under Origin Servers, click Add Item.
In the Select Type of Origin Server dropdown, choose IP address of Origin Server on given Sites.
Configure the origin server, then click Apply:
Variable
Value
IP
10.0.5.253
Site or Virtual Site
Site
Site
system/appworld-azure
Select Network on the site
Inside Network
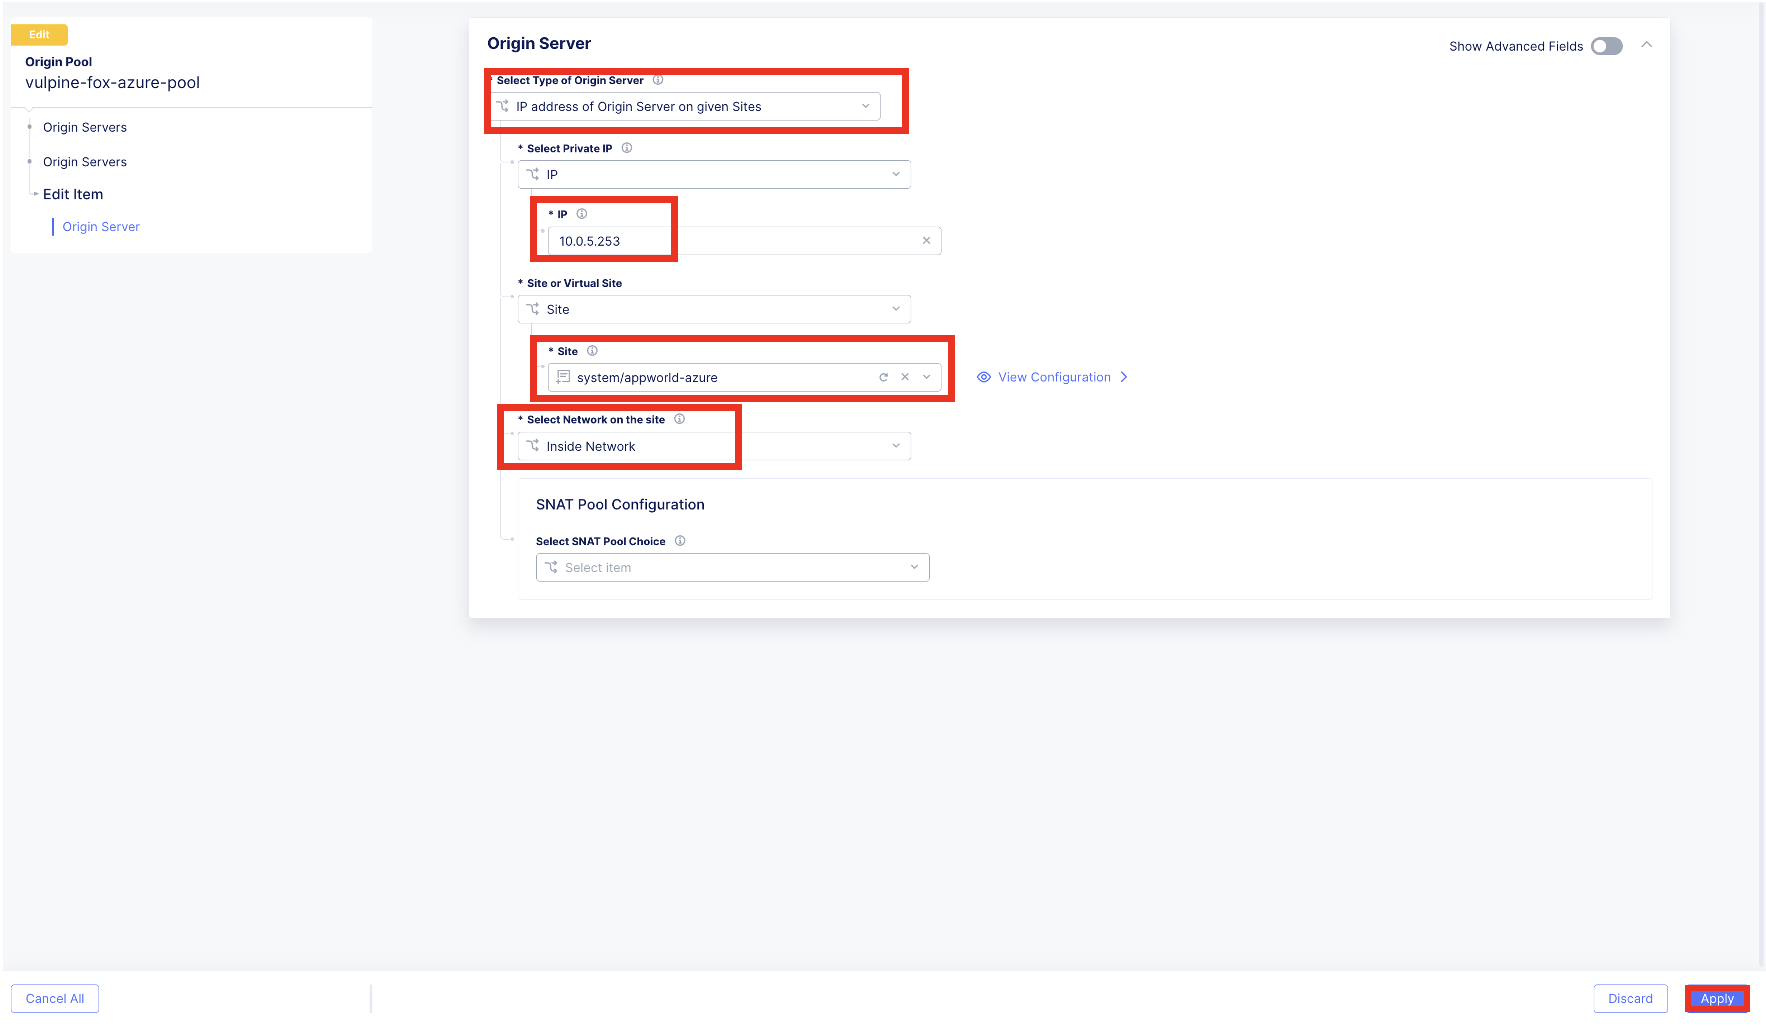
Note
The IP address 10.0.5.253 is the same as in earlier labs. This demonstrates how App Connect handles IP overlap between sites.
Change the Origin Server Port to 80.
Configure Health Checks:
Under Health Checks, click the Select Item dropdown.
Choose the health check you created earlier: <your-namespace>-http-health-check, then click Save Origin Pool.

Task 5: Create HTTP Load Balancer
Now you’ll create an HTTP load balancer that uses F5 Regional Edges as the global frontend.
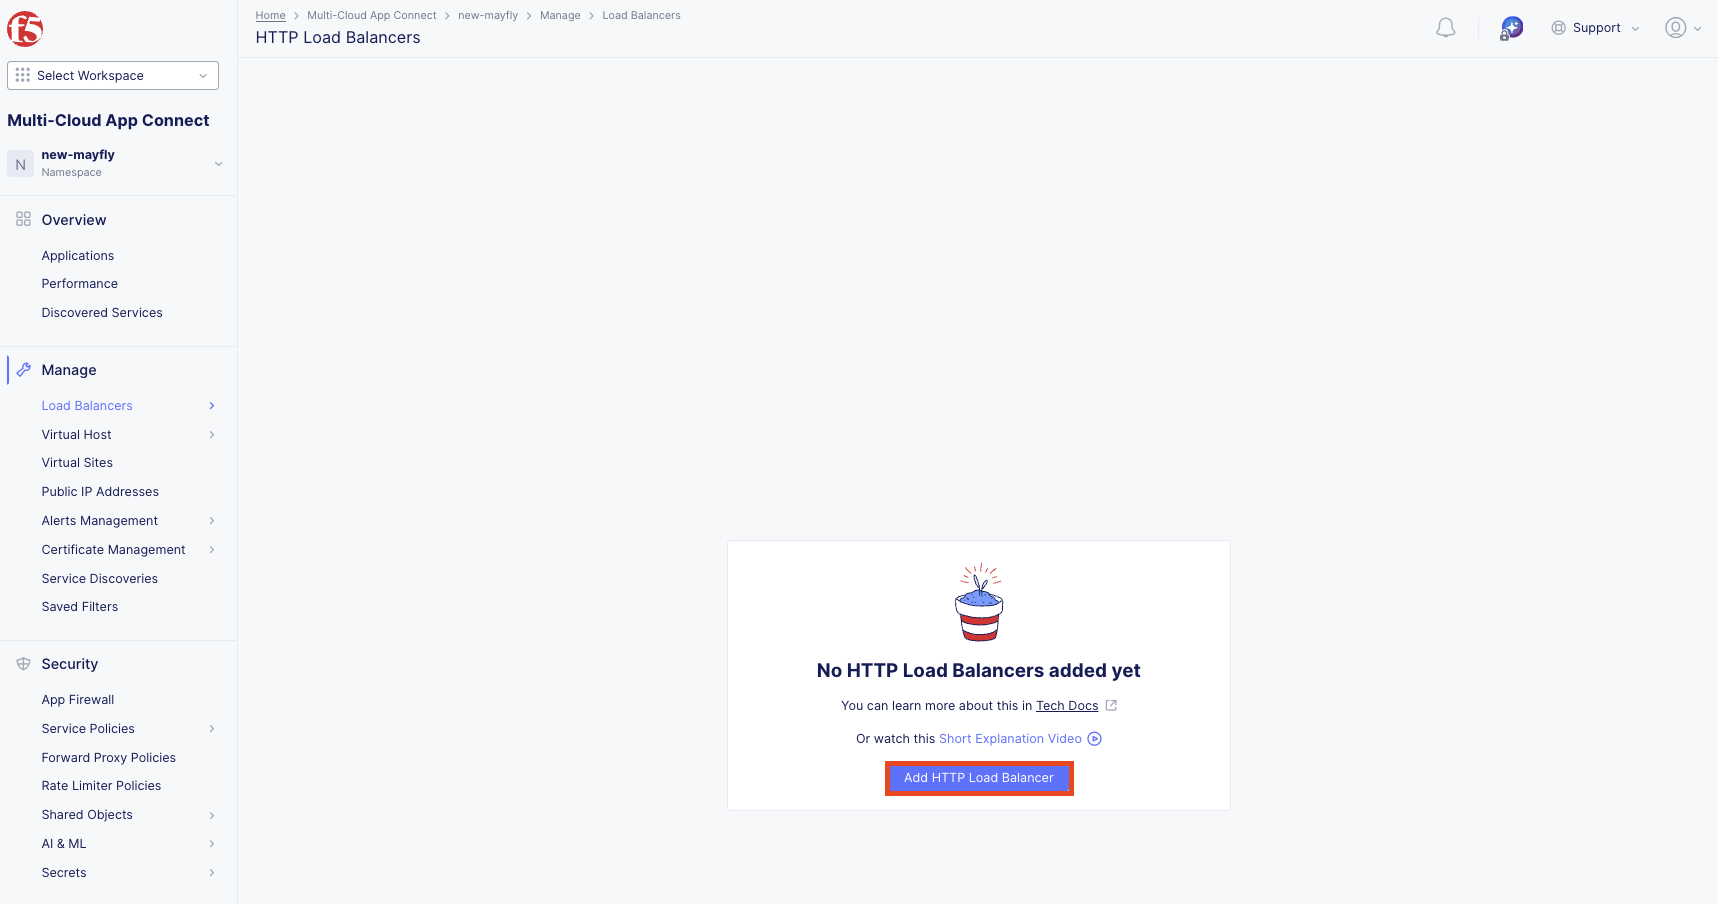
Navigate to Manage >> Load Balancers >> HTTP Load Balancers.
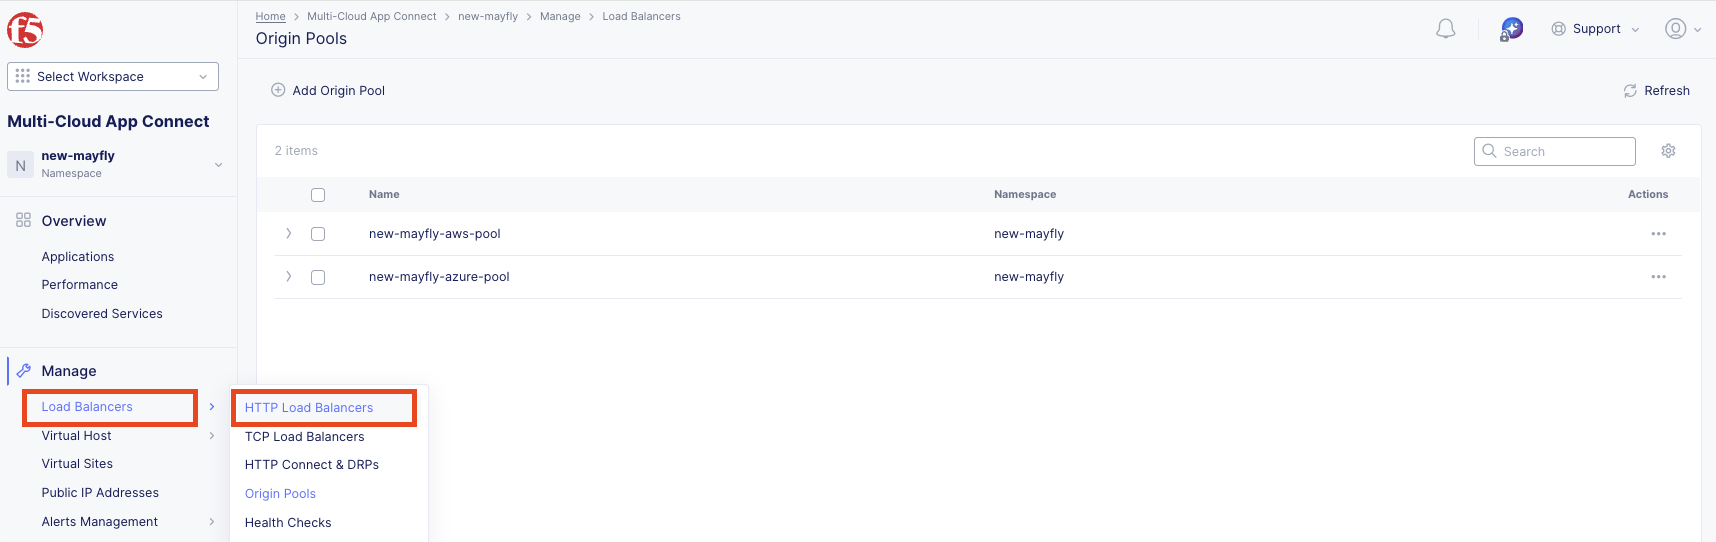
Click Add HTTP Load Balancer.
Configure the load balancer:
Variable
Value
Name
<your-namespace>-frontend
Domains
<your-namespace>-frontend.lab-mcn.f5demos.com
Load Balancer Type
HTTP
Automatically Manage DNS Records
Checked
HTTP Port
80
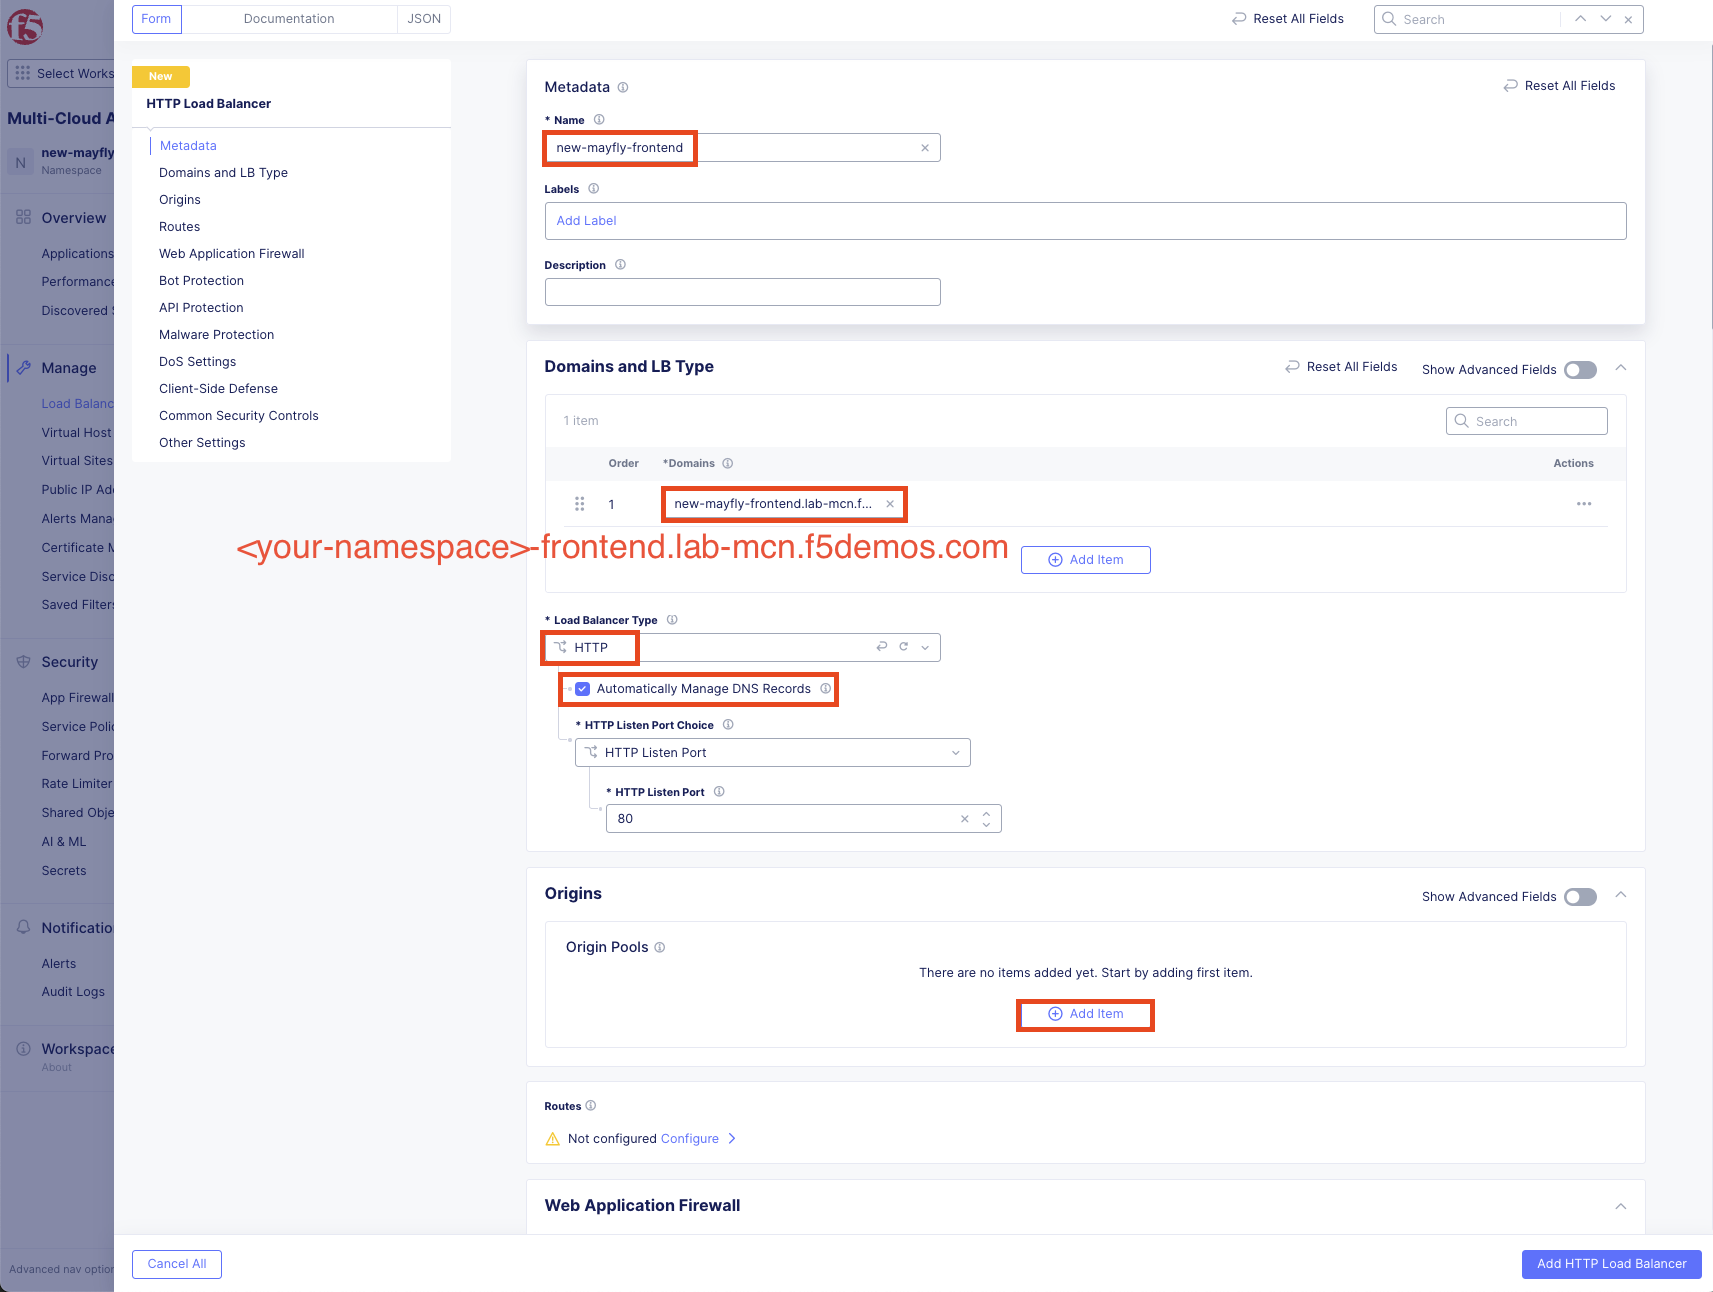
Configure Origin Pools:
Under Origin Pools, click Add Item.
Select your AWS pool: <your-namespace>-aws-pool
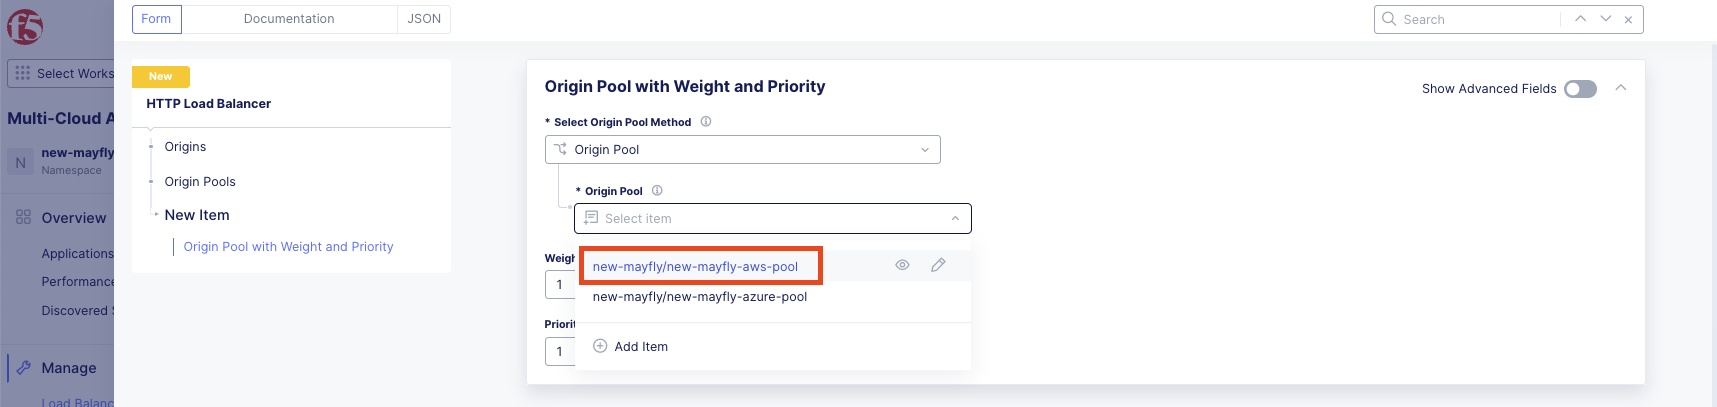
Leave Priority at 1 (default - highest priority) then click Apply.
Click Add Item again.
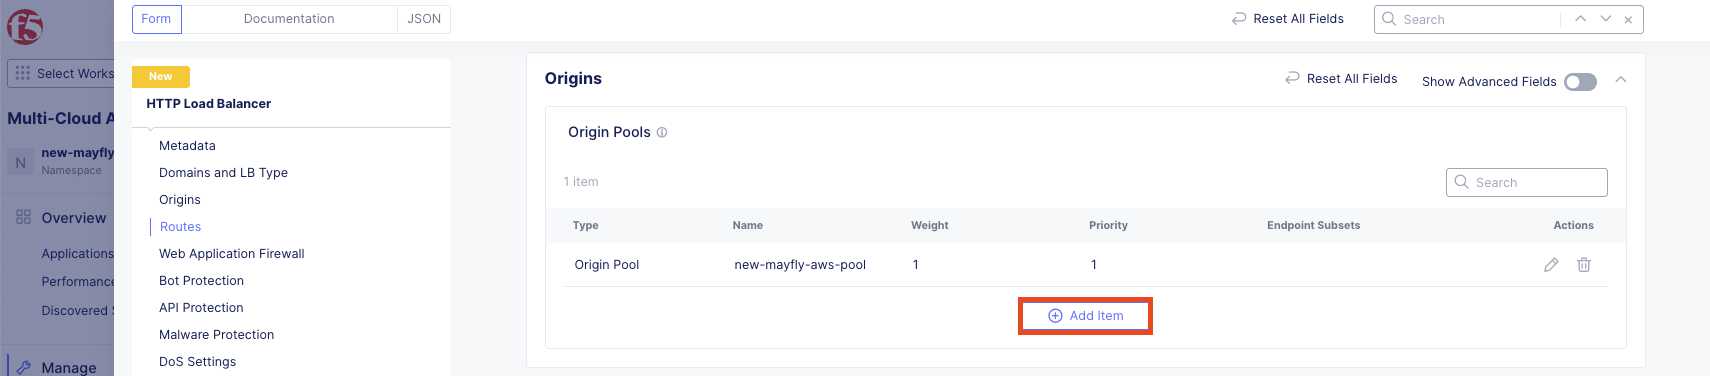
Select your Azure pool: <your-namespace>-azure-pool
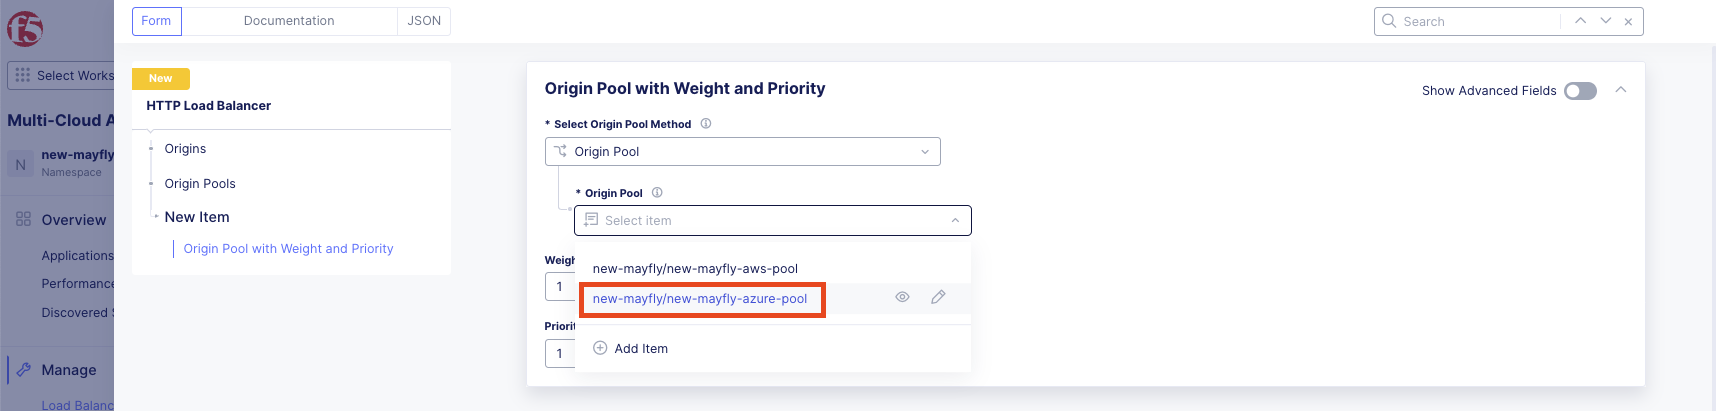
Change Priority to 0 (lowest priority - this makes Azure the backup), then click Apply.
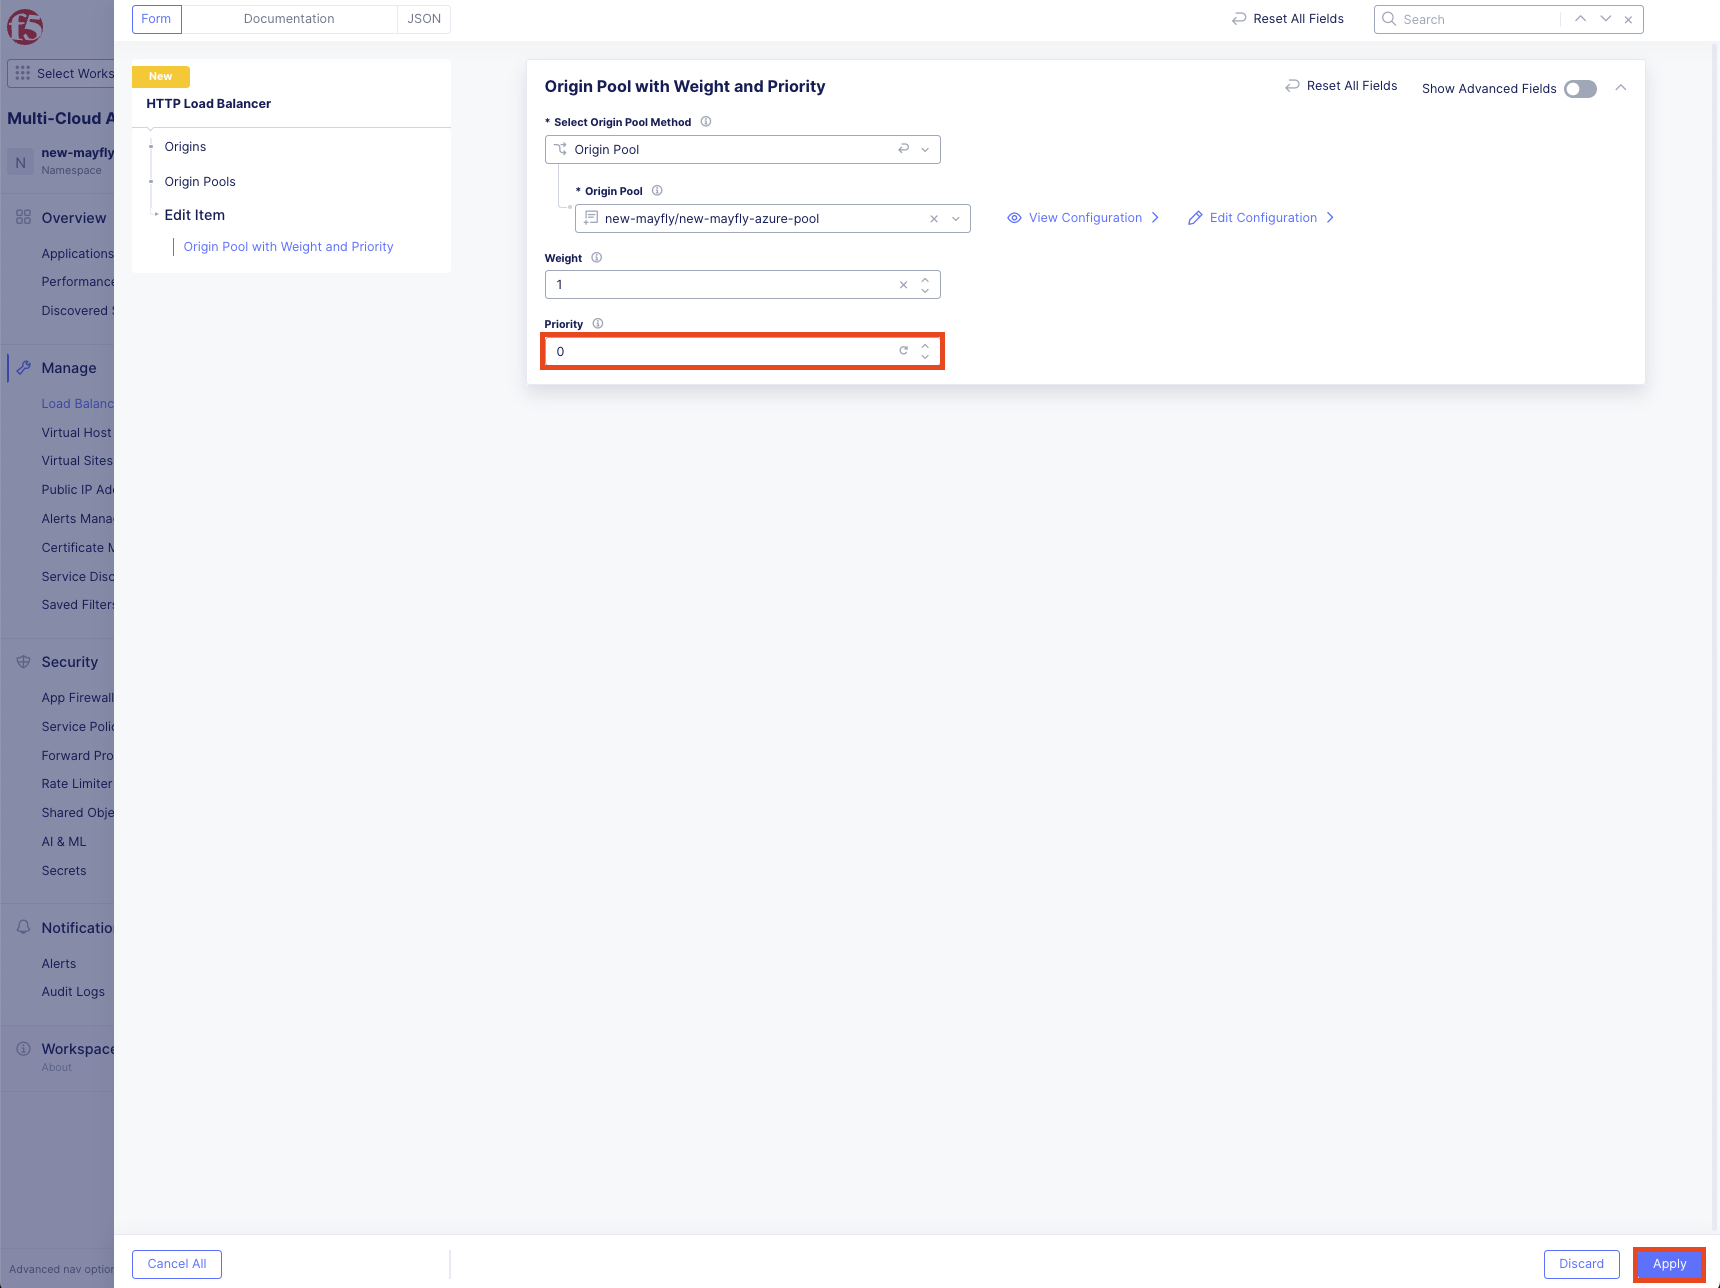
Note
Priority value of 1 is highest priority. Priority value of 0 is lowest priority. This configuration makes AWS the preferred destination and Azure the failover destination.
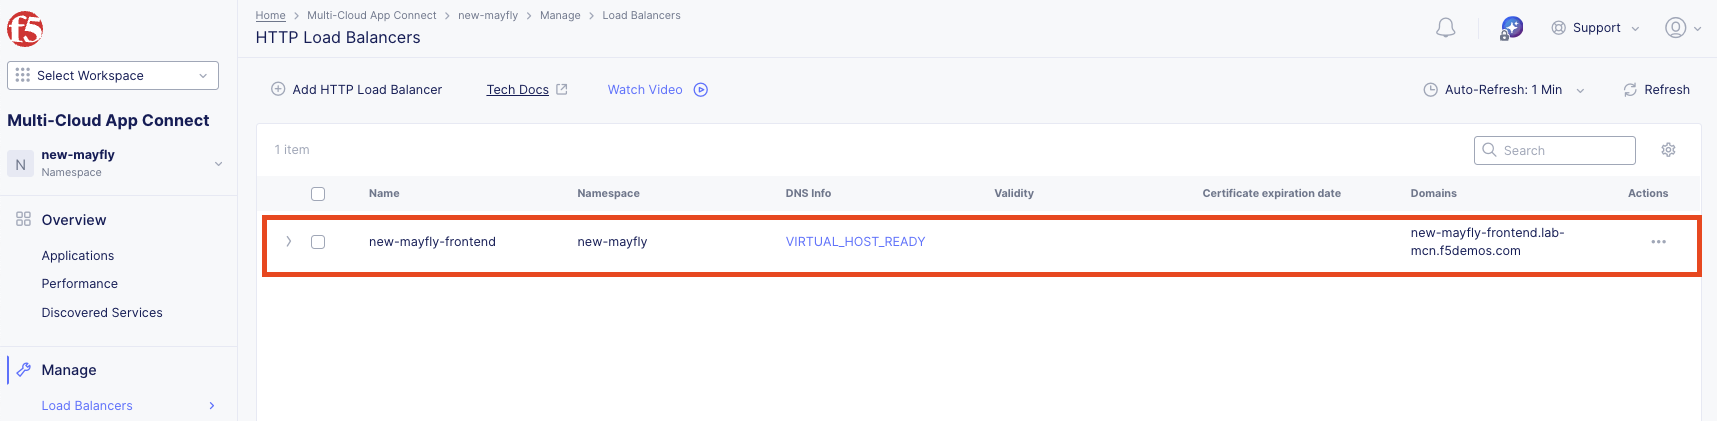
Verify your HTTP load balancer configuration then click Add HTTP Load Balancer.

Verify your HTTP load balancer appears in the list.
Task 6: Test the Load Balancer
Now let’s test your globally available frontend.
Open a Command Prompt or Terminal on your local machine.
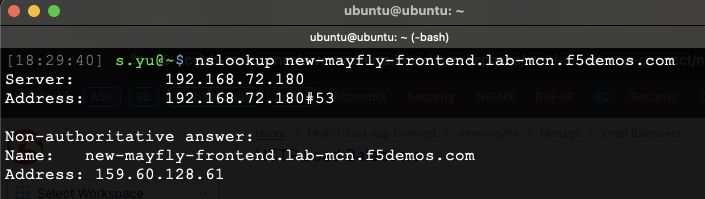
Run the following command:
nslookup <your-namespace>-frontend.lab-mcn.f5demos.com
Note the IP address returned.
Note
This may take a few moments to become resolvable depending on your local DNS configuration.
Open a new browser tab and navigate to:
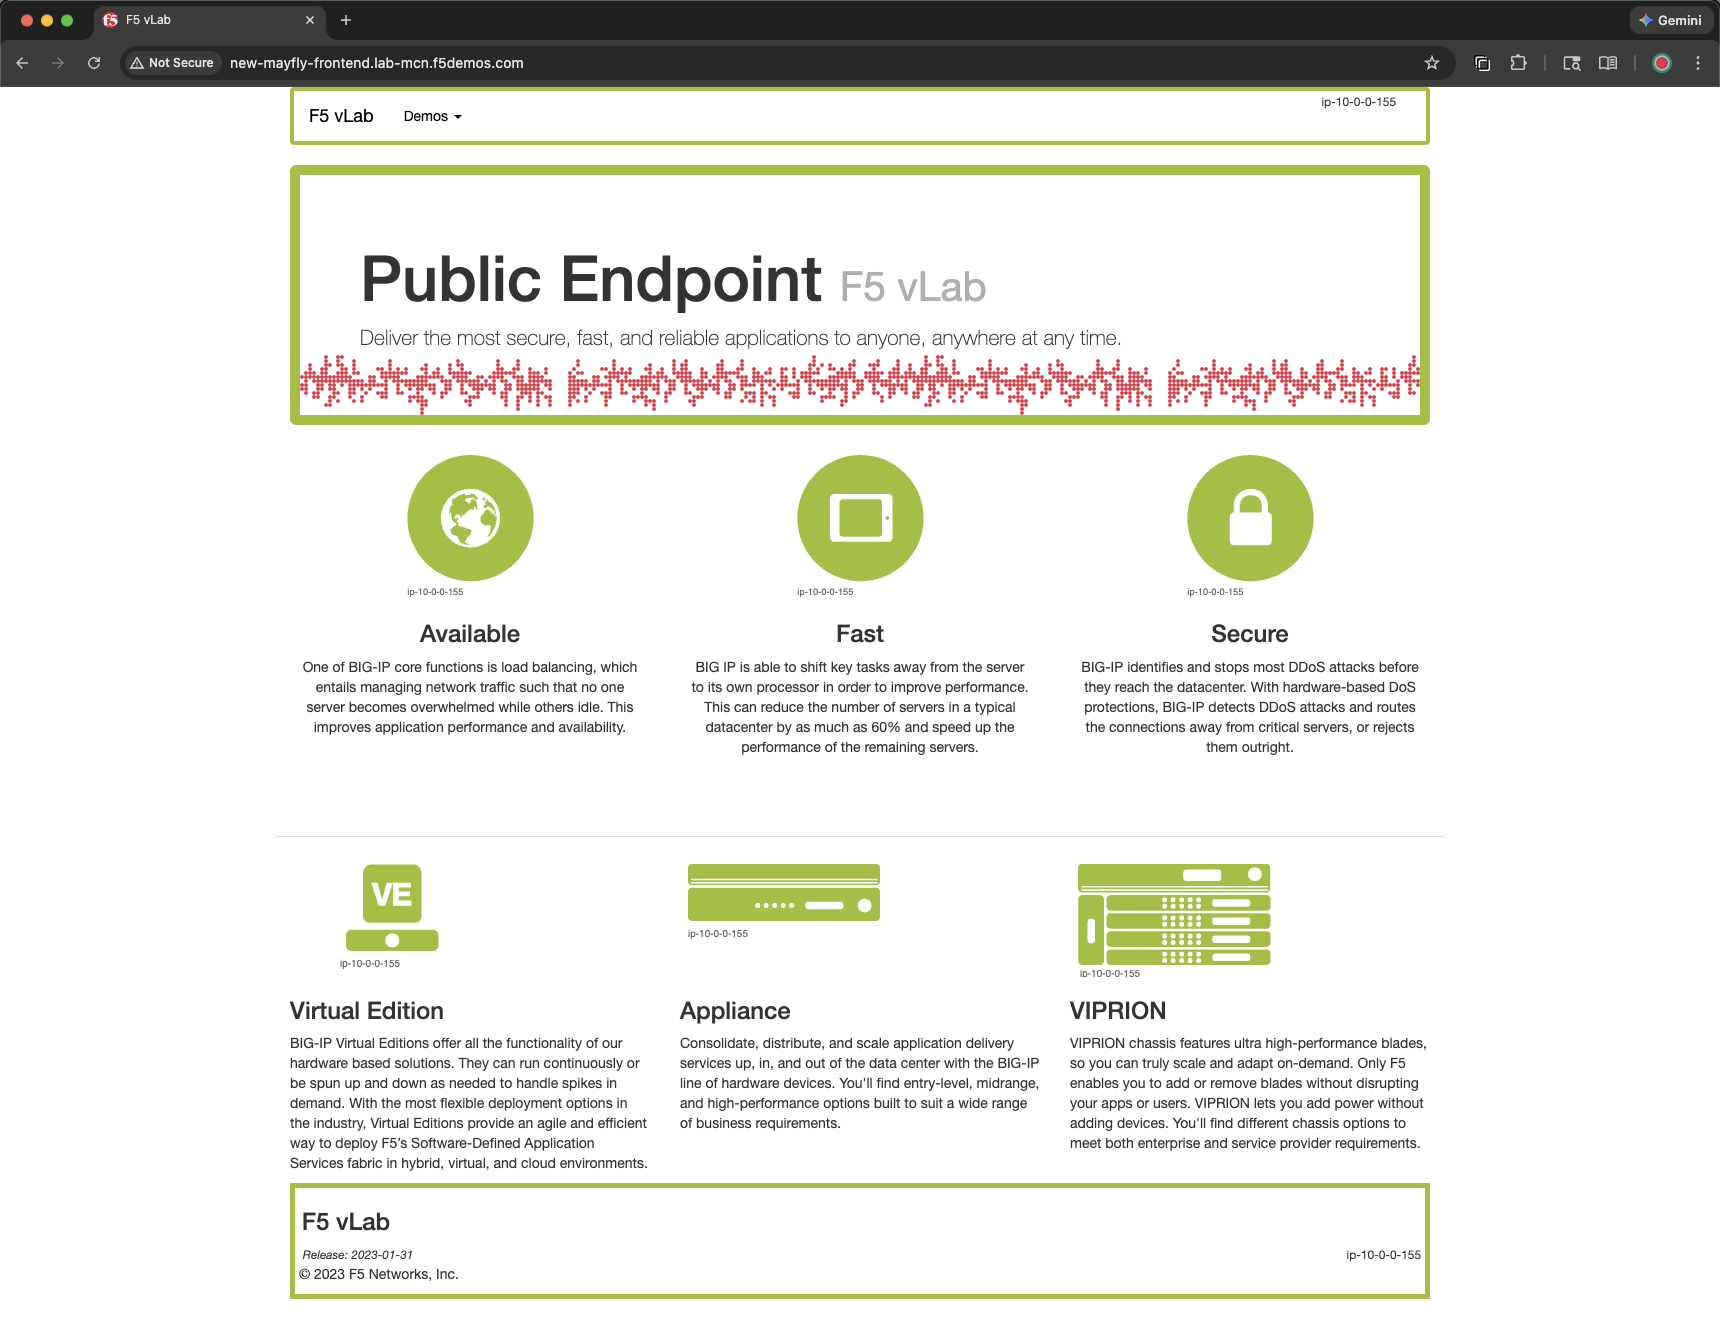
http://<your-namespace>-frontend.lab-mcn.f5demos.com
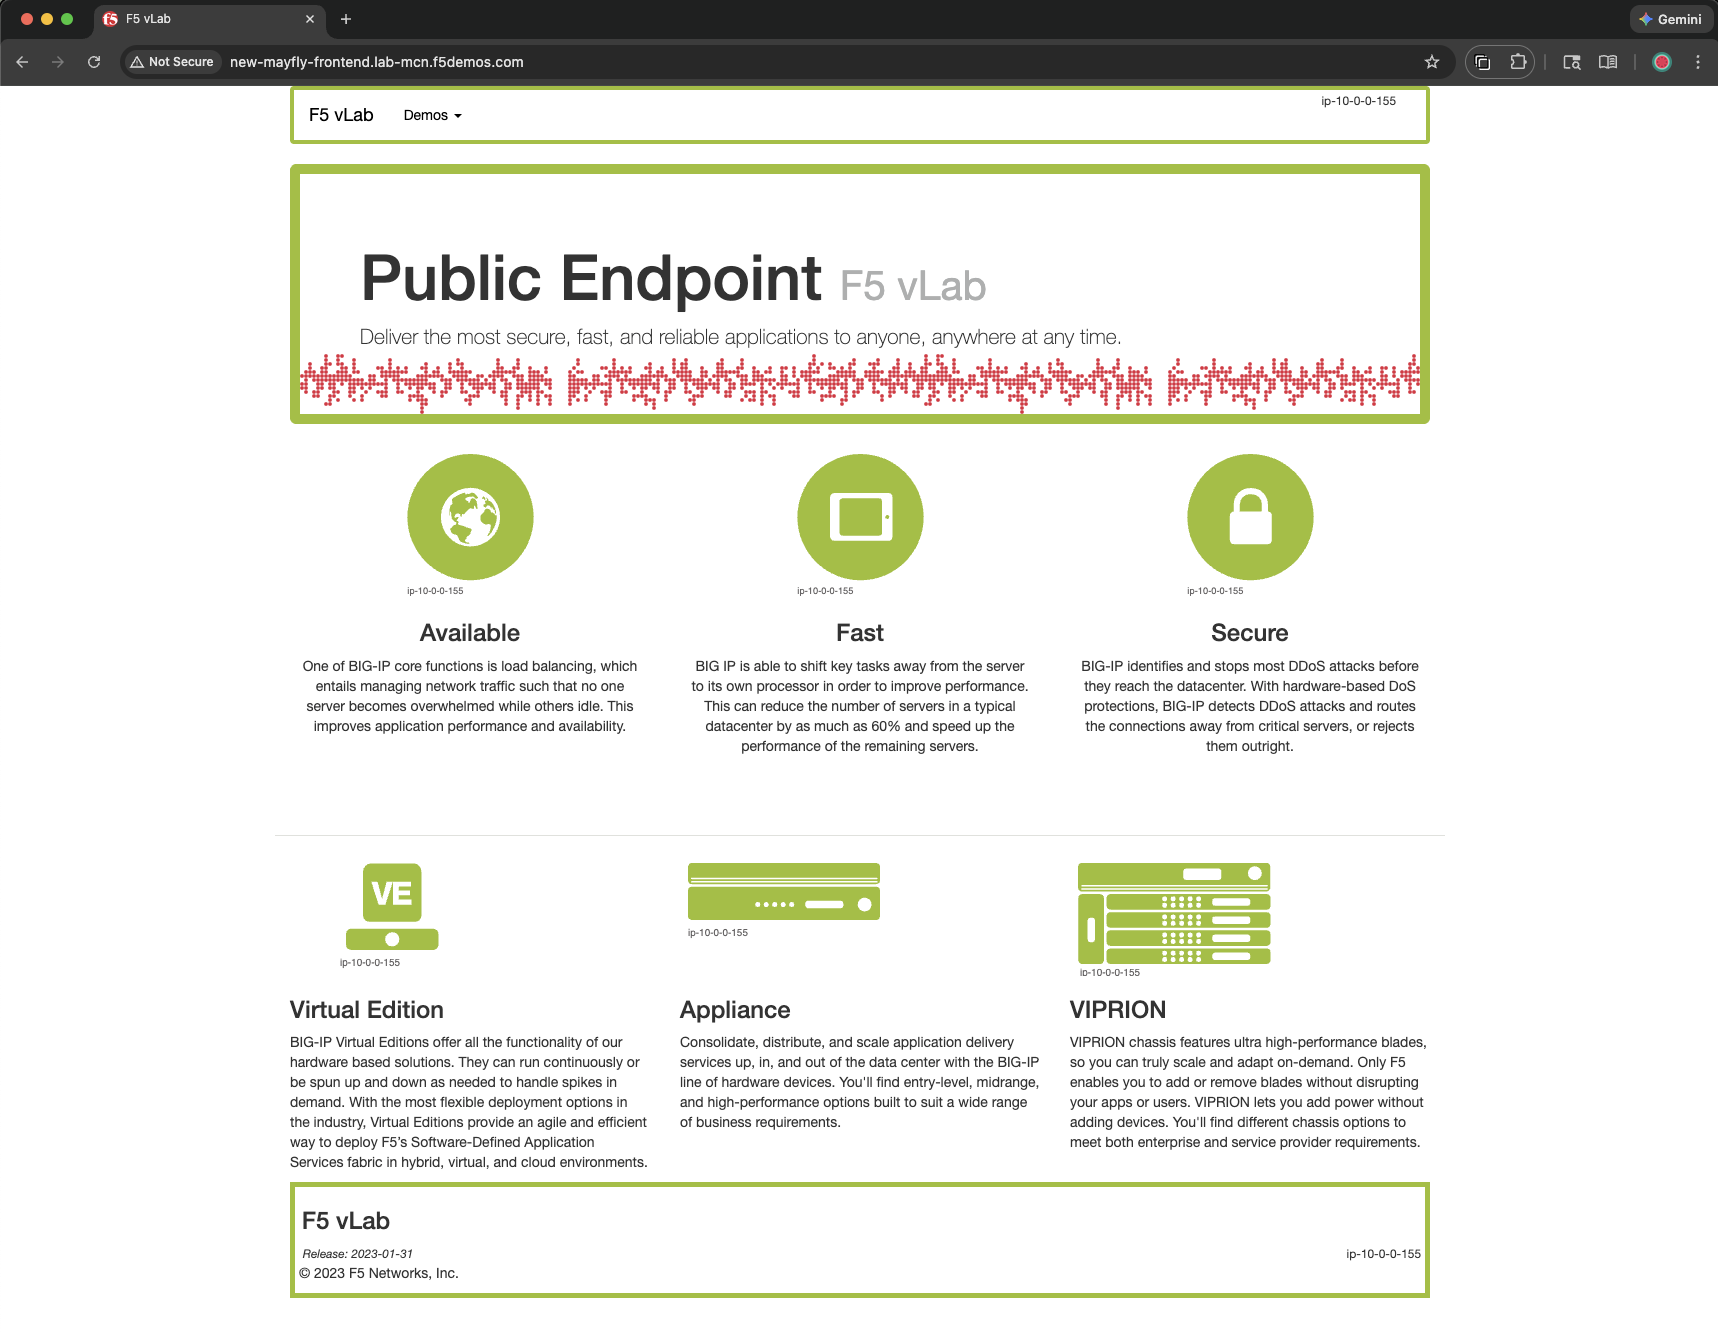
You should see the AWS frontend (green page).
Hard refresh your browser several times by pressing:
Windows/Linux (Chrome, Edge, Firefox): Ctrl + Shift + R or Ctrl + F5 or Shift + Click Refresh
macOS (Chrome, Firefox): Cmd + Shift + R
Verify you consistently see the AWS page.
Tip
You should NOT see a blue page (Azure) since AWS is the higher priority pool.
Task 7: Test Failover to Azure
Let’s simulate an AWS failure to test failover to the Azure pool.
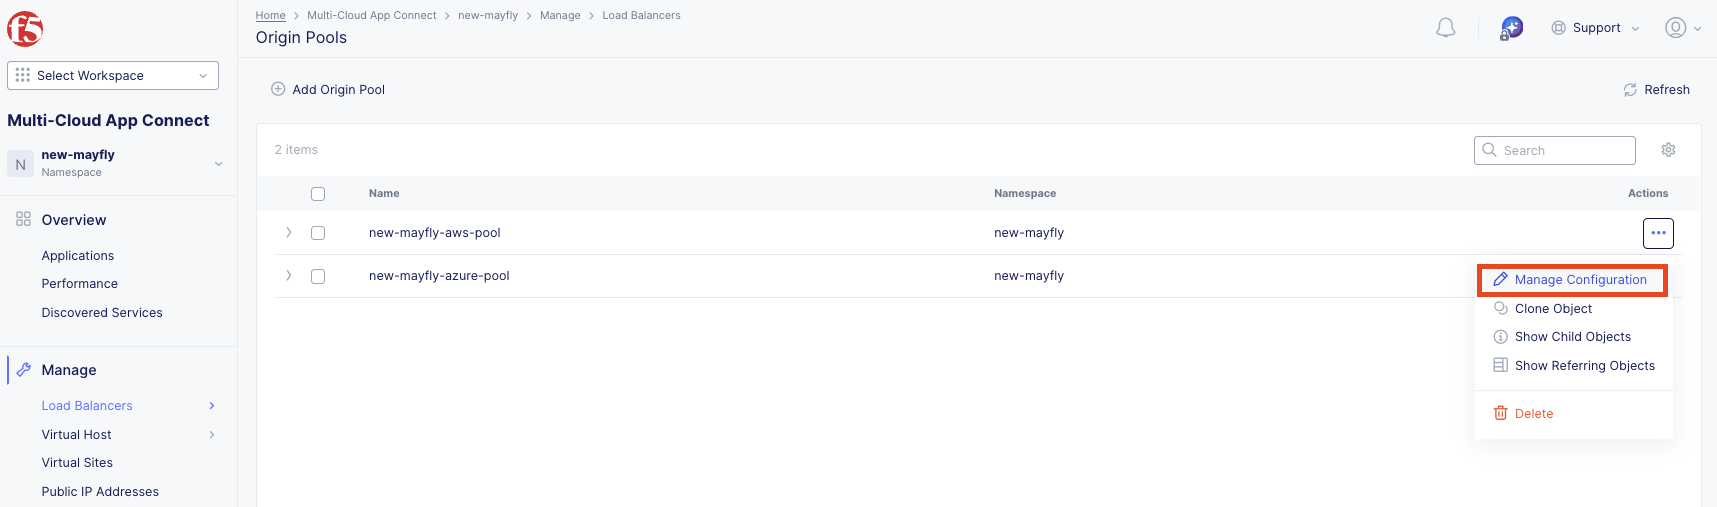
Navigate to Manage >> Load Balancers >> Origin Pools.
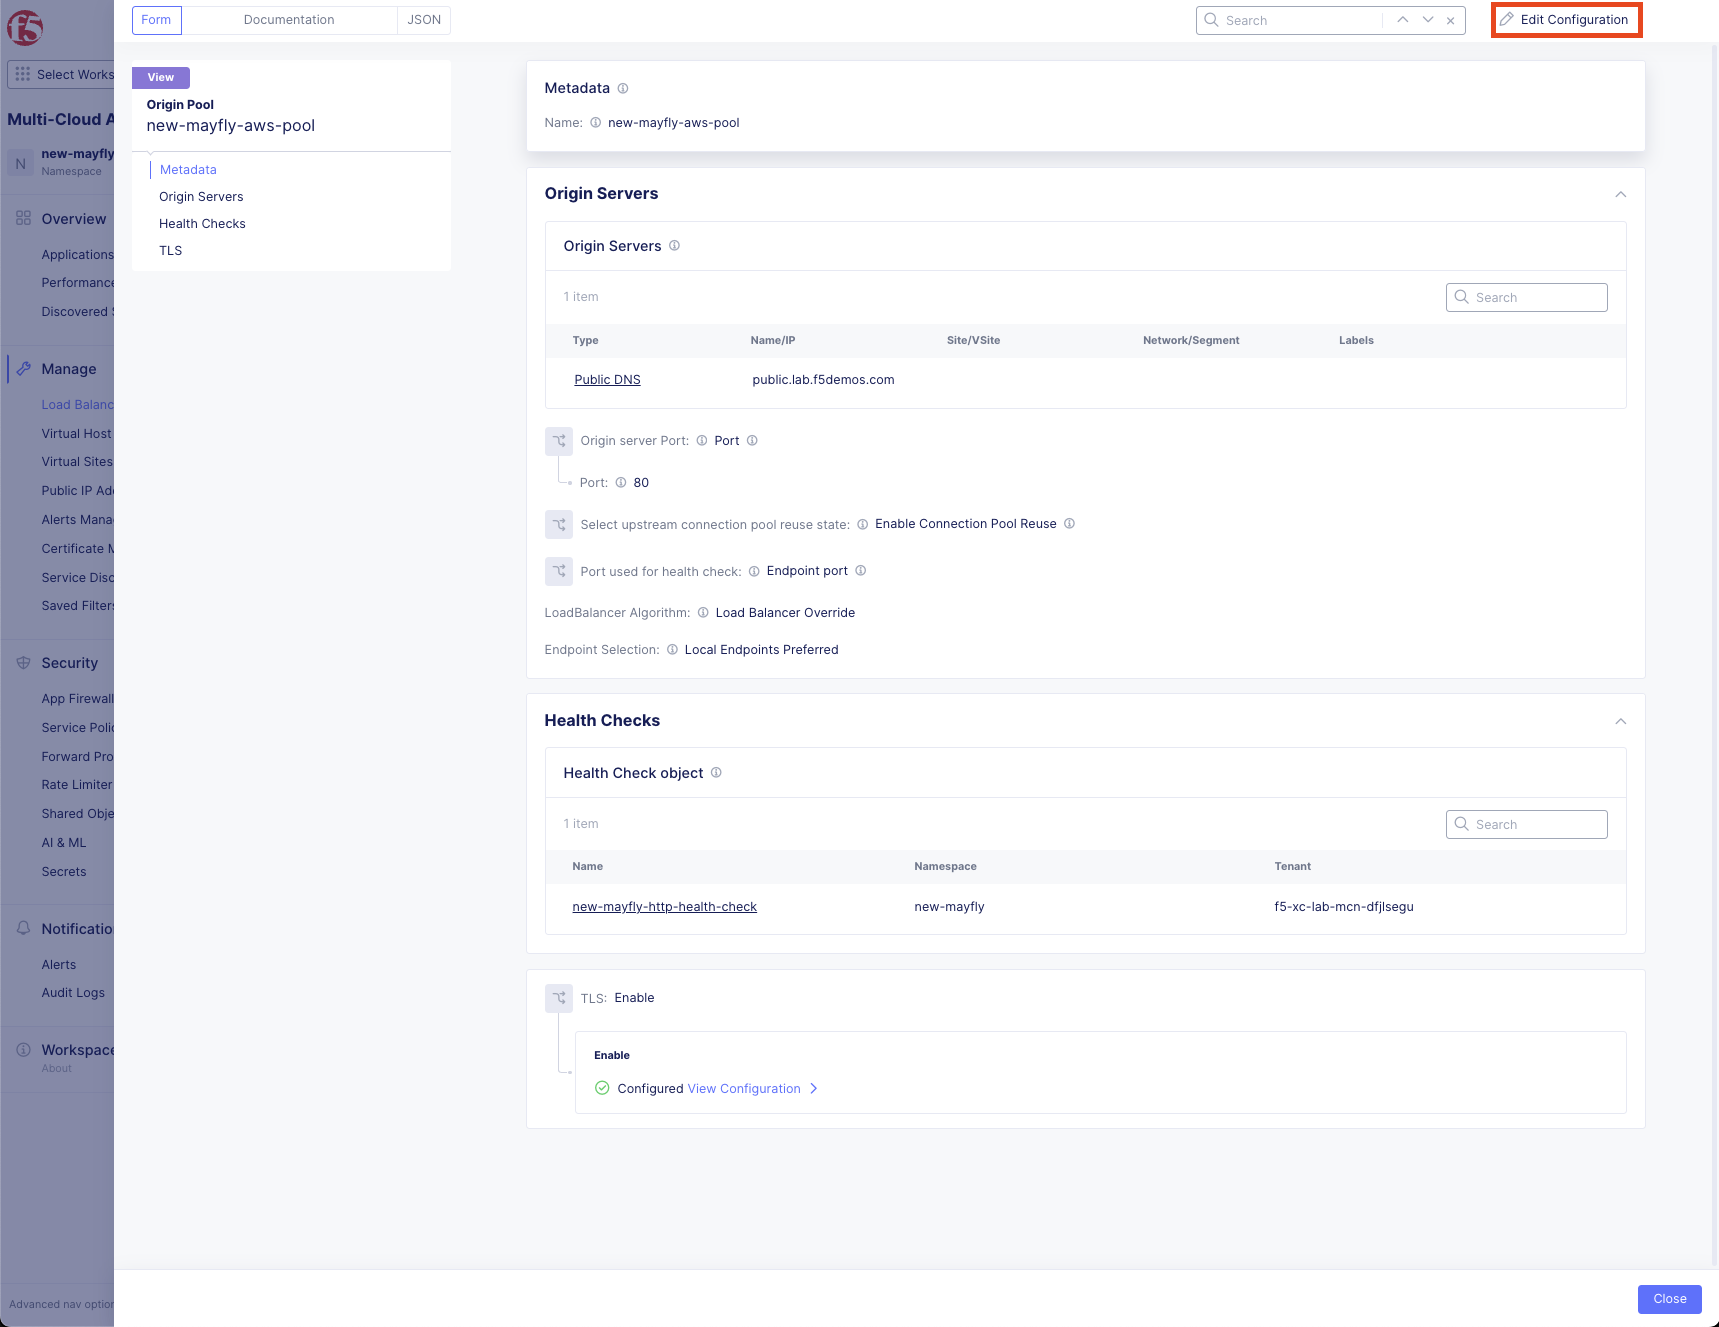
Click the three dots under Actions for <your-namespace>-aws-pool.
Select Manage Configuration.
Click Edit Configuration in the top right.

Scroll to the bottom of the TLS section, click the dropdown and select Enable.

Click Save Origin Pool.
Important
Enabling TLS will cause the health check to fail because the AWS server doesn’t expect TLS. This simulates an AWS workload failure.
Wait approximately 10-15 seconds for the health check to fail.
Go back to your browser tab and refresh:
Windows/Linux (Chrome, Edge, Firefox): Ctrl + Shift + R or Ctrl + F5 or Shift + Click Refresh
macOS (Chrome, Firefox): Cmd + Shift + R
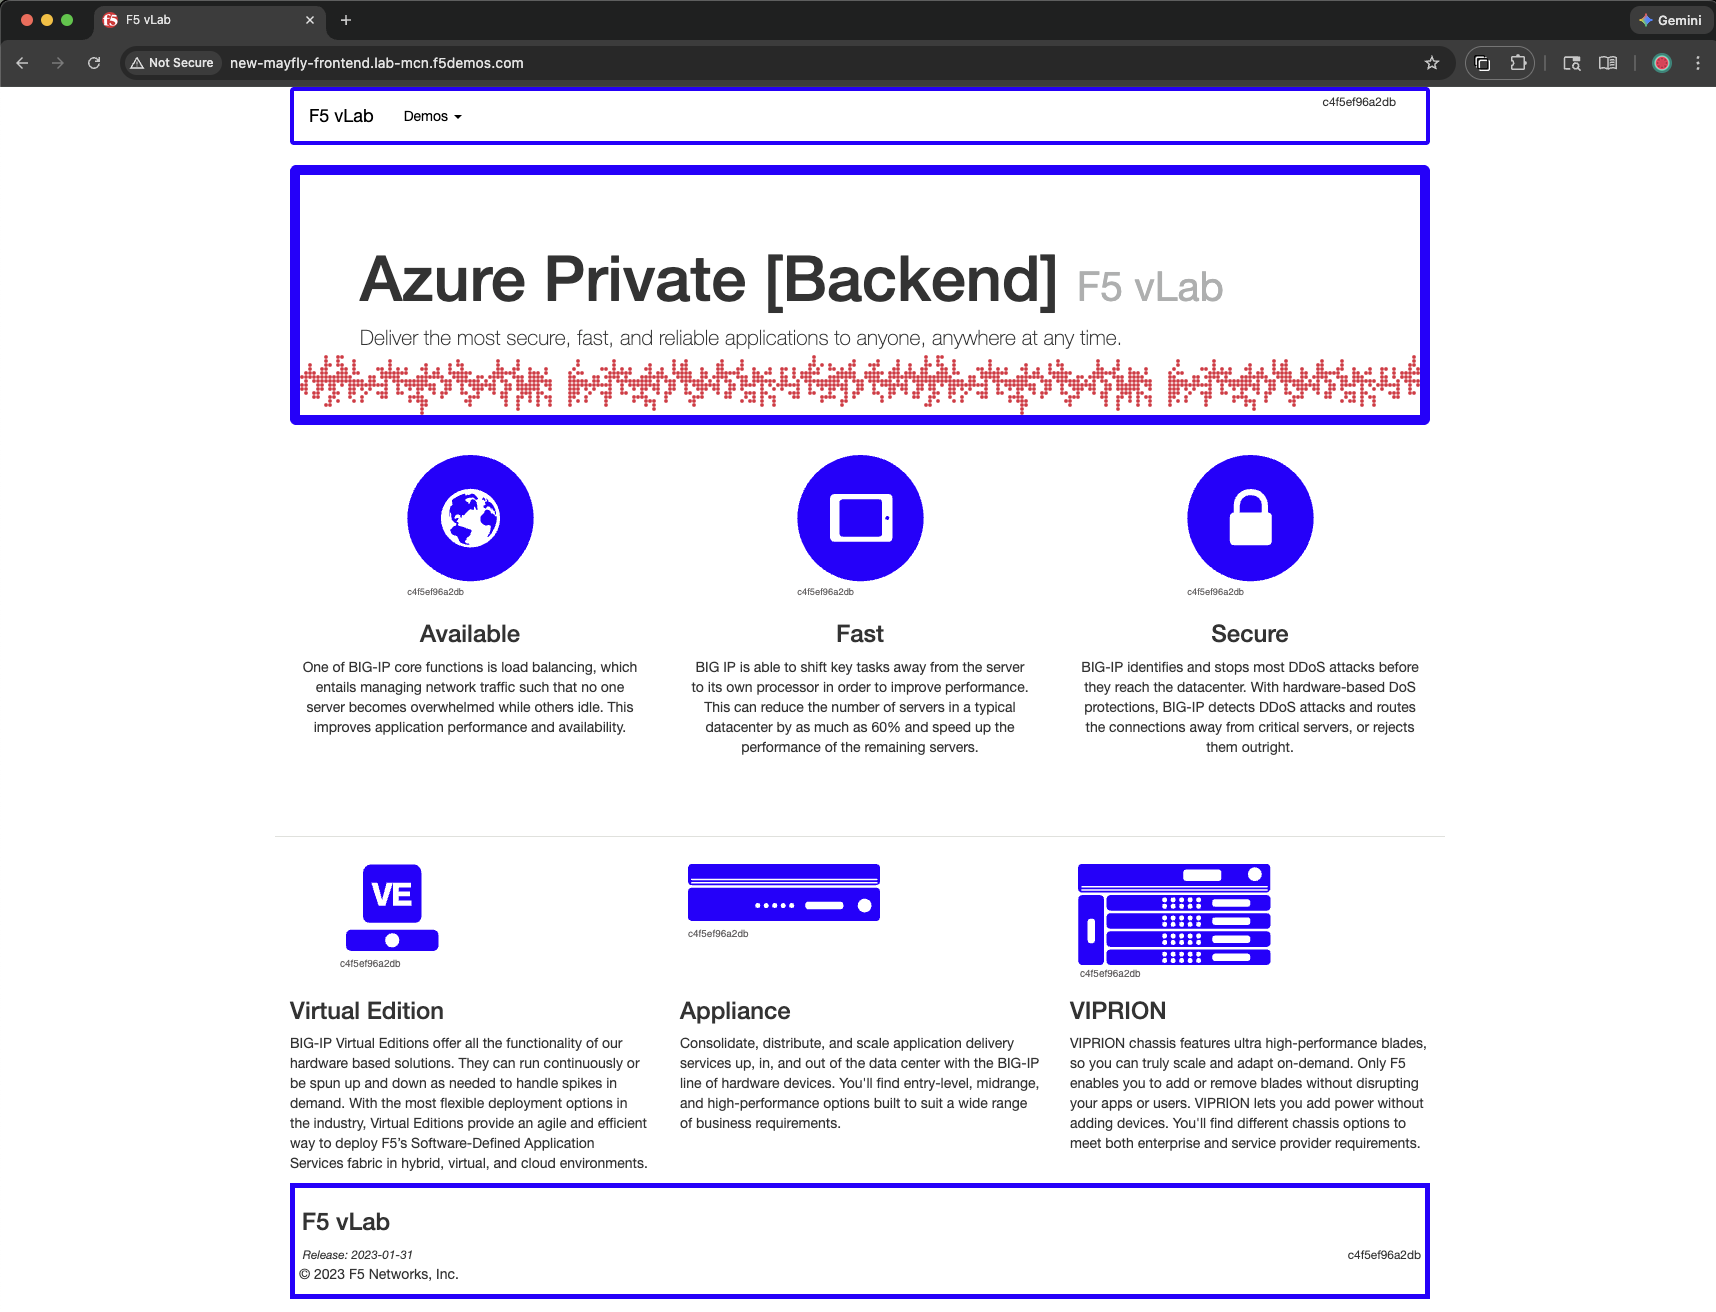
You should now see the Azure frontend (blue page).
Tip
The load balancer automatically failed over to the Azure pool when AWS became unhealthy.
Task 8: Restore AWS Pool
Let’s bring the AWS pool back online.
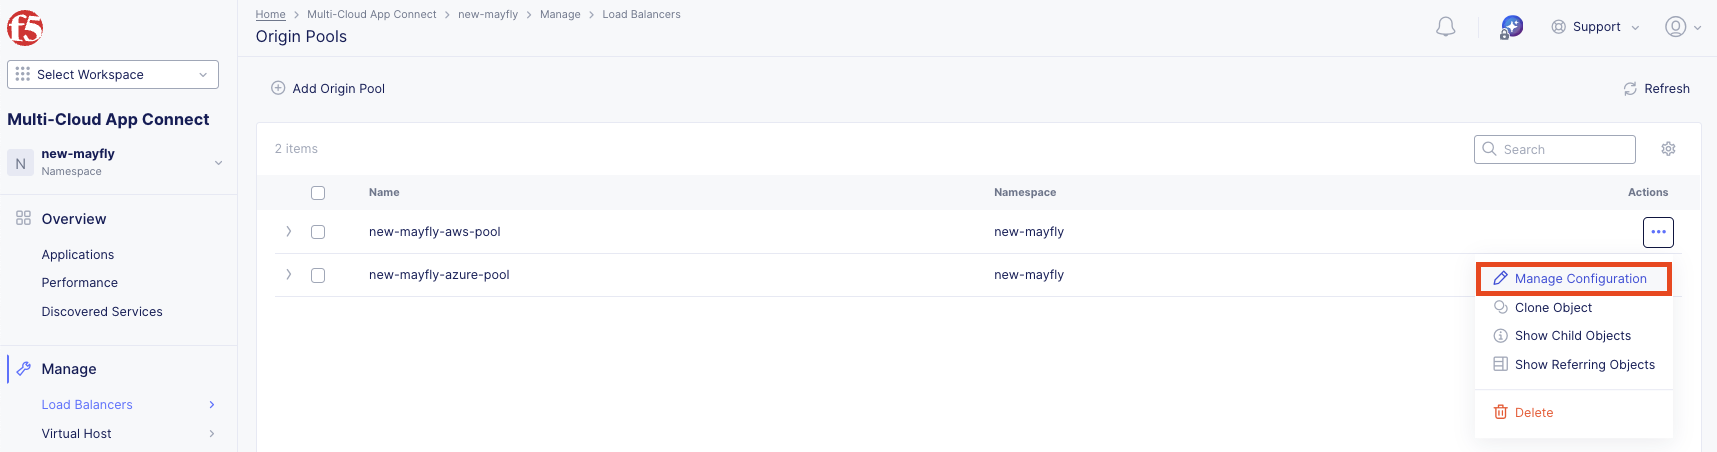
Navigate back to Manage >> Load Balancers >> Origin Pools.
Click the three dots under Actions for <your-namespace>-aws-pool, select Manage Configuration.
Click Edit Configuration.
Scroll to TLS and select Disable, then click Save Origin Pool.

Wait approximately 30-60 seconds for the health check to pass.
Go back to your browser tab and refresh:
Windows/Linux (Chrome, Edge, Firefox): Ctrl + Shift + R or Ctrl + F5 or Shift + Click Refresh
macOS (Chrome, Firefox): Cmd + Shift + R
Note
If you receive a 503 error, wait a moment and refresh again.
You should see the AWS frontend (green page) again.
Task 9: Review Performance Monitoring
Now let’s explore the analytics and monitoring capabilities.
Navigate to Multi-Cloud App Connect >> Overview >> Performance.
Scroll to the bottom and under Load Balancers, click on <your-namespace>-frontend.
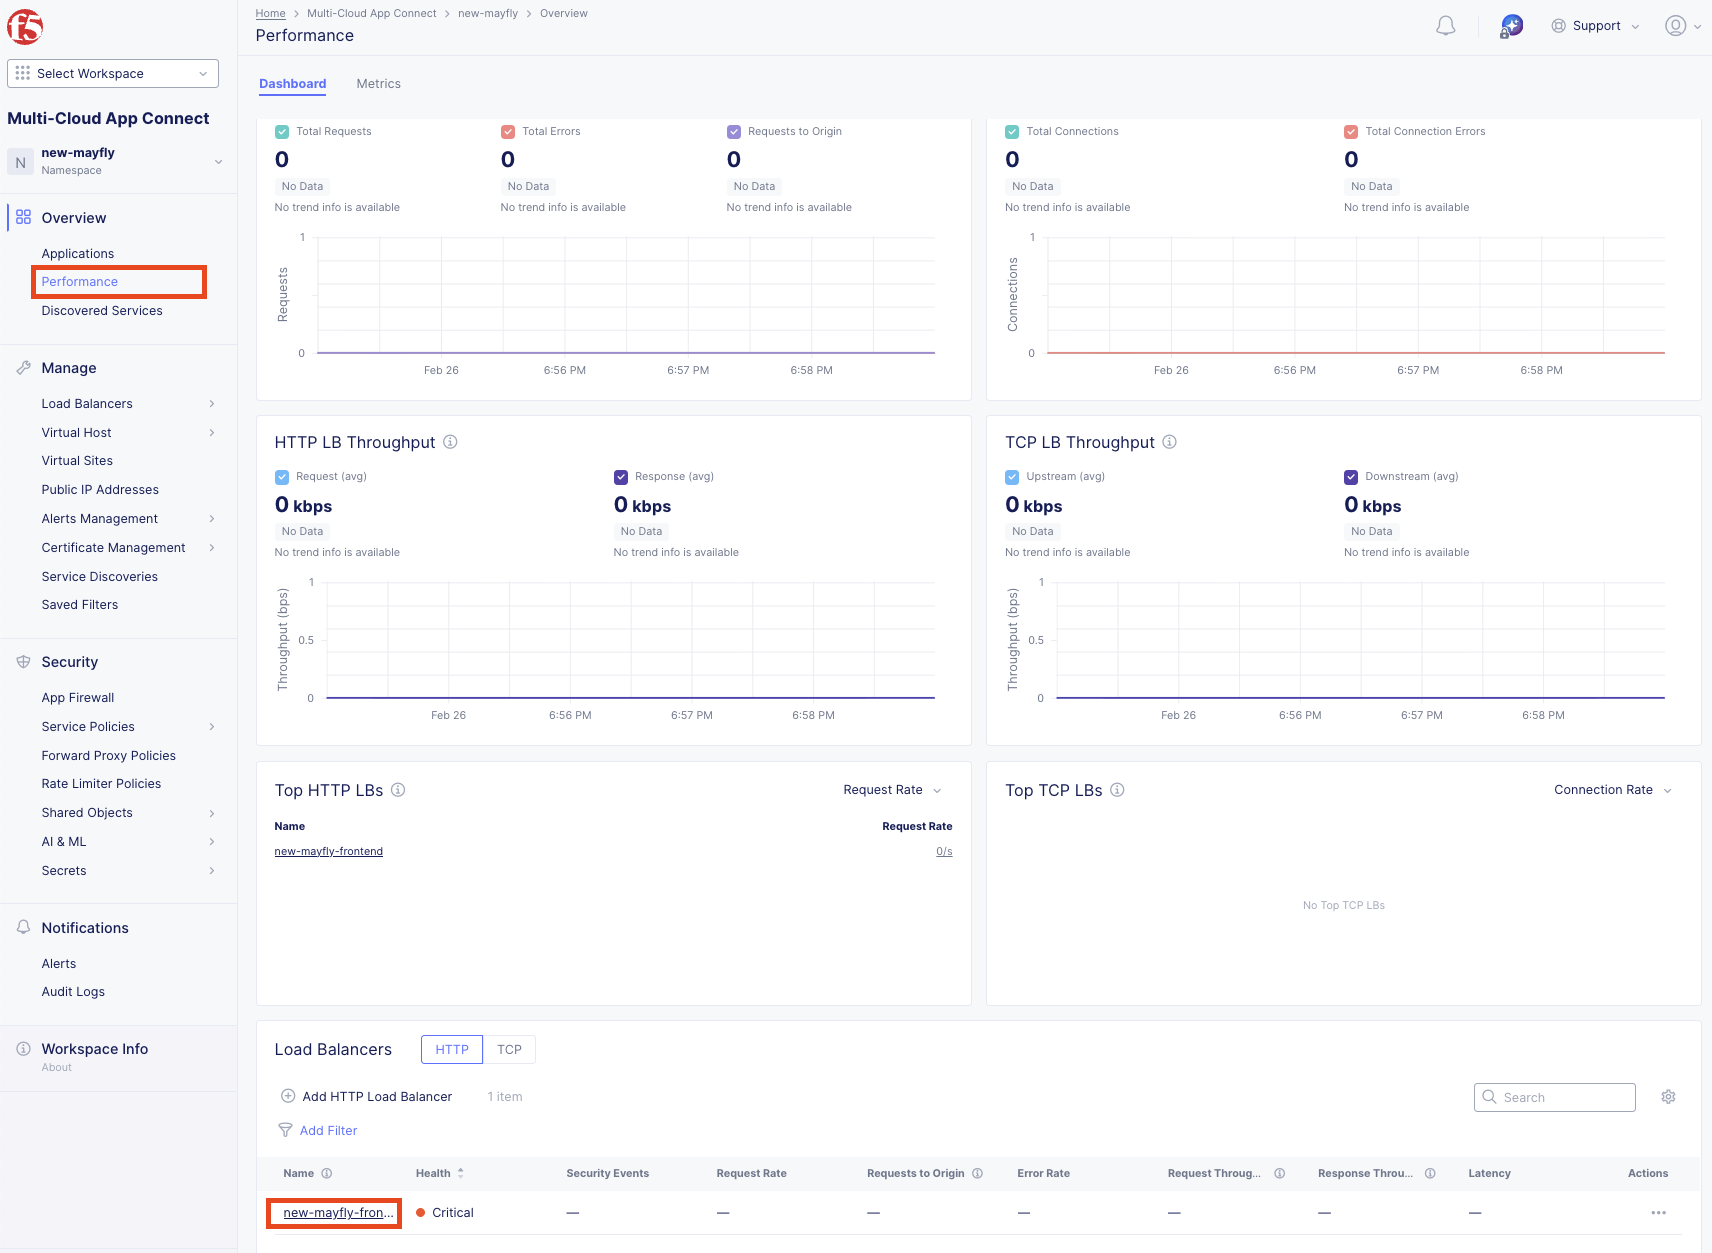
You will see the Performance Monitoring Dashboard.
Tip
If you don’t see recent traffic, adjust the time-frame selector in the top right.
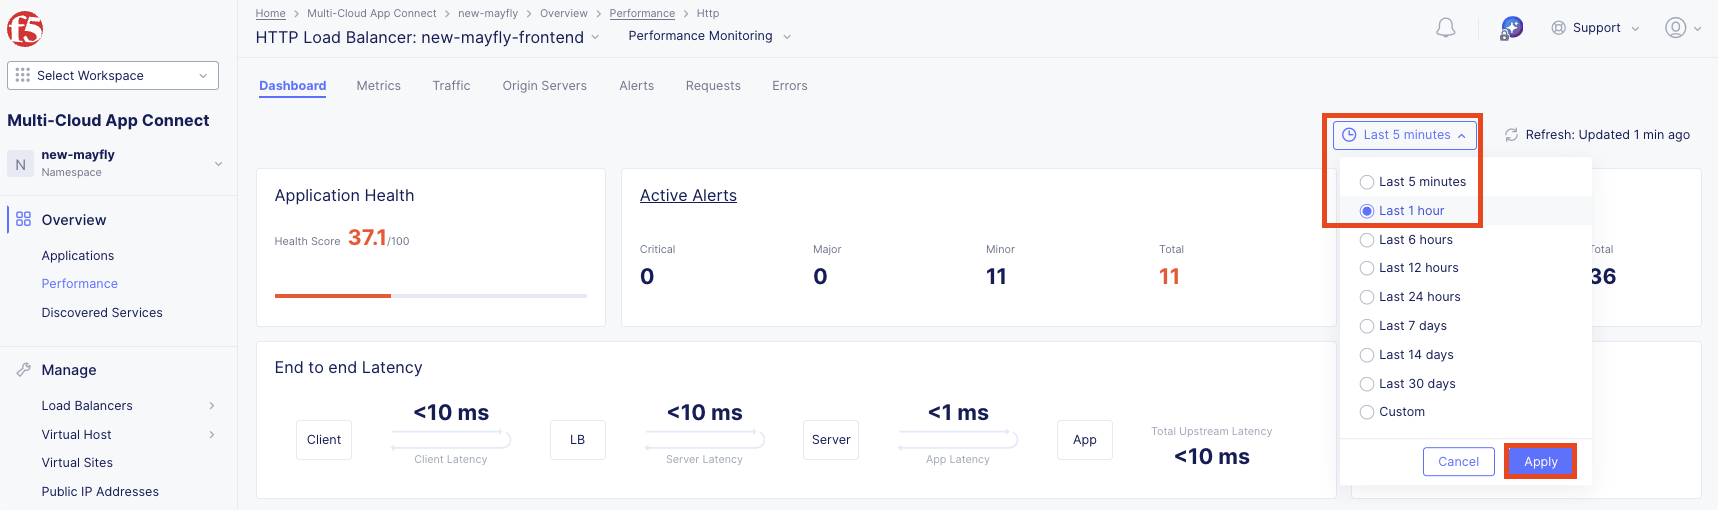
Review the Application Health score. It shouldn’t be 100% due to the AWS pool being offline during testing.
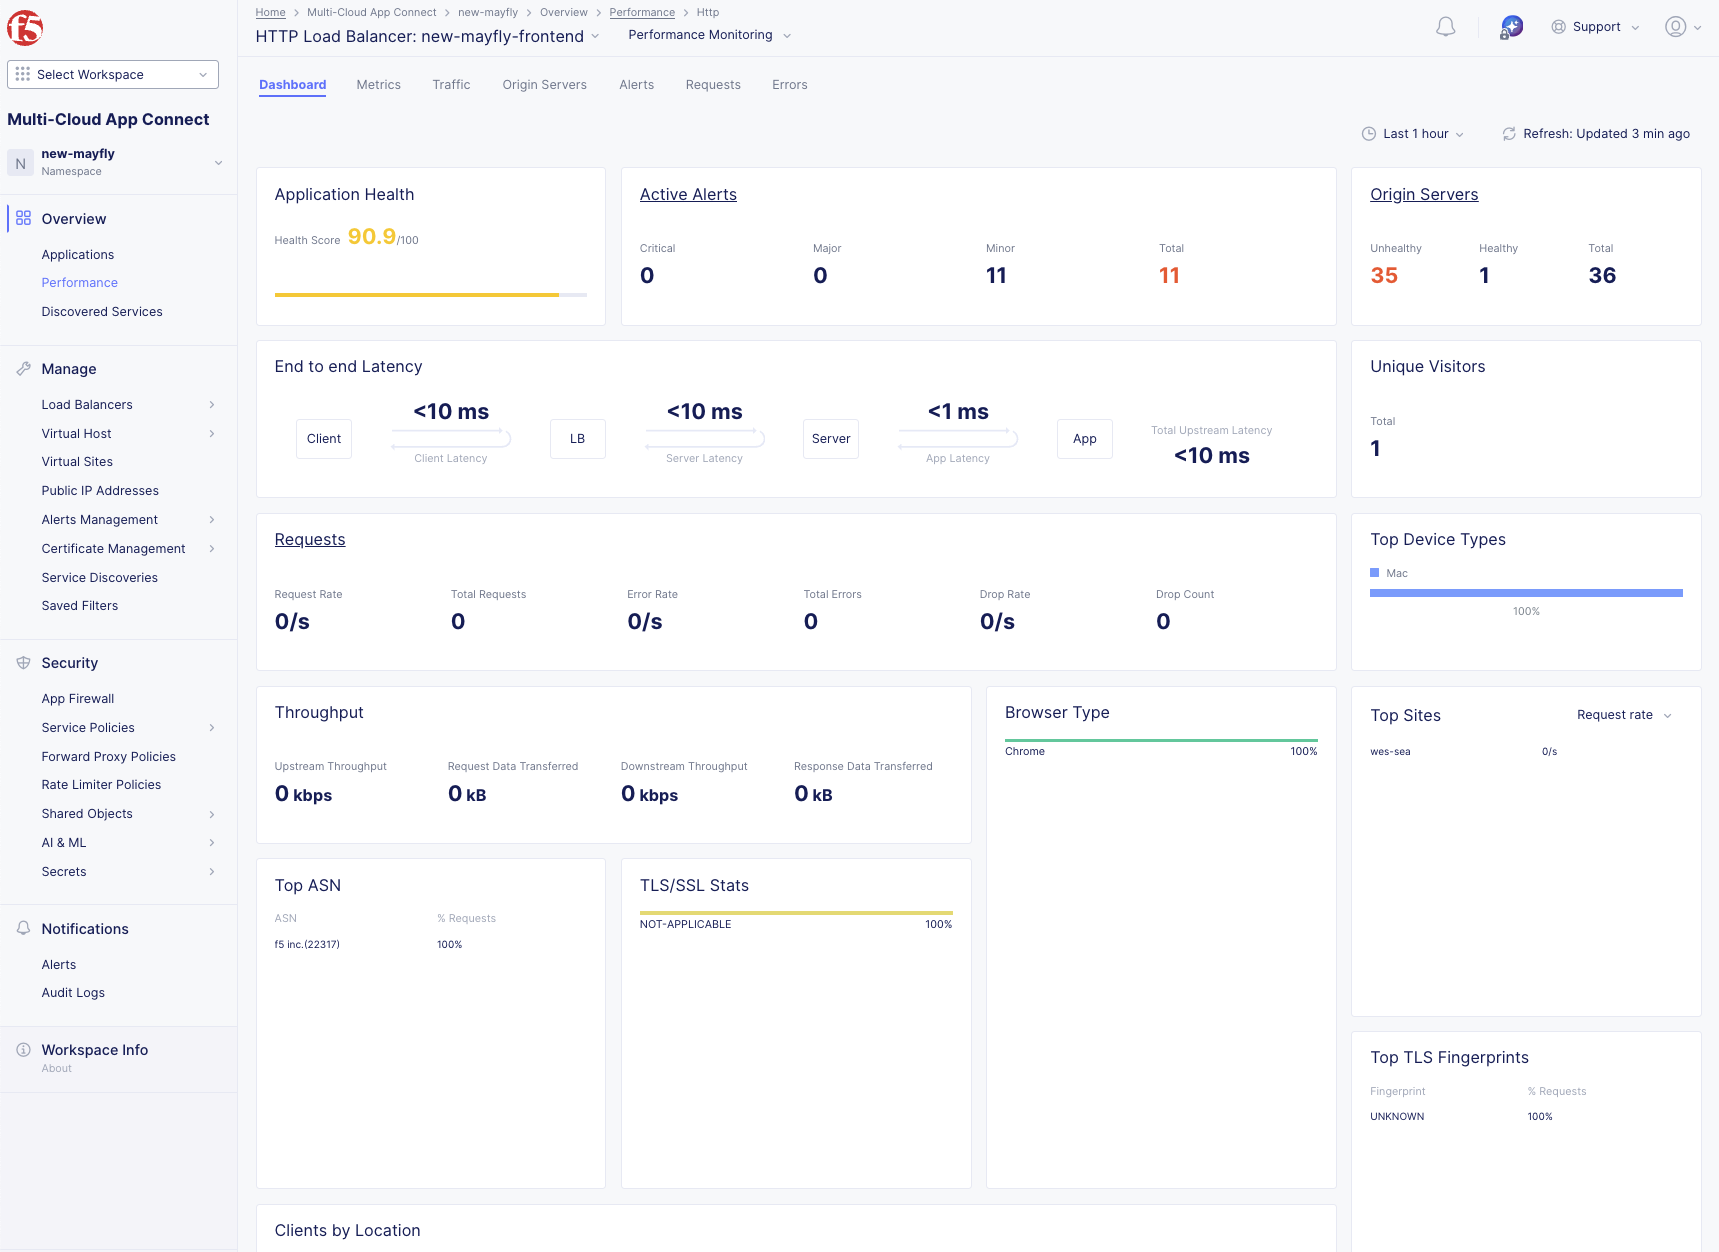
Notice the End-to-End Latency metrics showing request performance.
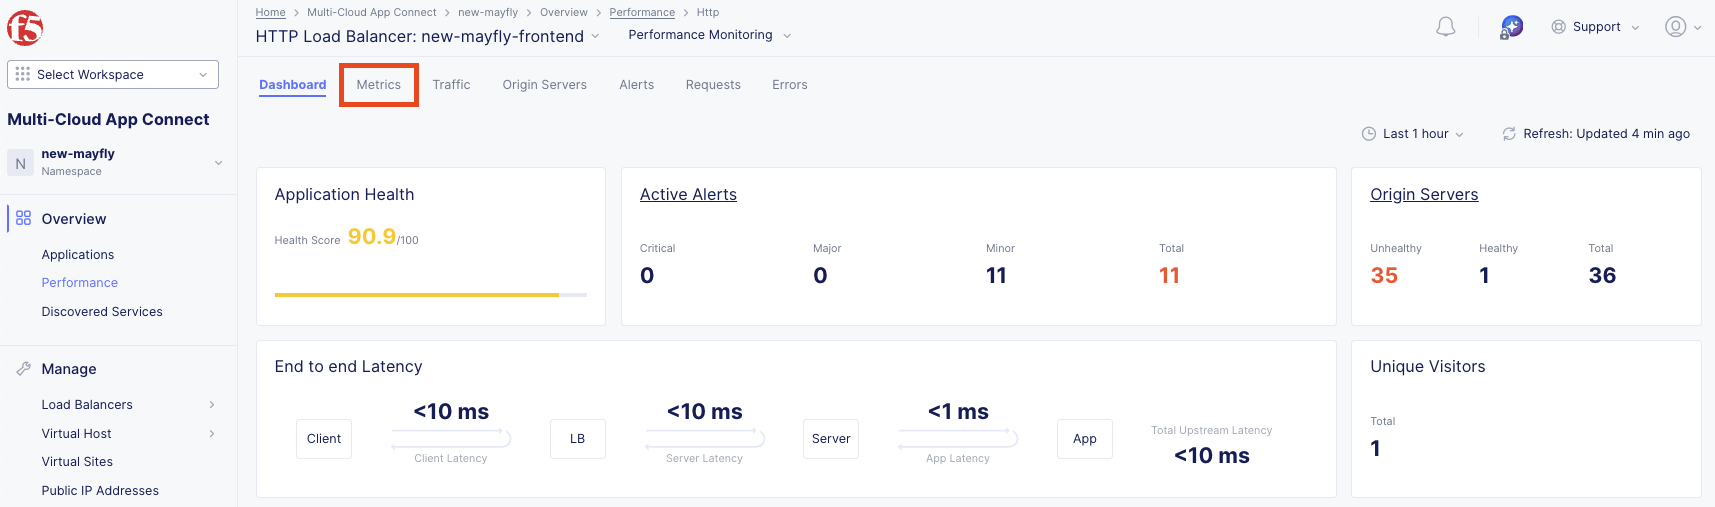
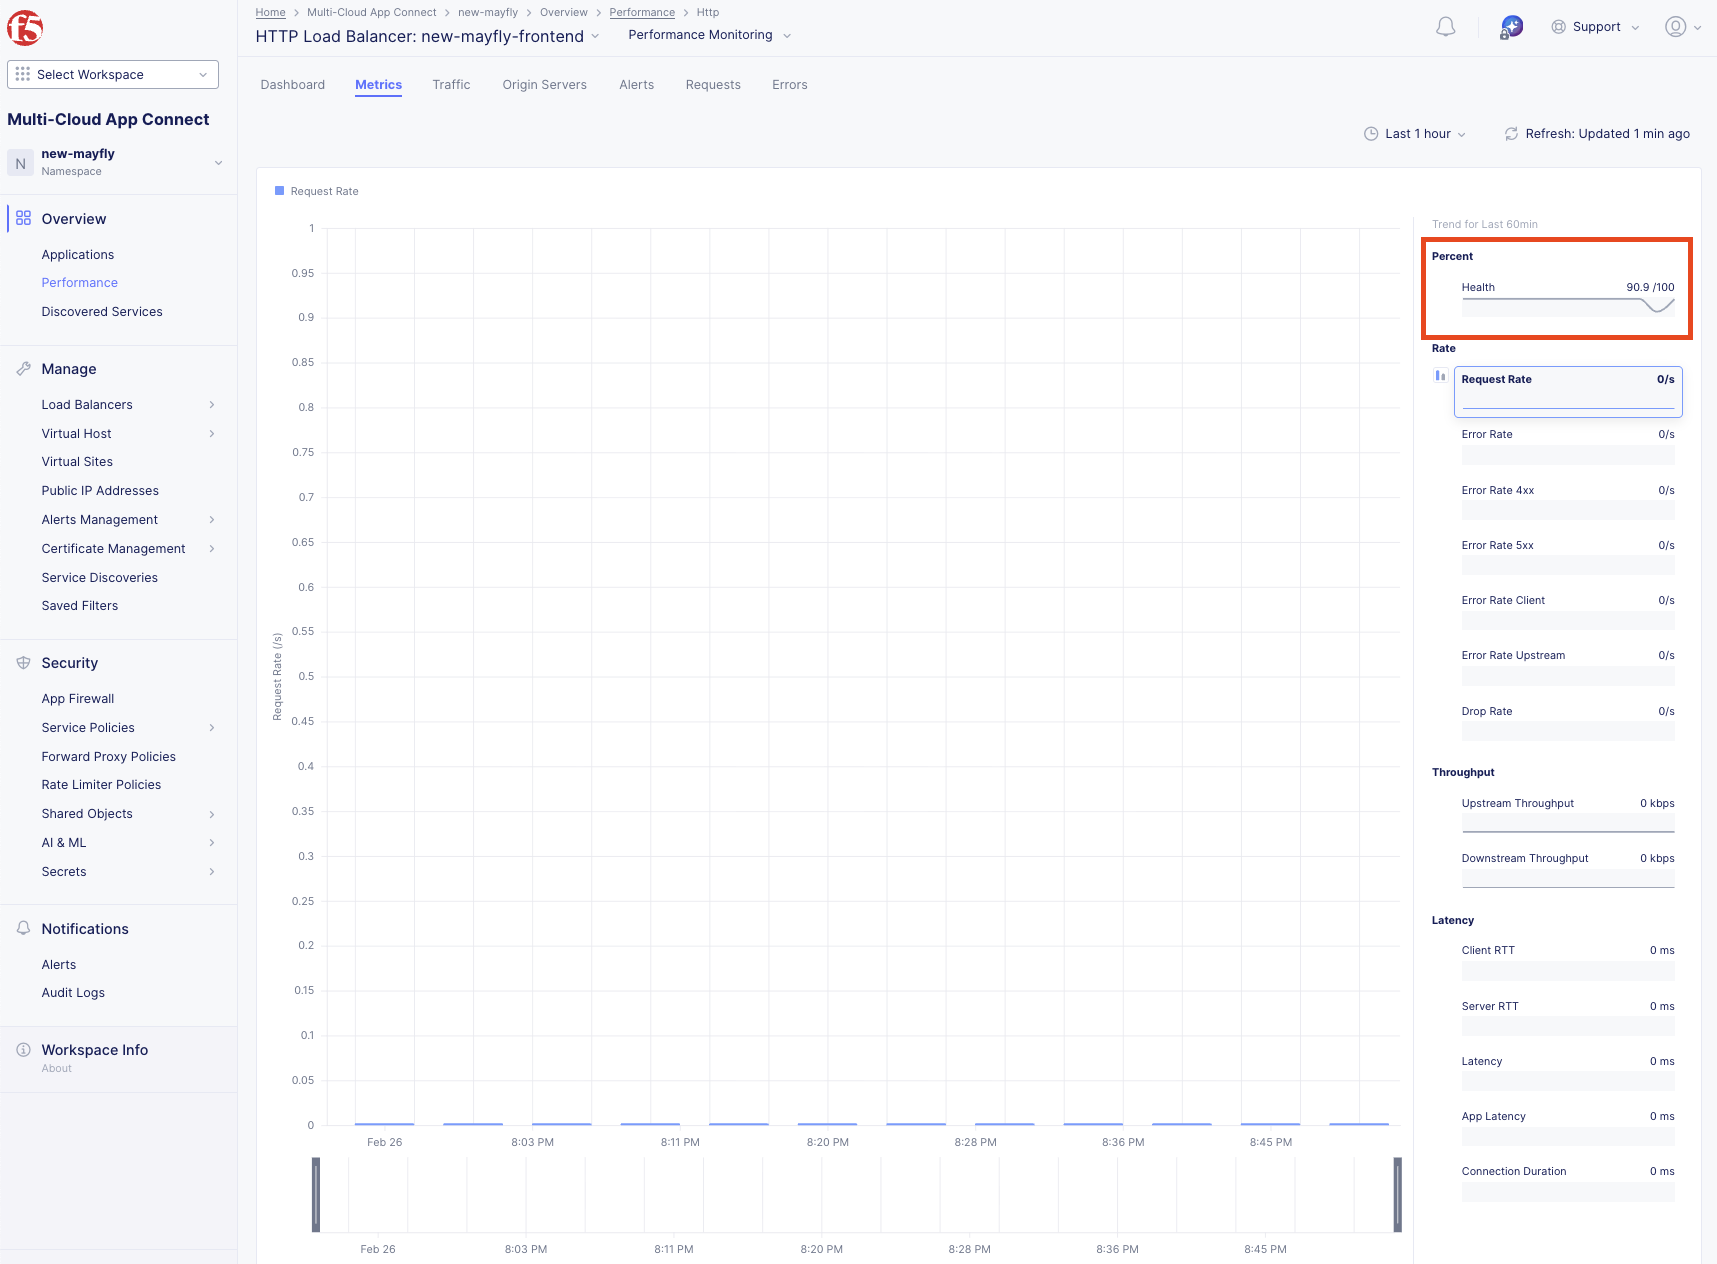
Click the Metrics tab.
Click the Health Percent metric on the right side.
Click on the block when the application health was degraded.
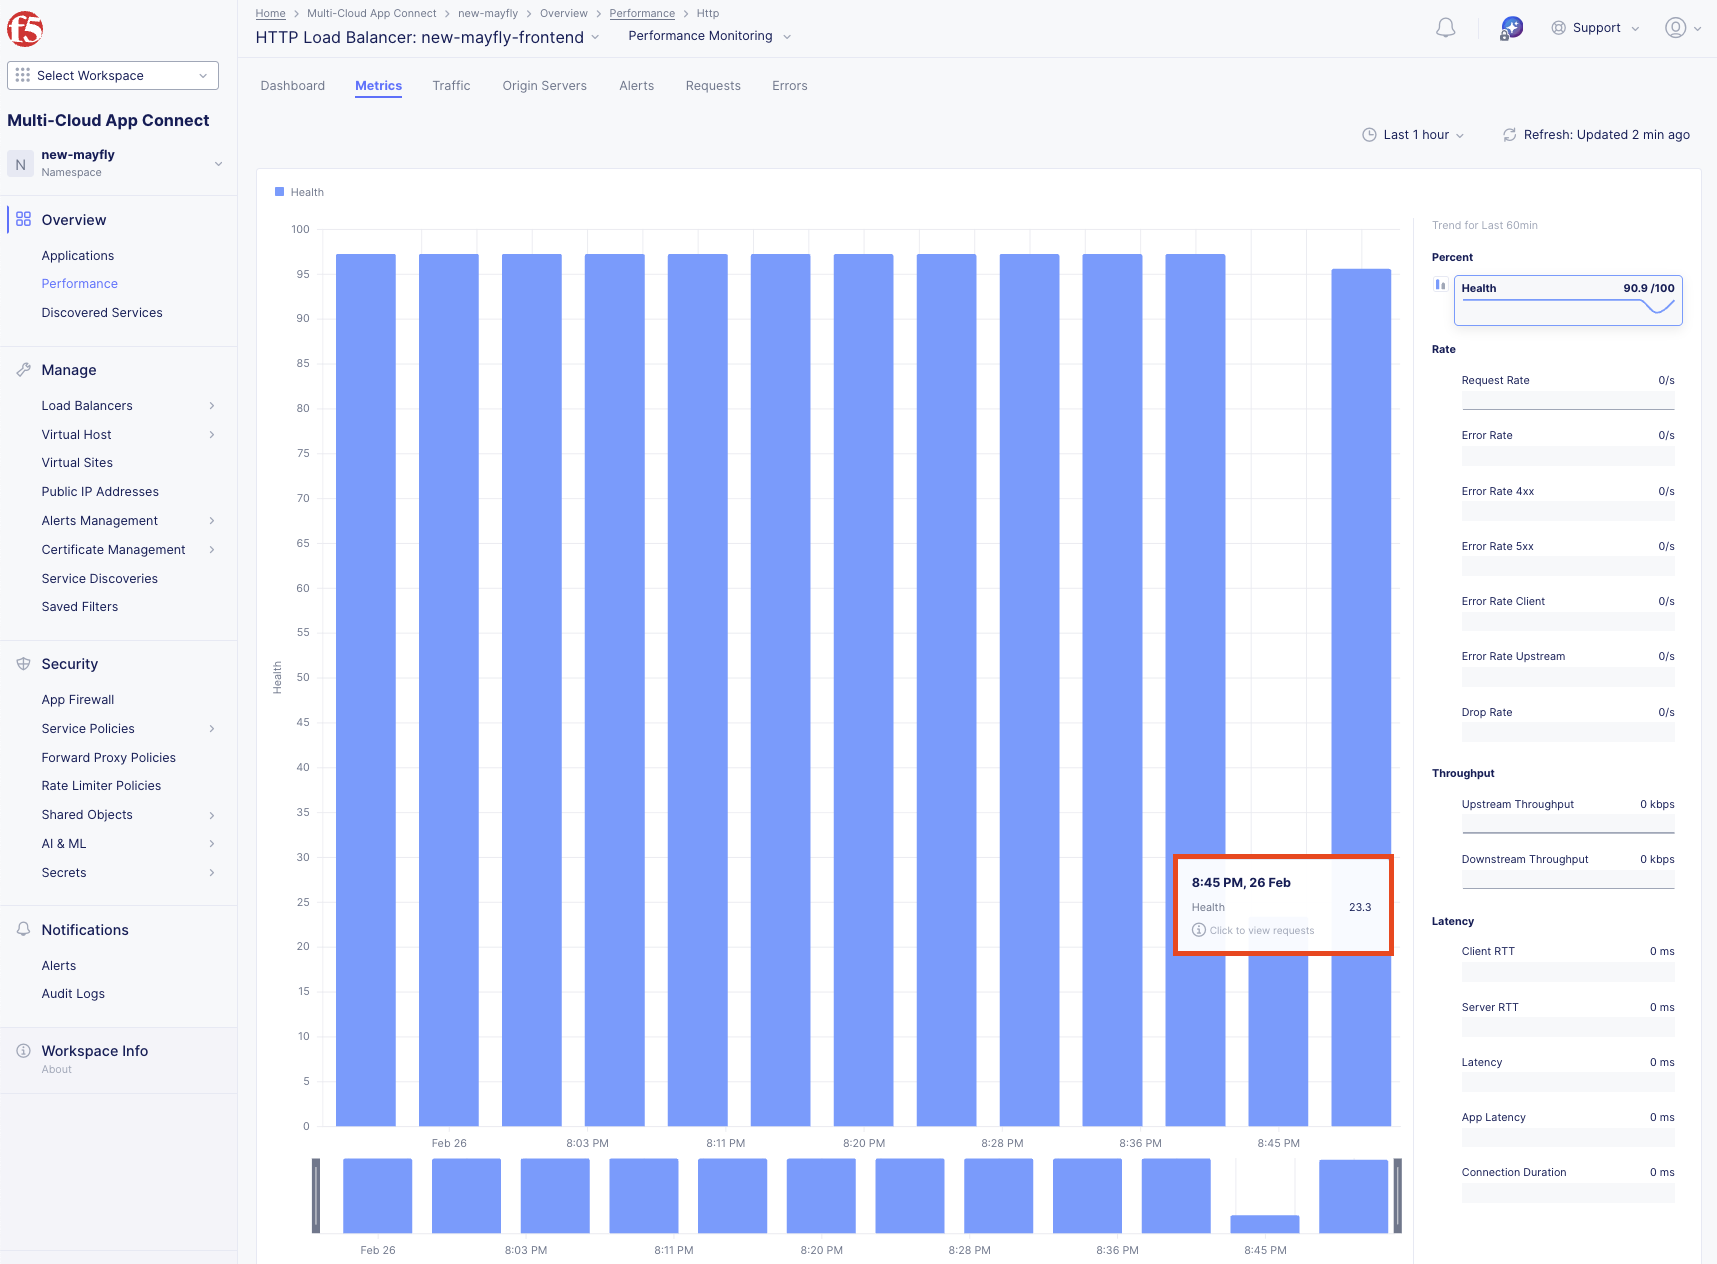
Verify that Azure was serving requests during the AWS failure.
Task 10: Review Traffic Analytics
Click the Origin Servers tab in the top menu and change the time-frame to 1 hour.
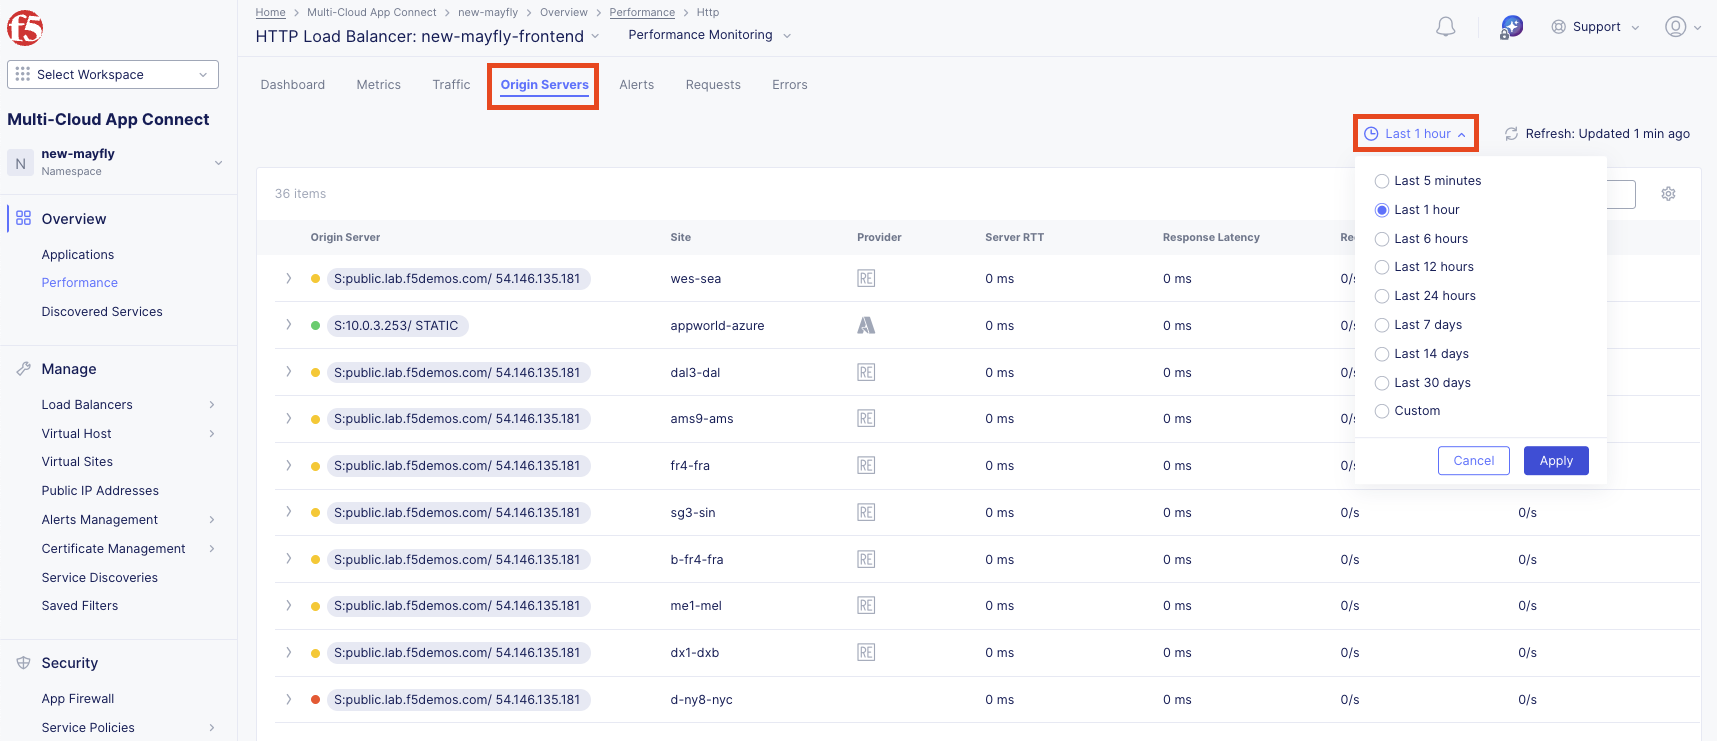
At the bottom left, change the setting to 50 items per page.
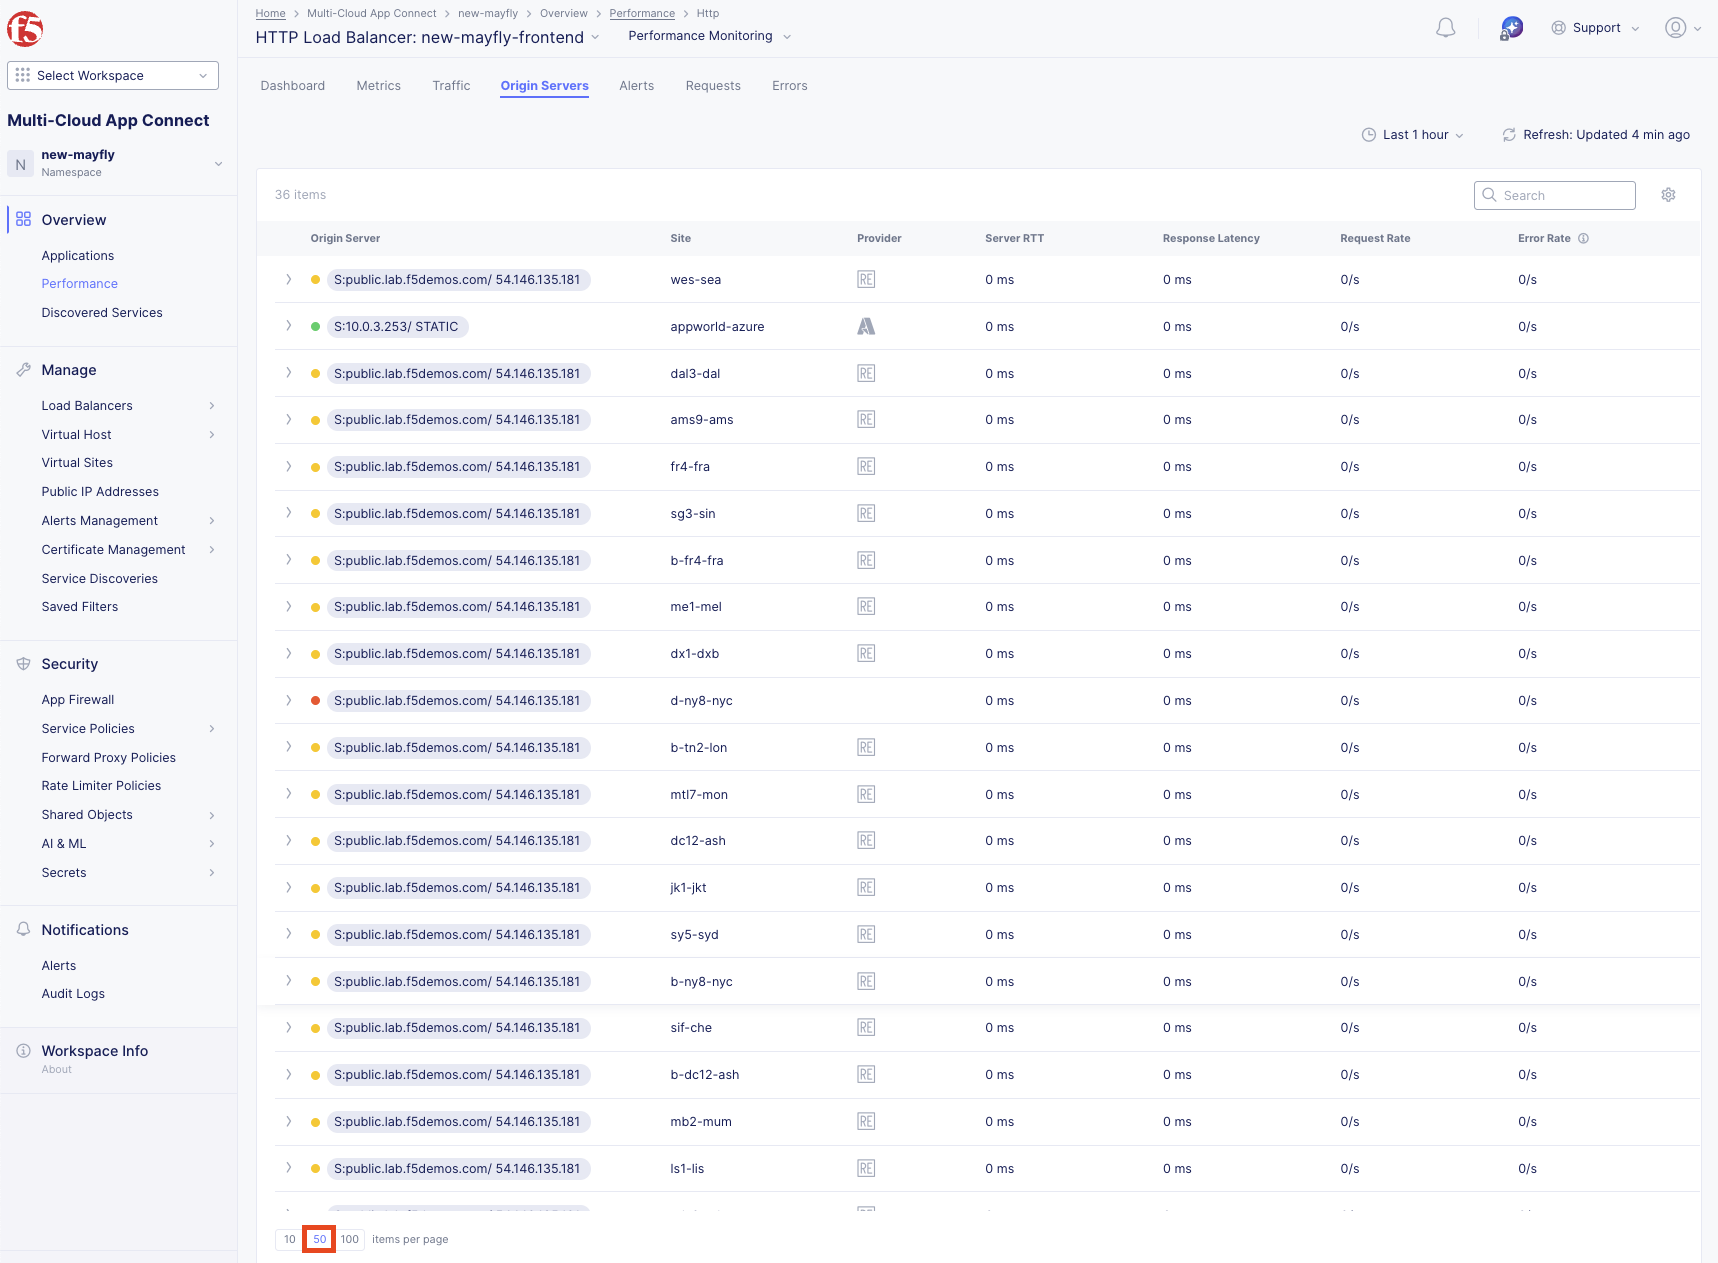
Question: Why are there so many Origin Servers for the AWS workload?
Answer: The AWS pool uses a public DNS name (FQDN). Each Regional Edge is a proxy to the public IP, so each Regional Edge must independently verify availability from its perspective.
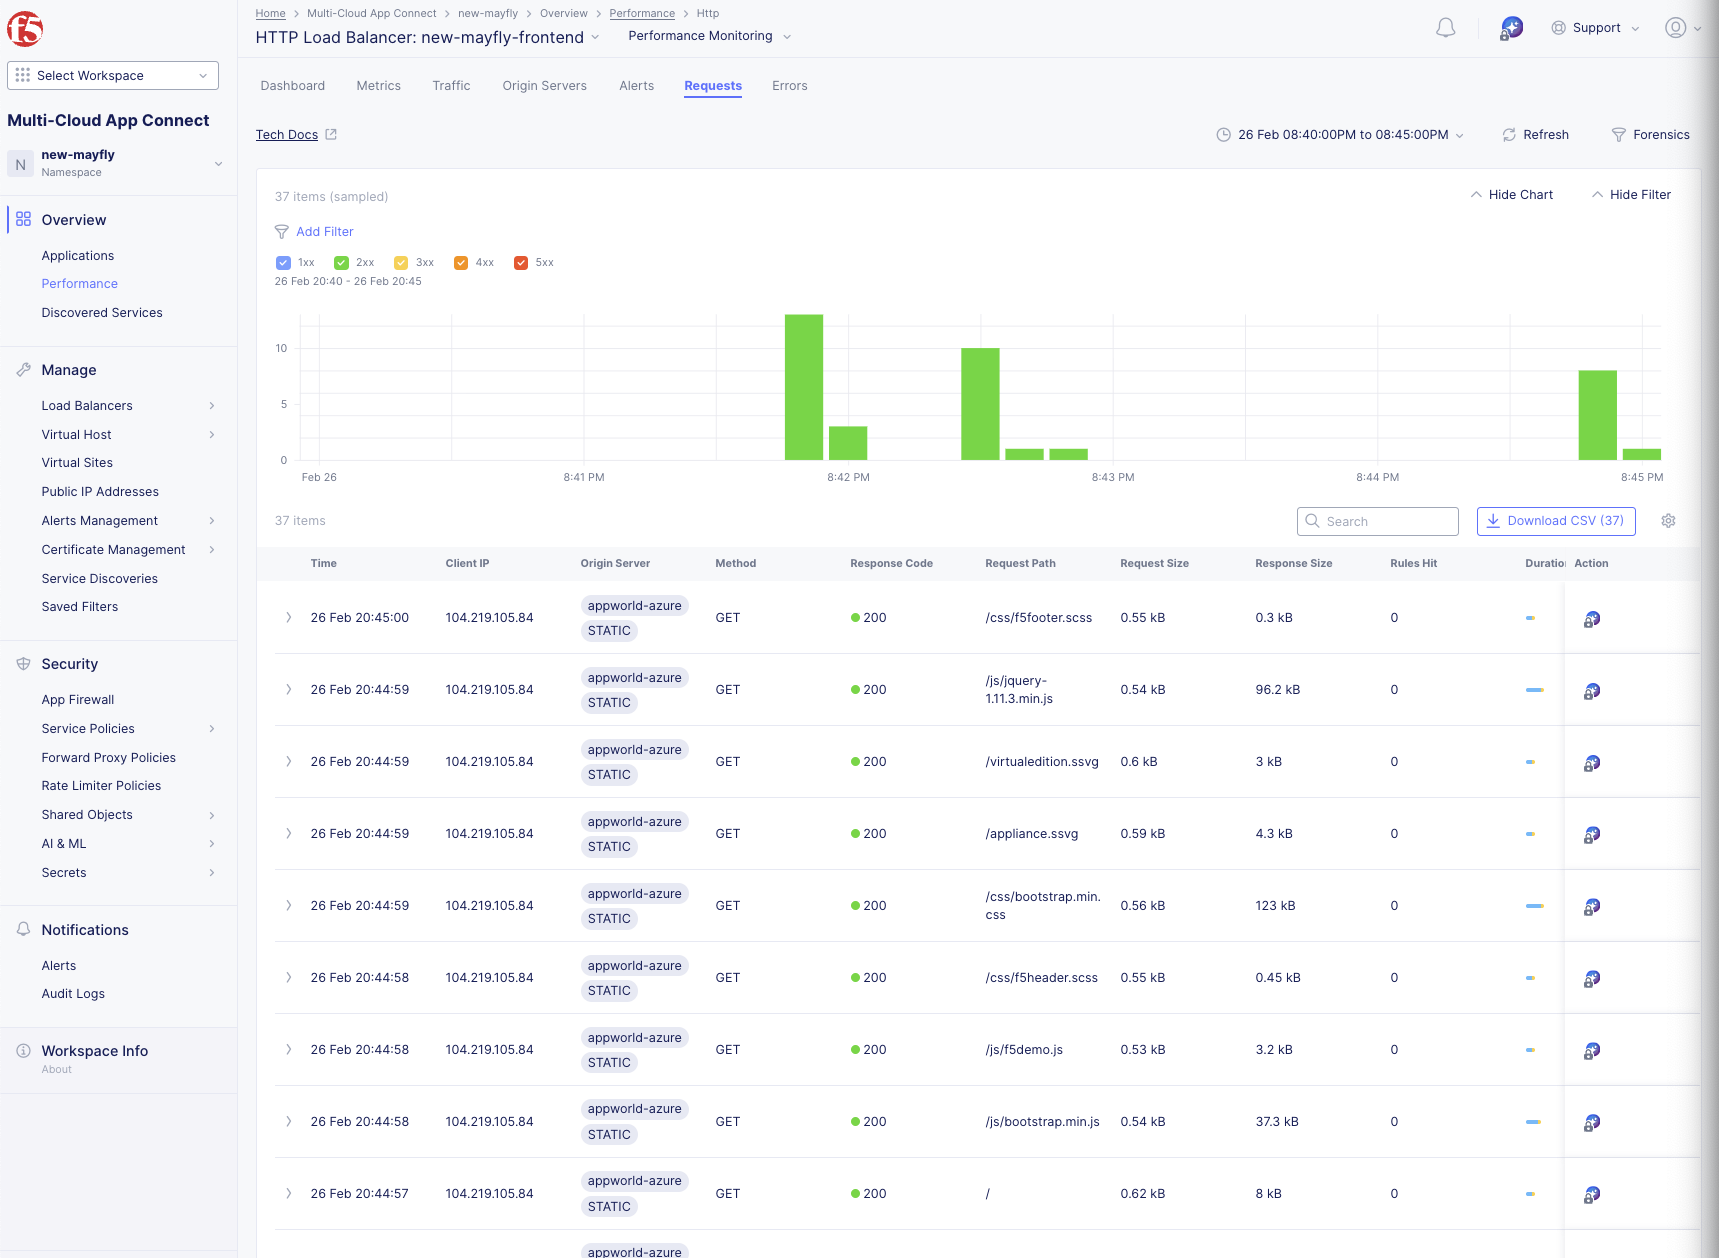
Task 11: Review Request Logs
Click the Requests tab in the top menu and change the time-frame to 1 hour.
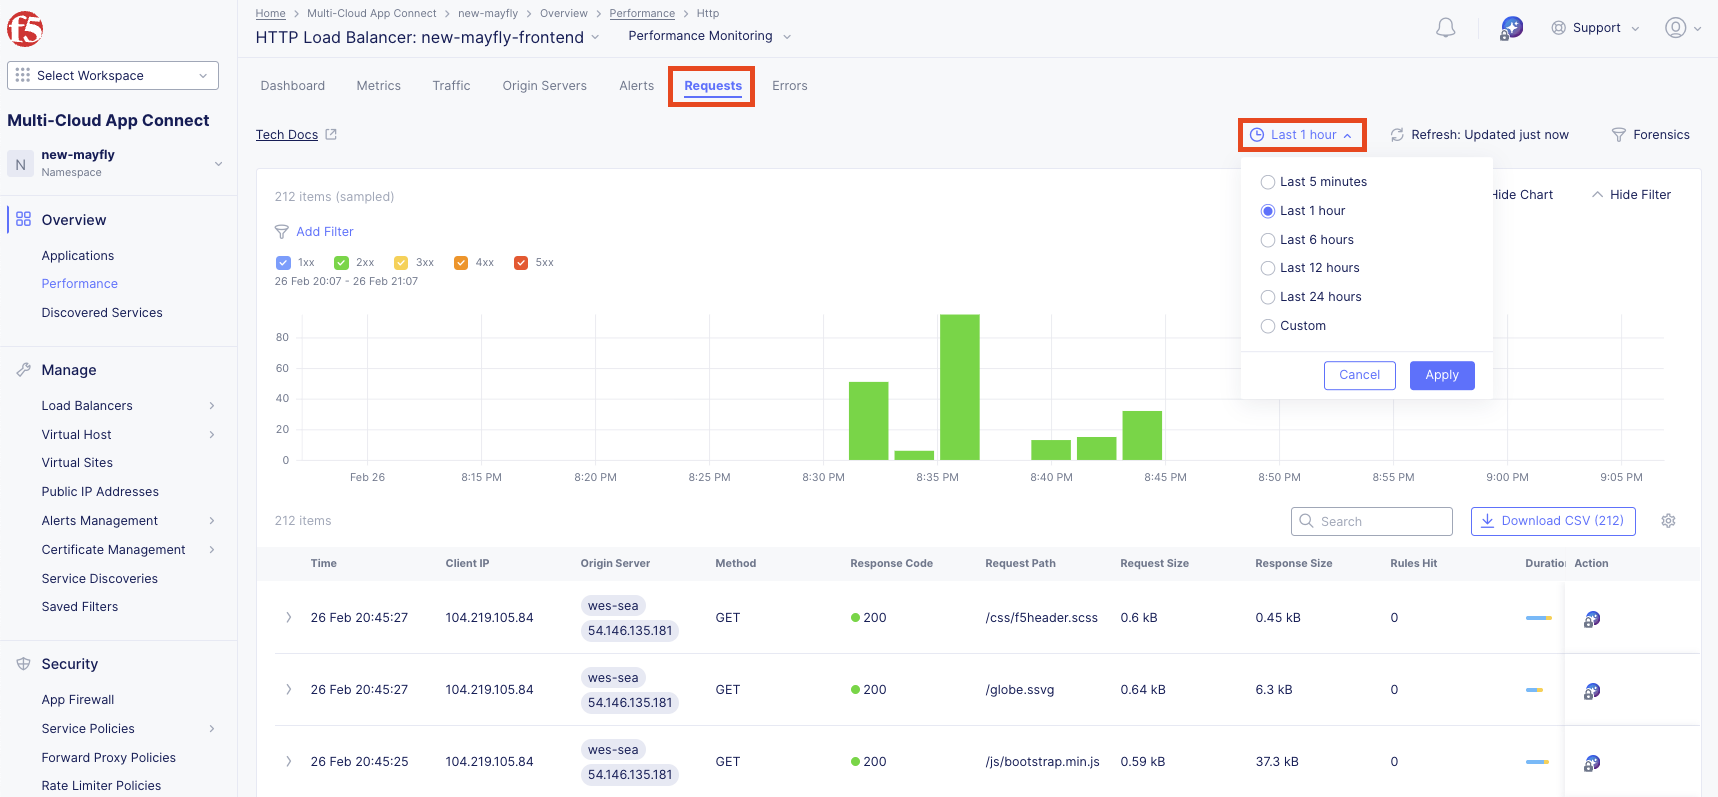
Change the setting to 50 items per page.
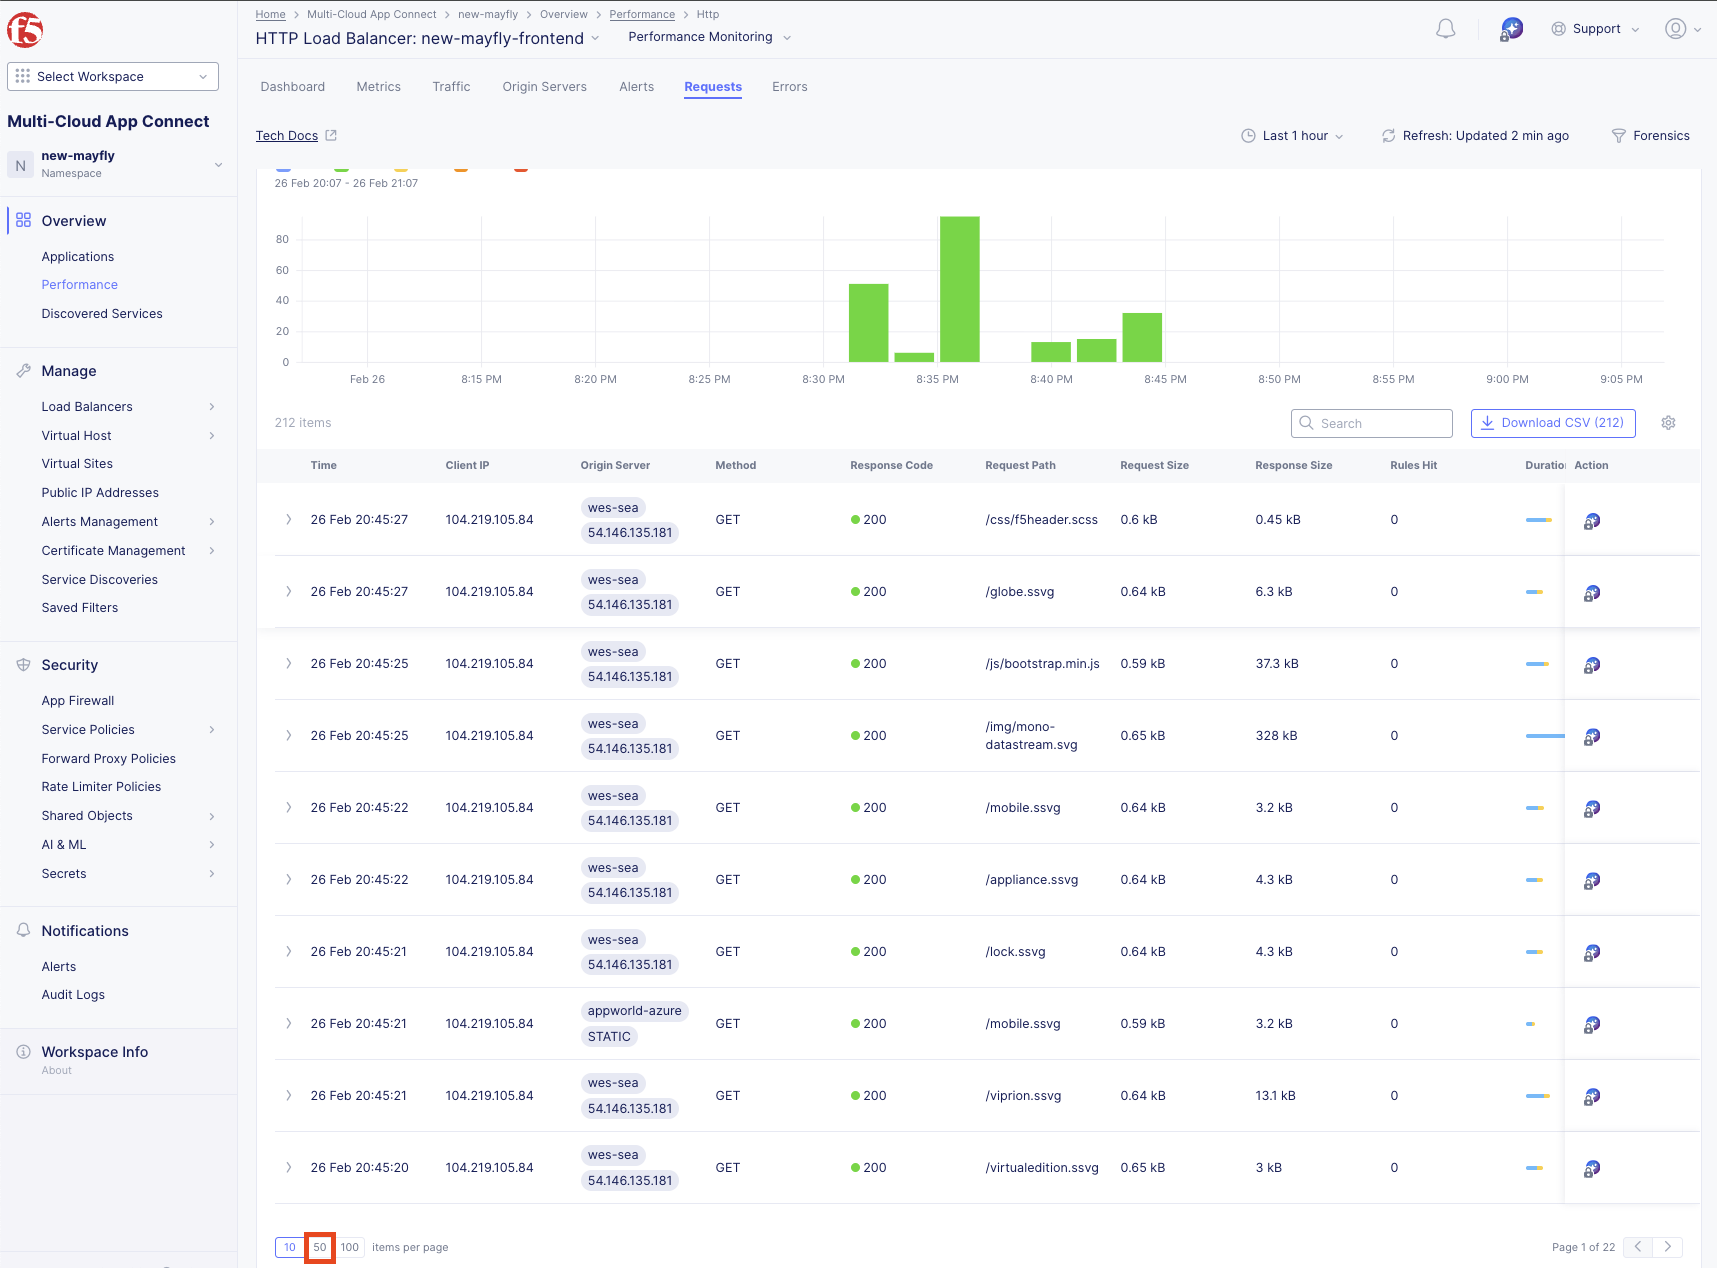
Choose any request in the log and click the expand arrow next to the timestamp.
Review the detailed request information including end-to-end analytics.

Click JSON to view the request log in JSON format.
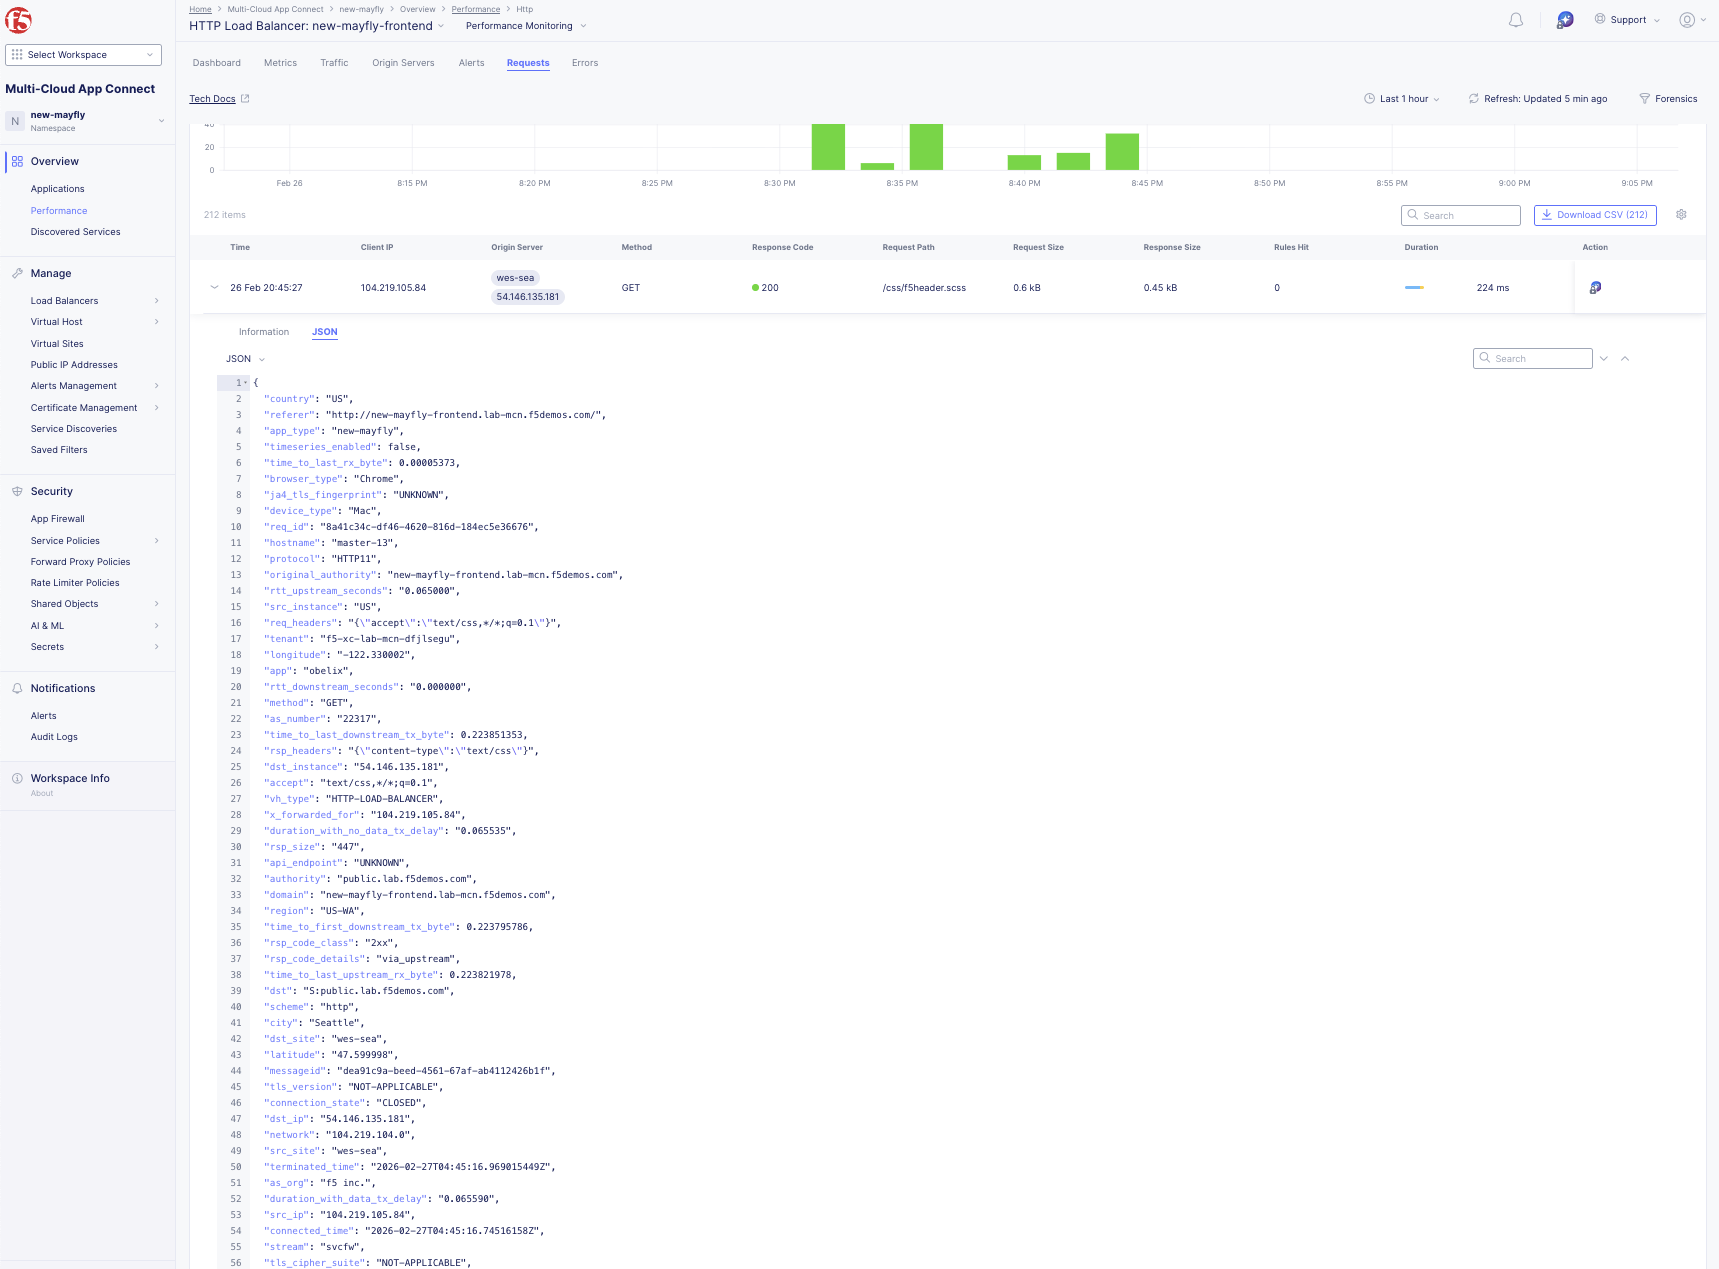
Tip
The request log captures comprehensive information about every request, providing deep visibility into application traffic.
Lab Summary
What You’ve Learned:
How to navigate the Multi-Cloud App Connect workspace
The difference between Network Connect (L3/4 routing) and App Connect (L7 proxy)
How to create origin pools for public and private workloads
How to configure HTTP load balancers with priority-based failover
How to test application failover between origin pools
How to use performance monitoring and analytics dashboards
How Regional Edges provide global application delivery
Key Takeaways:
App Connect uses proxies at Layer 7 instead of routers at Layer 3/4
Origin pools can use public DNS names or private IPs on specific sites
Priority settings control active/standby failover behavior (1 = highest, 0 = lowest)
Regional Edges provide globally distributed application delivery
Health checks automatically detect and react to backend failures
Rich analytics provide end-to-end visibility into application performance
Your Environment:
You now have a globally available frontend load balancer:
Frontend: F5 Regional Edges serving <your-namespace>-frontend.lab-mcn.f5demos.com
Primary Backend: AWS public workload (Priority 1)
Backup Backend: Azure private workload (Priority 0)
In the next lab, you’ll leverage App Connect for site-to-site connectivity to solve IP overlap challenges.
Important
Your HTTP load balancer must be working correctly before proceeding to Lab 4.
End of Lab 3