F5 Distributed Cloud > F5 Distributed Cloud: Code, Secure, Repeat > Module 0 – Intro & Environment Source | Edit on
Task 4 – Configure VS Code Server
In this task, you will access the browser-based VS Code Server and configure the Cline extension to use Gemini. This step prepares your development environment for AI-assisted coding used throughout the rest of the lab.
The goal here is simple: make sure your coding environment works before you start coding.
Visual Studio Code Server Access
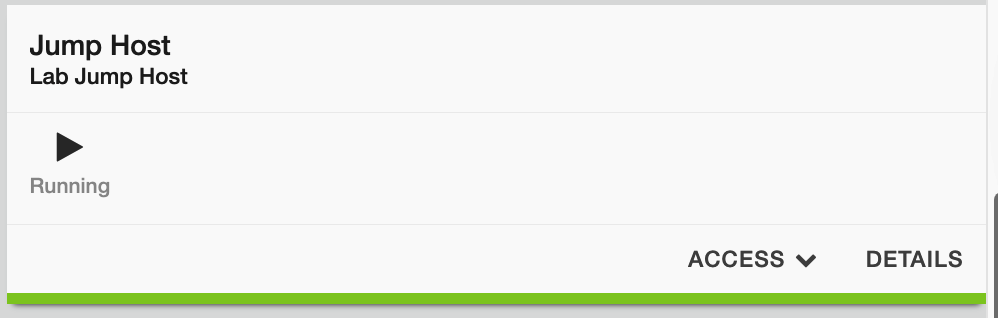
Access the VS Code Server from the Jump Host.
In your UDF deployment, locate the Jump Host tile and click Access.
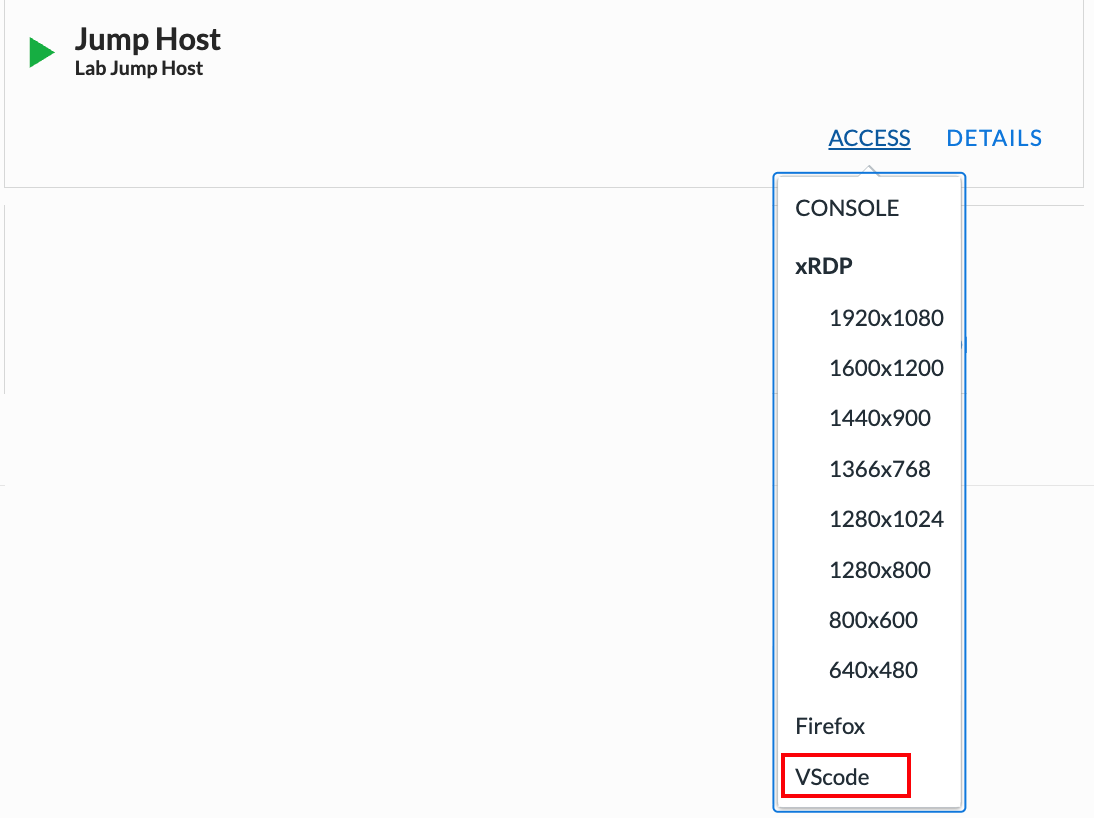
Launch the VS Code Server.
Click VSCODE to open the VS Code Server interface.
Authenticate to VS Code Server.
A new browser tab will open with the VS Code Server password prompt. Enter the following password:
Password: @ppW0rld2026!

Confirm access to the VS Code Server workspace.
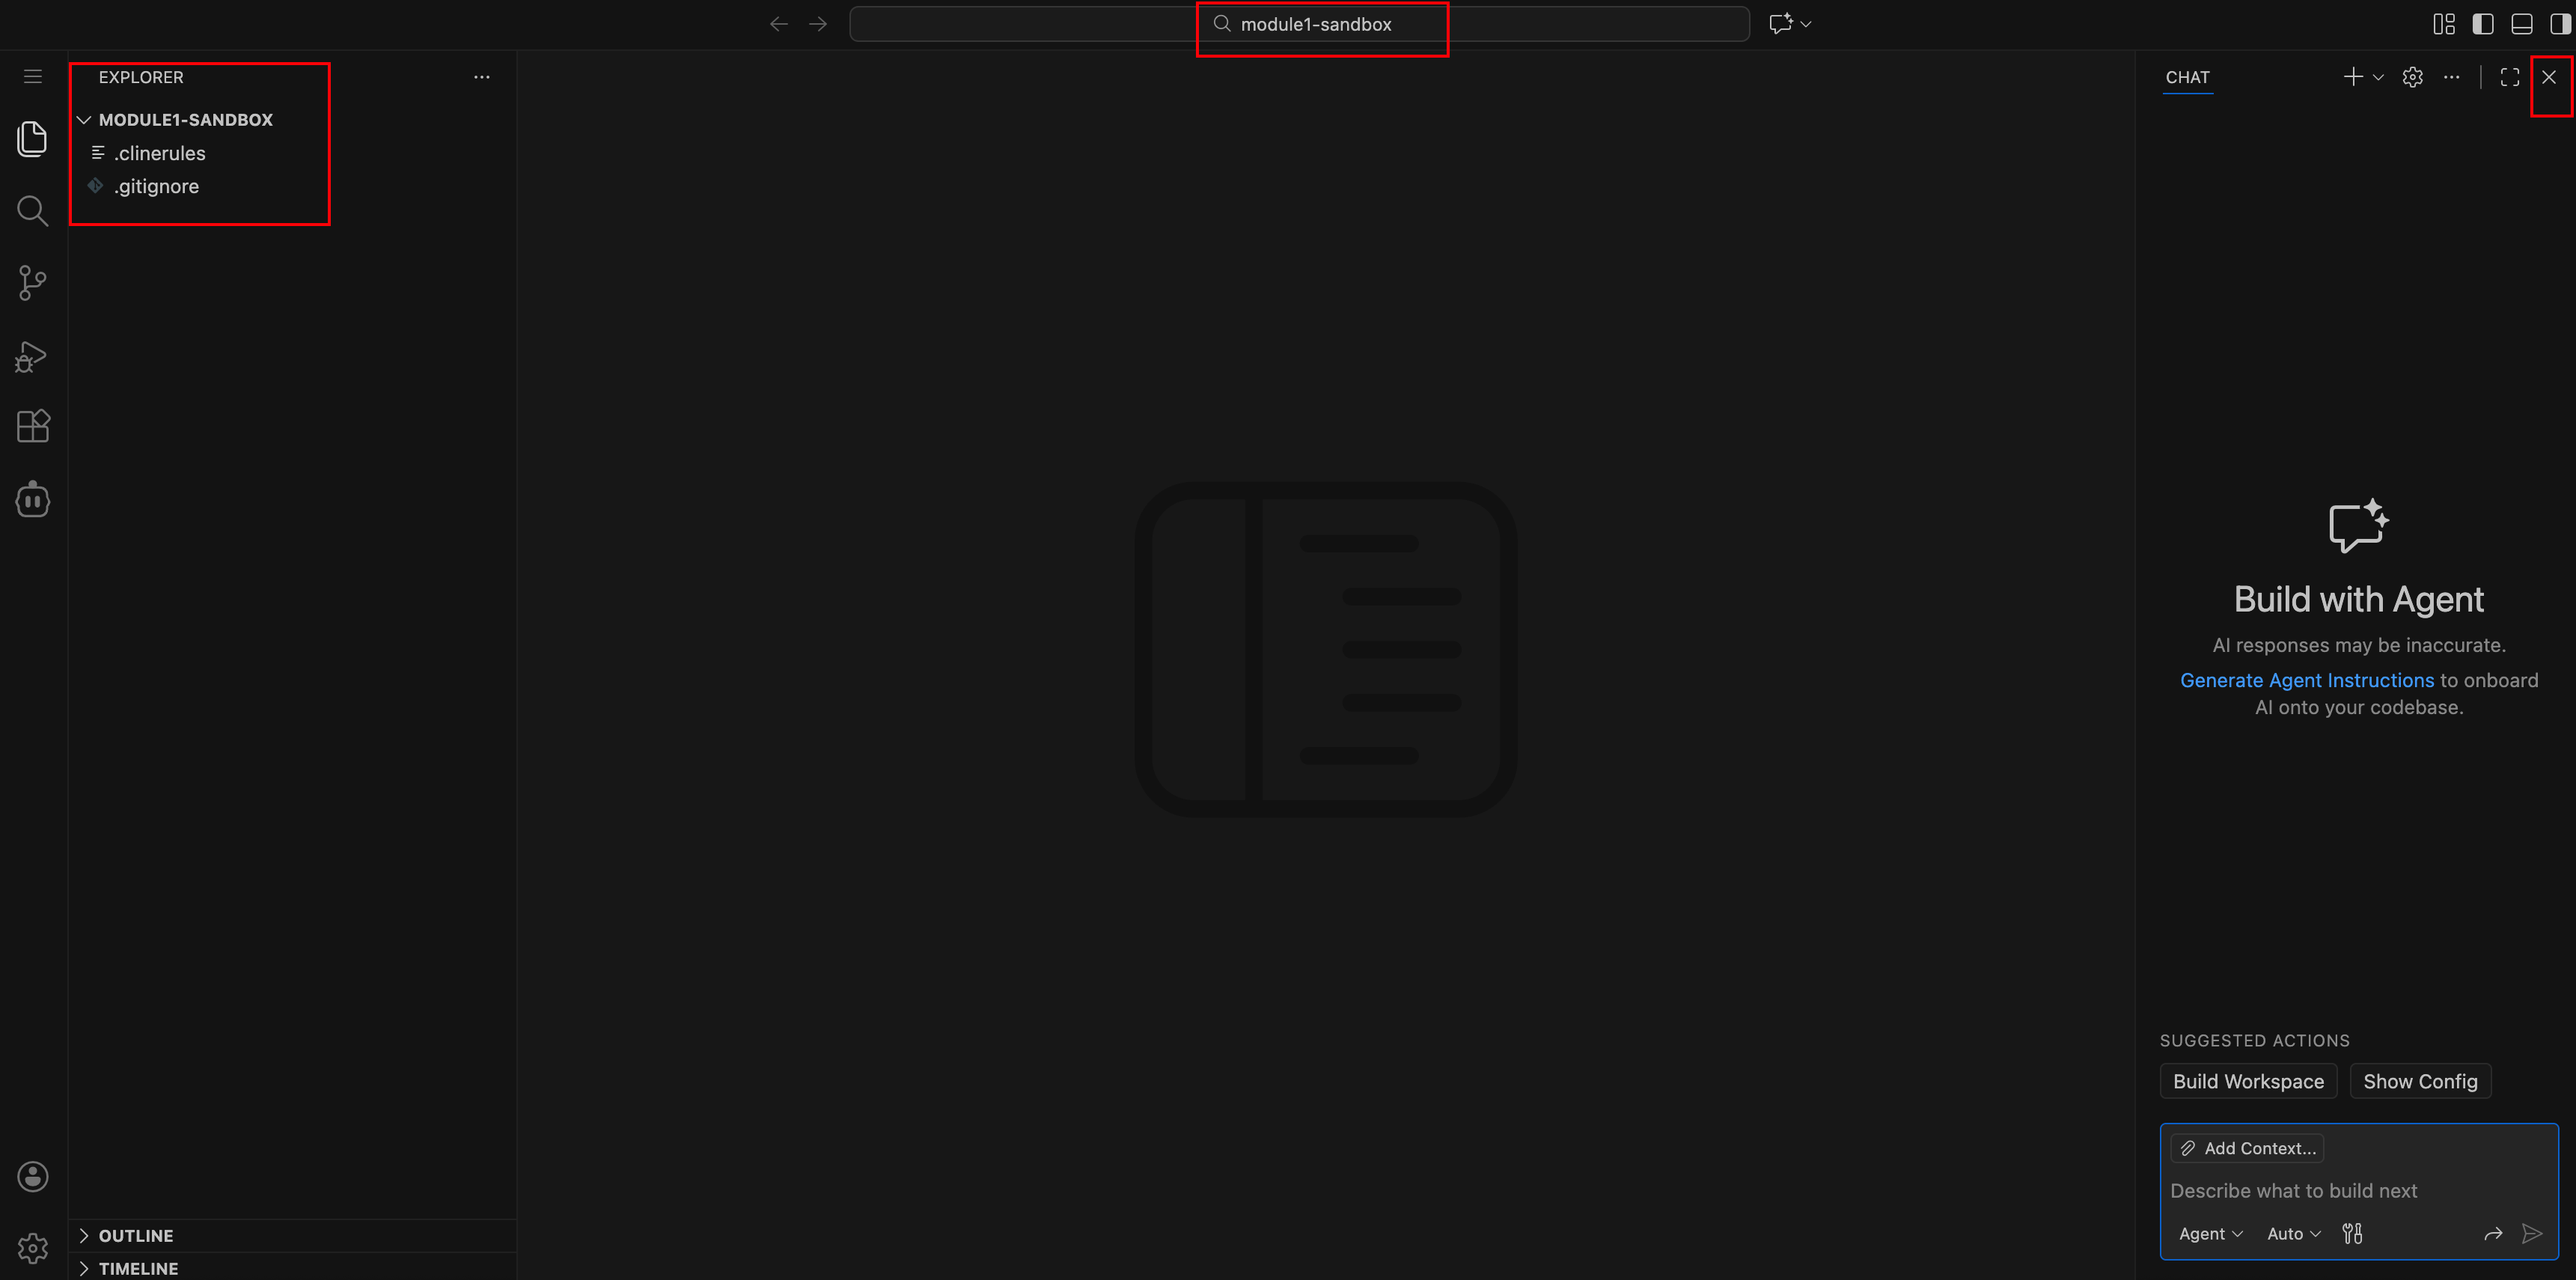
After authentication, you should see the VS Code Server landing page.
The Explorer (left panel) should show the workspace MODULE1-SANDBOX
The Copilot / chat panel may be open on the right—this can be safely closed
Note
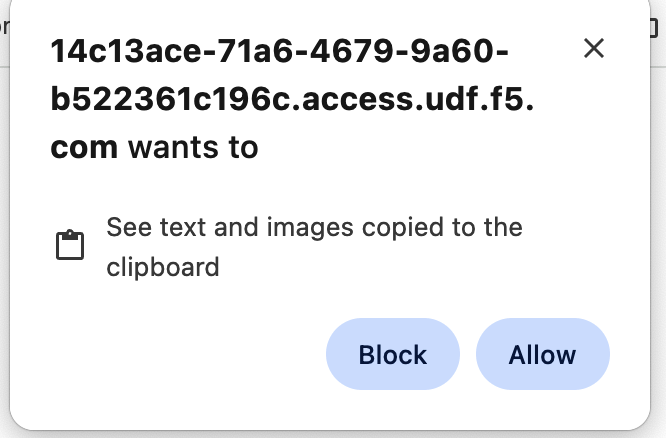
You may see browser pop-ups requesting permission to access text or images on the clipboard. Click **Allow*—this is required for copy/paste and image-based prompts.*
VS Code Quick Orientation (For Beginners) - OPTIONAL
If you are new to VS Code, here is a quick tour of the interface you’re looking at. If you are familiar with the VS Code application you can safely skip this step.
- Left Panel – Activity Bar & Explorer
The vertical icon bar on the far left is the Activity Bar.
The top icon (two files) opens the Explorer, where you see folders and files.
The branch icon opens Source Control (used for Git commits).
The Cline icon opens the Cline AI chat.
Think of this panel as your navigation center.

- Center Panel – Code Editor
This is where files open.
You can have multiple tabs open at once.
This is where you review and edit code generated by Cline.
- Bottom Panel – Terminal
This is where commands run (e.g.,
flask run,pytest).Cline may also open and use its own terminal session.
You can resize this panel by dragging its top border.
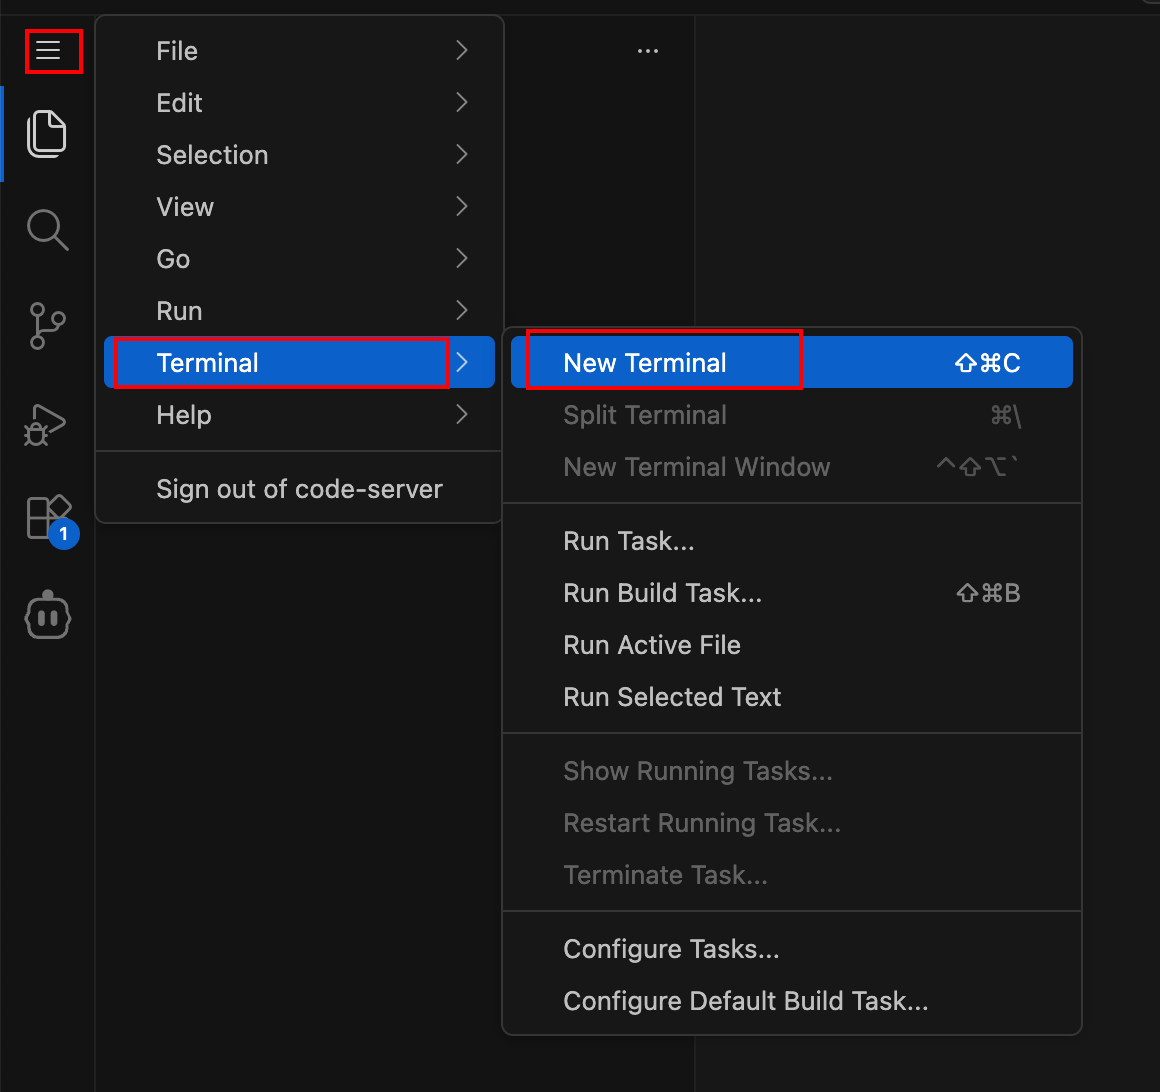
Opening a New Terminal
To open a new terminal manually:
Click Terminal → New Terminal from the top menu OR
Use the shortcut: ``Ctrl + ` ``
You can open multiple terminals if needed.

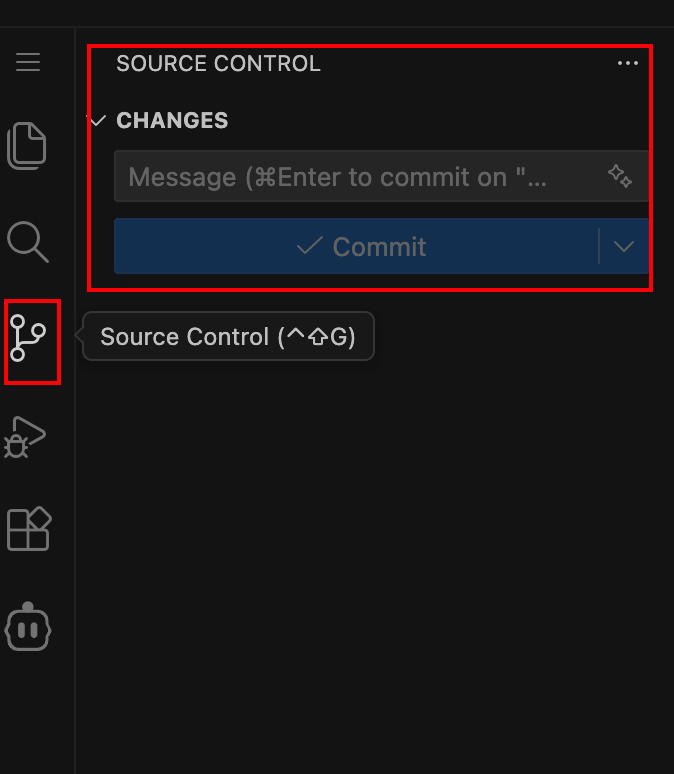
Accessing Source Control
To commit changes to GitLab:
Click the Source Control icon (branch icon) in the left Activity Bar.
Review changed files.
Enter a commit message.
Click the checkmark to commit.
Click Sync Changes to push to GitLab.
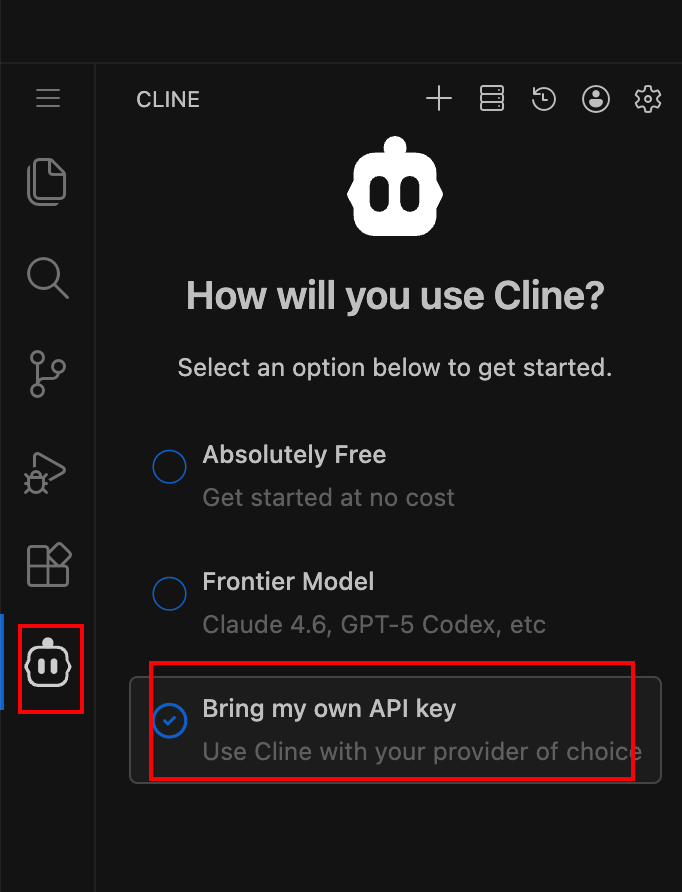
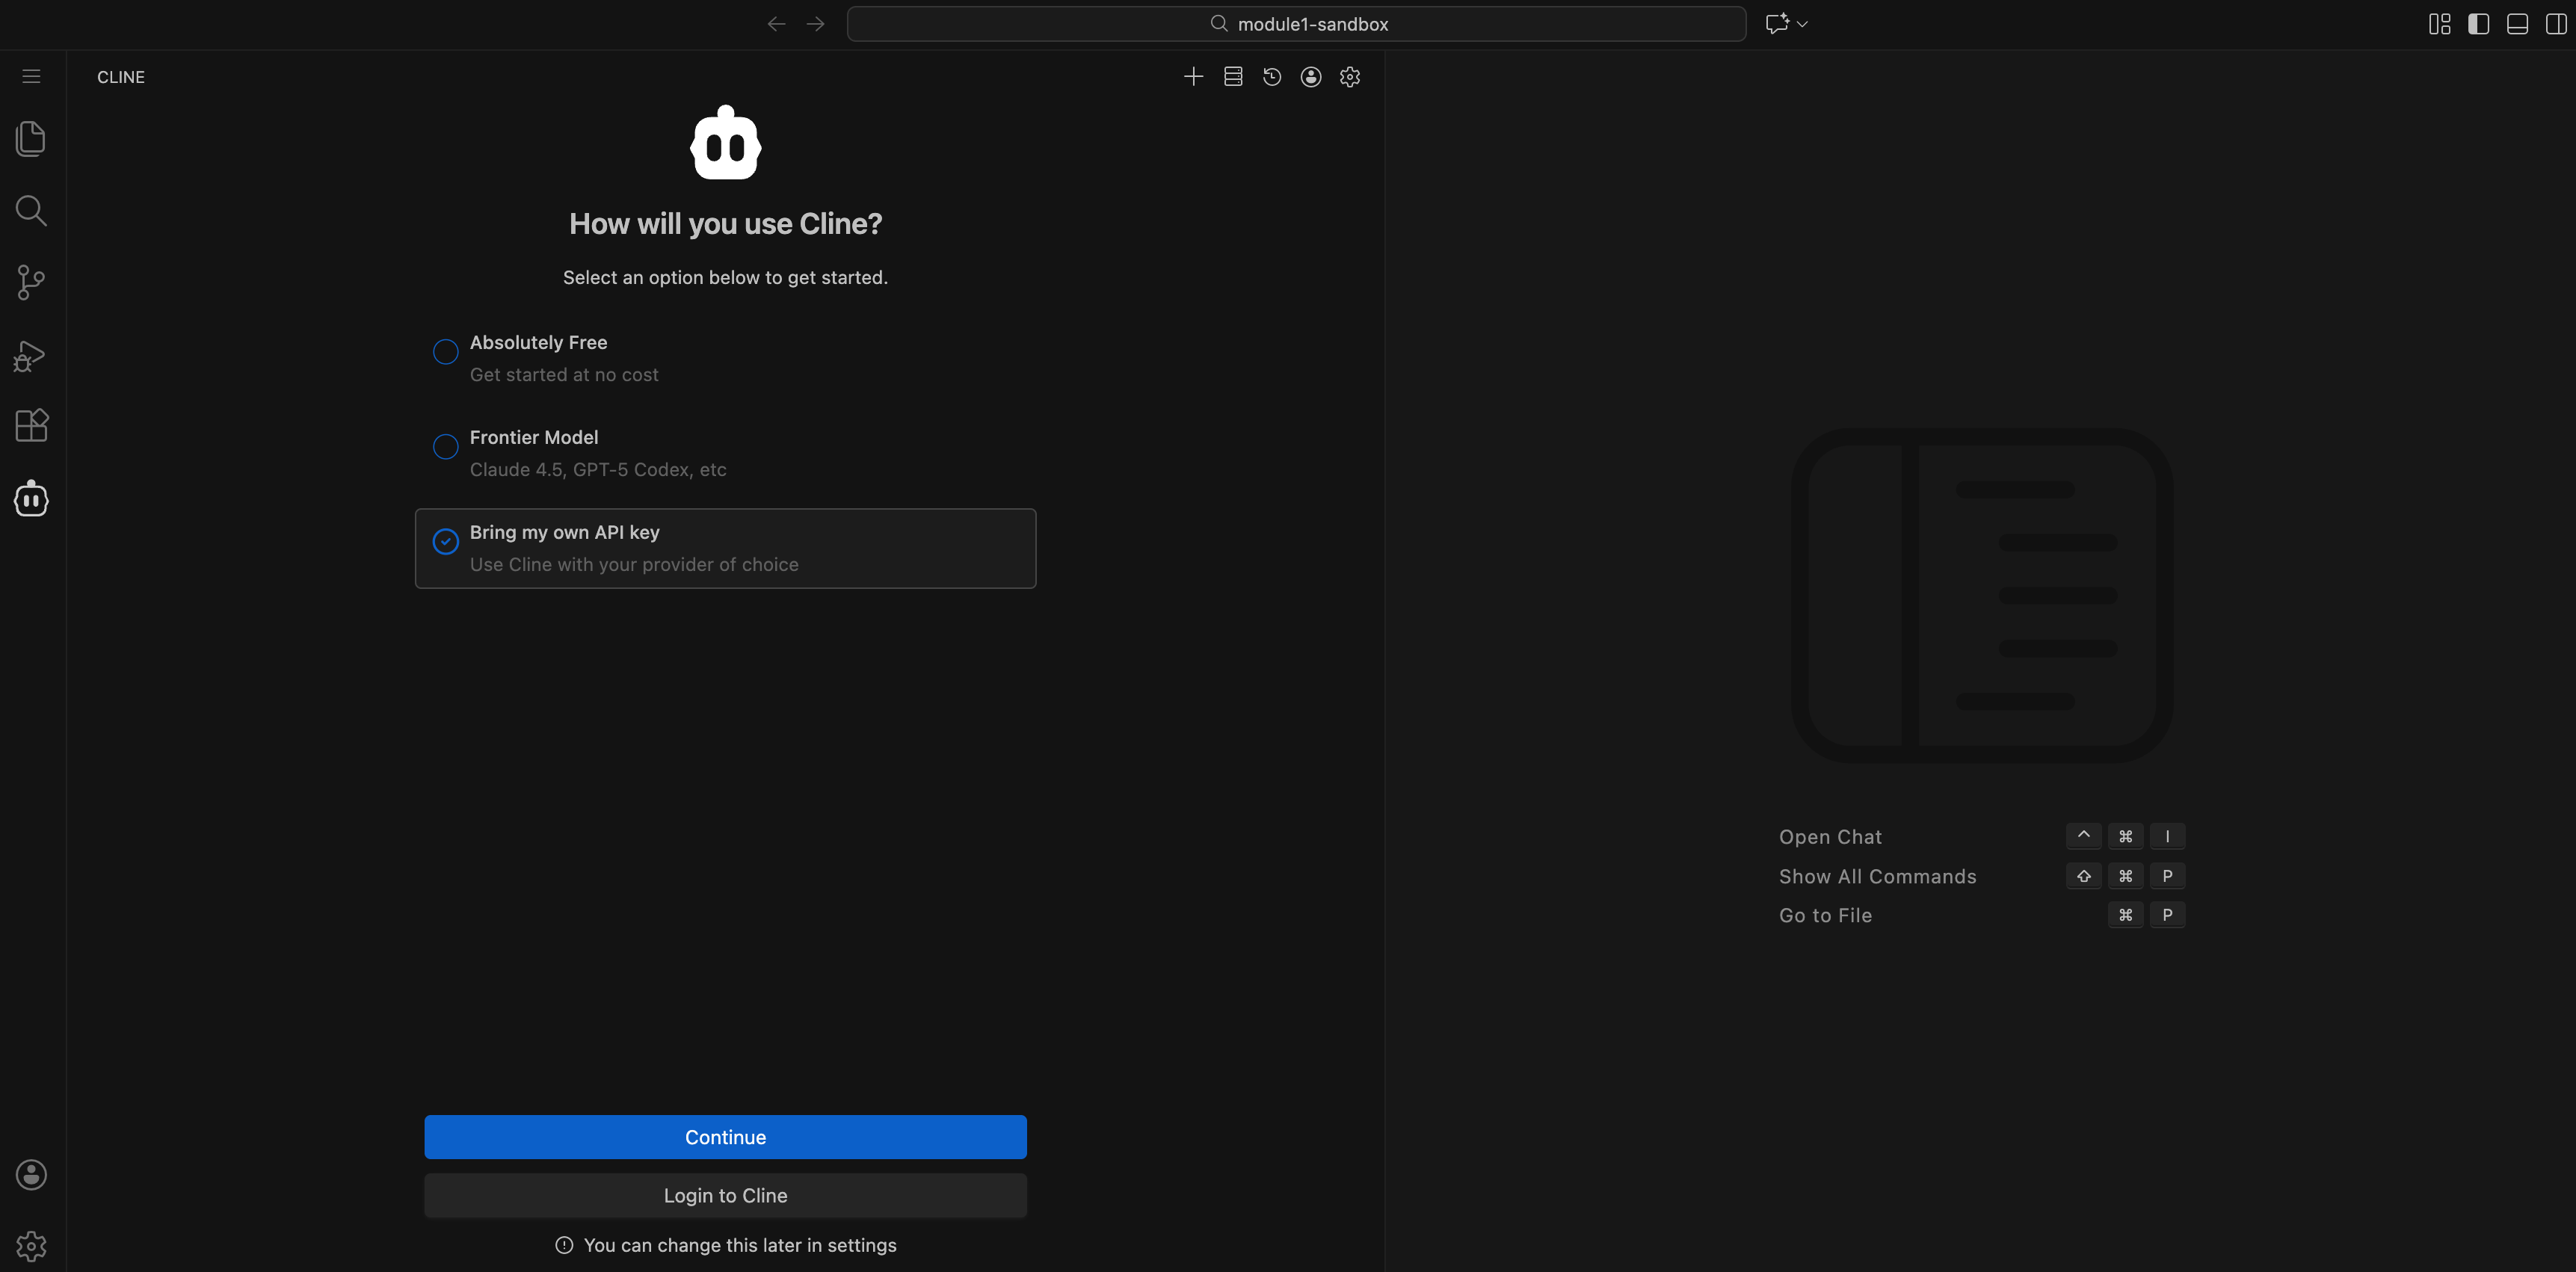
Accessing Cline
To open Cline:
Click the Cline icon in the left Activity Bar.
Use Plan mode to review proposed changes.
Use Act mode to allow file modifications.
What to notice:
Everything happens inside the browser.
You control when code is written.
You control when code is committed.
You are always in charge of what gets executed.
Configure VS Code Cline Extension
The Cline extension enables AI-assisted coding using Gemini. In this step, you will connect Cline to the preconfigured Gemini backend.
Open the Cline extension.
In VS Code, locate the Cline icon on the left activity bar and click it.

Choose to bring your own API key.
In the Cline extension setup screen, select Bring my own API key, then click Continue.
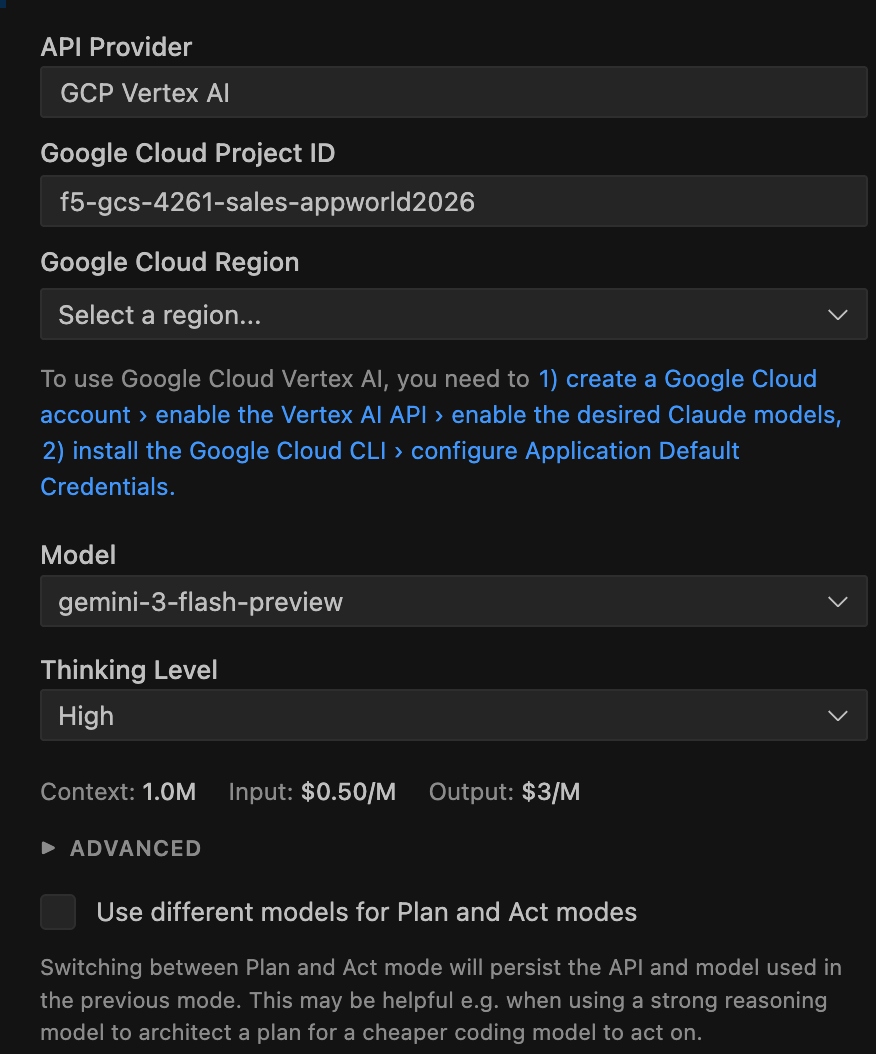
Configure the Gemini provider.
In the Configure the provider screen, enter the following values:
API Provider: GCP Vertex AI
Google Cloud Project ID: f5-gcs-4261-sales-appworld2026
Google Cloud Region: global
Model:
gemini-3-flash-preview
Click Continue to proceed.
Close the Cline configuration popup.
Once configuration is complete, close the popup window.

What to notice:
No API keys are pasted manually.
The provider and model are explicitly defined.
Cline is now ready to interact with Gemini.
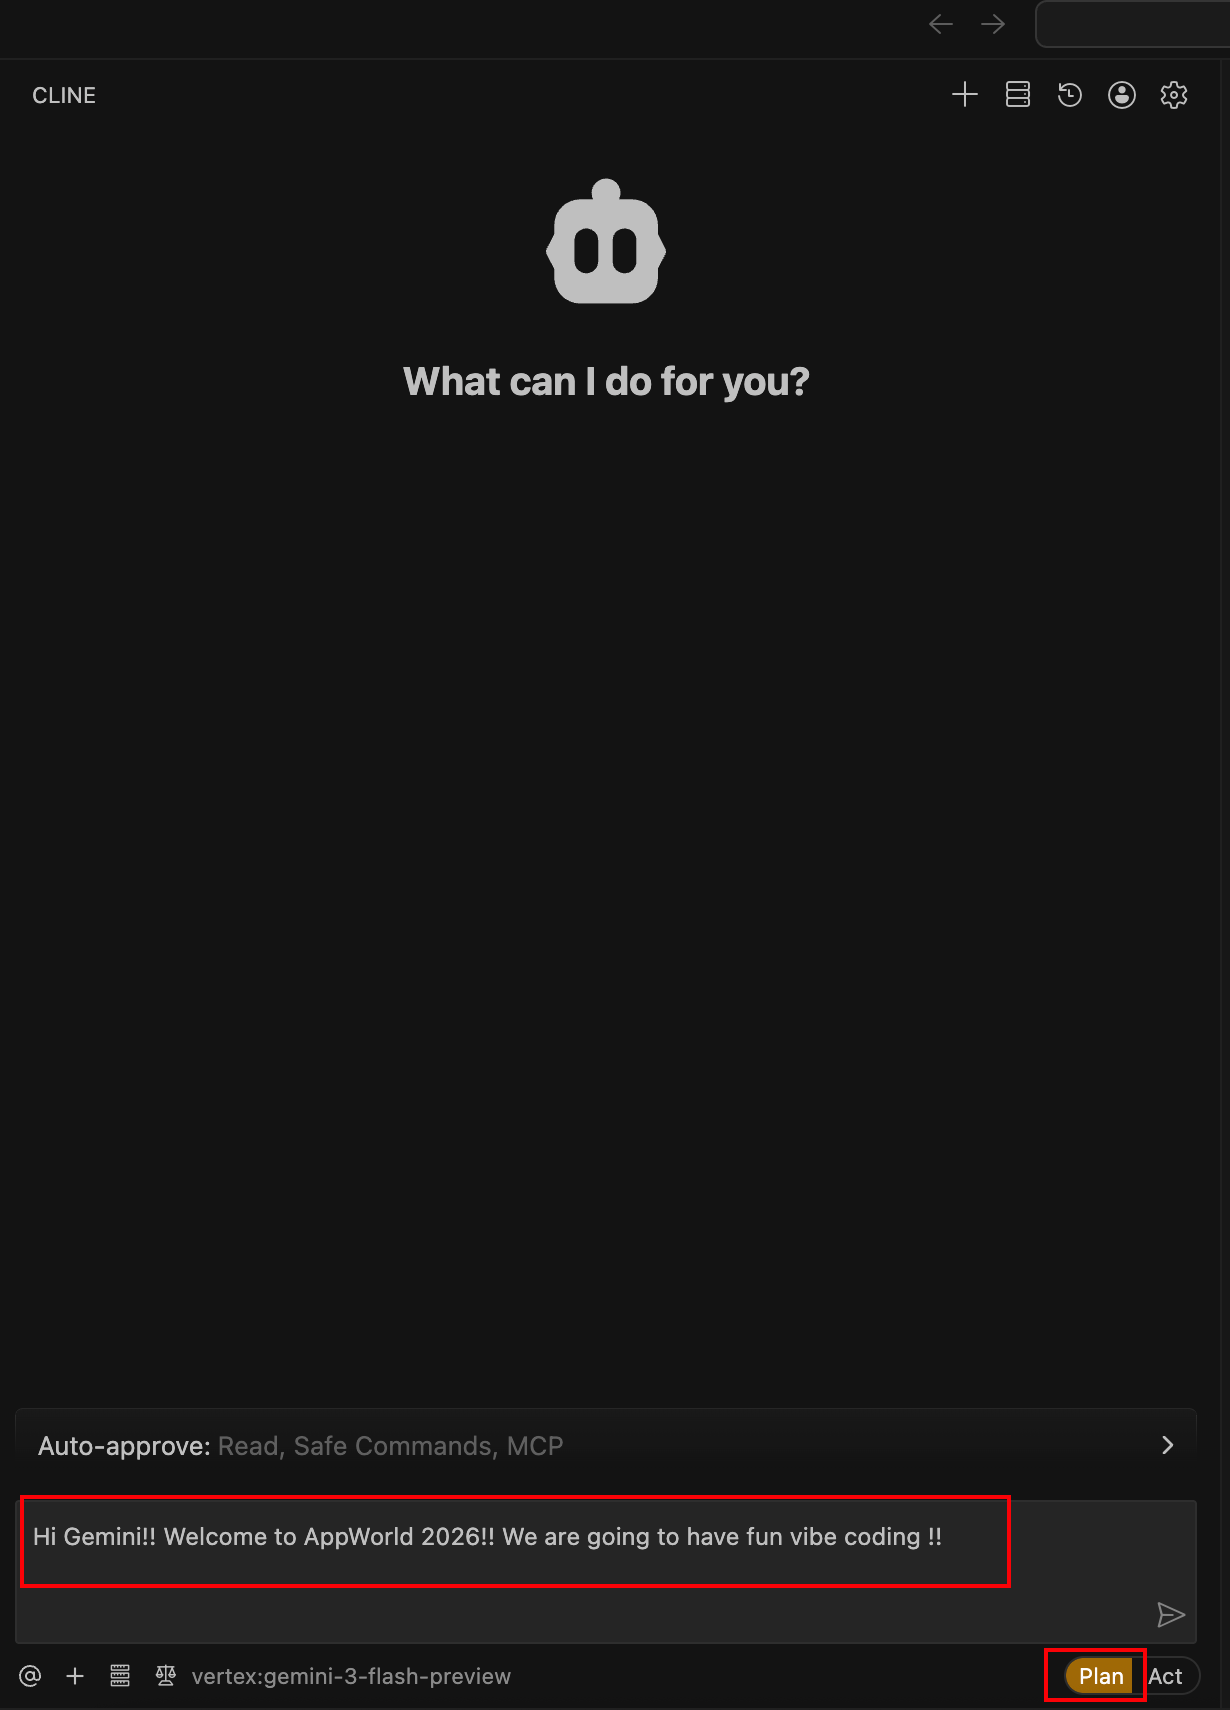
Validate Gemini Connectivity
Test the connection to Gemini.
In the Cline chat window:
Make sure Plan mode is selected (not Act)
Enter the following prompt:
Hi Gemini!! Welcome to AppWorld 2026!! We are going to have fun vibe coding !!
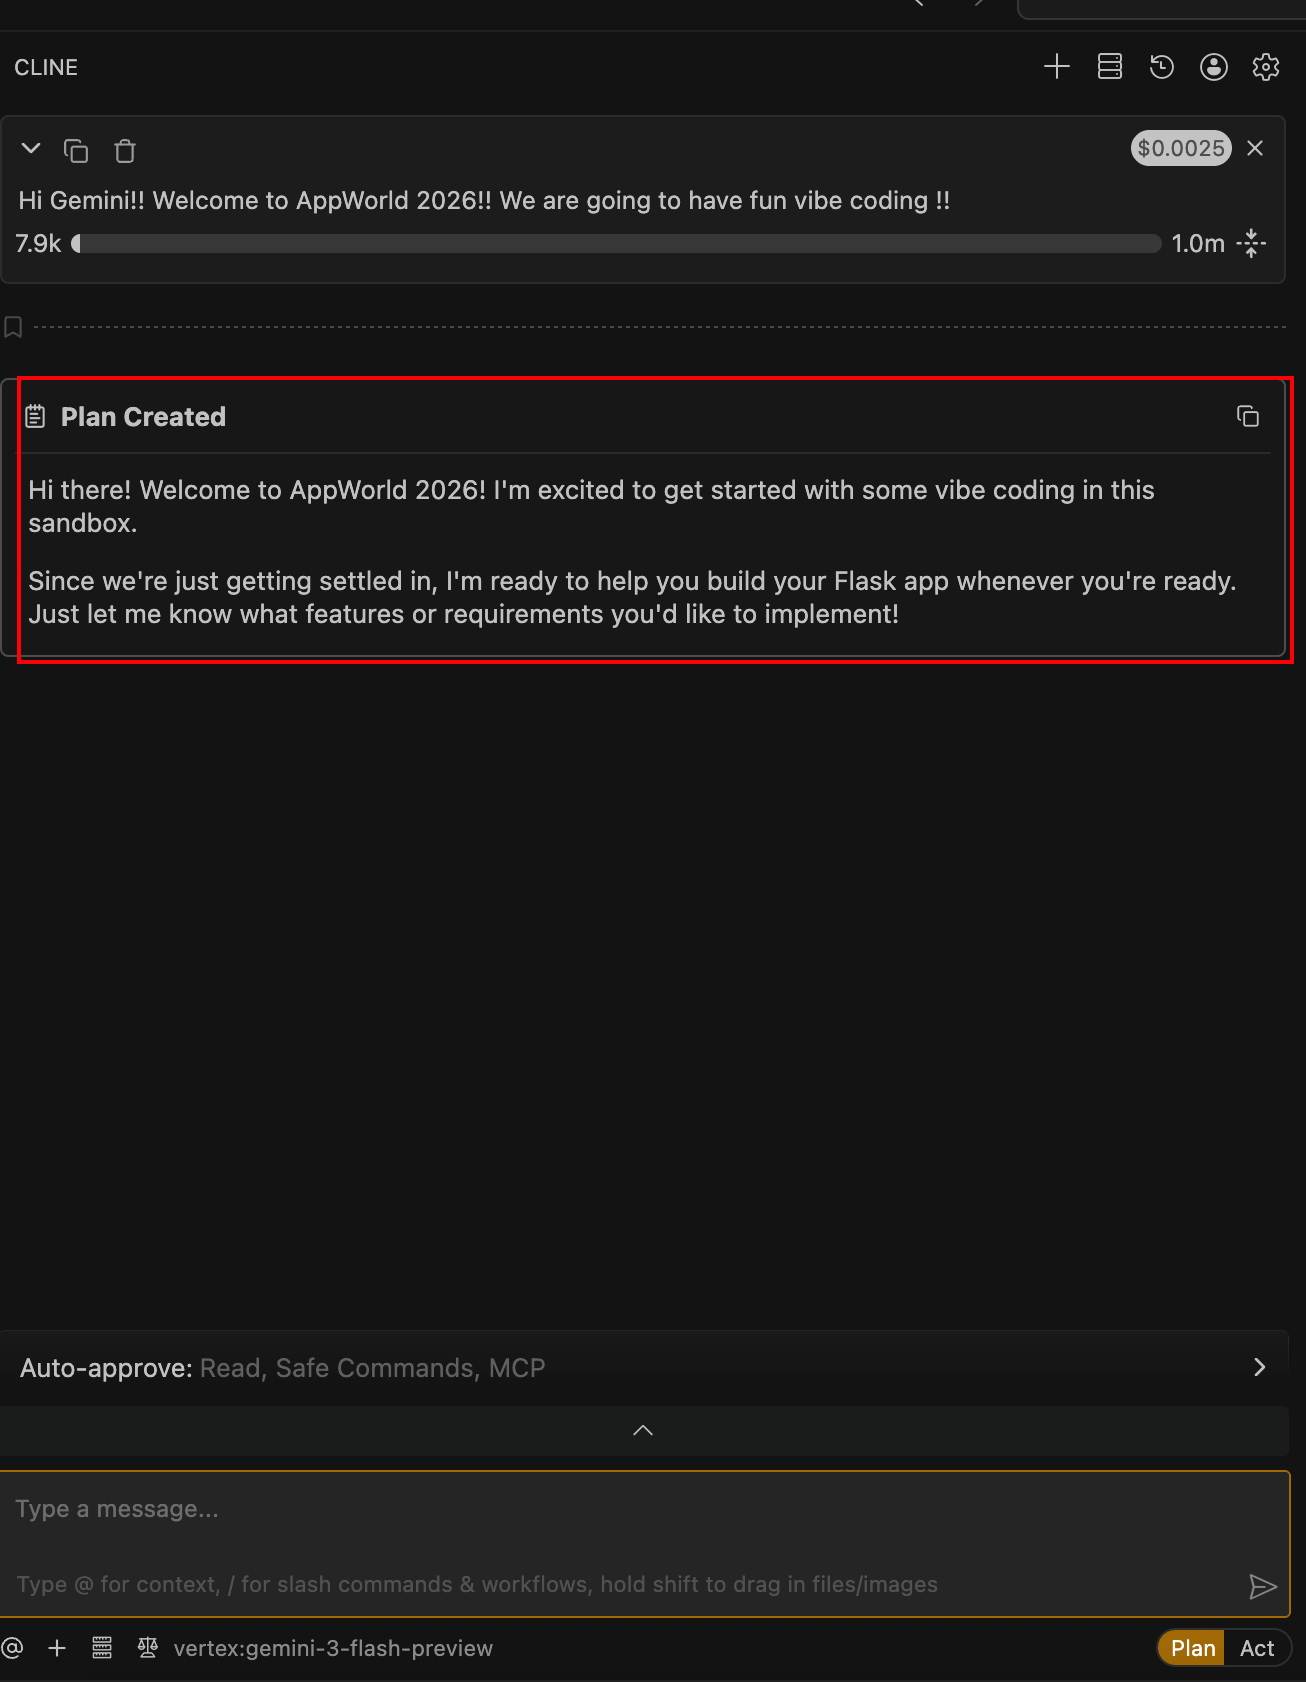
Verify the response from Gemini.
If everything is configured correctly, you should receive a response similar to the one shown below.
Wrap-Up
At this point, you have:
Accessed the VS Code Server
Verified workspace readiness
Configured the Cline extension
Confirmed connectivity to Gemini
Understood how to navigate VS Code panels and terminals
Your development environment is now fully prepared for vibe coding.
Next, you will begin using Cline to generate and modify application code—putting the Code. Secure. Repeat. workflow into action.