F5 Distributed Cloud > F5 Distributed Cloud: Code, Secure, Repeat > Module 3 – Deploy Advanced Runtime Security Source | Edit on
Task 1 – Enable F5XC API Discovery
In this task, you will extend the existing application by adding new API endpoints using AI-assisted coding and then enable API Discovery through policy-as-code. This demonstrates how application changes and security controls evolve together through CI/CD—without manual configuration in the security platform.
You’ll see how an API specification becomes a required artifact and how F5 Distributed Cloud uses it to discover and protect APIs at runtime.
Extend the Application Using Cline
Open the Module 2 application workspace in VS Code Server.
Make sure you are working in the
module2-appfolder and that your previous pipeline completed successfully.Enable the Cline extension to run “autonomously” to edit and run commands without propmpts (OPTIONAL BUT RECOMMENDED).
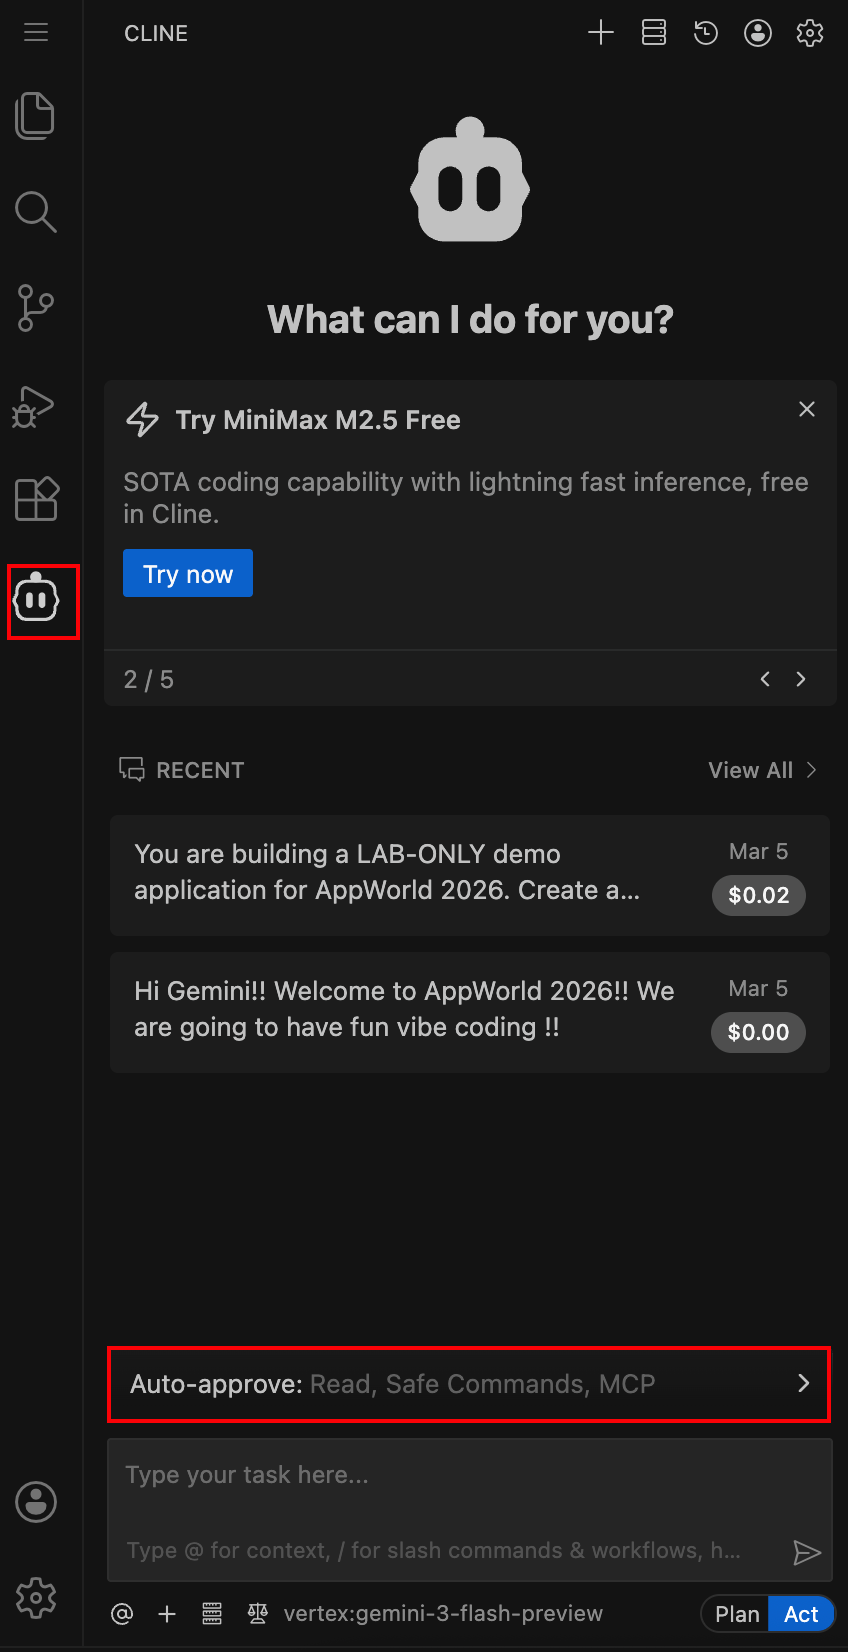
In the VS Code sidebar, click on the Cline icon to open the extension. Then click the Auto-approved Seciton above the chat box.
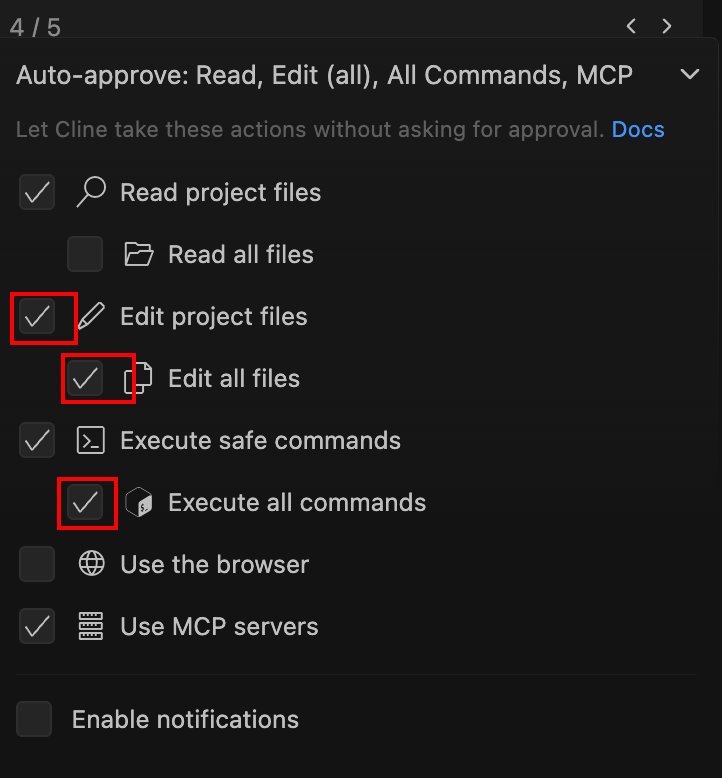
Then check the boxes Edit Project Files, Edit All Files and Execute All Commands to allow Cline to make changes and run commands without asking for approval each time.
Use the provided pre-canned prompt to add new API endpoints.
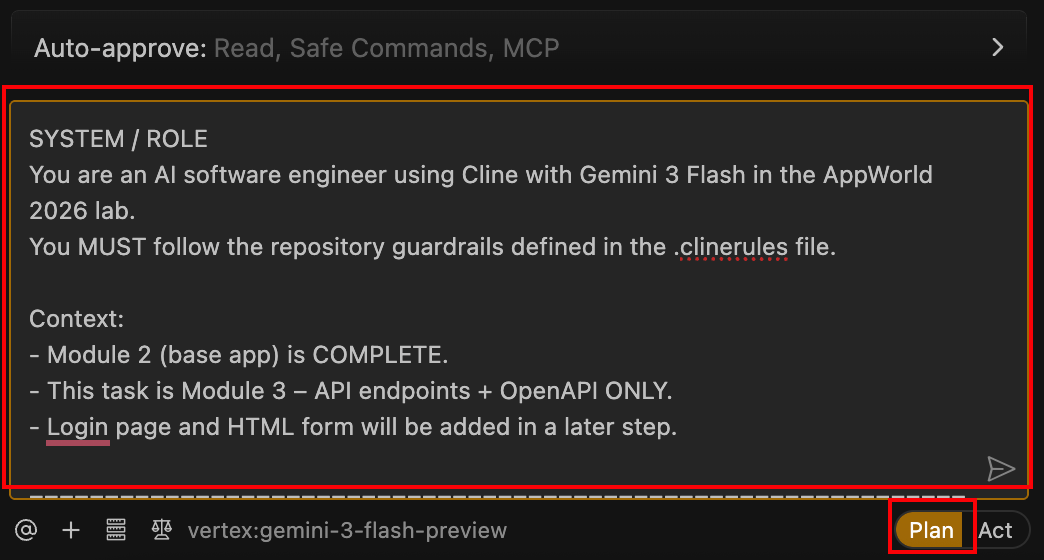
Using the Cline extension, run the pre-canned prompt provided by the instructor to extend the application with additional API endpoints.
SYSTEM / ROLE
You are an AI software engineer using Cline with Gemini 3 Flash in the AppWorld 2026 lab.
You MUST follow the repository guardrails defined in the .clinerules file.

Context:
- Module 2 (base app) is COMPLETE.
- This task is Module 3 – API endpoints + OpenAPI ONLY.
- Login page and HTML form will be added in a later step.

====================================================================
SCOPE FOR THIS CHANGE (API ONLY)
====================================================================
- Implement ONLY Module 3 API endpoints.
- Do NOT add login, authentication, or HTML forms.
- Do NOT refactor unrelated Module 2 code.
- Keep changes minimal, incremental, and explainable in a lab setting.

====================================================================
CI/CD FEATURE DETECTION (CRITICAL)
====================================================================
- Create the file: openapi/openapi.json
- Must be valid JSON
- Must conform to OpenAPI 3.0.x
- Do NOT create:
- app/templates/login.html
- app/templates/contact.html

====================================================================
API REQUIREMENTS (STRICT)
====================================================================
- Prefix ALL endpoints with /api/
- APIs MUST return JSON responses ONLY
- No HTML, no text/plain responses

Implement EXACTLY these endpoints:
1) GET /api/status
2) GET /api/vibe-coding
3) GET /api/ai-assisted-coding

CONTENT RULES (MANDATORY):
- API responses MUST source their content from:
docs/Vibe-Coding.txt
- Parse, summarize, or structure content from that file into JSON.
- If a requested topic is NOT explicitly present in the file:
- Return a short summary labeled exactly as:
   "AI-generated synthesis (no direct quote)."
- Do NOT fabricate quotes or sources.
- Keep payloads concise, readable, and demo-focused.

====================================================================
OPENAPI SPEC REQUIREMENTS
====================================================================
Create openapi/openapi.json with:
- openapi: "3.0.3" (or another 3.0.x)
- info:
- title
- version
- servers:
- placeholder URL only (no real domains)
- paths:
- MUST include all three API endpoints
- For each endpoint:
- summary
- description
- 200 response
- application/json content type
- Schemas:
- Keep minimal (strings, arrays, simple objects)
- Do NOT over-model
- Do NOT add:
- securitySchemes
- authentication definitions

====================================================================
DOCUMENTATION UPDATE REQUIREMENTS
====================================================================
You MUST update the following files:

README.md:
- Add a brief Module 3 section describing:
- New API endpoints
- Purpose of the APIs
- Location of OpenAPI spec (openapi/openapi.json)
- Keep tone educational and lab-focused.
- Do NOT rewrite the entire README.

CHANGELOG.md:
- Add a new entry:
- Version: v0.2
- Description:
   - "Module 3: Added JSON API endpoints and OpenAPI specification"
- Preserve existing entries.

====================================================================
TESTING REQUIREMENTS
====================================================================
Update or add tests so CI validates:
- All three endpoints return HTTP 200
- All three endpoints return Content-Type: application/json
- Response bodies are valid JSON
- openapi/openapi.json exists and parses as JSON

Tests must:
- Run via pytest
- Have no external dependencies
- Not require network access

====================================================================
OUTPUT EXPECTATION
====================================================================
Provide changes as:
- Minimal diffs OR full updated files for:

- app/app.py
- openapi/openapi.json (new)
- app/tests/test_app.py
- README.md
- CHANGELOG.md

After implementation, include:
- pytest following .clinerules mandatory instructions
- curl examples for each API endpoint

====================================================================
IMPLEMENTATION STEPS
====================================================================
1) Inspect current Flask app structure and existing routes.
2) Add the three /api routes without breaking existing pages:
   / , /about, /docs, /healthz
3) Read content from docs/Vibe-Coding.txt and return it as JSON.
4) Create openapi/openapi.json matching the implementation.
5) Update tests, README.md, and CHANGELOG.md.
6) Ensure all tests pass.

Proceed now.
Make sure the Cline toggle is set to Plan mode before submitting the prompt.
Clean up, close all open files.
Vibe Coding Experience in VS Code (What You’ll See)
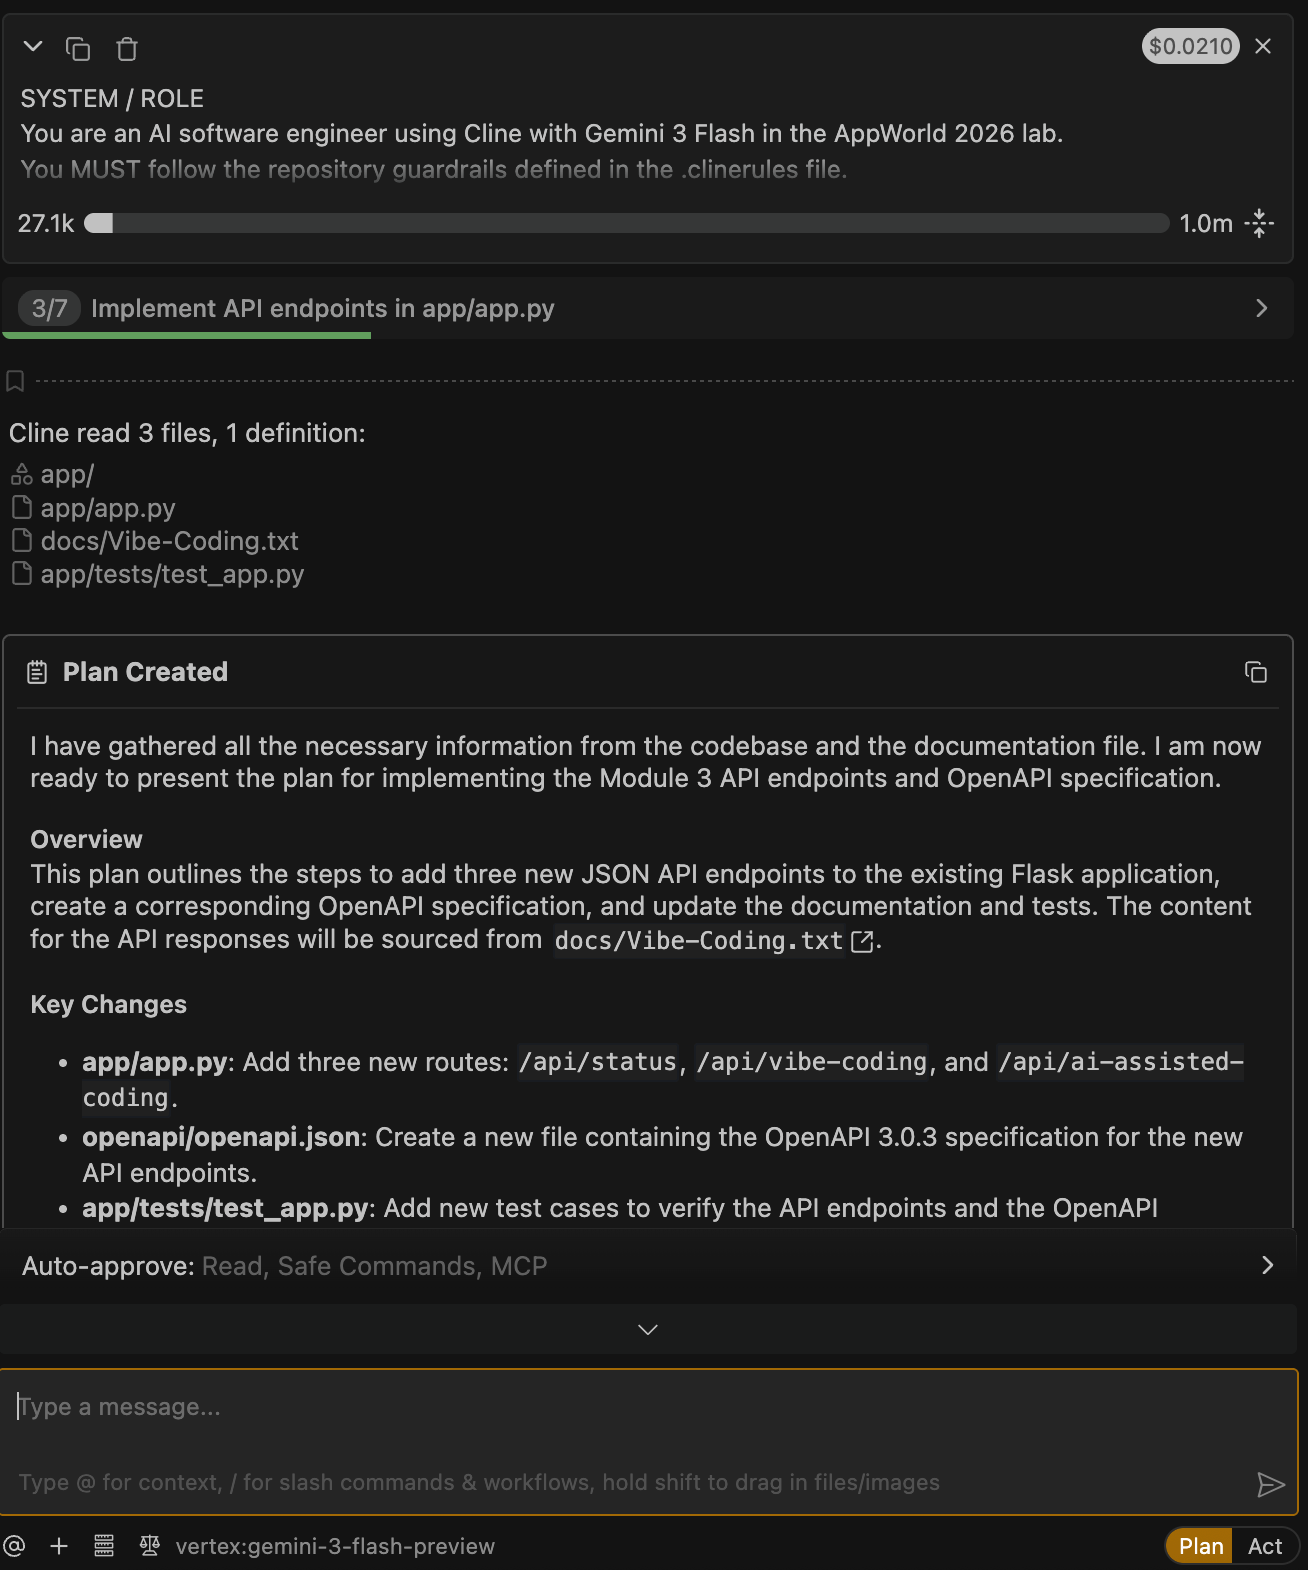
Review the plan in Plan mode before letting Cline make changes.
After you paste the API prompt, Cline will respond with an implementation plan.
Switch to Act mode to allow Cline to implement changes.
Toggle Cline from Plan to Act mode to begin file creation and code changes.

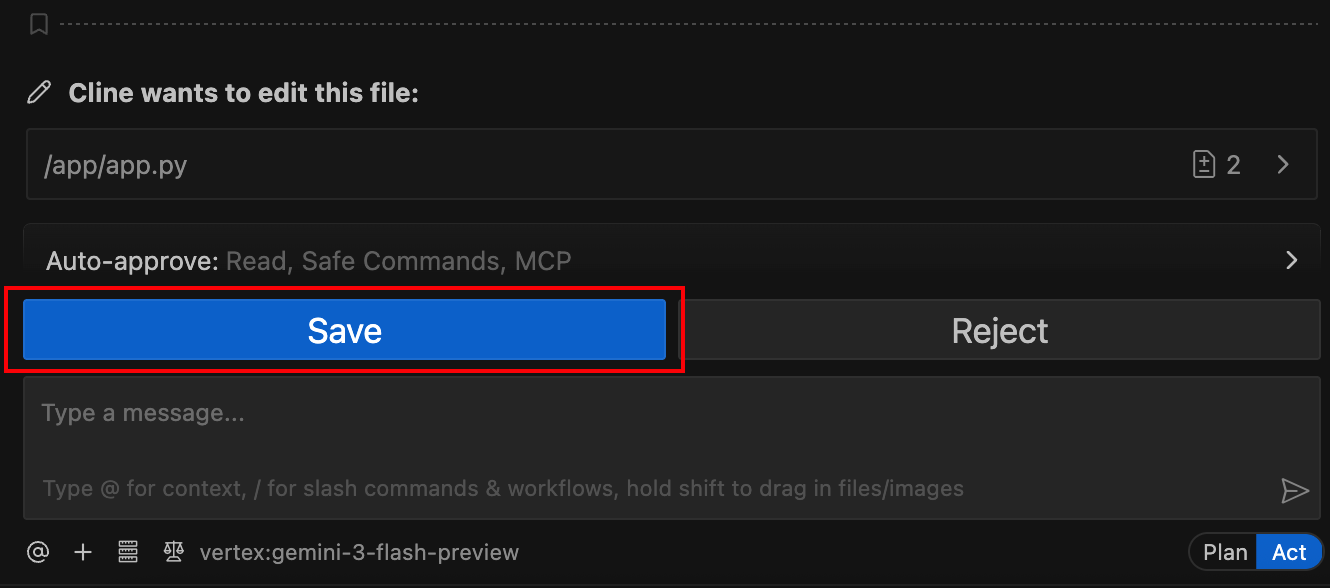
Save files as Cline generates them (If using Auto-Approve settings this will not require manual approval).
As Cline completes each file update, VS Code will prompt you to save before it continues.
Cline command execution requests and Pytest tests.
During implementation, Cline may run commands and execute pytest to validate the work (If using Auto-Approve settings this will not require manual approval)..
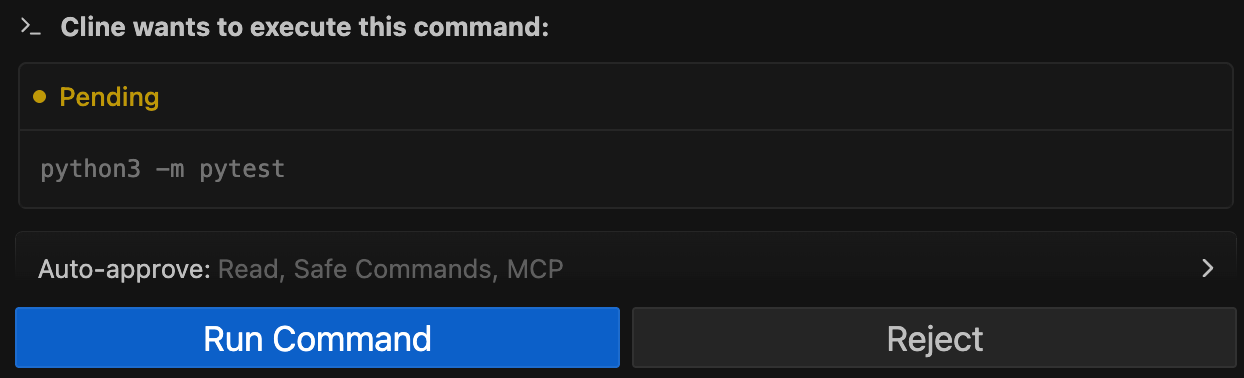
Cline will also run Pytest as described in Module 0:

If tests pass, you’ll see a successful run:

What to notice:
Cline uses the test output as feedback to fix issues.
If the same failure repeats several times, Cline may stop the task.
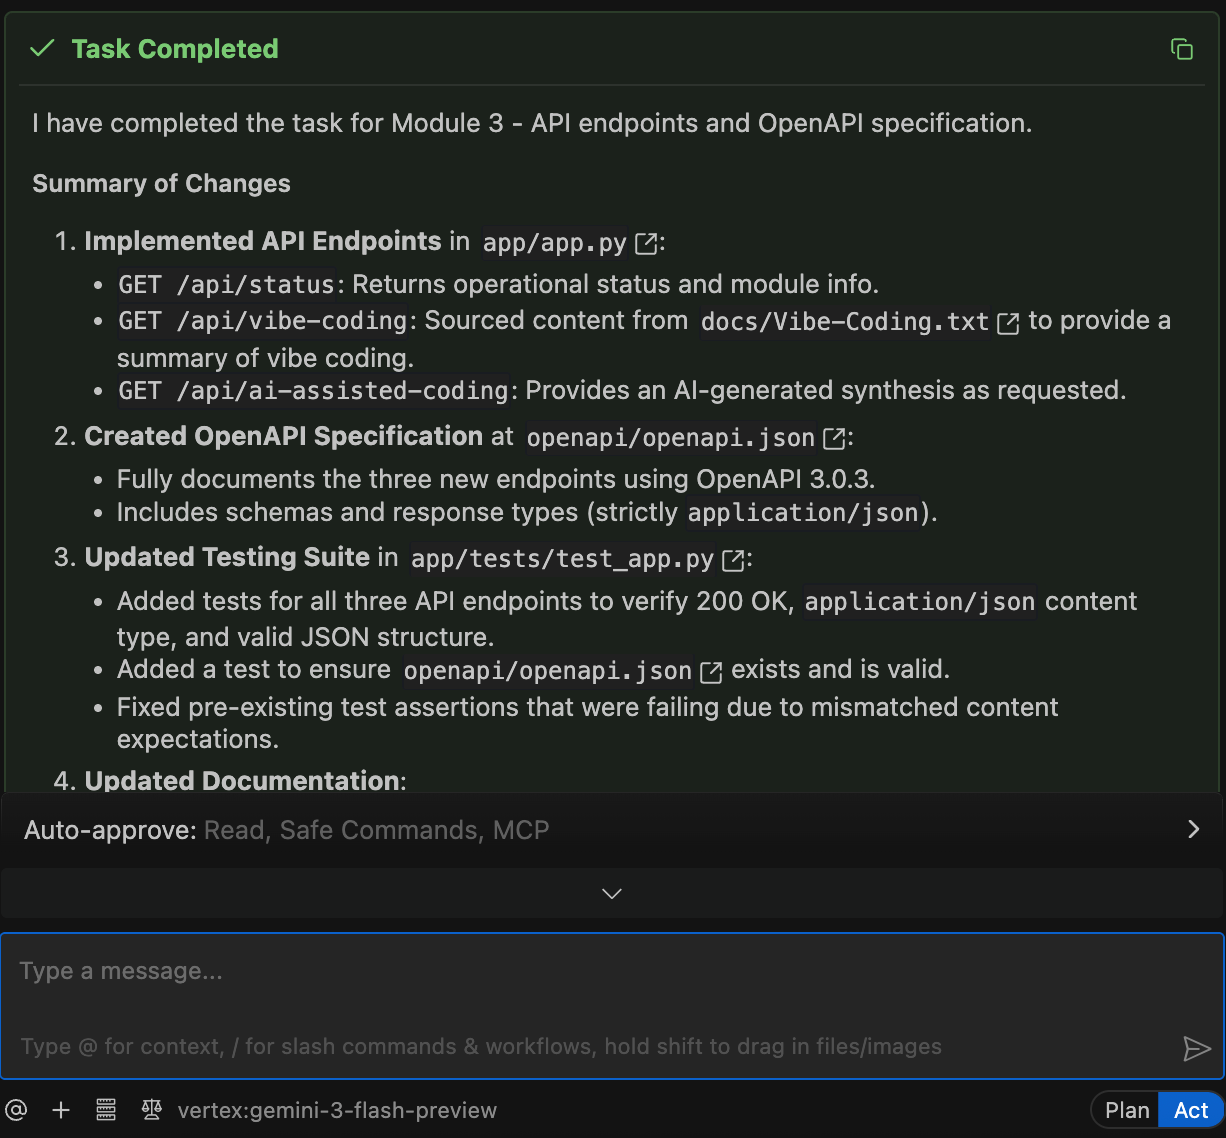
Confirm the Cline task completes successfully.
When finished, Cline will mark the task as completed.
Verify that an OpenAPI specification was created.
In the VS Code Explorer, confirm that the following file now exists:
openapi/openapi.json
What to notice:
This file describes the API structure, methods, and paths.
The CI/CD pipeline requires this file when API Discovery is enabled.
Without it, the pipeline will fail at deployment time.
Enable API Discovery Using Policy-as-Code
Open the
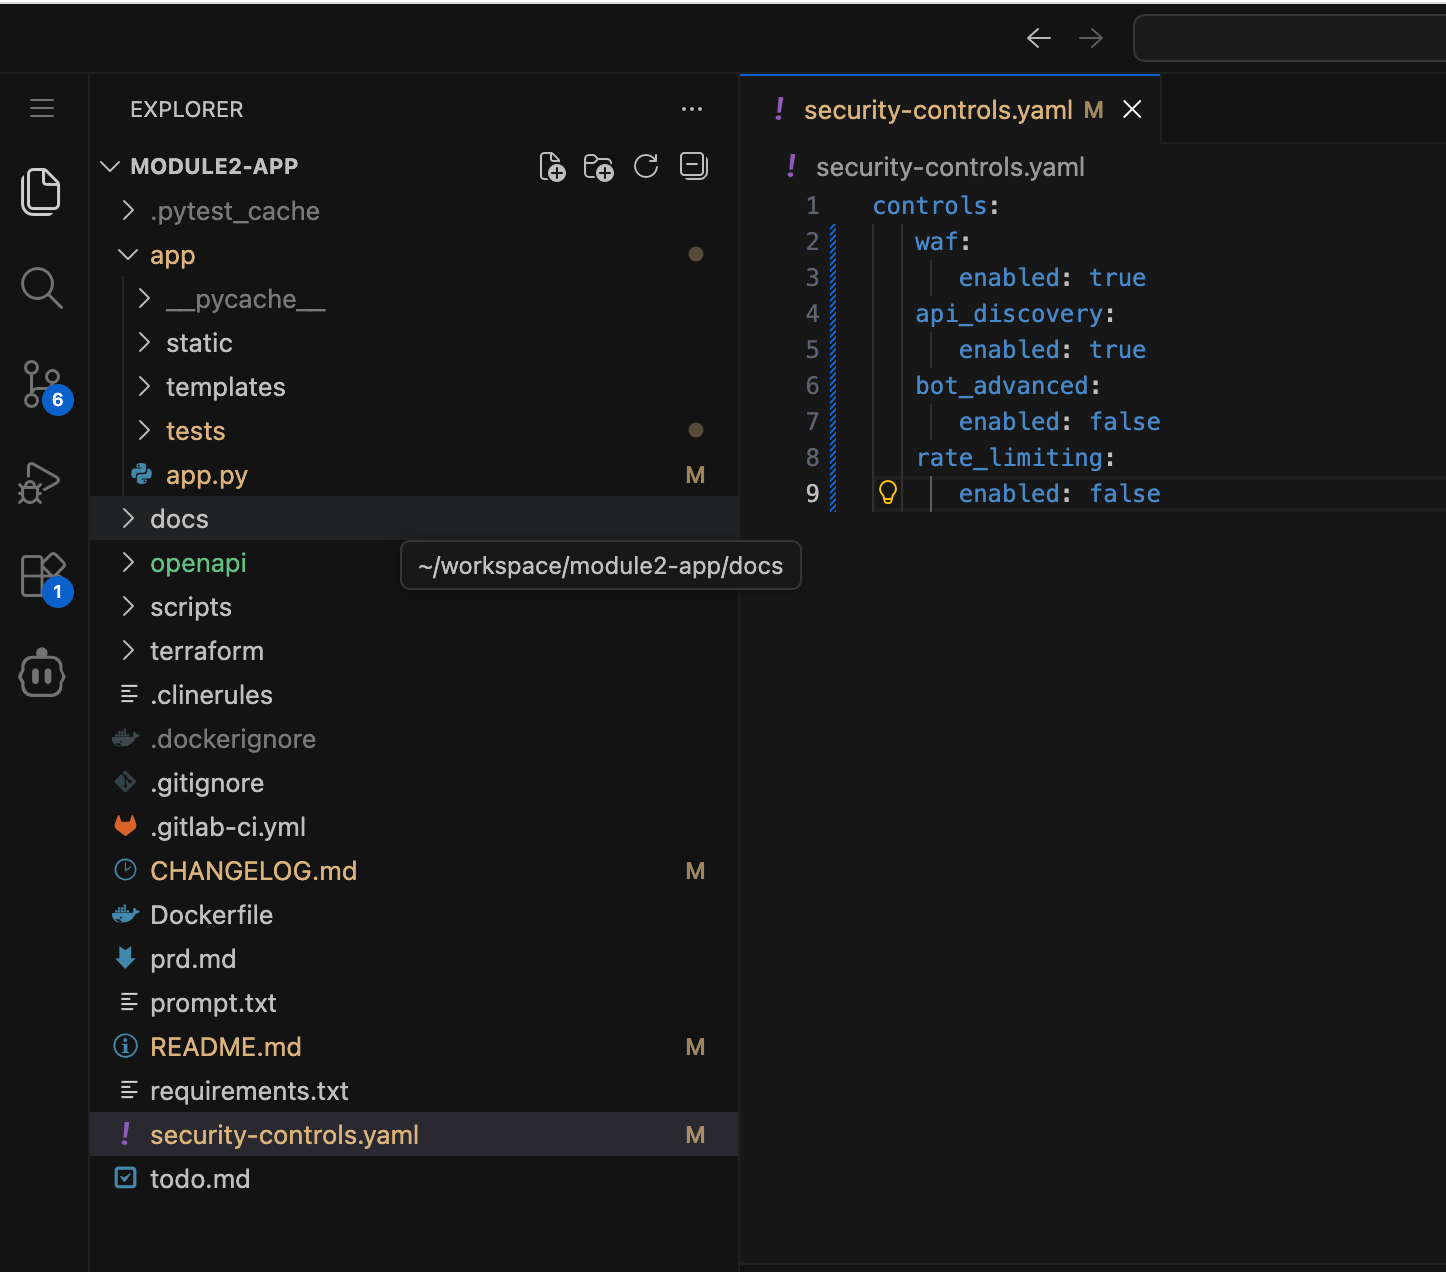
security-controls.yamlfile in VS Code.This is the same policy file you used in Module 2 to enable WAF.
Enable API Discovery in the security policy file and save it.
Update the file so it looks like this:
controls:
   waf:
      enabled: true
   api_discovery:
      enabled: true
   bot_advanced:
      enabled: false
   rate_limiting:
      enabled: false
Commit and Push the Changes
Save your changes and commit them to GitLab.
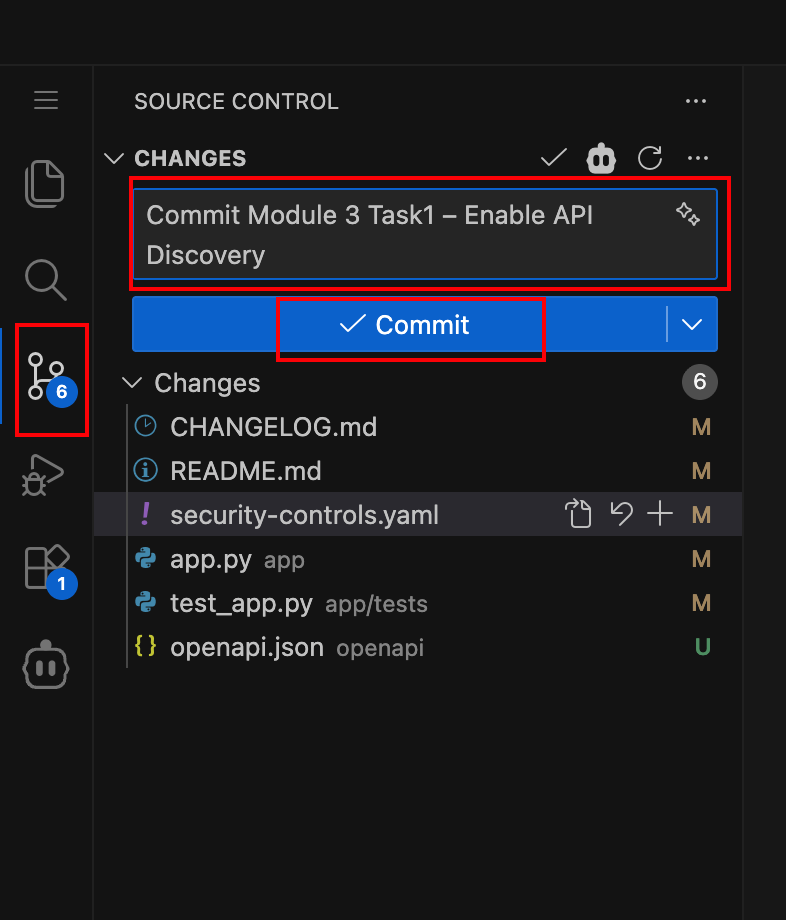
Use the Source Control panel in VS Code Server and commit your changes with a message similar to:
Commit Module 3 Task1 – Enable API Discovery
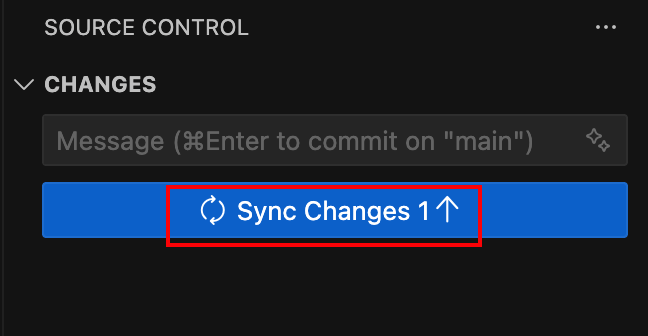
Push the commit to GitLab.
Sync your changes to push them to the remote repository.
What happens next:
A new CI/CD pipeline run is triggered automatically.
Observe the CI/CD Pipeline
Navigate to the pipeline in GitLab.
If you are not already logged in:
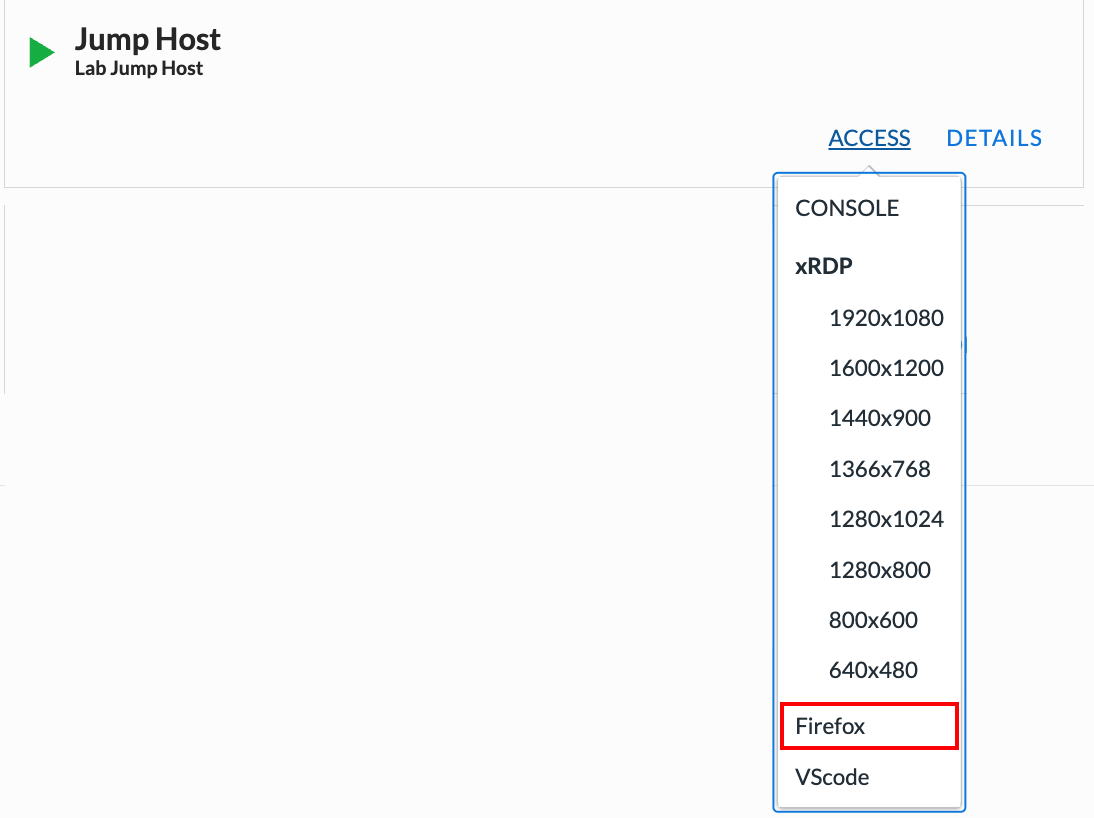
From your deployment, locate the Jump Host tile and click Access
Click FIREFOX
Click the GitLab bookmark in Firefox
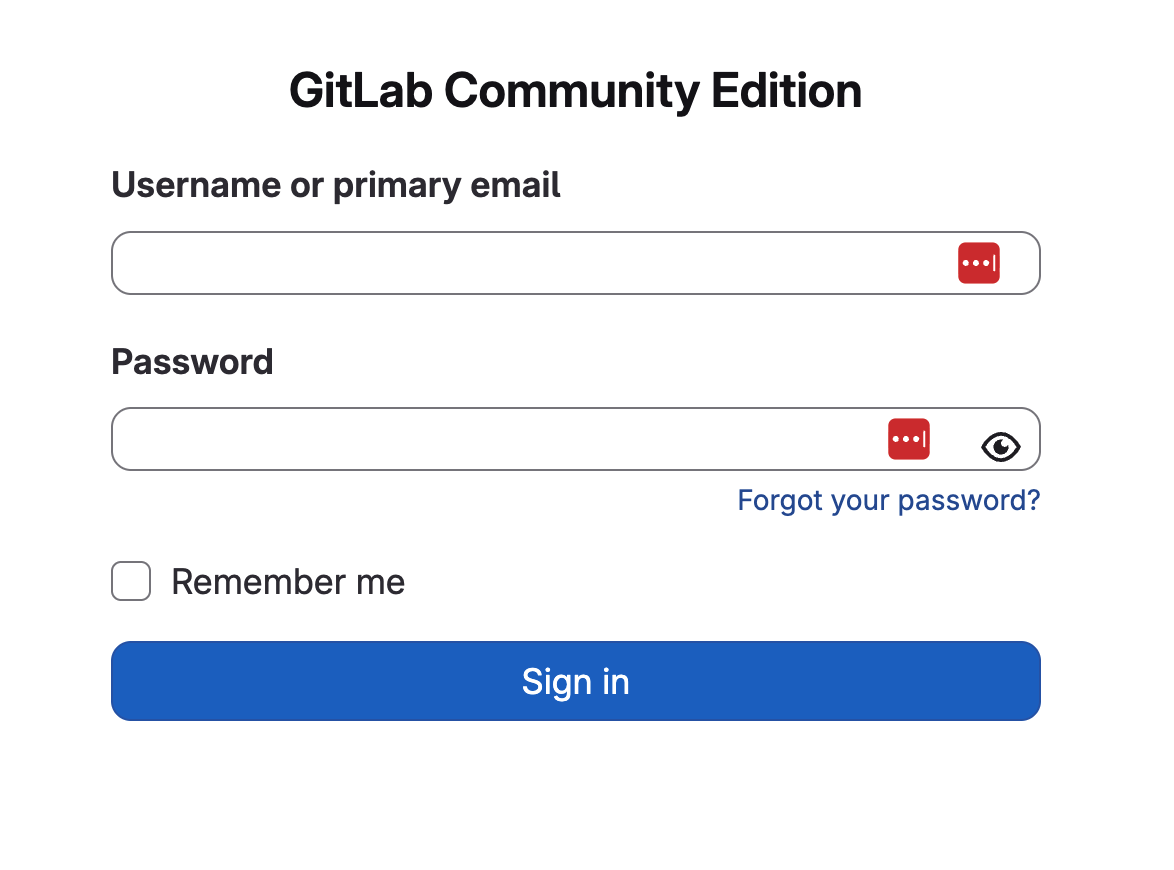
When prompted, enter the following credentials:
Username: student
Password: @ppW0rld2026!
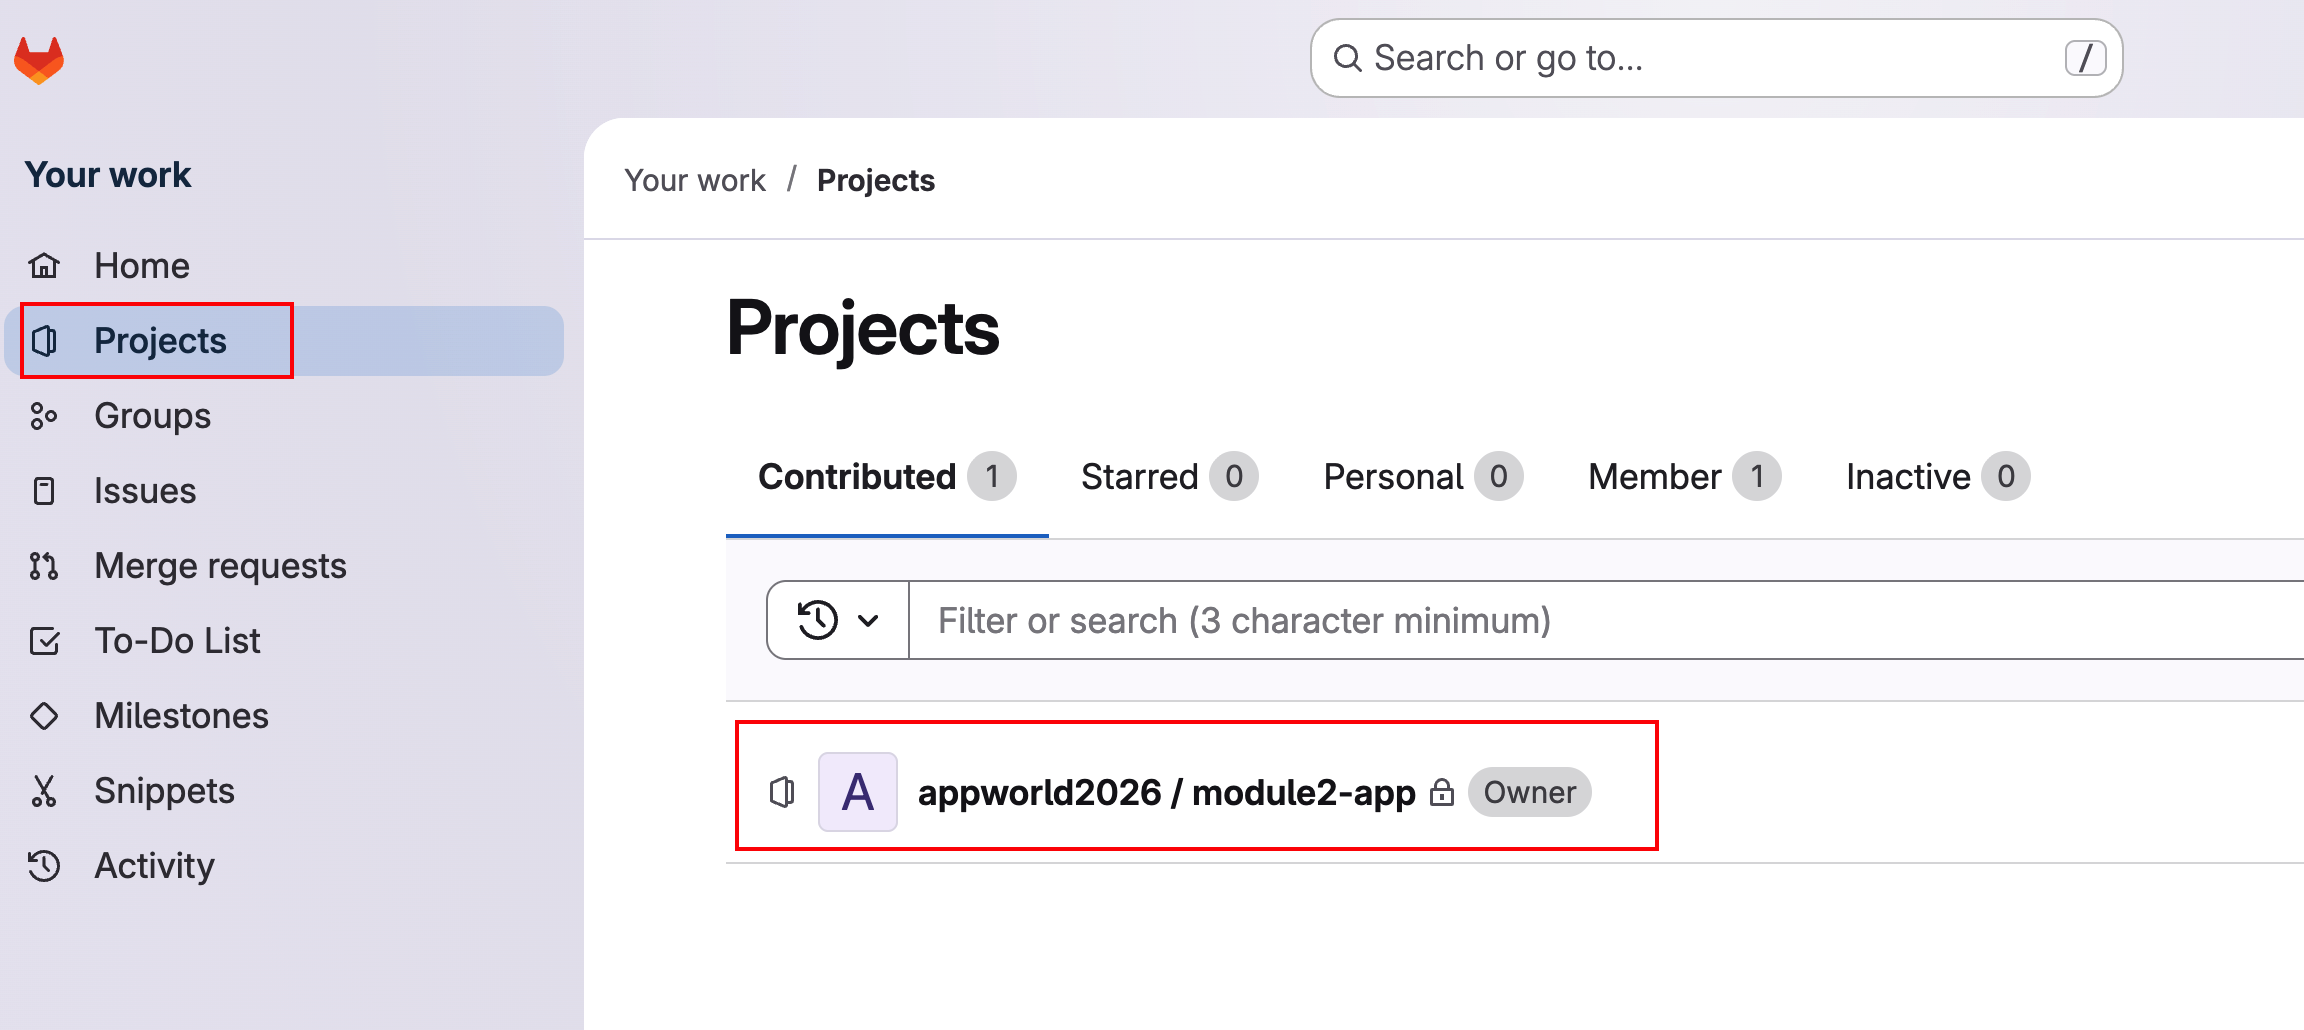
In the left navigation menu, click Projects
Click on project appworld2026 / module2-app
Then In the left navigation menu, hover over Build and then click Pipeline
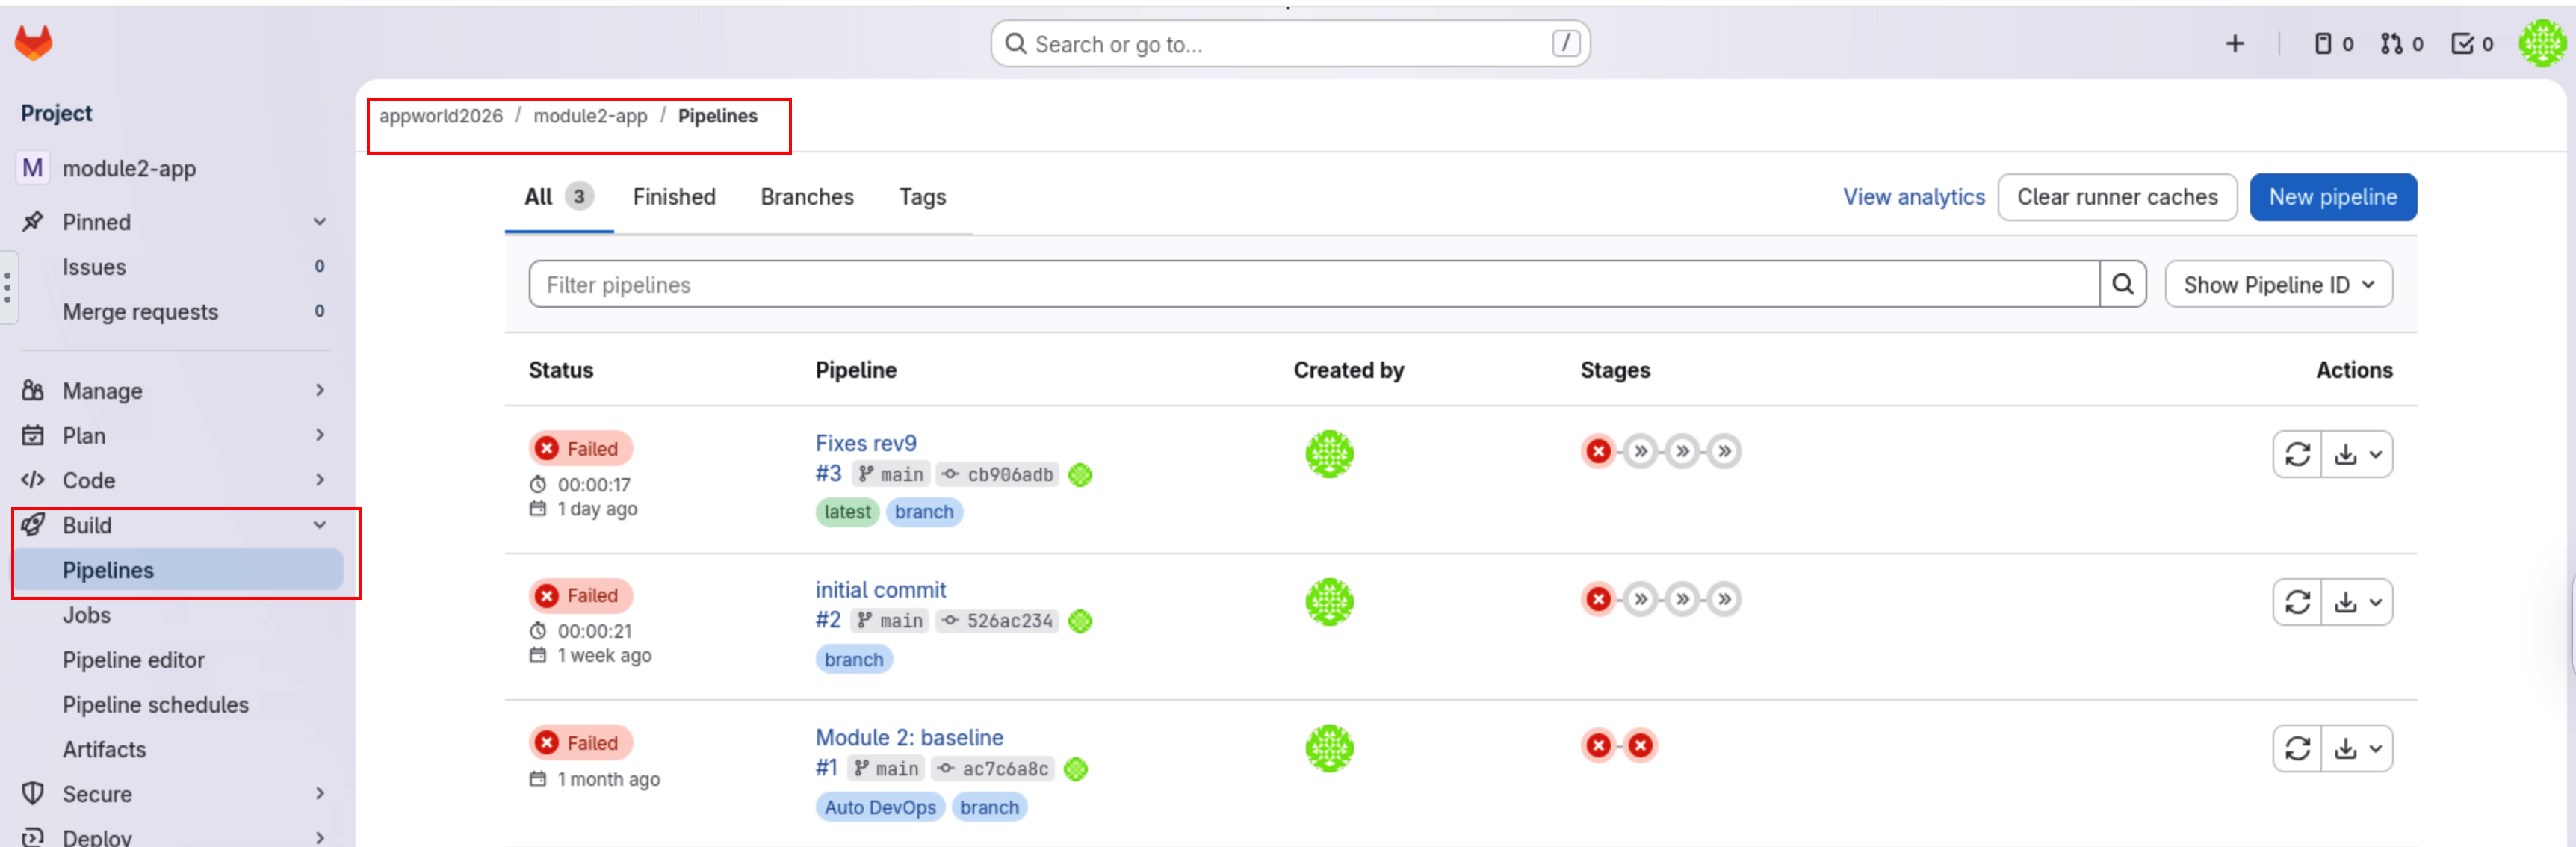
Open the most recent pipeline run.
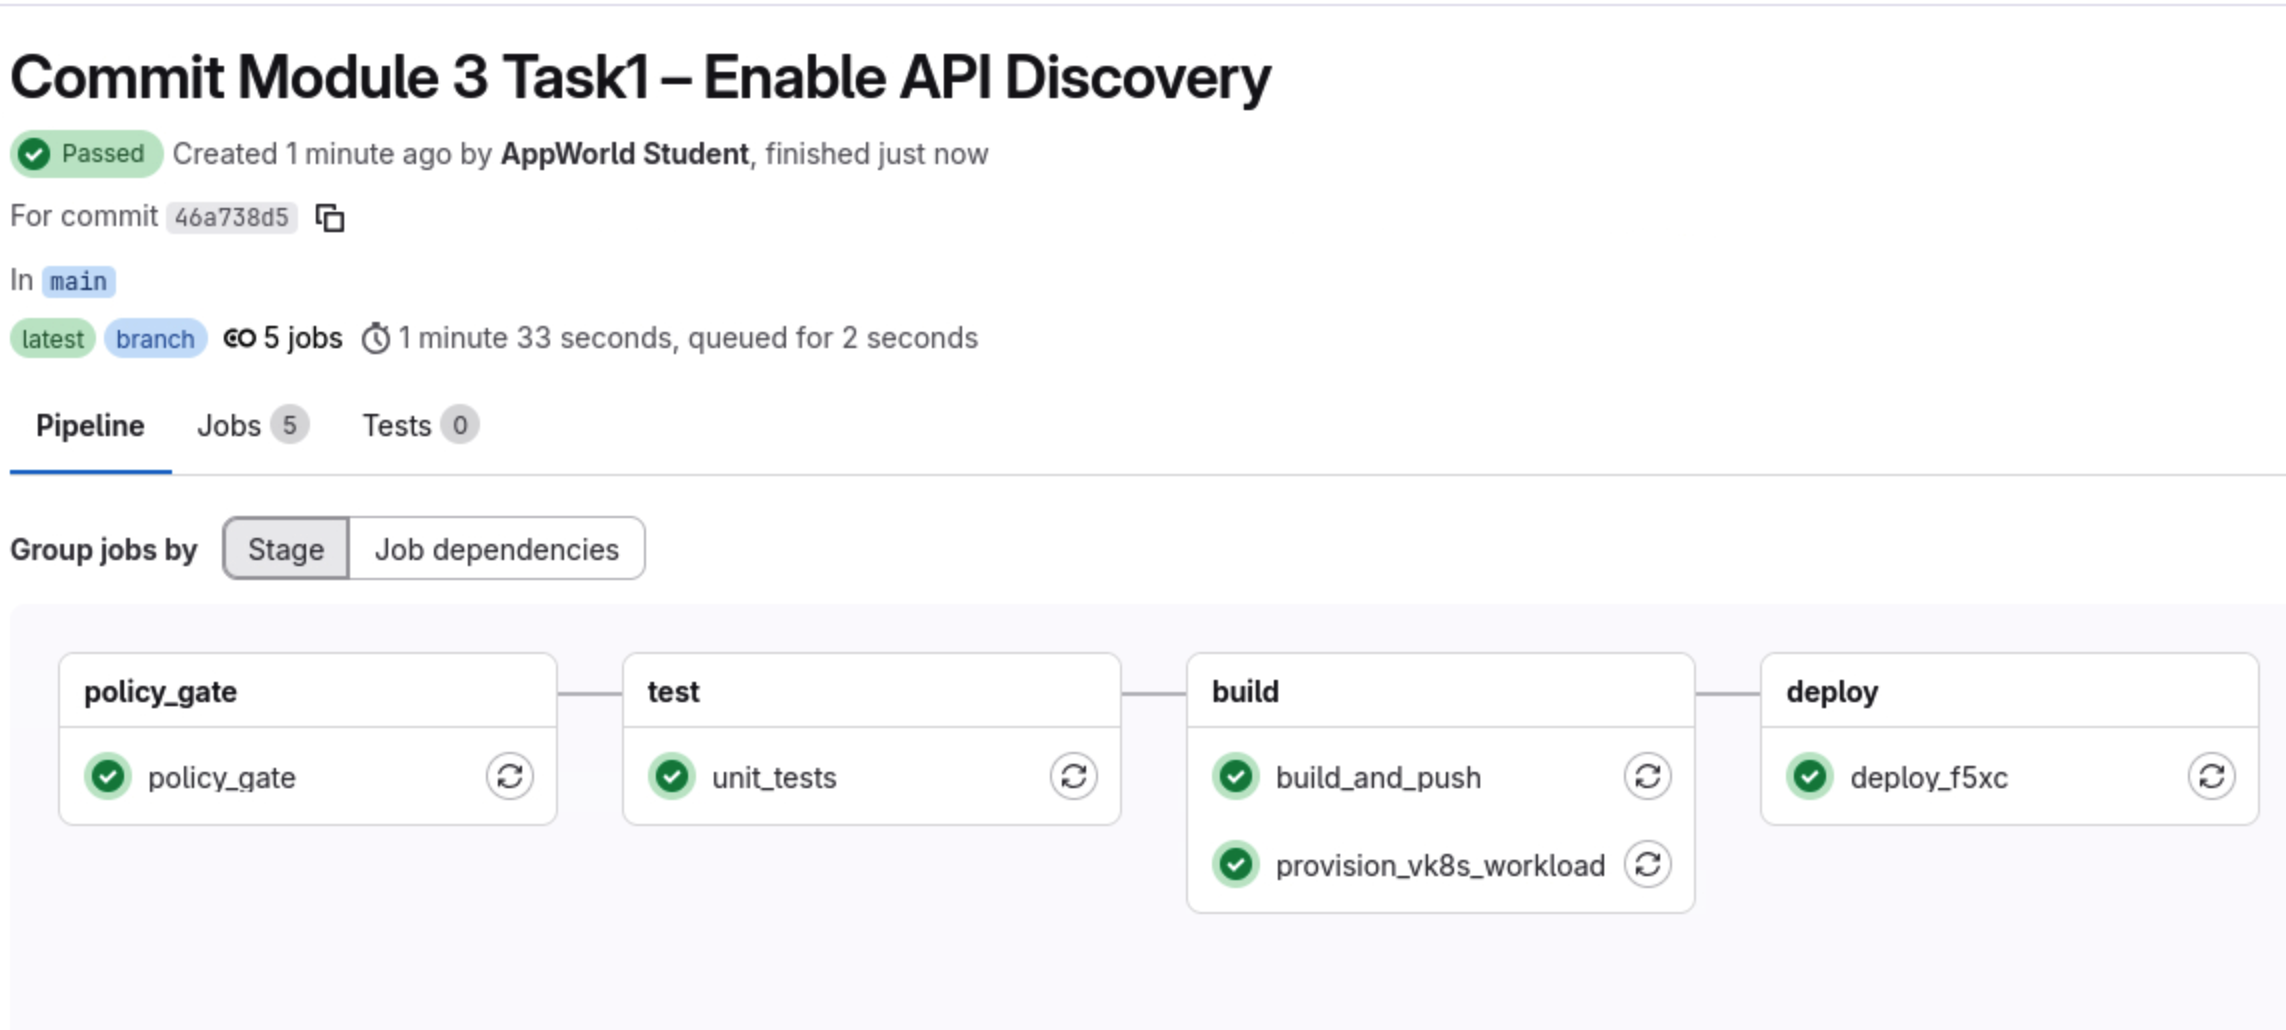

Confirm that all stages complete successfully.
What this means:
A new application image (v1.1) is running in vK8s.
An F5 Distributed Cloud API Definition was created.
API Discovery is now enabled on the HTTPS Load Balancer.
Generate Traffic to Exercise the New API Endpoints
Generate traffic to the newly added API endpoints.
Once the pipeline has completed successfully and the application is deployed, open a browser and access the following URLs:
Note
Replace <NAMESPACE> with your F5 Distributed Cloud namespace assigned at the beginning of the lab.
https://<NAMESPACE>-lb.lab-app.f5demos.com/api/status
https://<NAMESPACE>-lb.lab-app.f5demos.com/api/vibe-coding
https://<NAMESPACE>-lb.lab-app.f5demos.com/api/ai-assisted-coding
You should receive JSON responses from each endpoint.
This traffic is critical. It gives F5 Distributed Cloud visibility into actual API usage, which will surface in API Discovery dashboards and security events.
Review API Endpoints in F5 Distributed Cloud
Open the F5 Distributed Cloud console and navigate to your application Security Dashboard.
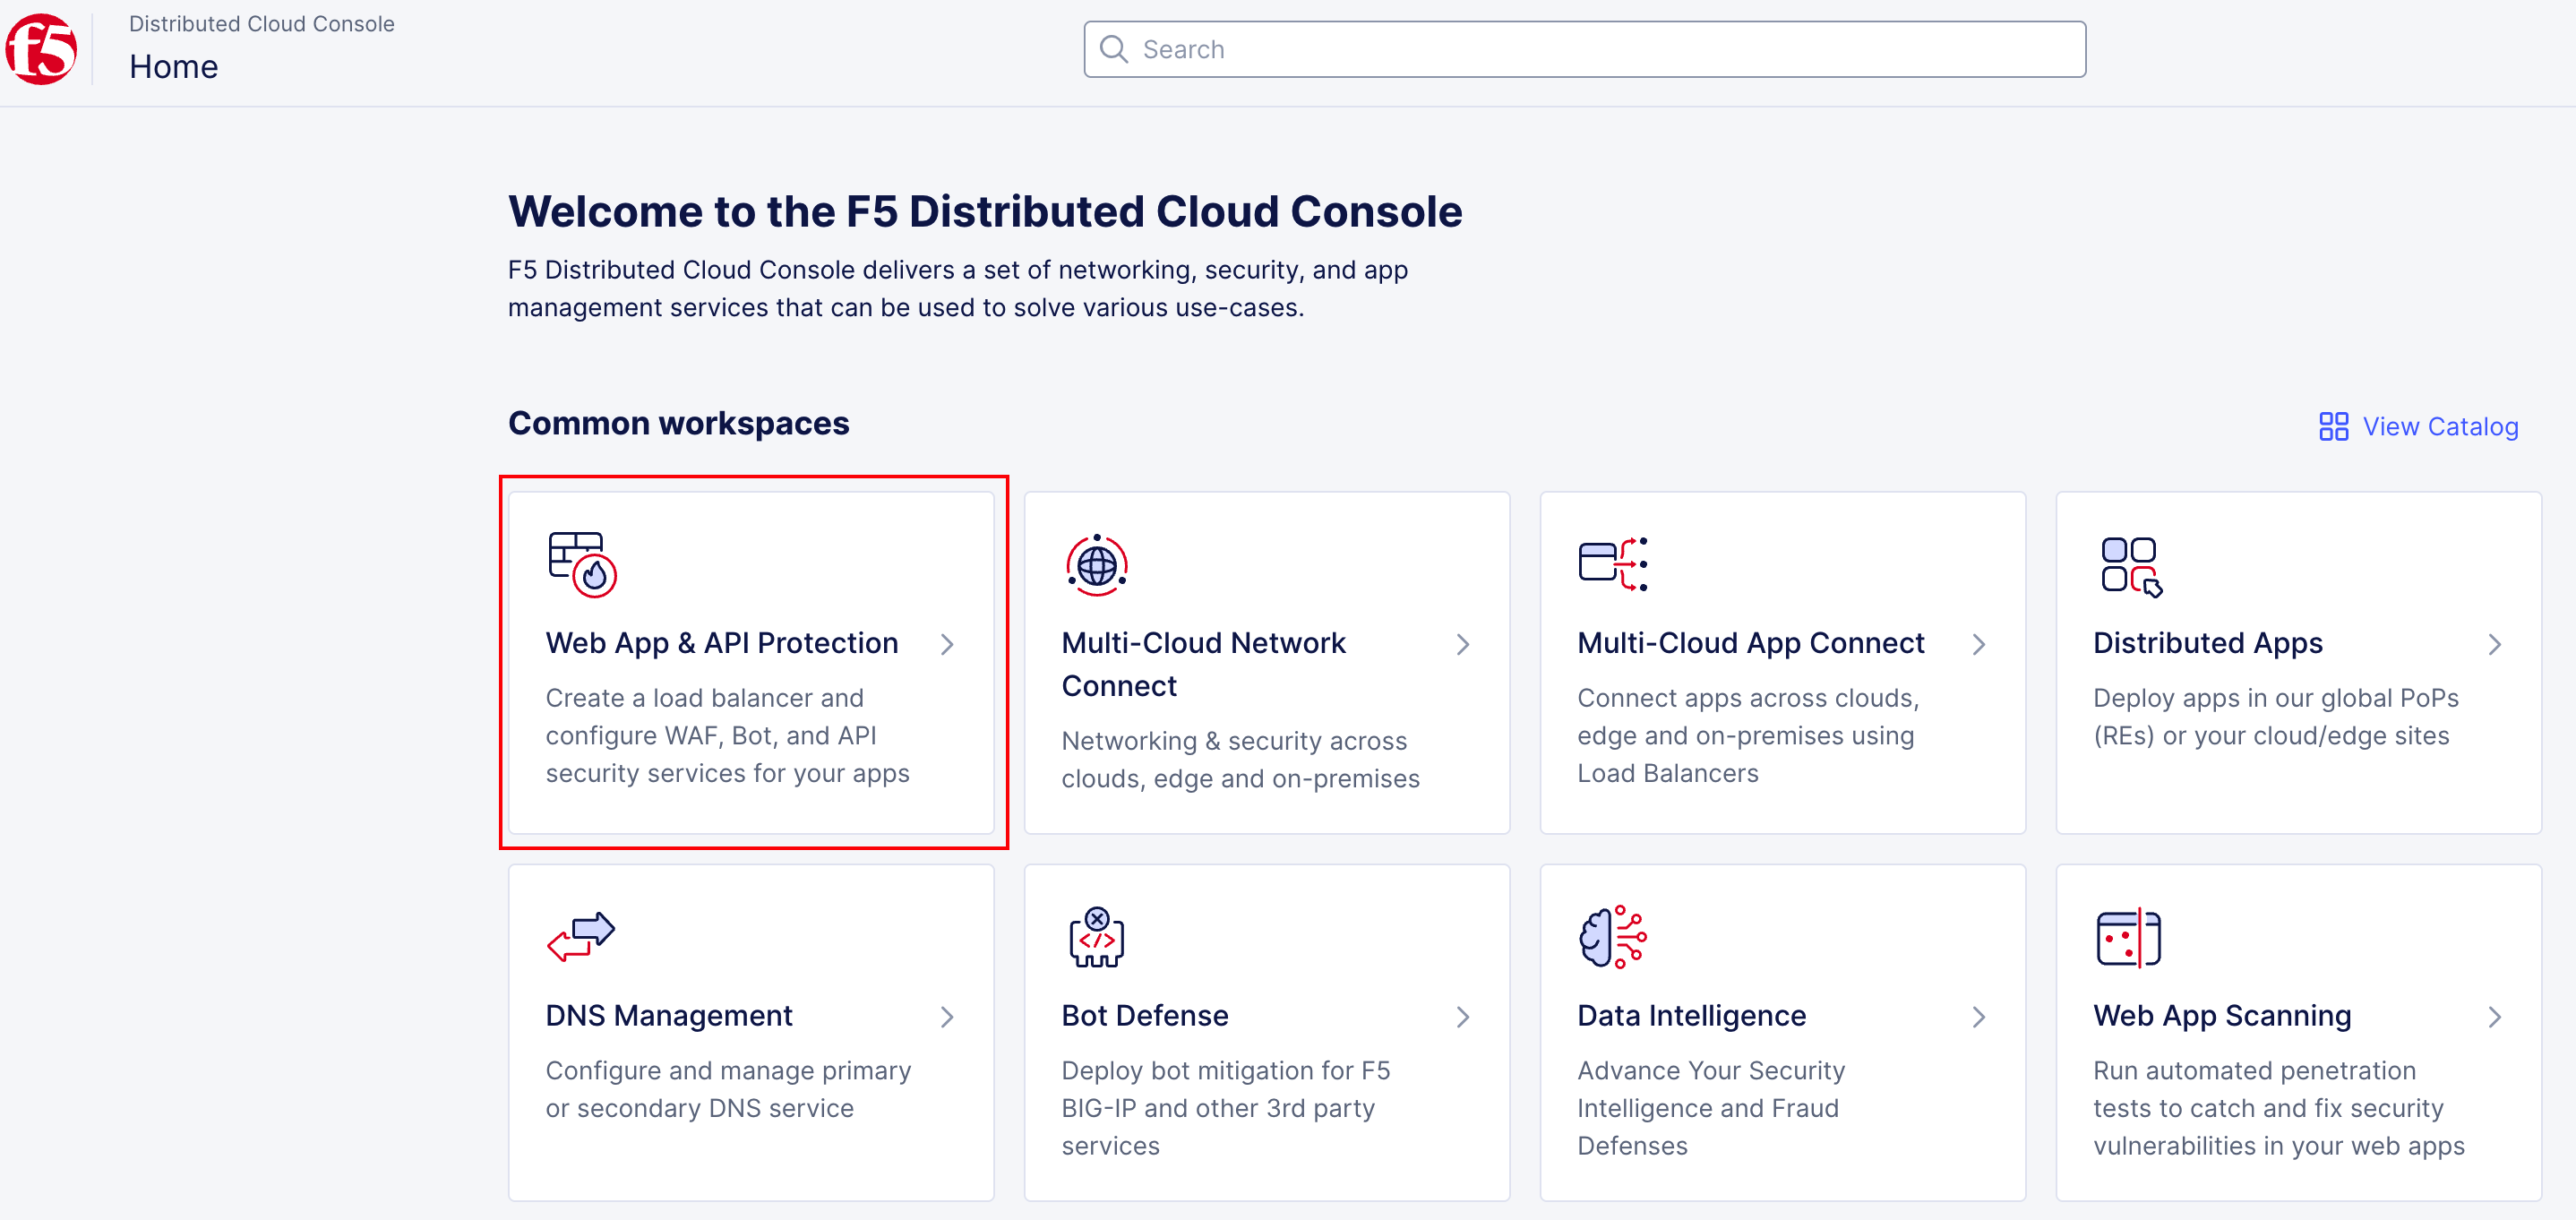
To go back to the main F5XC home page, click the F5 logo, then:
Click on the Web App & API Protection tile
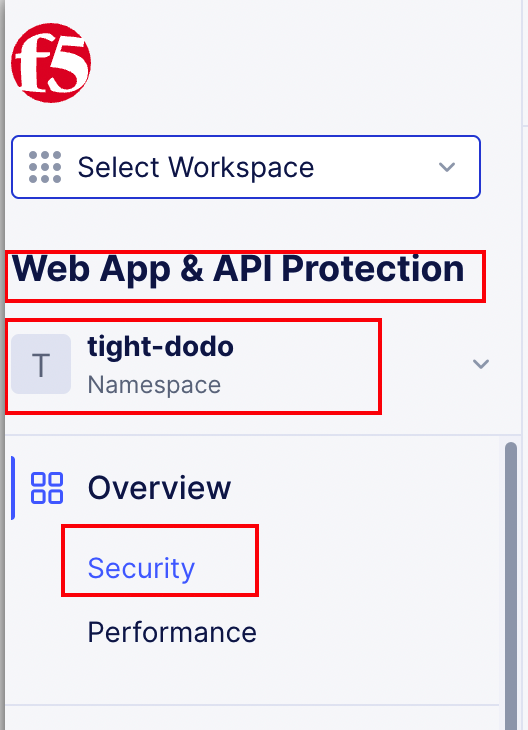
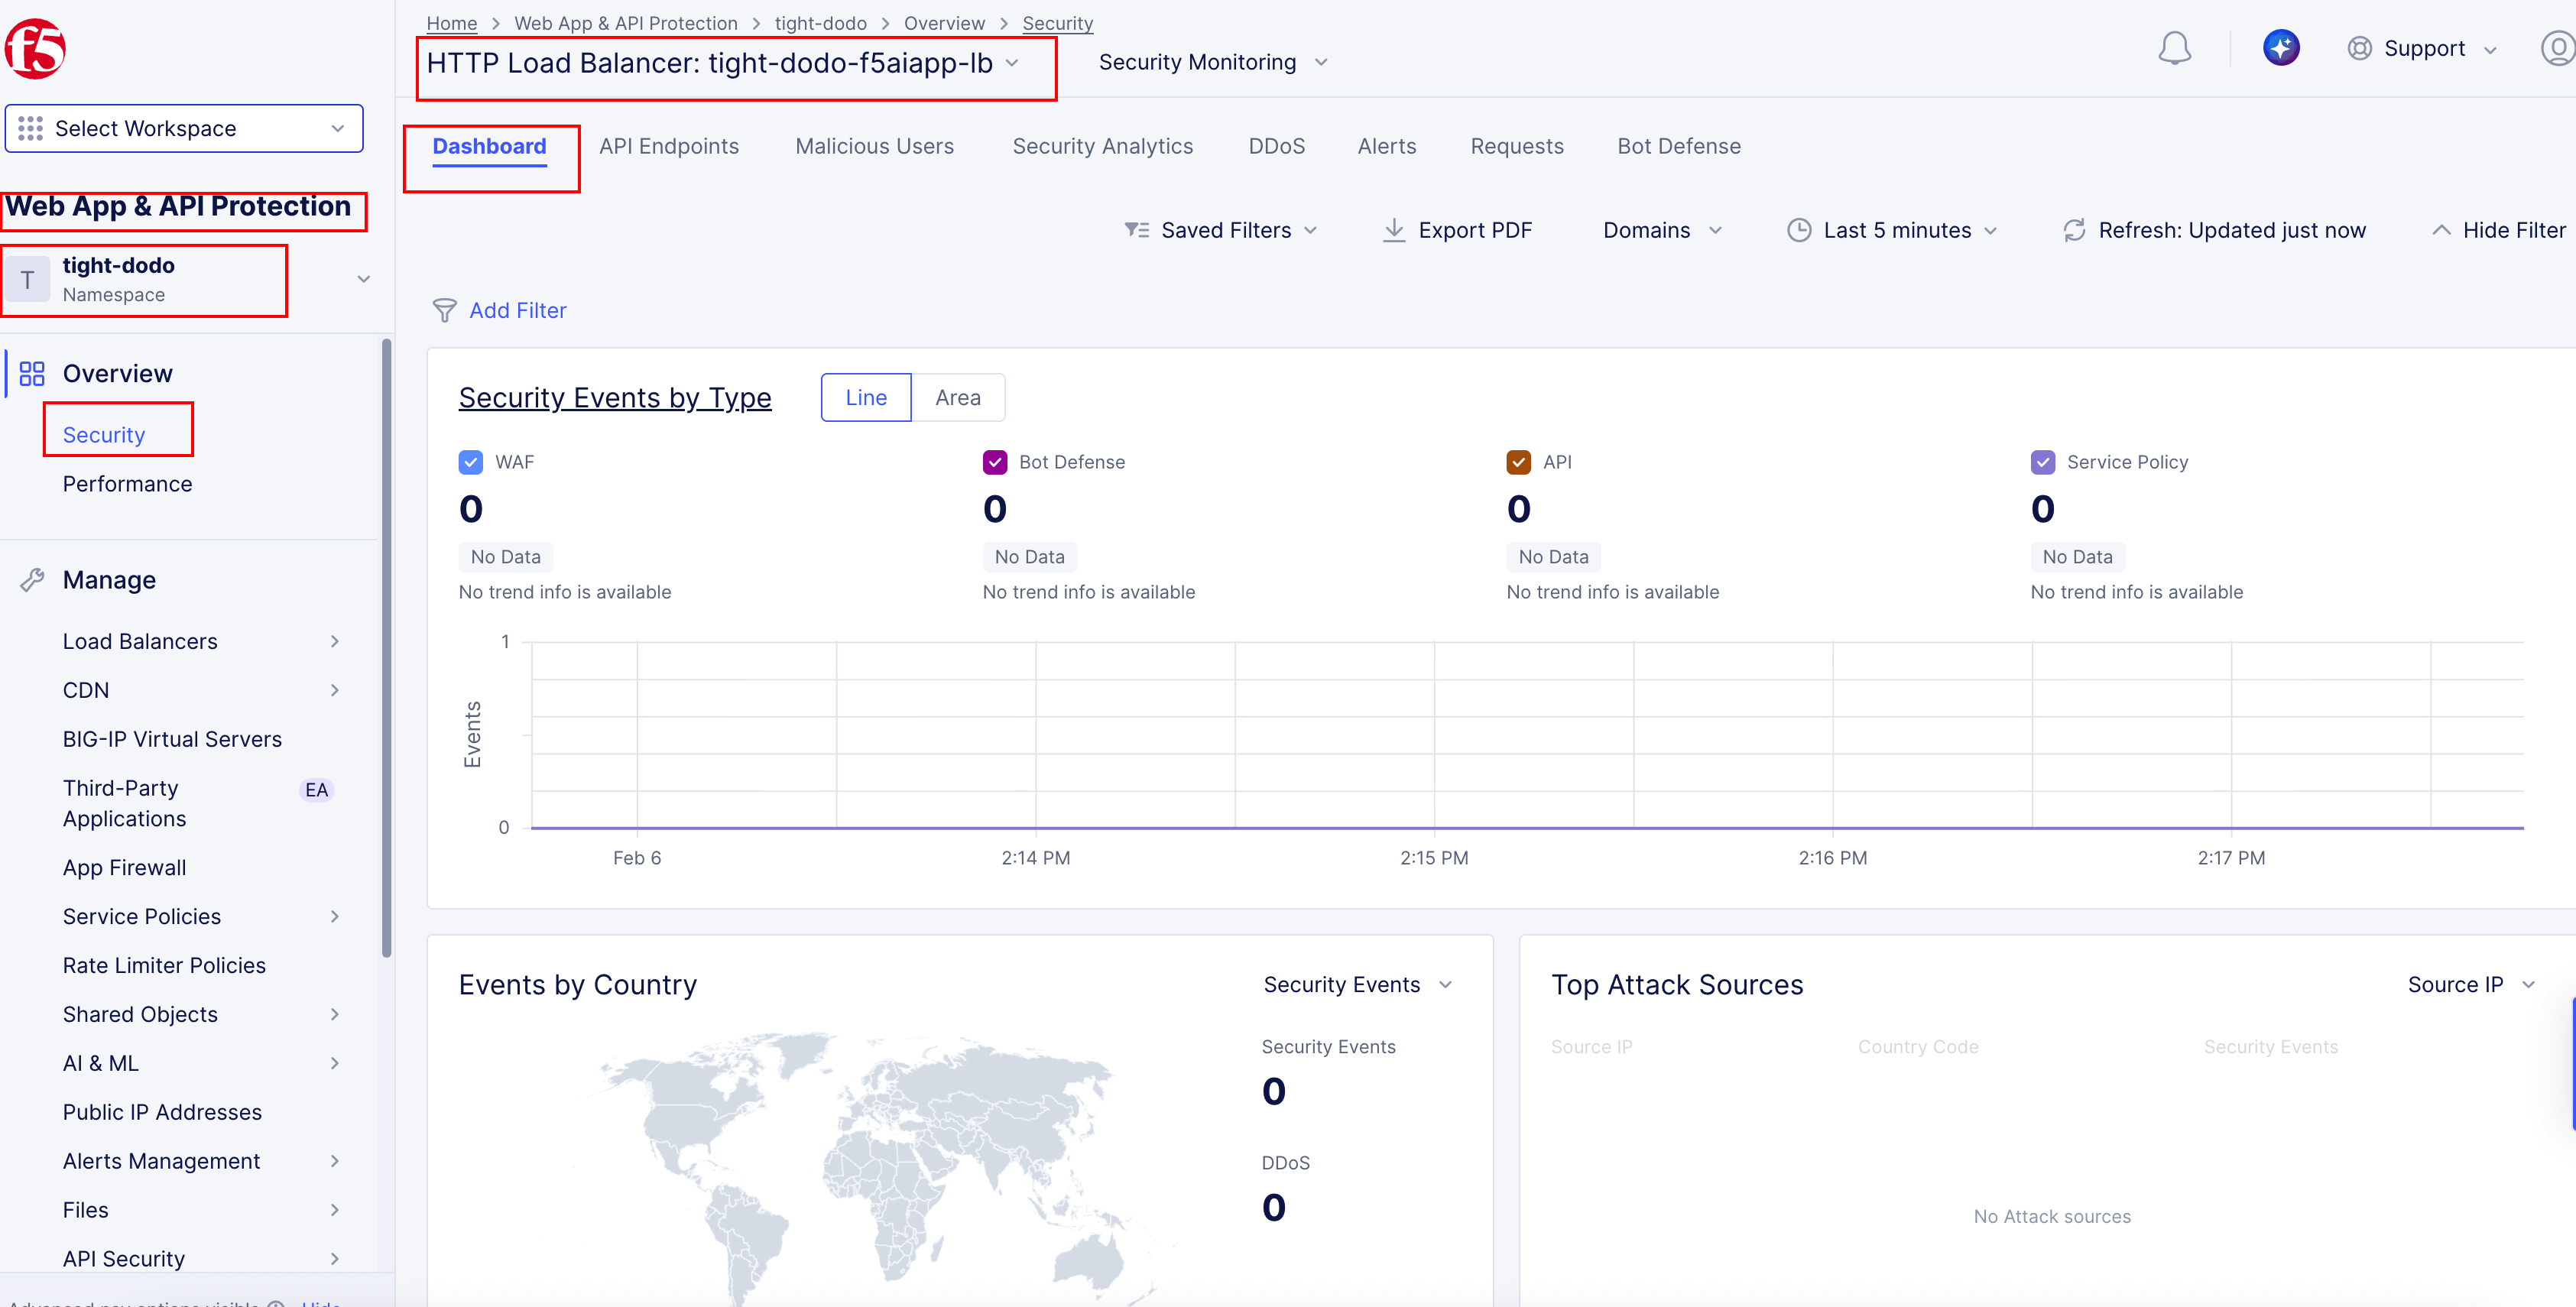
Under the “Overview” section, make sure you are the Security Dashboard
Then Scroll all the way down and click in your load balancer to go to the Security Dashboard for your application.
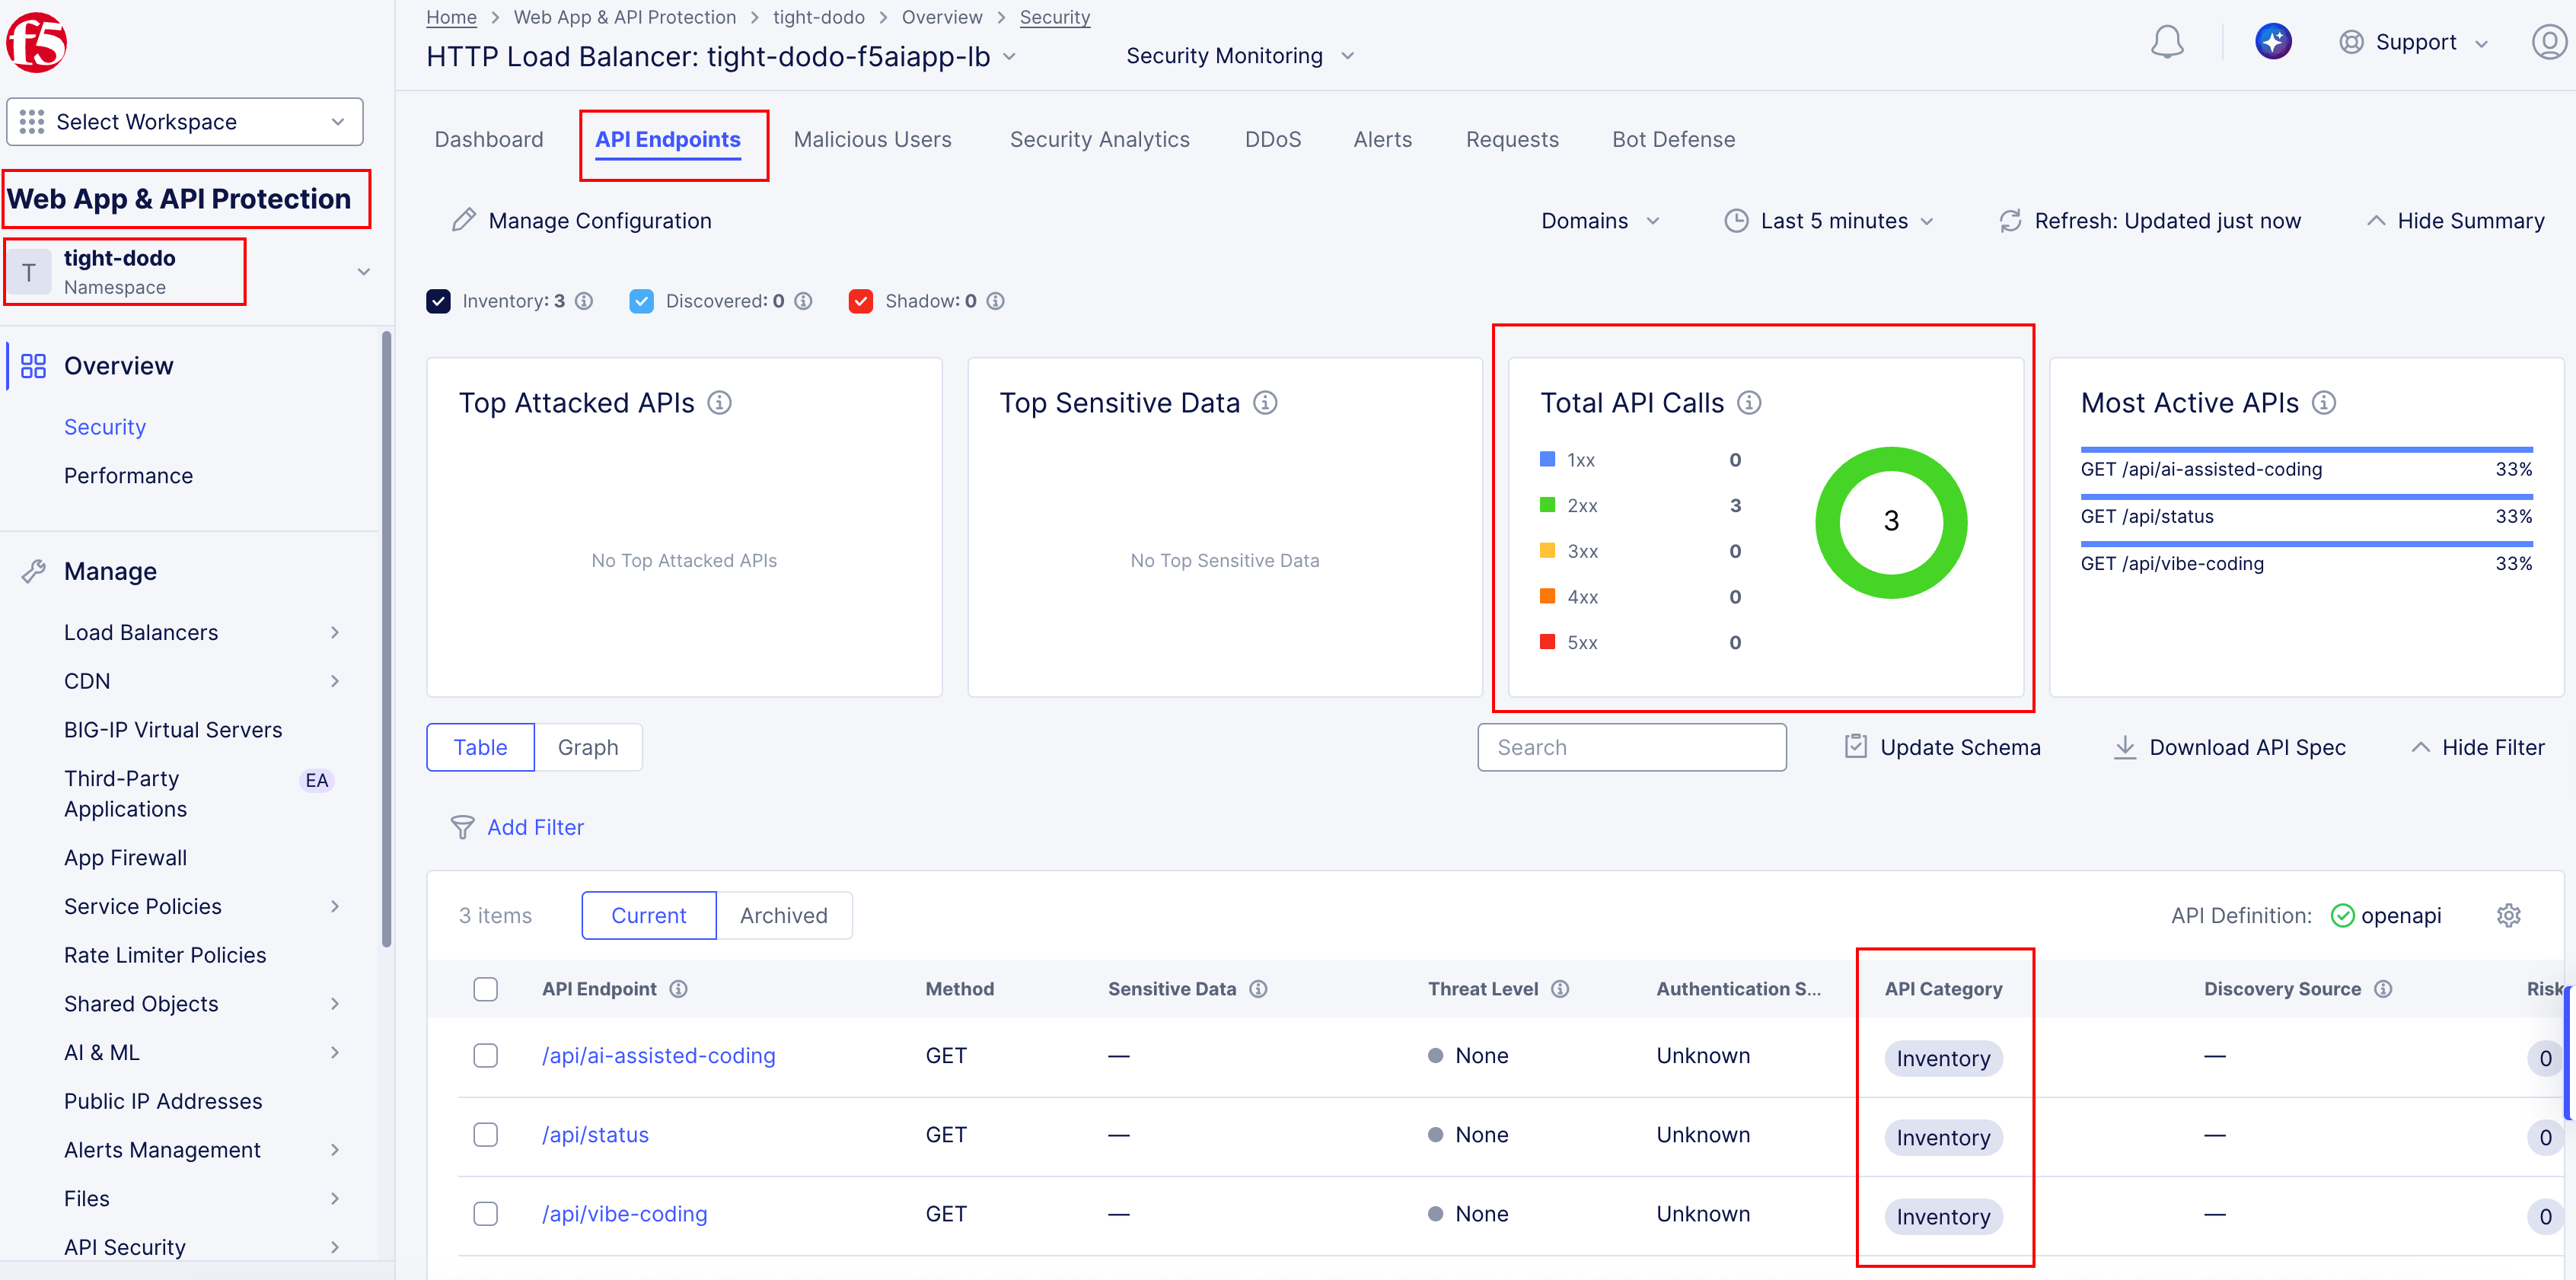
Review API Endpoints configuration and schema.
Click on the API Endpoints tab to see discovered API endpoints and their correlation with the OpenAPI specification. You can also switch from Table to Graph view for a visual representation.
What to notice:
API Discovery is now enabled for the application.
Discovered endpoints align with the OpenAPI specification.
Runtime traffic is being analyzed against expected API behavior.
Wrap-Up
You have successfully:
Extended a live application using AI-assisted coding
Introduced an OpenAPI specification into the workflow
Enabled API Discovery entirely through CI/CD
Deployed updated security controls without manual configuration
In the next task, you will build on this foundation by enabling Bot Defense and protecting user-facing flows such as login and contact pages—continuing the Code. Secure. Repeat. cycle.