F5 Distributed Cloud > F5 Distributed Cloud: Web Application Security & Scanning Source | Edit on
Lab 4: Web App Scanning
Objective:
Analyze a baseline scan, configure web app scanning, and compare results with a post-protection scan to demonstrate the effectiveness of F5 Distributed Cloud.
Narrative:
Following the successful rollout of the F5 Web Application Security policies, there is a request to setup OWASP Top 10 Web Vulnerability Scanning of the application and measure the security posture of the application over time. Currently ACME Corp does a penetration test every six months which requires an external vendor and lots of effort. ACME Corp would like to move to weekly scans with more automation and less effort. There is also a requirement to run the scan from a specifically allowed known IP addresses so the security team can setup specific rules to identify and allow the scans to come in from the the internet. After reviewing this requirement, ACME decides to evaluate F5 Distributed Cloud Web App Scanning. F5 Distributed Cloud Web App Scanning is an offering that lets you discover exposed assets and run automated penetration tests of your web applications and APIs.
Note
Expected Lab Time: 20 minutes
Lab 4 Summary-Web App Scanning: Configure continuous web application scanning for the ACME Corp web application using F5’s Web App Scanning service. You will first review a baseline vulnerability scan with no security protections in place, highlighting multiple OWASP Top 10 findings. Next, you will outline and configure an automated scan (scope, schedule, and scanner IPs) without waiting for the scan to complete. Pre-generated before-and-after scan reports are provided to demonstrate the impact of F5 Distributed Cloud security controls. After applying WAF, bot defense, and malicious user protections, the post-scan report shows a significant reduction in exposed vulnerabilities, validating the effectiveness of the deployed protections.
Note
This lab includes supplemental pre-security and post-security assessment results from a deliberately vulnerable test application used in place of the public-facing AppWorld application to better demonstrate the effectiveness of the security controls and remediation measures implemented. These results were generated using the same security protections and policies applied within the lab; however, differences in findings are expected due to the intentionally vulnerable nature of the test application. All results are provided for demonstration and evaluation purposes within a controlled lab environment only.
Task 1: View Existing Scan
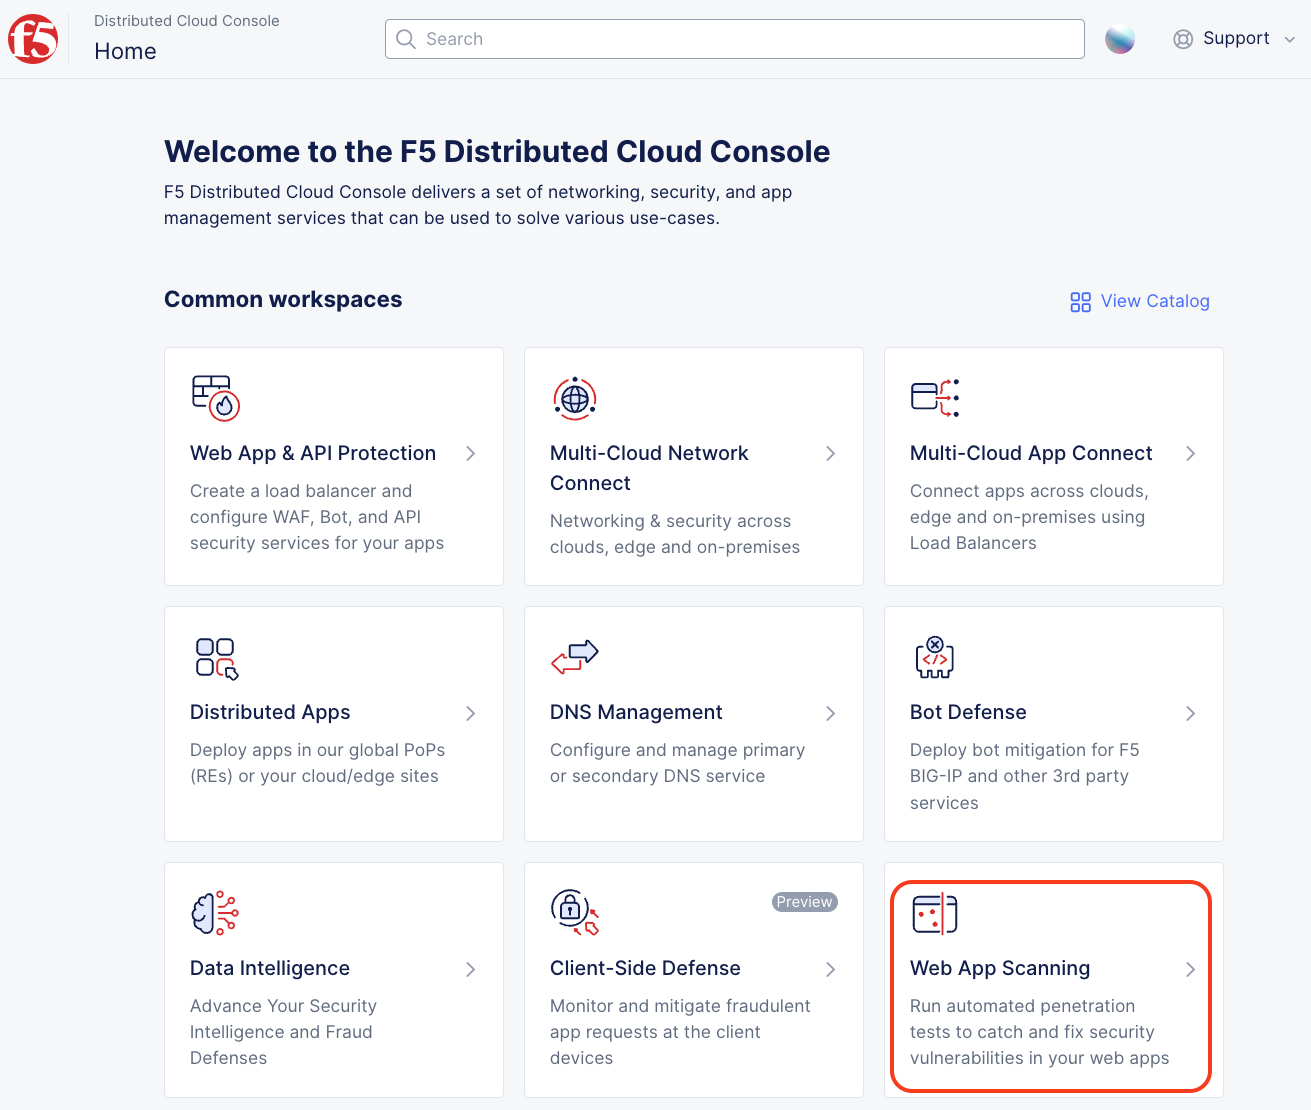
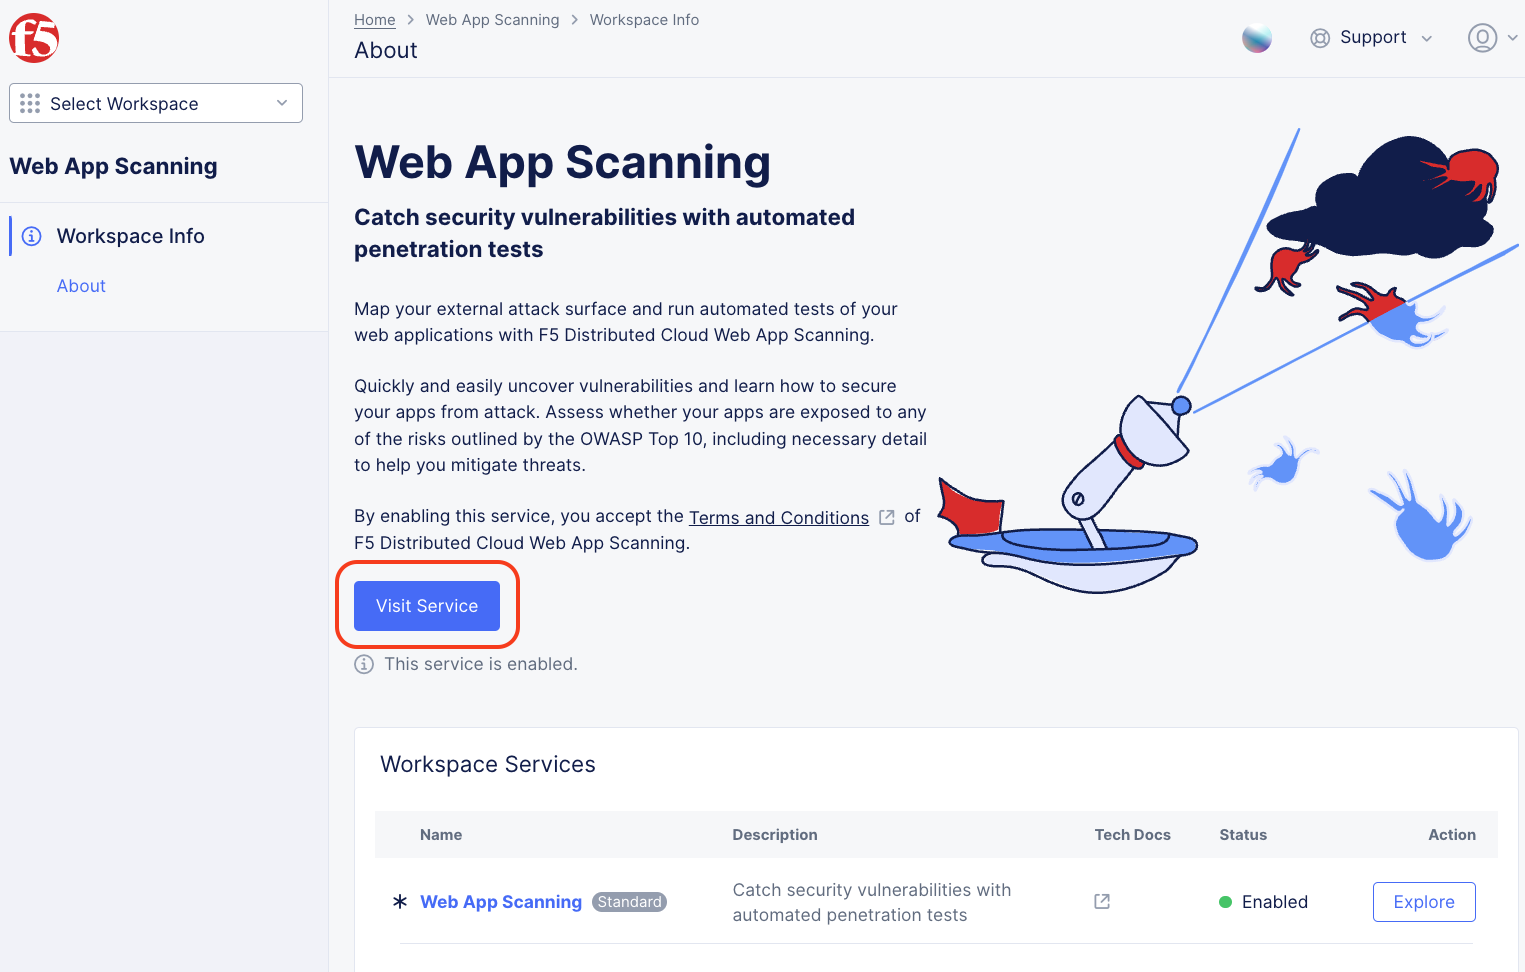
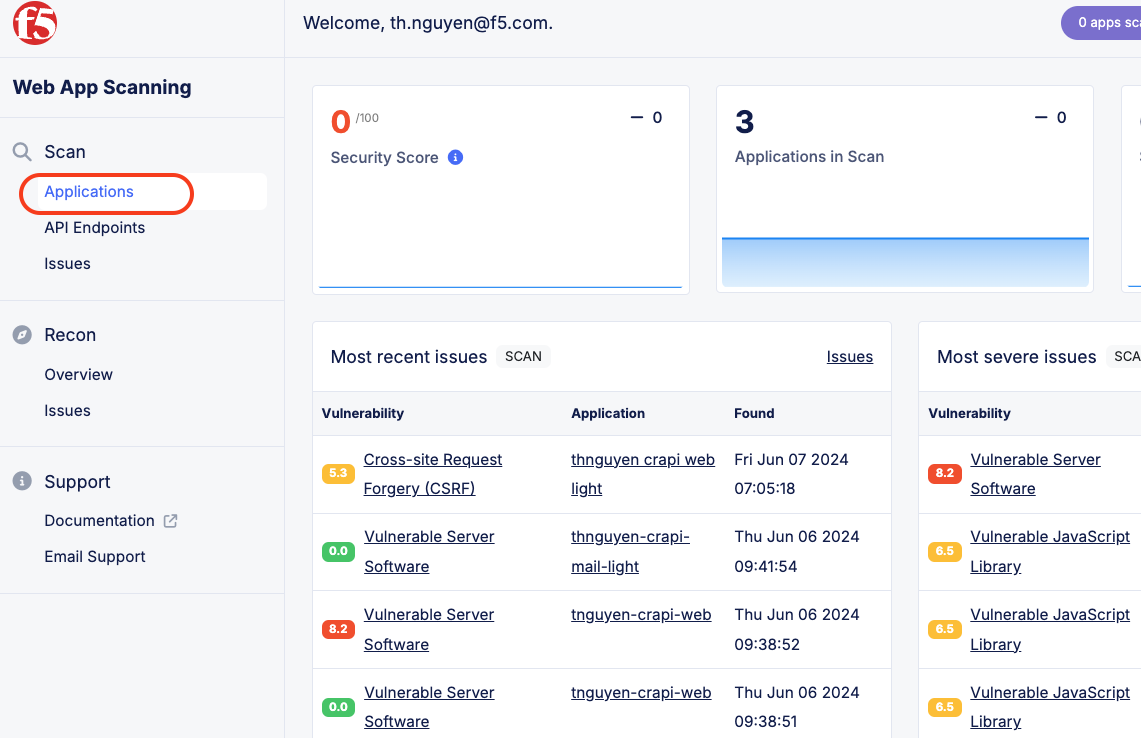
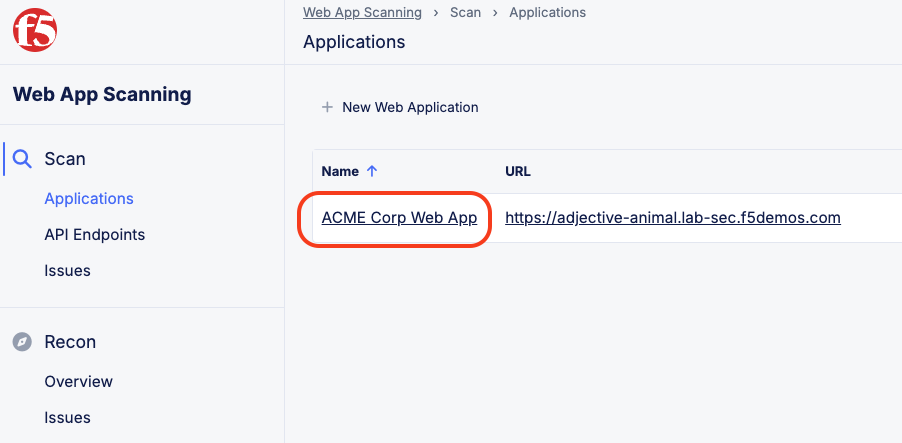
In this lab, you will evaluate the security posture of the ACME Corp web application using F5 Distributed Cloud Web App Scanning. Before configuring a new scan, you will first review a pre-existing vulnerability scan that was performed before any F5 Distributed Cloud security controls were applied. This baseline report represents the application in its original, vulnerable state and highlights multiple security findings. After reviewing the baseline scan, you will proceed through the lab as normal by configuring web application scanning. At the conclusion of the lab, you will review a second pre-existing scan report that was generated after WAF, bot defense, and malicious user protections were enabled, demonstrating a significantly improved security posture. This approach allows you to clearly see the before-and-after impact of F5 Distributed Cloud without waiting for long-running scans to complete during the lab. Steps to Locate the Baseline Scan Report:
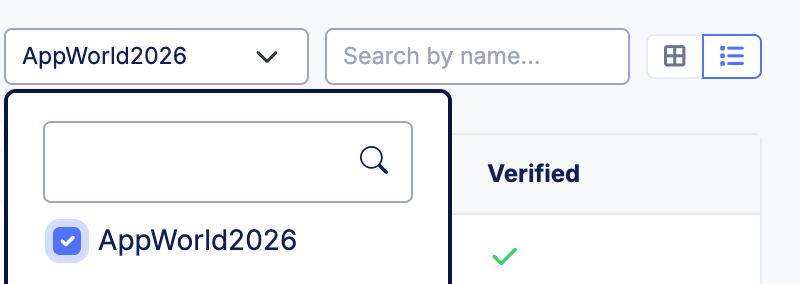
6. In the list of available scans, locate & select: AppWorld 2026 Baseline Vulnerability Scan. Note In the upper right-hand corner, select the Filter by tags… drop-down menu and enable the AppWorld2026 entry. Alternatively, you can search for the scan by name using the Search by Name field by typing in AppWorld.
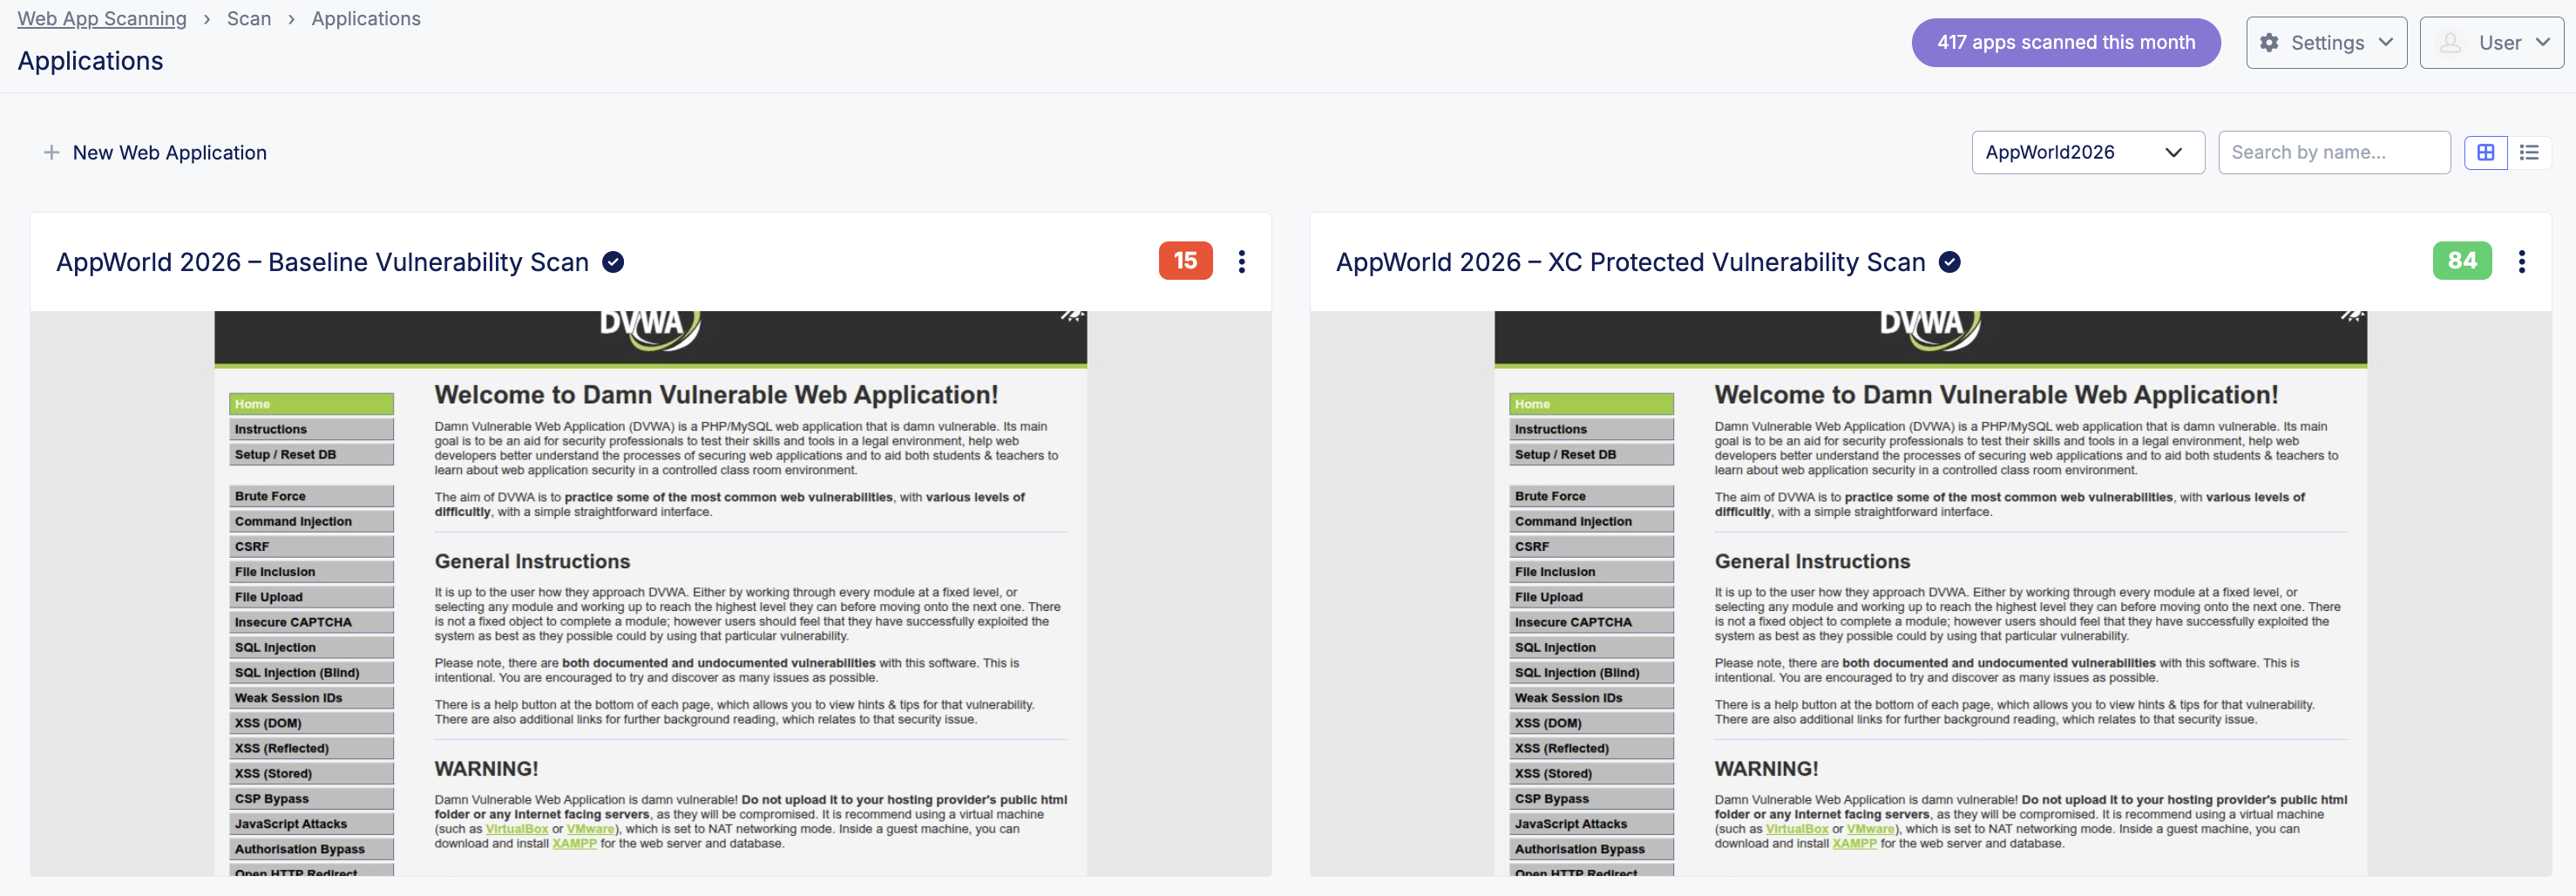
Here are the results after searching for the appropriate scan report:
|

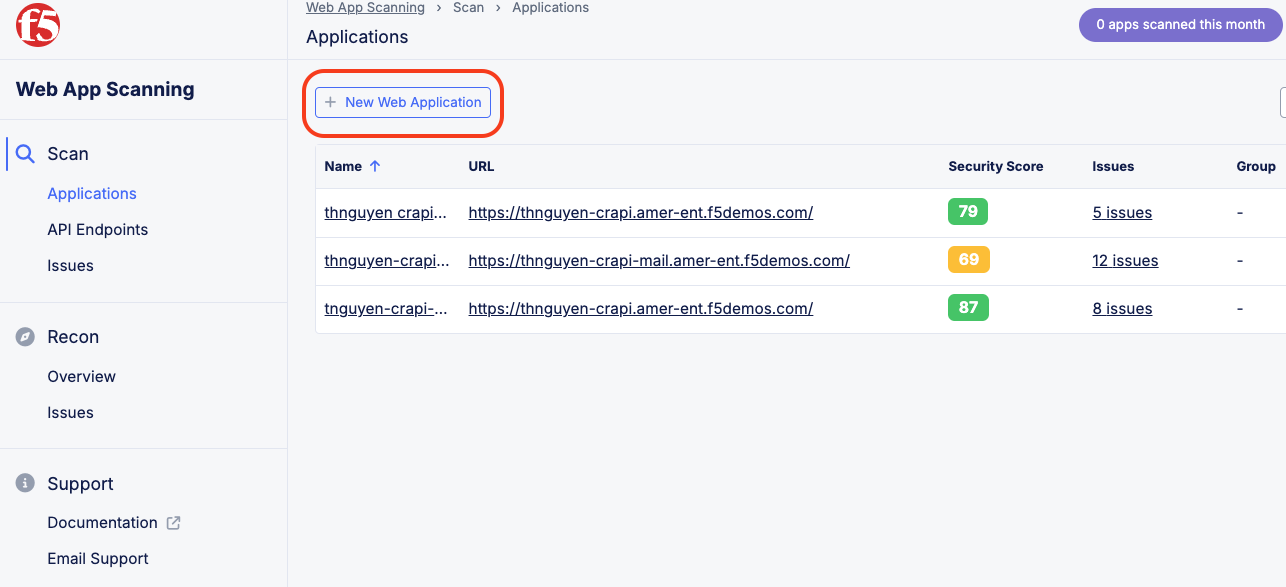
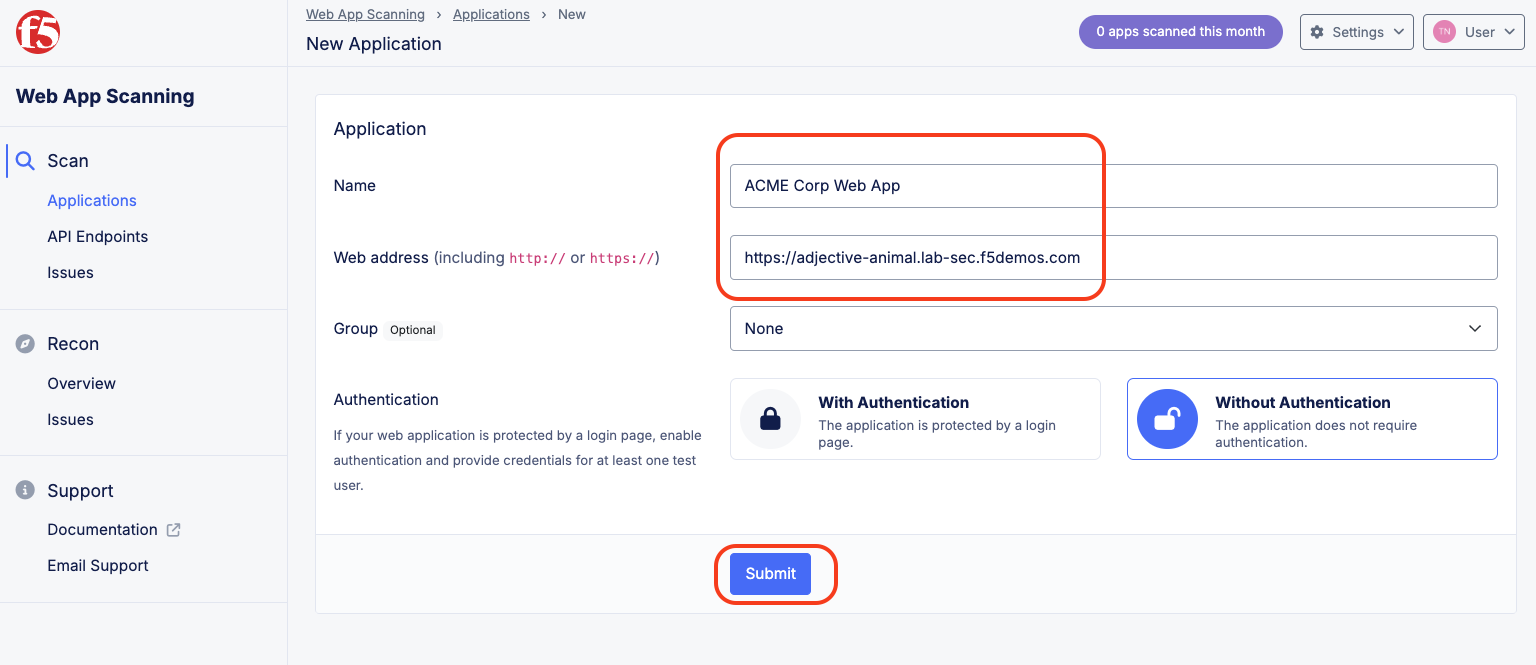
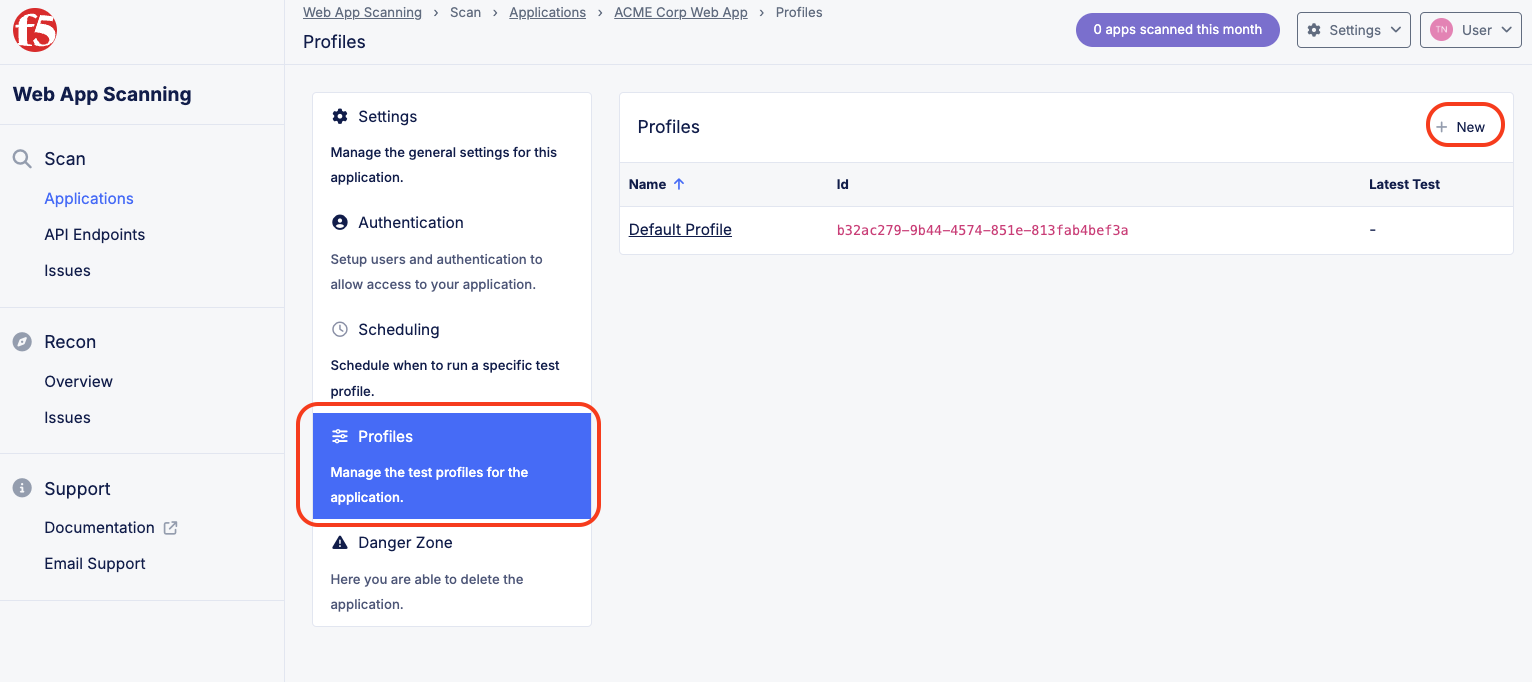
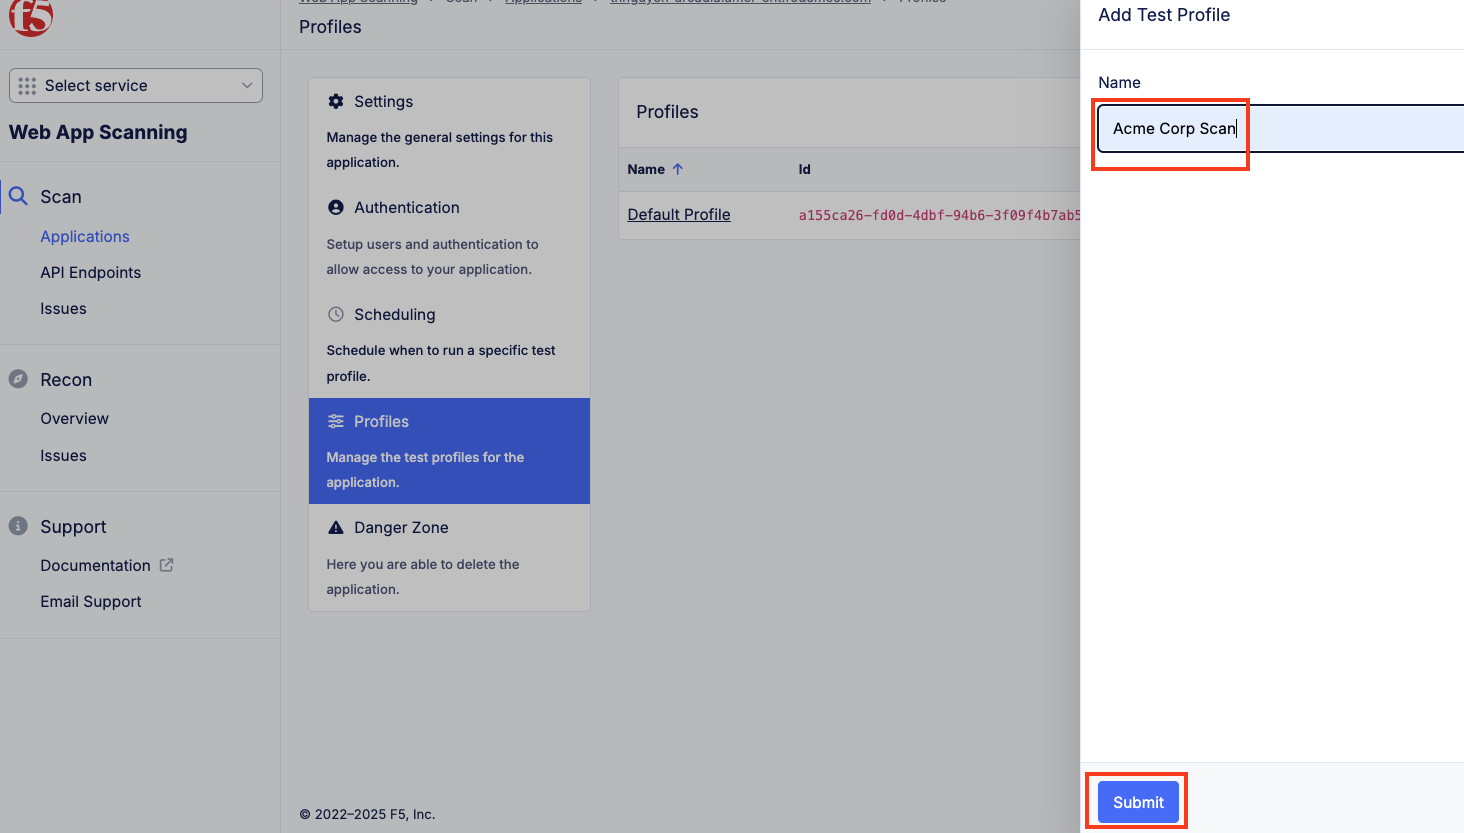
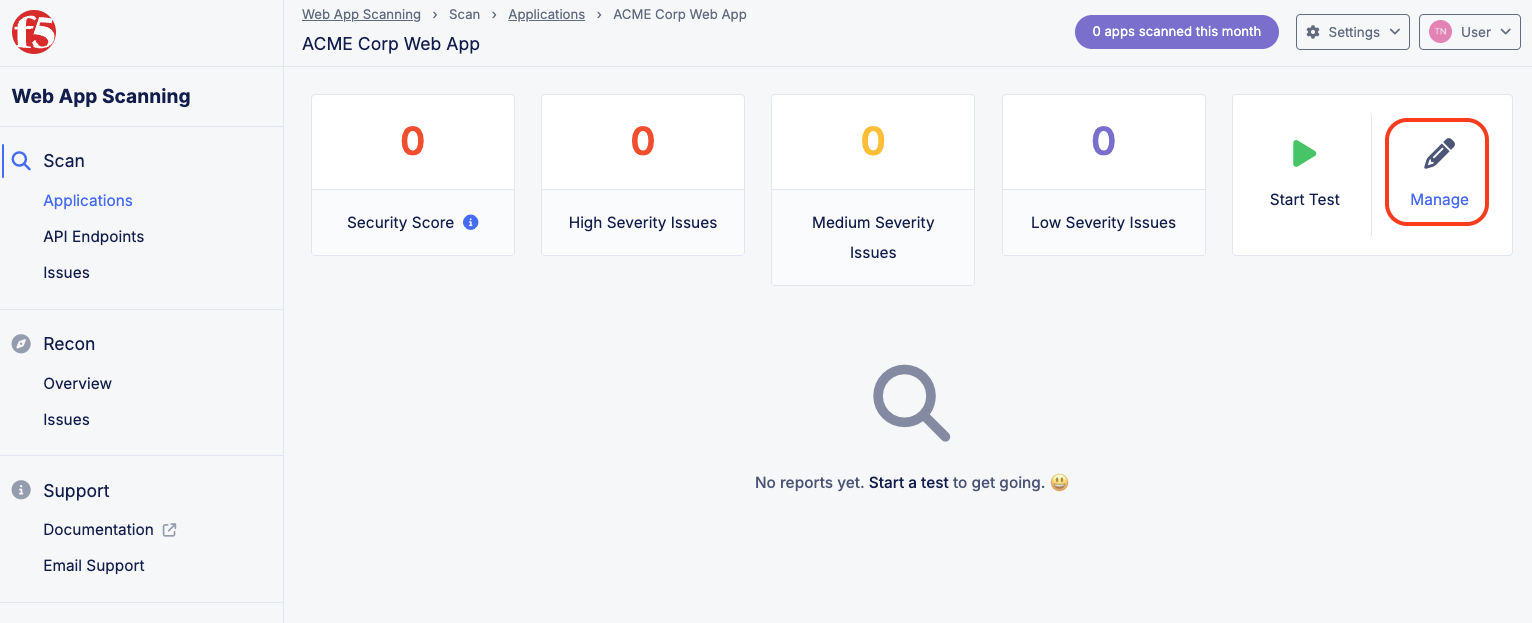
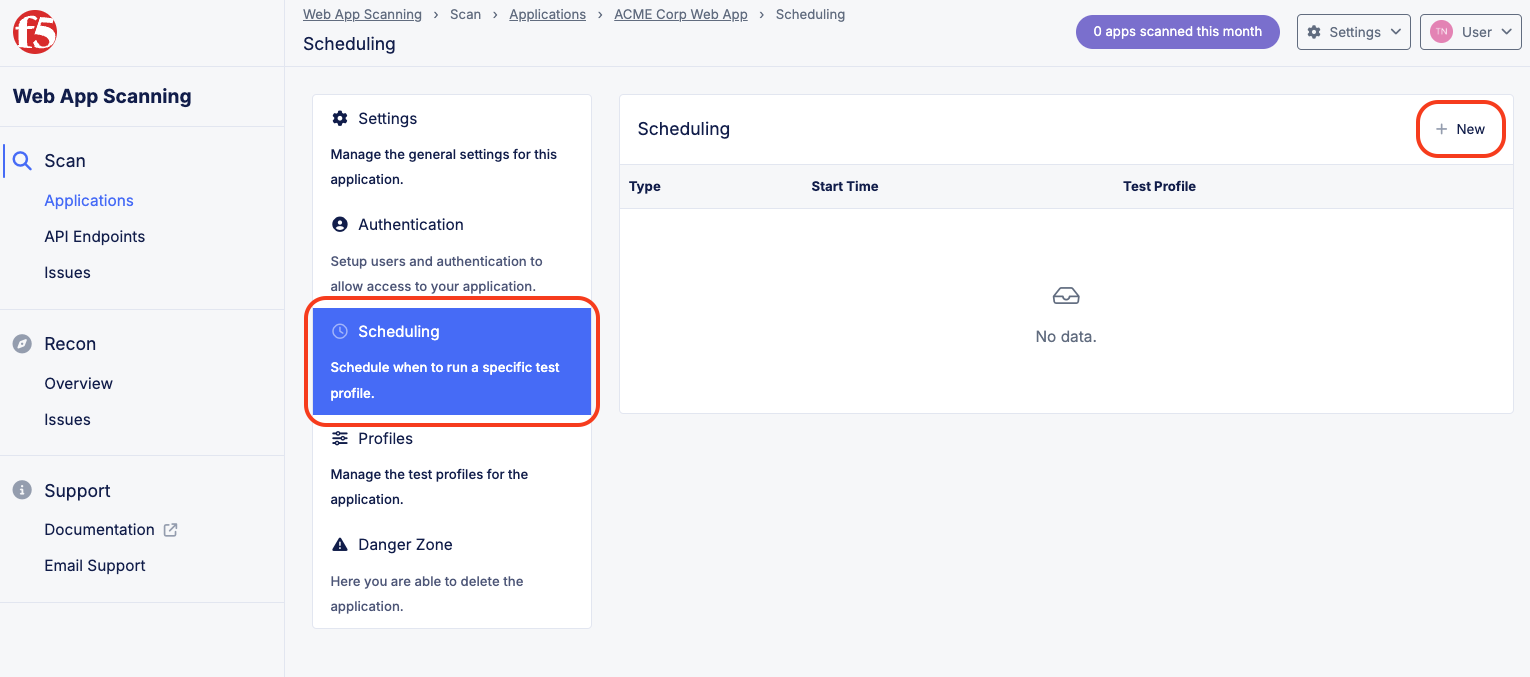
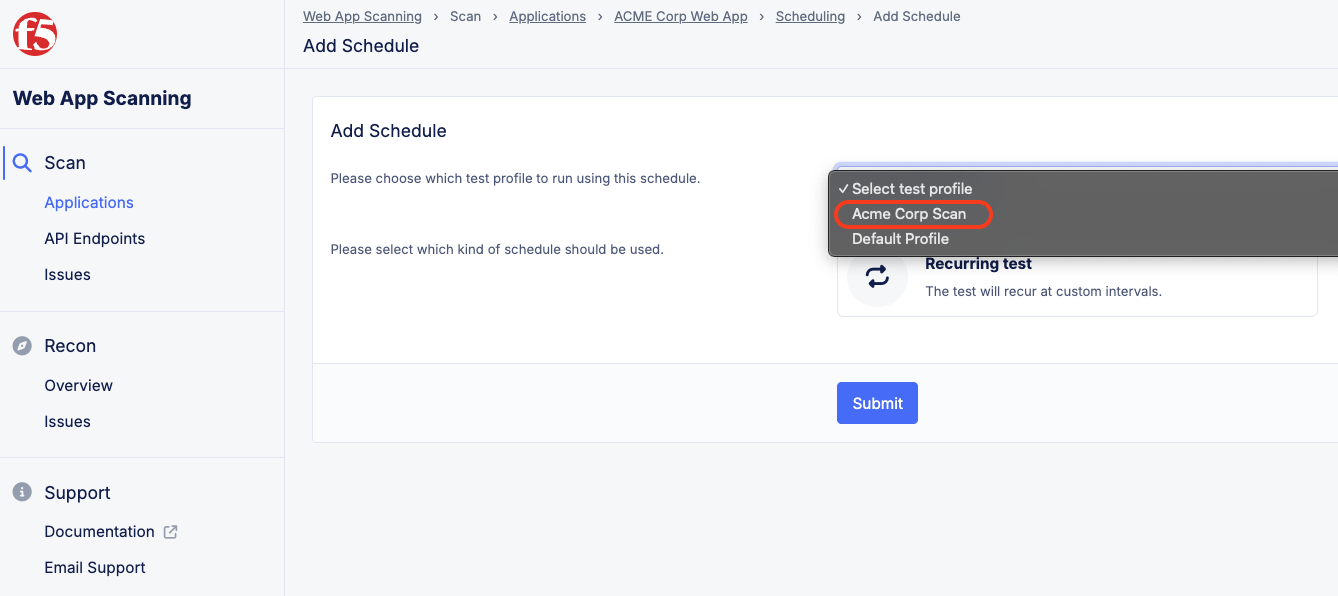
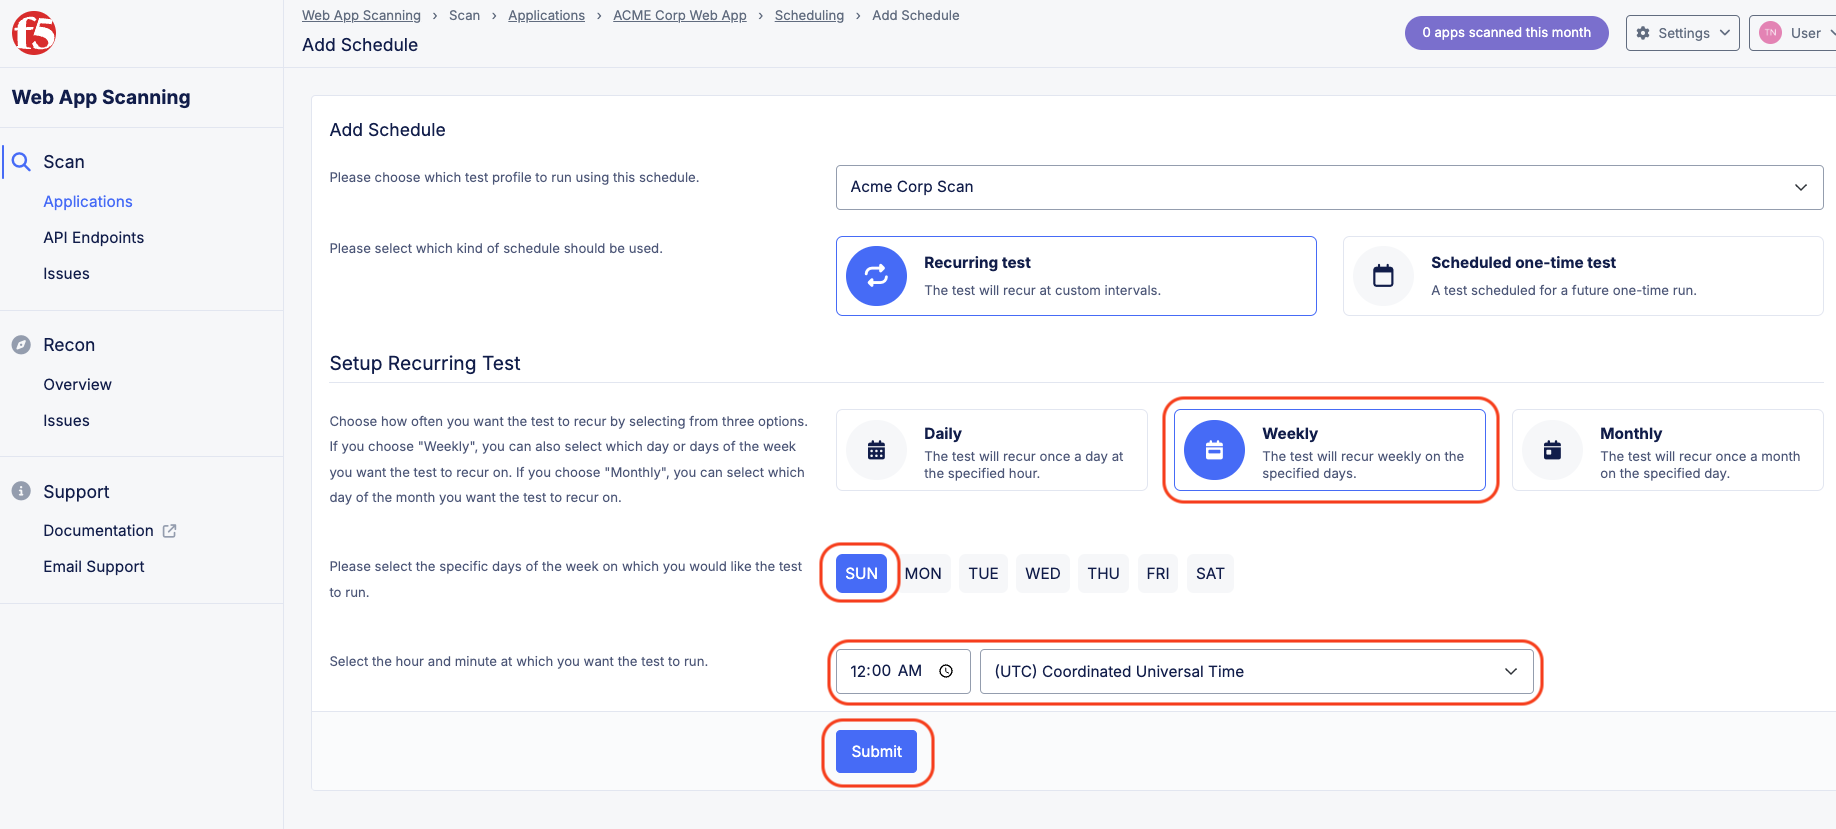
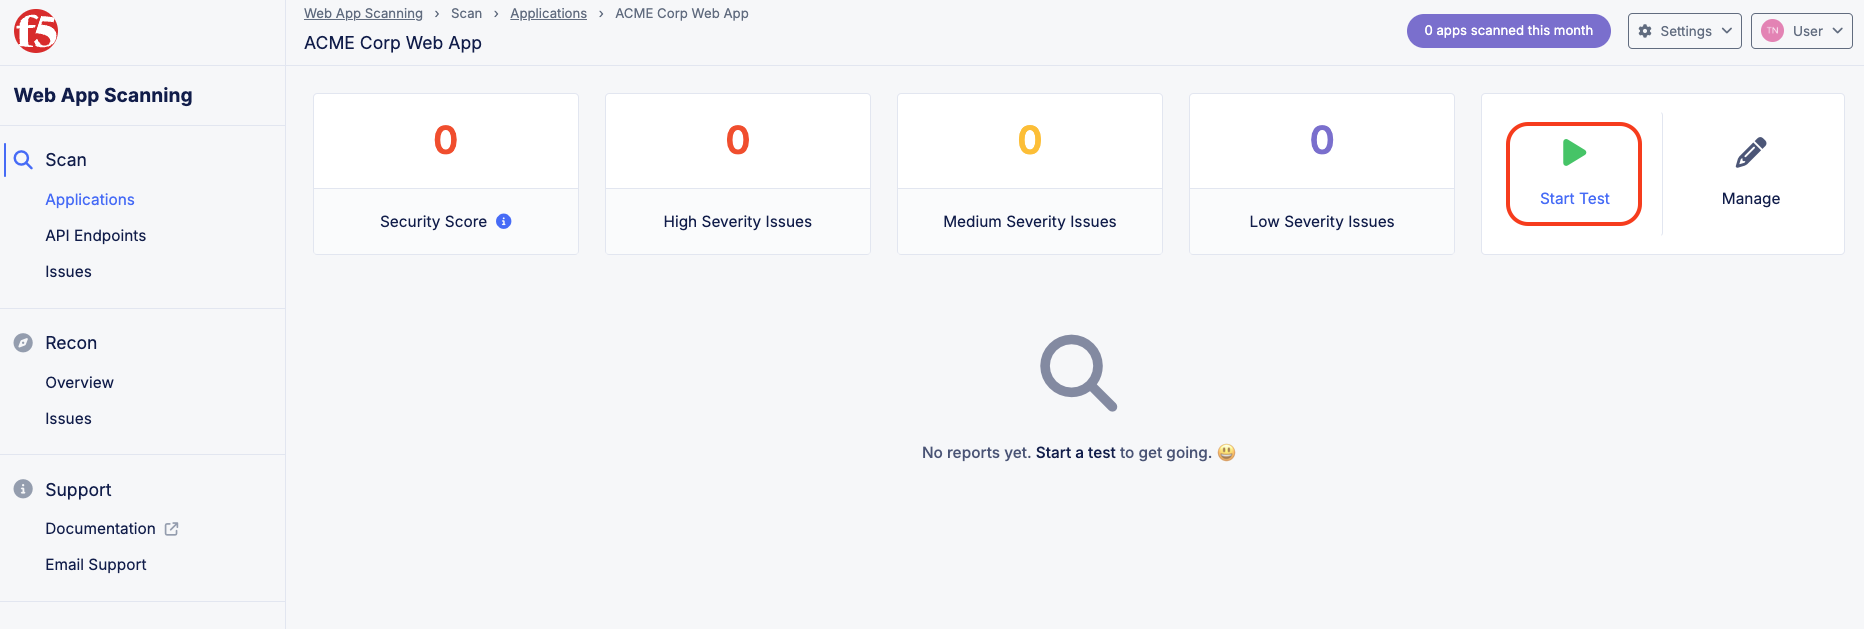
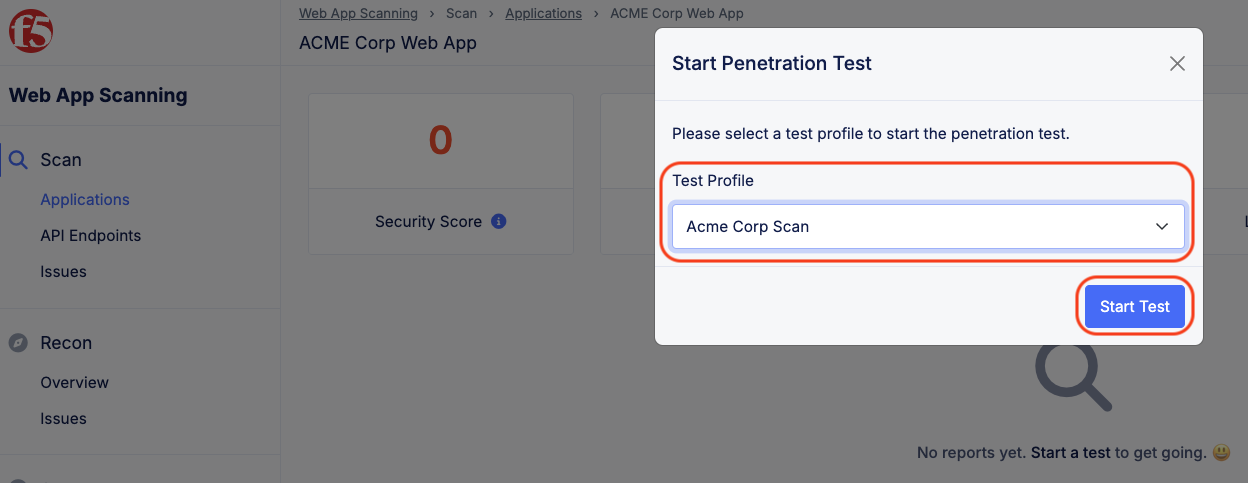
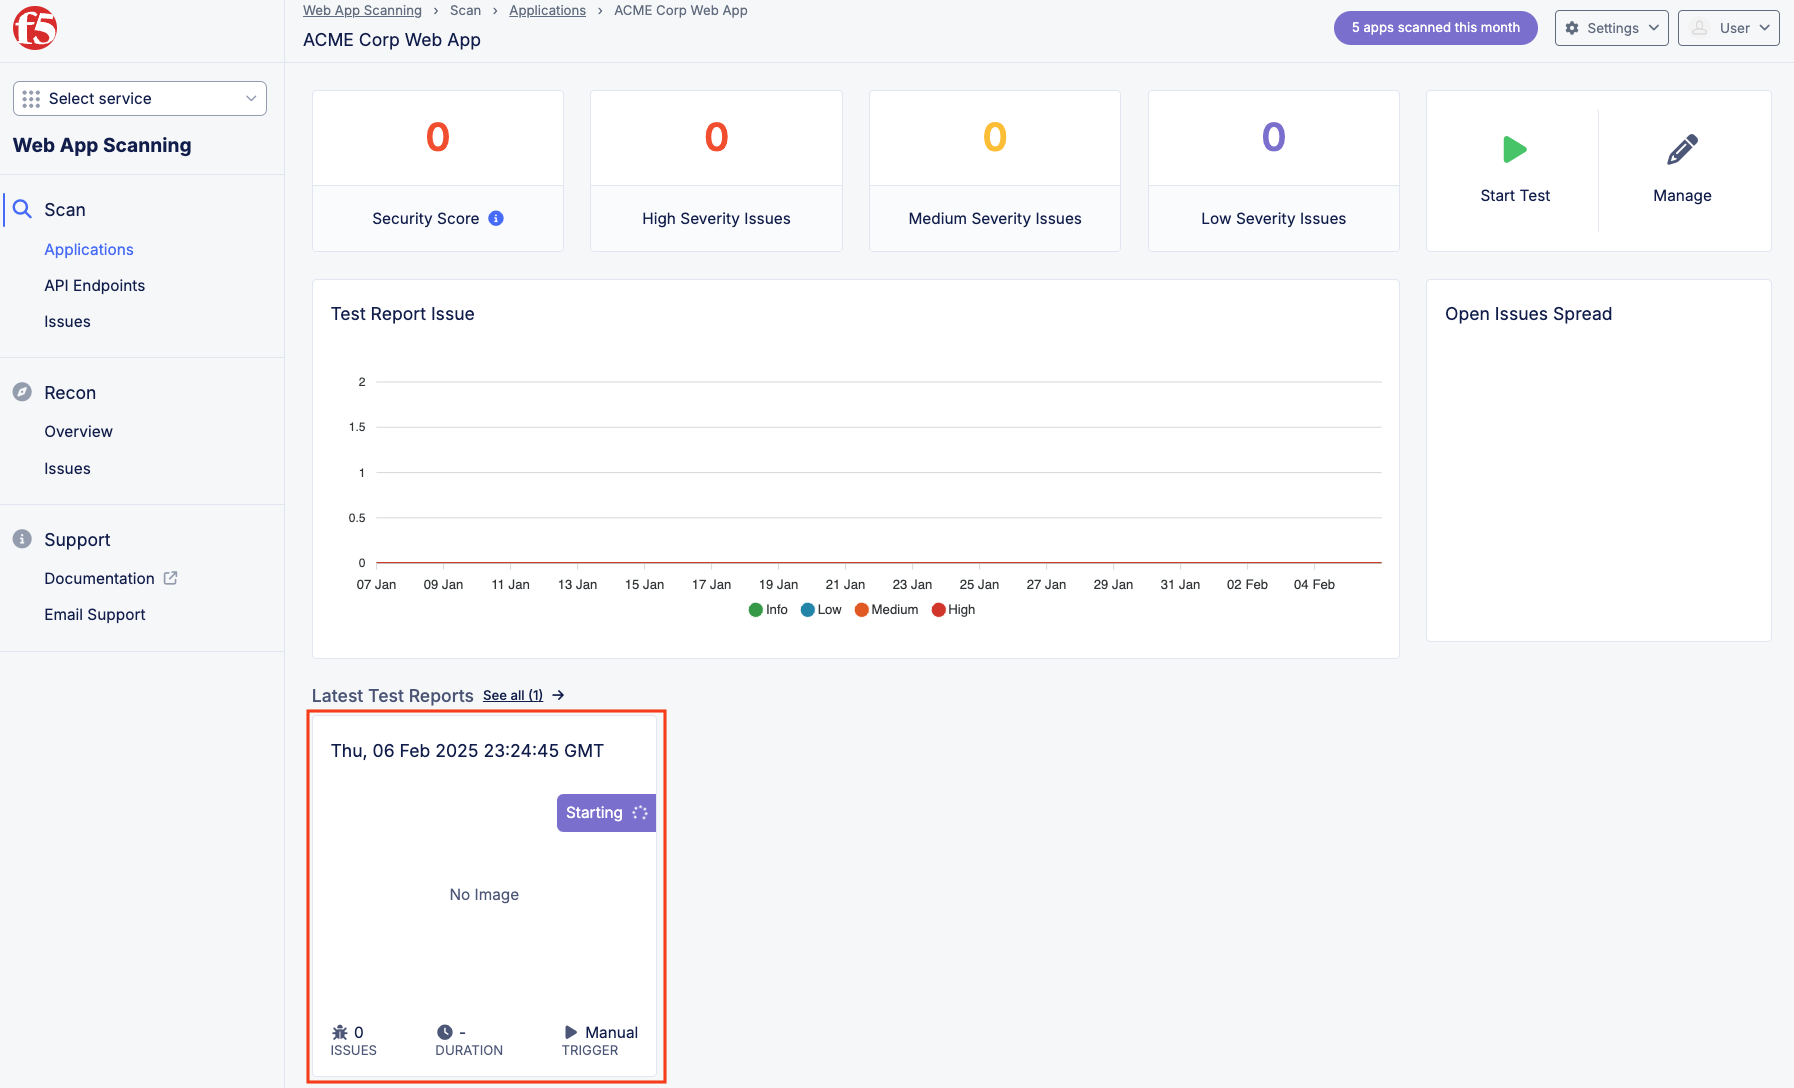
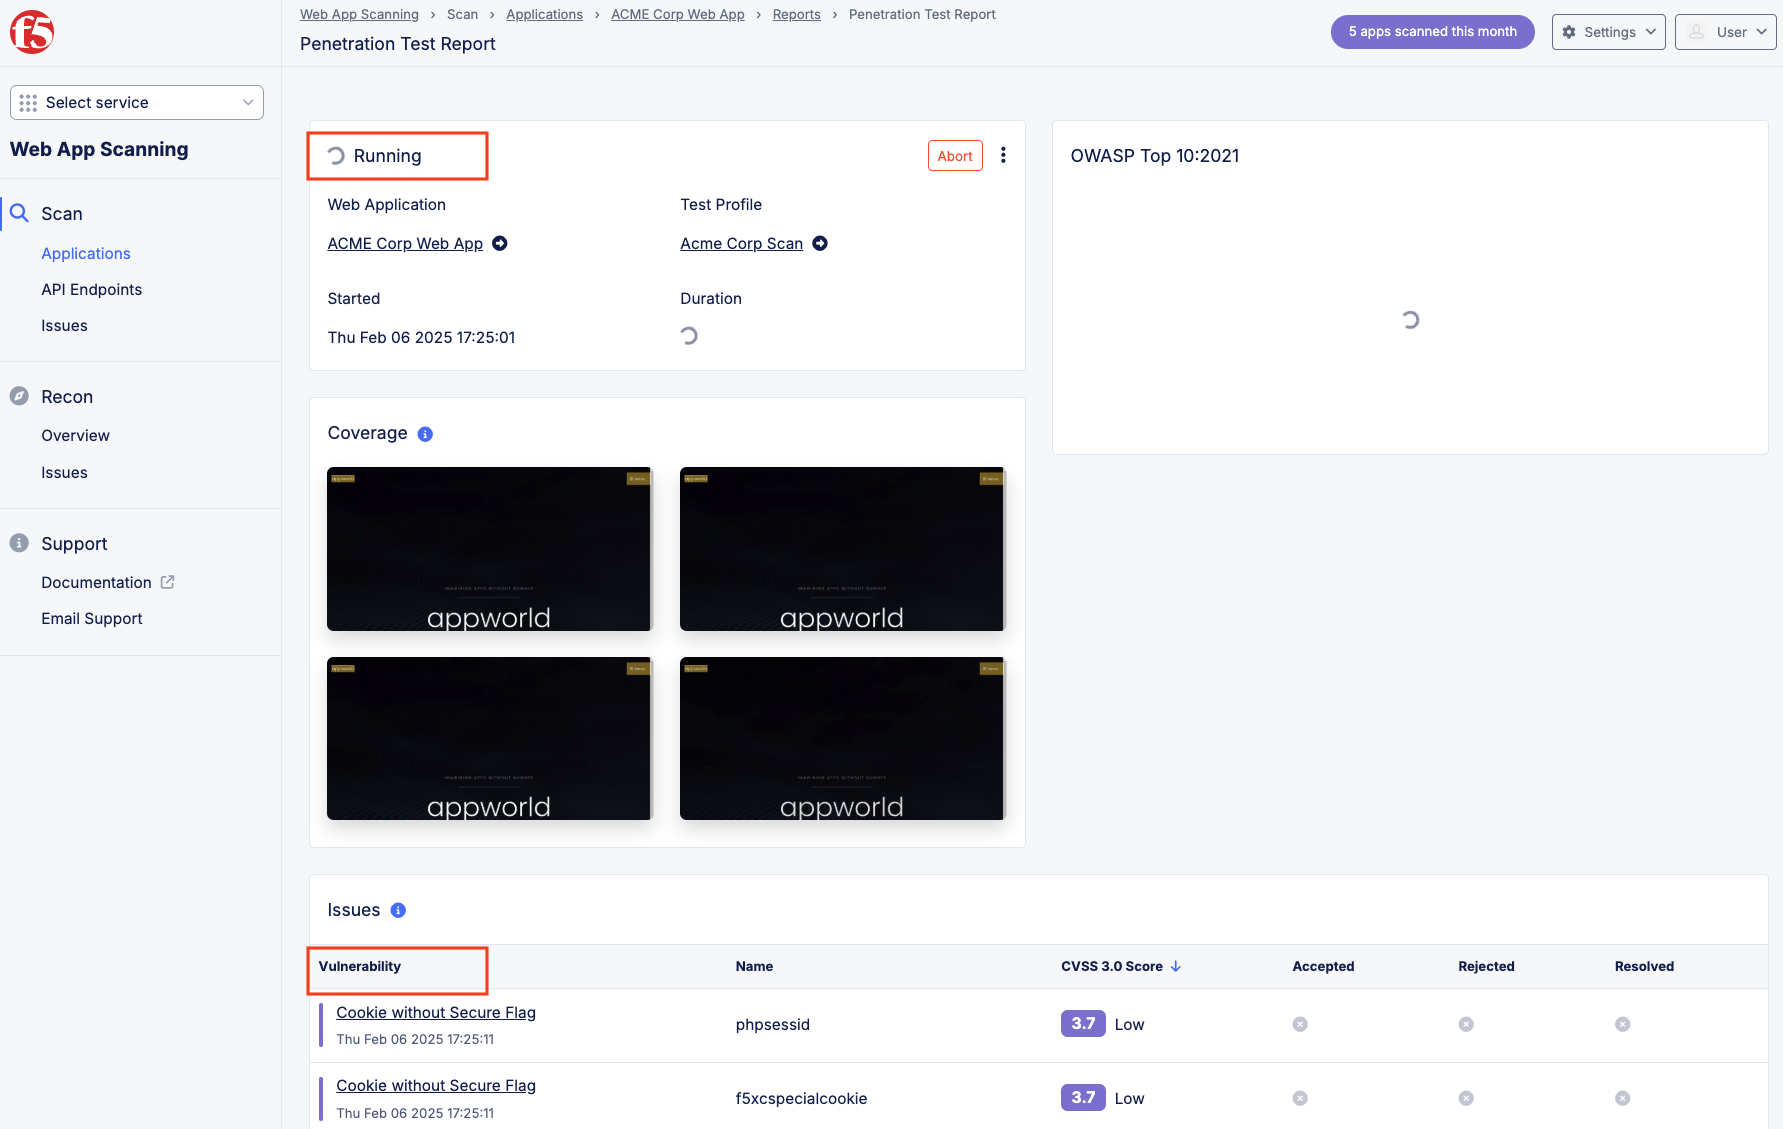
Task 2: Configure a Web Application Scan
Now that you had a chance to review the Baseline Scan report in this next task, you will setup a penetration test of your internet facing application to report on OWASP Top 10 for Web Applications. Below are some of the tests conducted by the Scan:
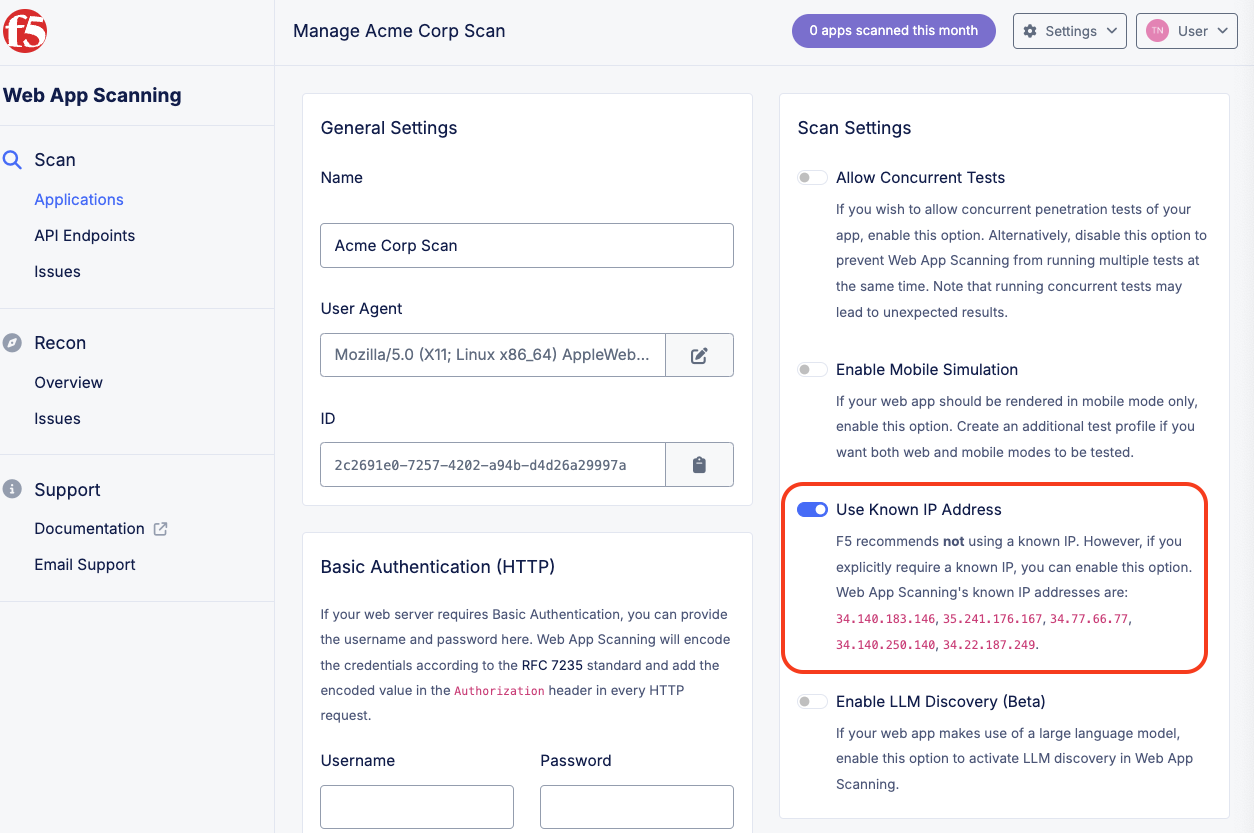
Note F5 recommends not using a known IP, in order to more closely simulate attackers coming from unknown IPs.
|


Task 3: View Post Lab Scan
Now that you have seen the baseline vulnerabilities and deployed layered protections across the application, its time to see the results.
We will now review the pre-generated post-protection scan report, compare it to the original findings, and observe how F5 Distributed Cloud WAF, Bot Defense, and Malicious User Mitigation reduced critical exposures and measurably improved the application’s security posture.
Steps to Locate the Protected Scan Report
6. In the list of available scans, locate & select: AppWorld 2026 XC Protected Vulnerability Scan. Note In the upper right-hand corner, select the Filter by tags… drop-down menu and enable the AppWorld2026 entry. Alternatively, you can search for the scan by name using the Search by Name field by typing in AppWorld.
Here are the results after searching for the appropriate scan report:
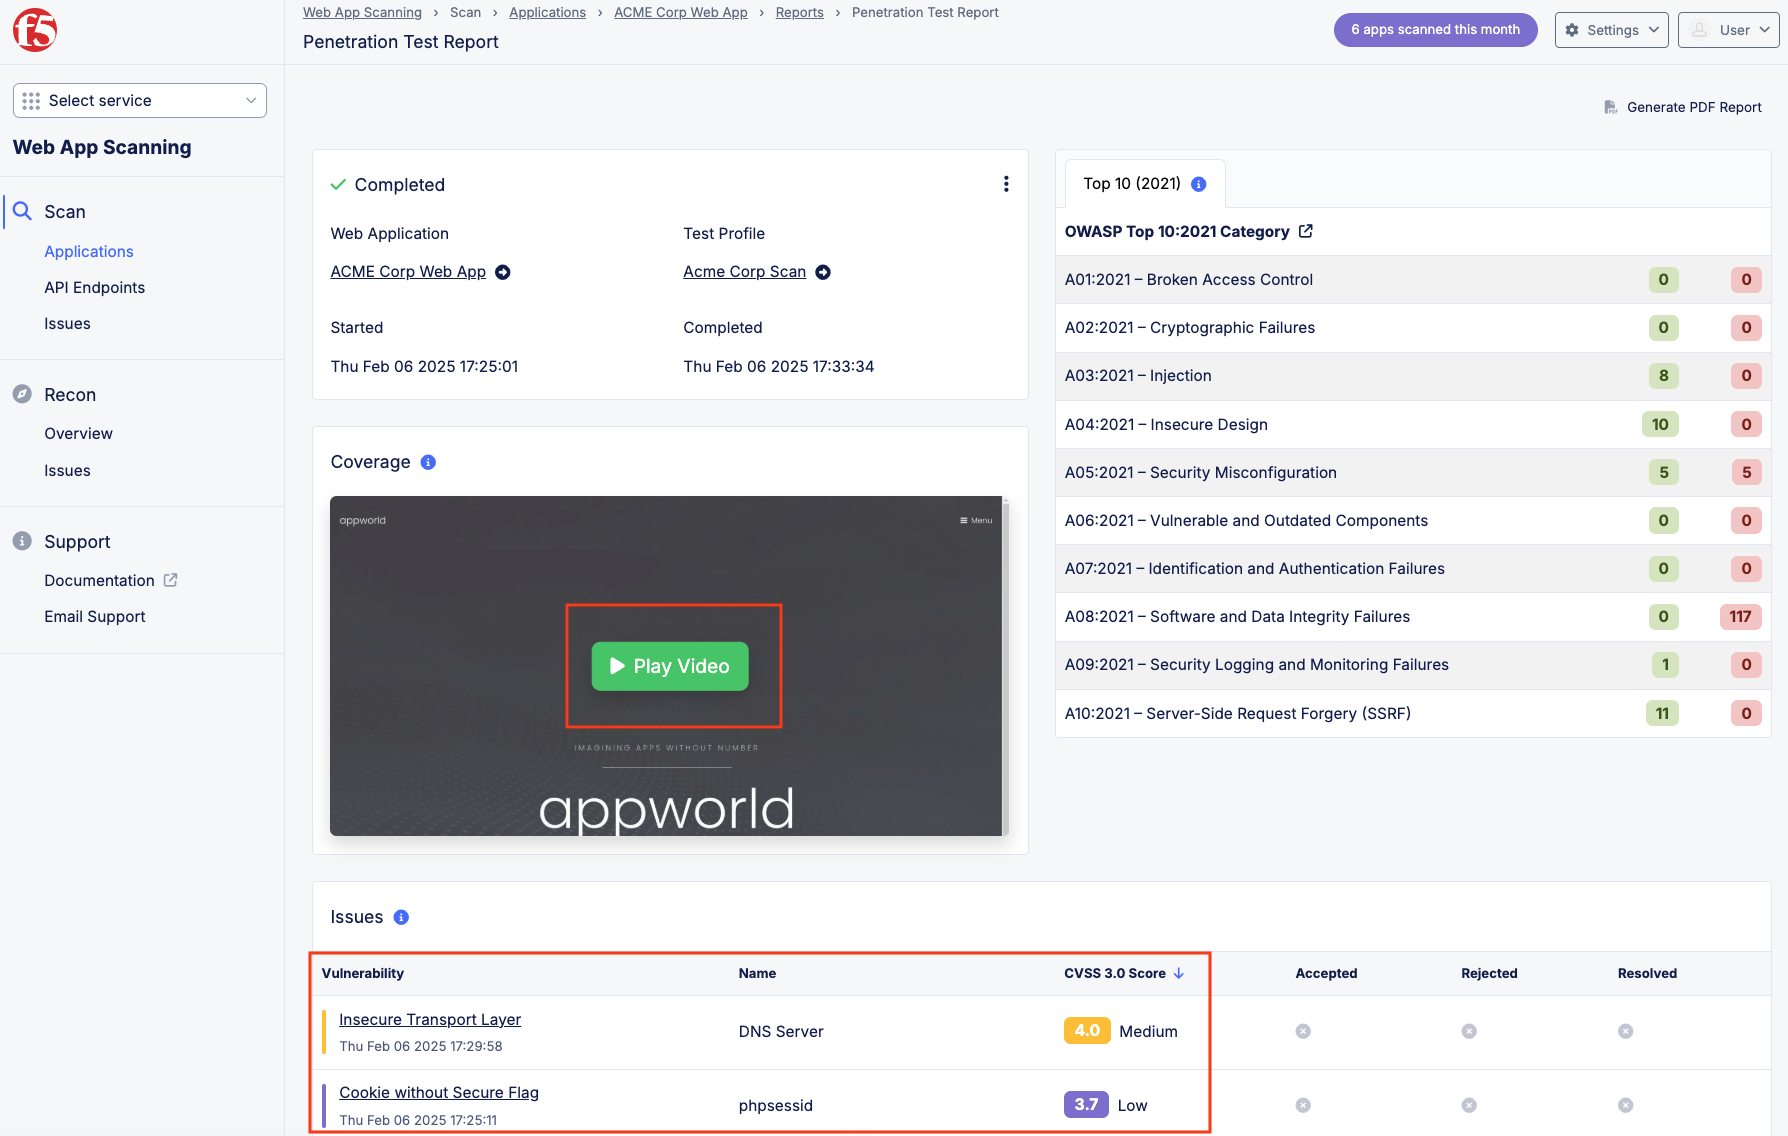
7. Select AppWorld 2026 - XC Protected Vulnerability Scan to review the scan results, noting:
|

By leveraging F5 Distributed Cloud Web App Scanning, organizations can have an ongoing view of the security posture of their web applications and track the issues over time. The Web App Scanning solution can also discover API endpoints and LLM models that make up a Web Application and even provide reports against the OWASP Top 10 for LLMs. So as ACME Corp continues to add new applications, F5 Distributed Web App Scanning can continue to maintain consistent visibility for those web assets.
End of Lab 4: This concludes Lab 4. Feel free to wait for the scan to complete and review the results and playback the recorded video.