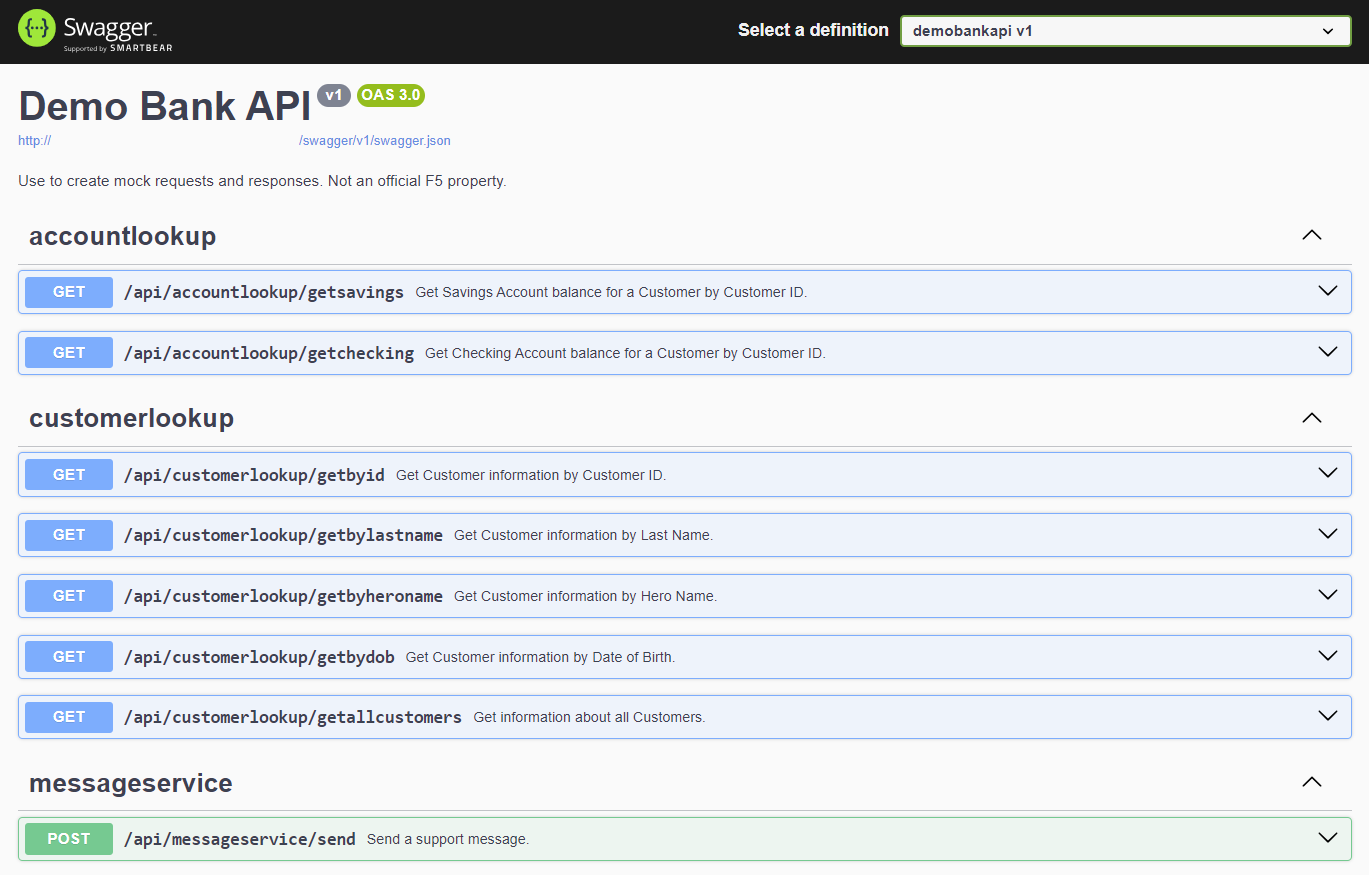
F5 Distributed Cloud > F5 Distributed Cloud: Discovering & Securing API’s Source | Edit on
Lab 5: Rate Limiting
Scenario
An internal application occasionally enters a temporary loop, repeatedly sending requests to a single endpoint. This degrades performance for other clients and, at times, renders the API unusable.
Implement a solution to limit the number of requests an endpoint will accept from a given client “source” within a specific time window to prevent excessive load.
Expected Lab Time: 8 minutes
Task 1: Simulate Unmitigated Excessive Requests
Currently, our Banking Application does not implement or enforce rate-limiting to a specific endpoint.
In this task, you will follow steps to send multiple requests within one minute to the /getallcustomers endpoint.
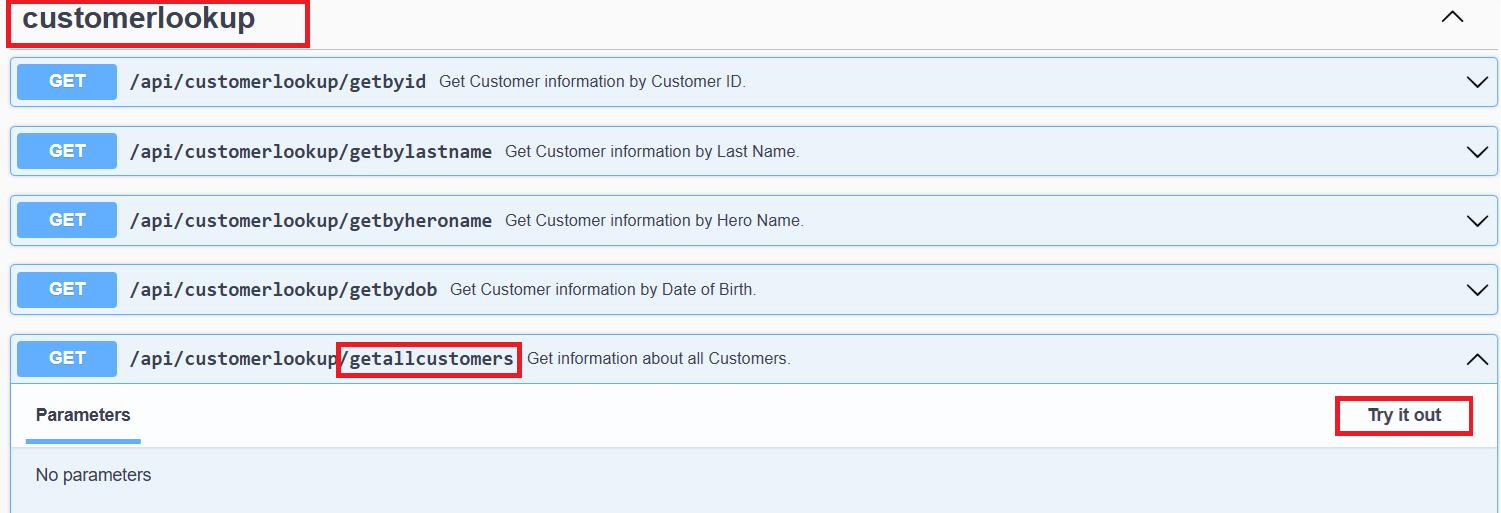
Using another browser tab, navigate to the following URL.
http://<your-namespace>.lab-sec.f5demos.com/swagger
Within the Swagger page, navigate and expand the customerlookup/getallcustomers endpoint, and click Try it out.
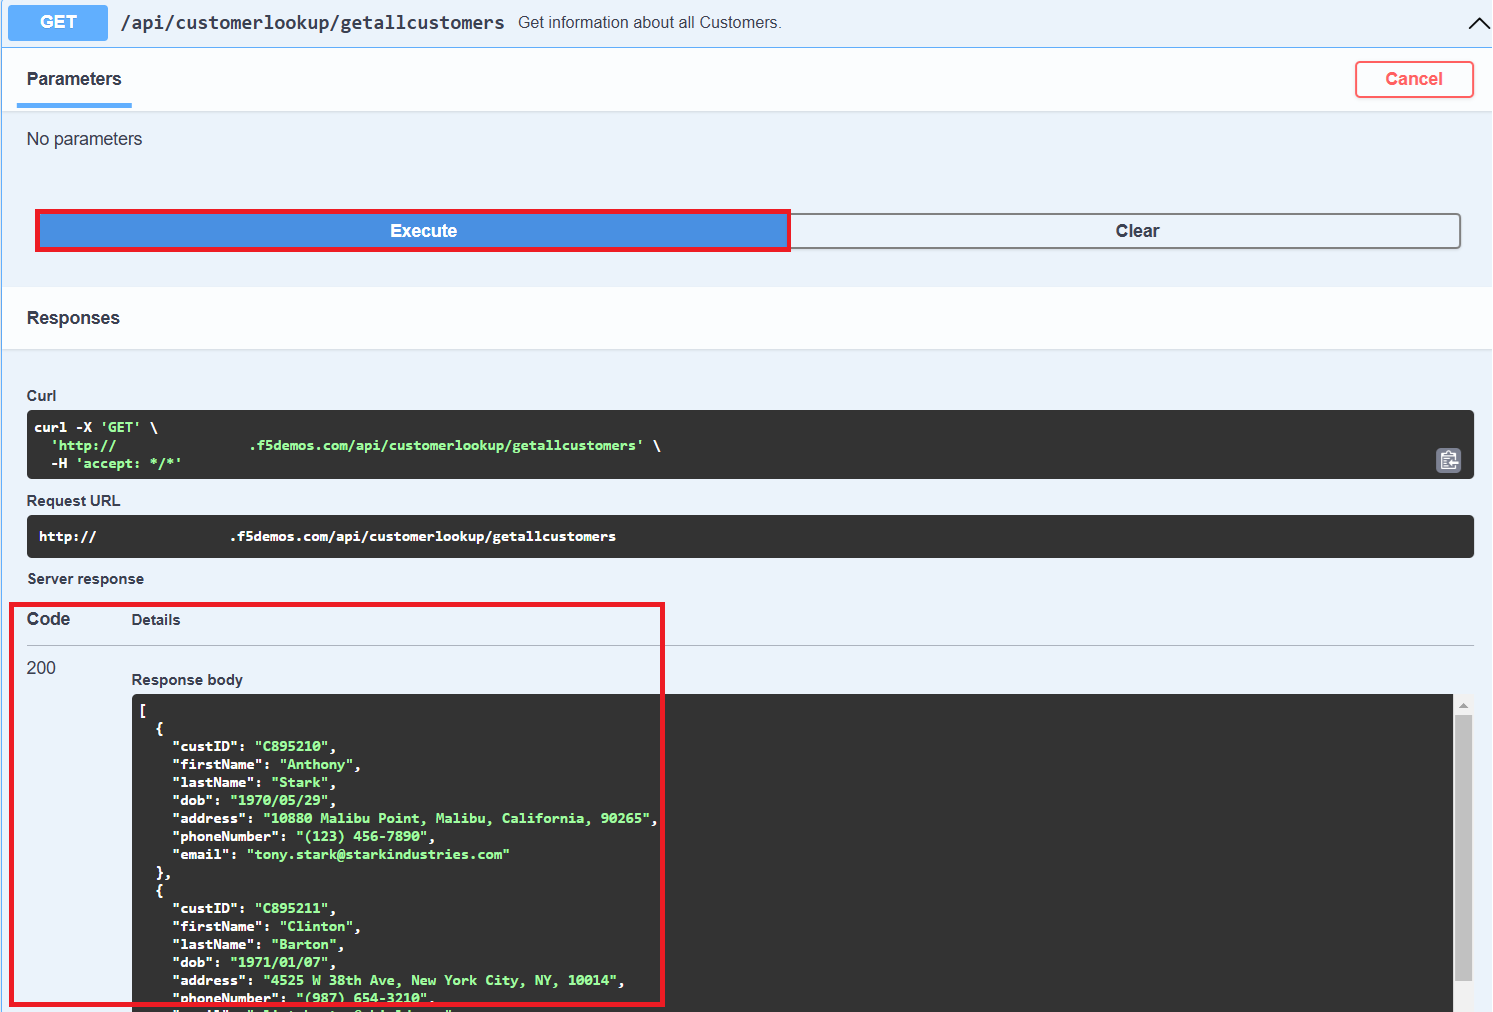
Click the Execute button, and observe the Response Body (200 OK):
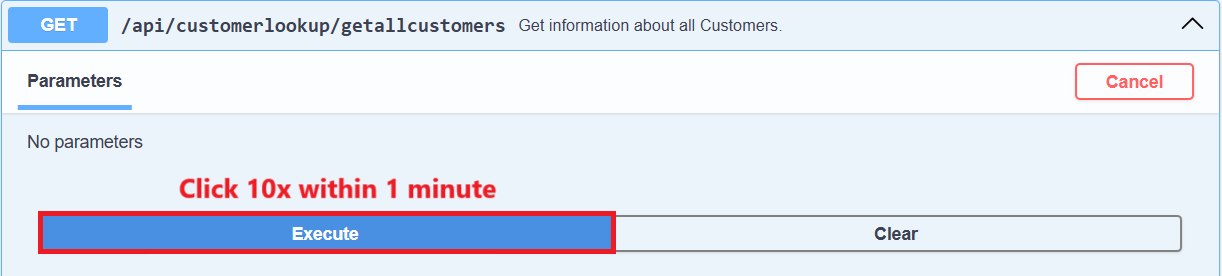
Click the Execute button 10 times within one minute, and observe the Response Body; each request should be allowed.
Task 2: Enabled API Rate-Limiting
In this task’s series of steps, you will enable the API Rate-Limiting feature on the previously built HTTP Load Balancer object delivering the targeted API.
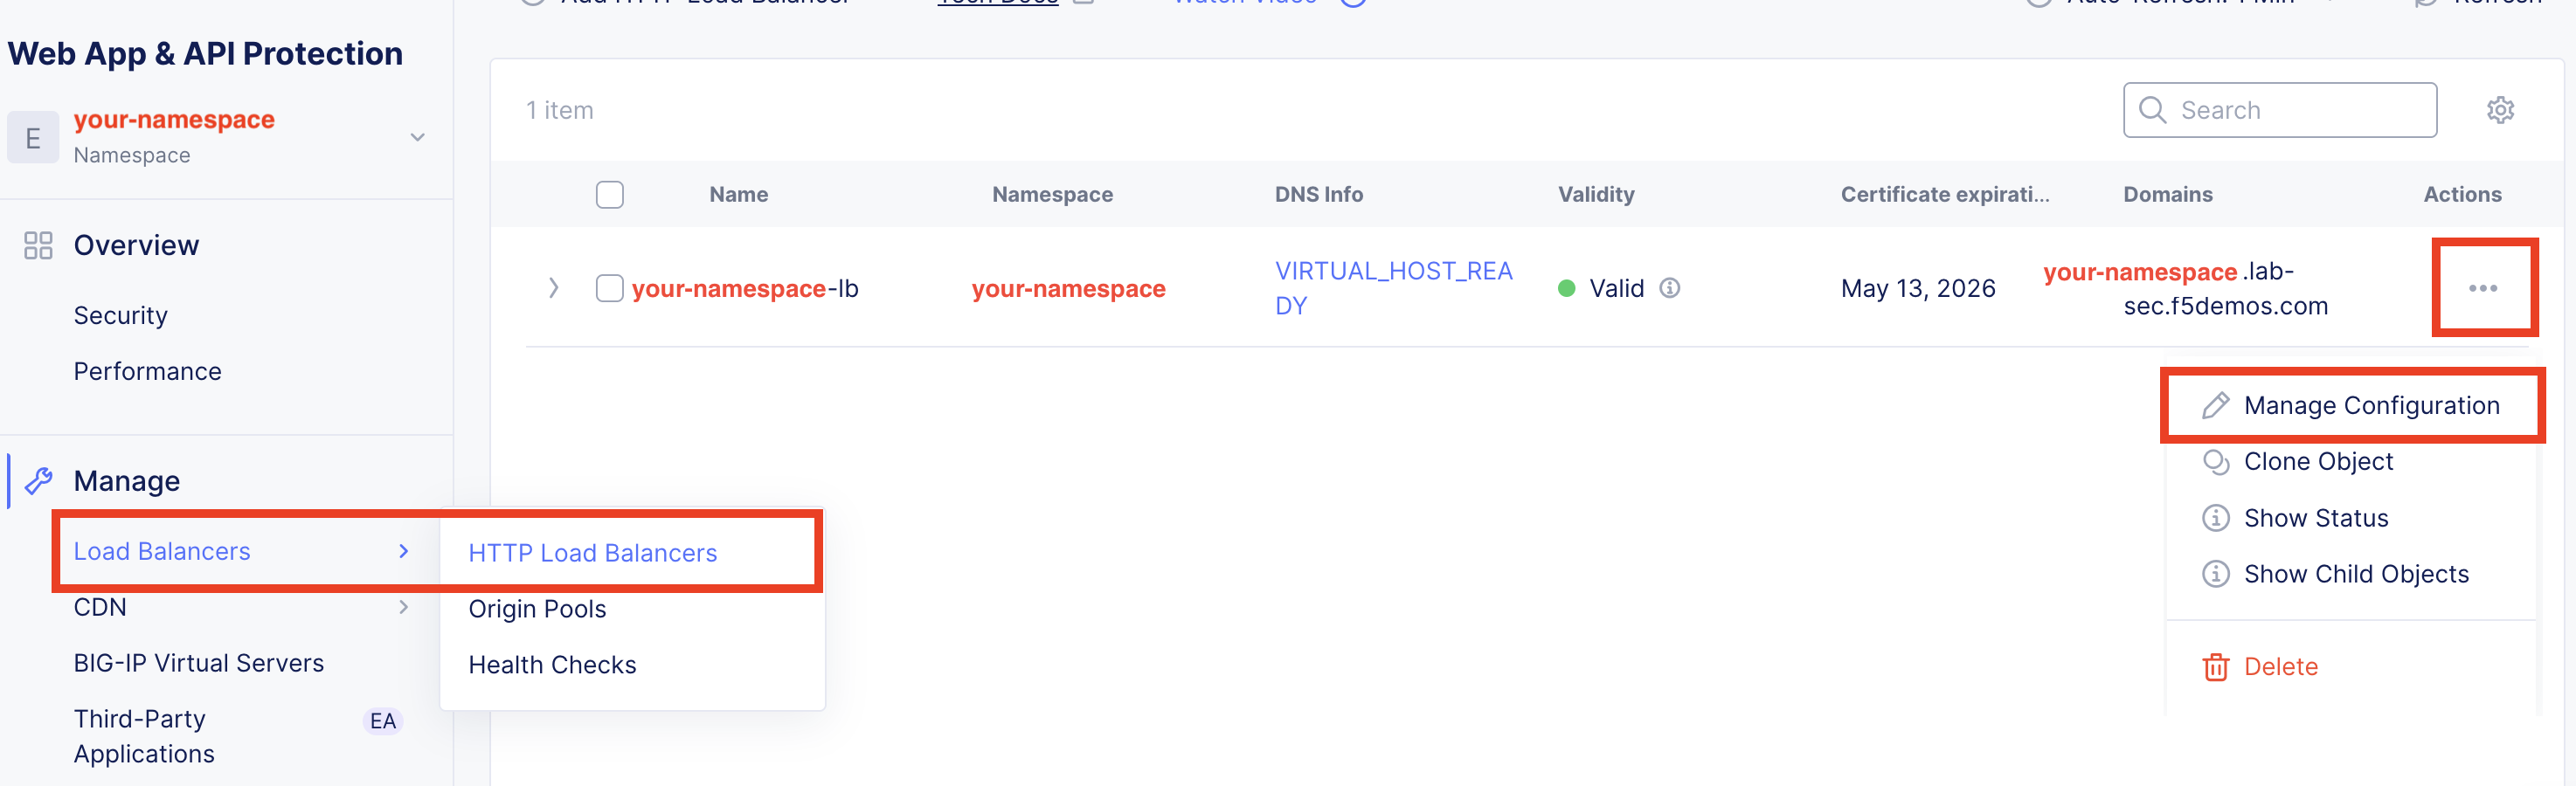
In the left-hand navigation of the Web App & API Protection service, click on Load Balancers > HTTP Load Balancers under the Manage section.
In the resulting Load Balancers window, click on the three dots … in the Action column, and the select Manage Configuration.
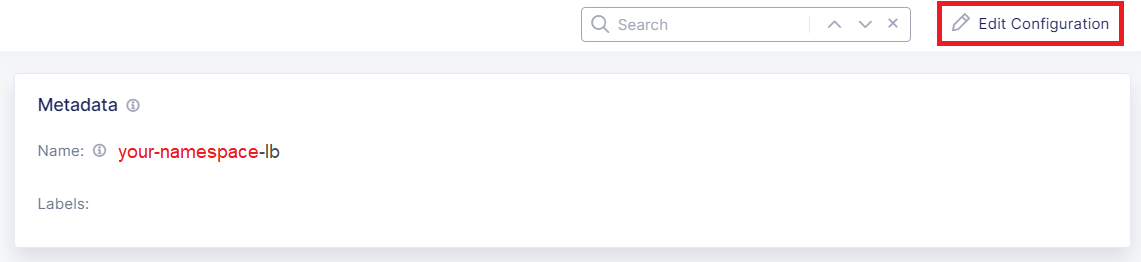
Click Edit Configuration in the top-right corner.
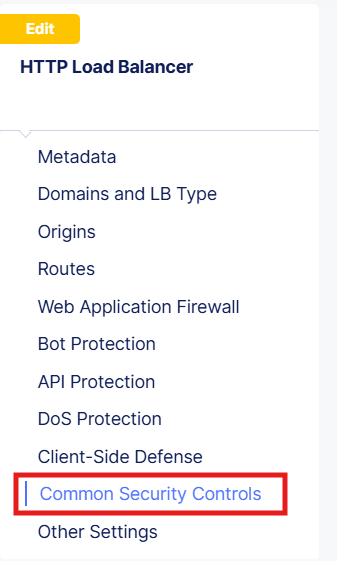
Using the left-hand navigation, click the Common Security Controls link.
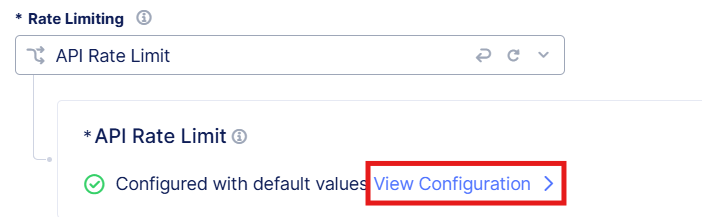
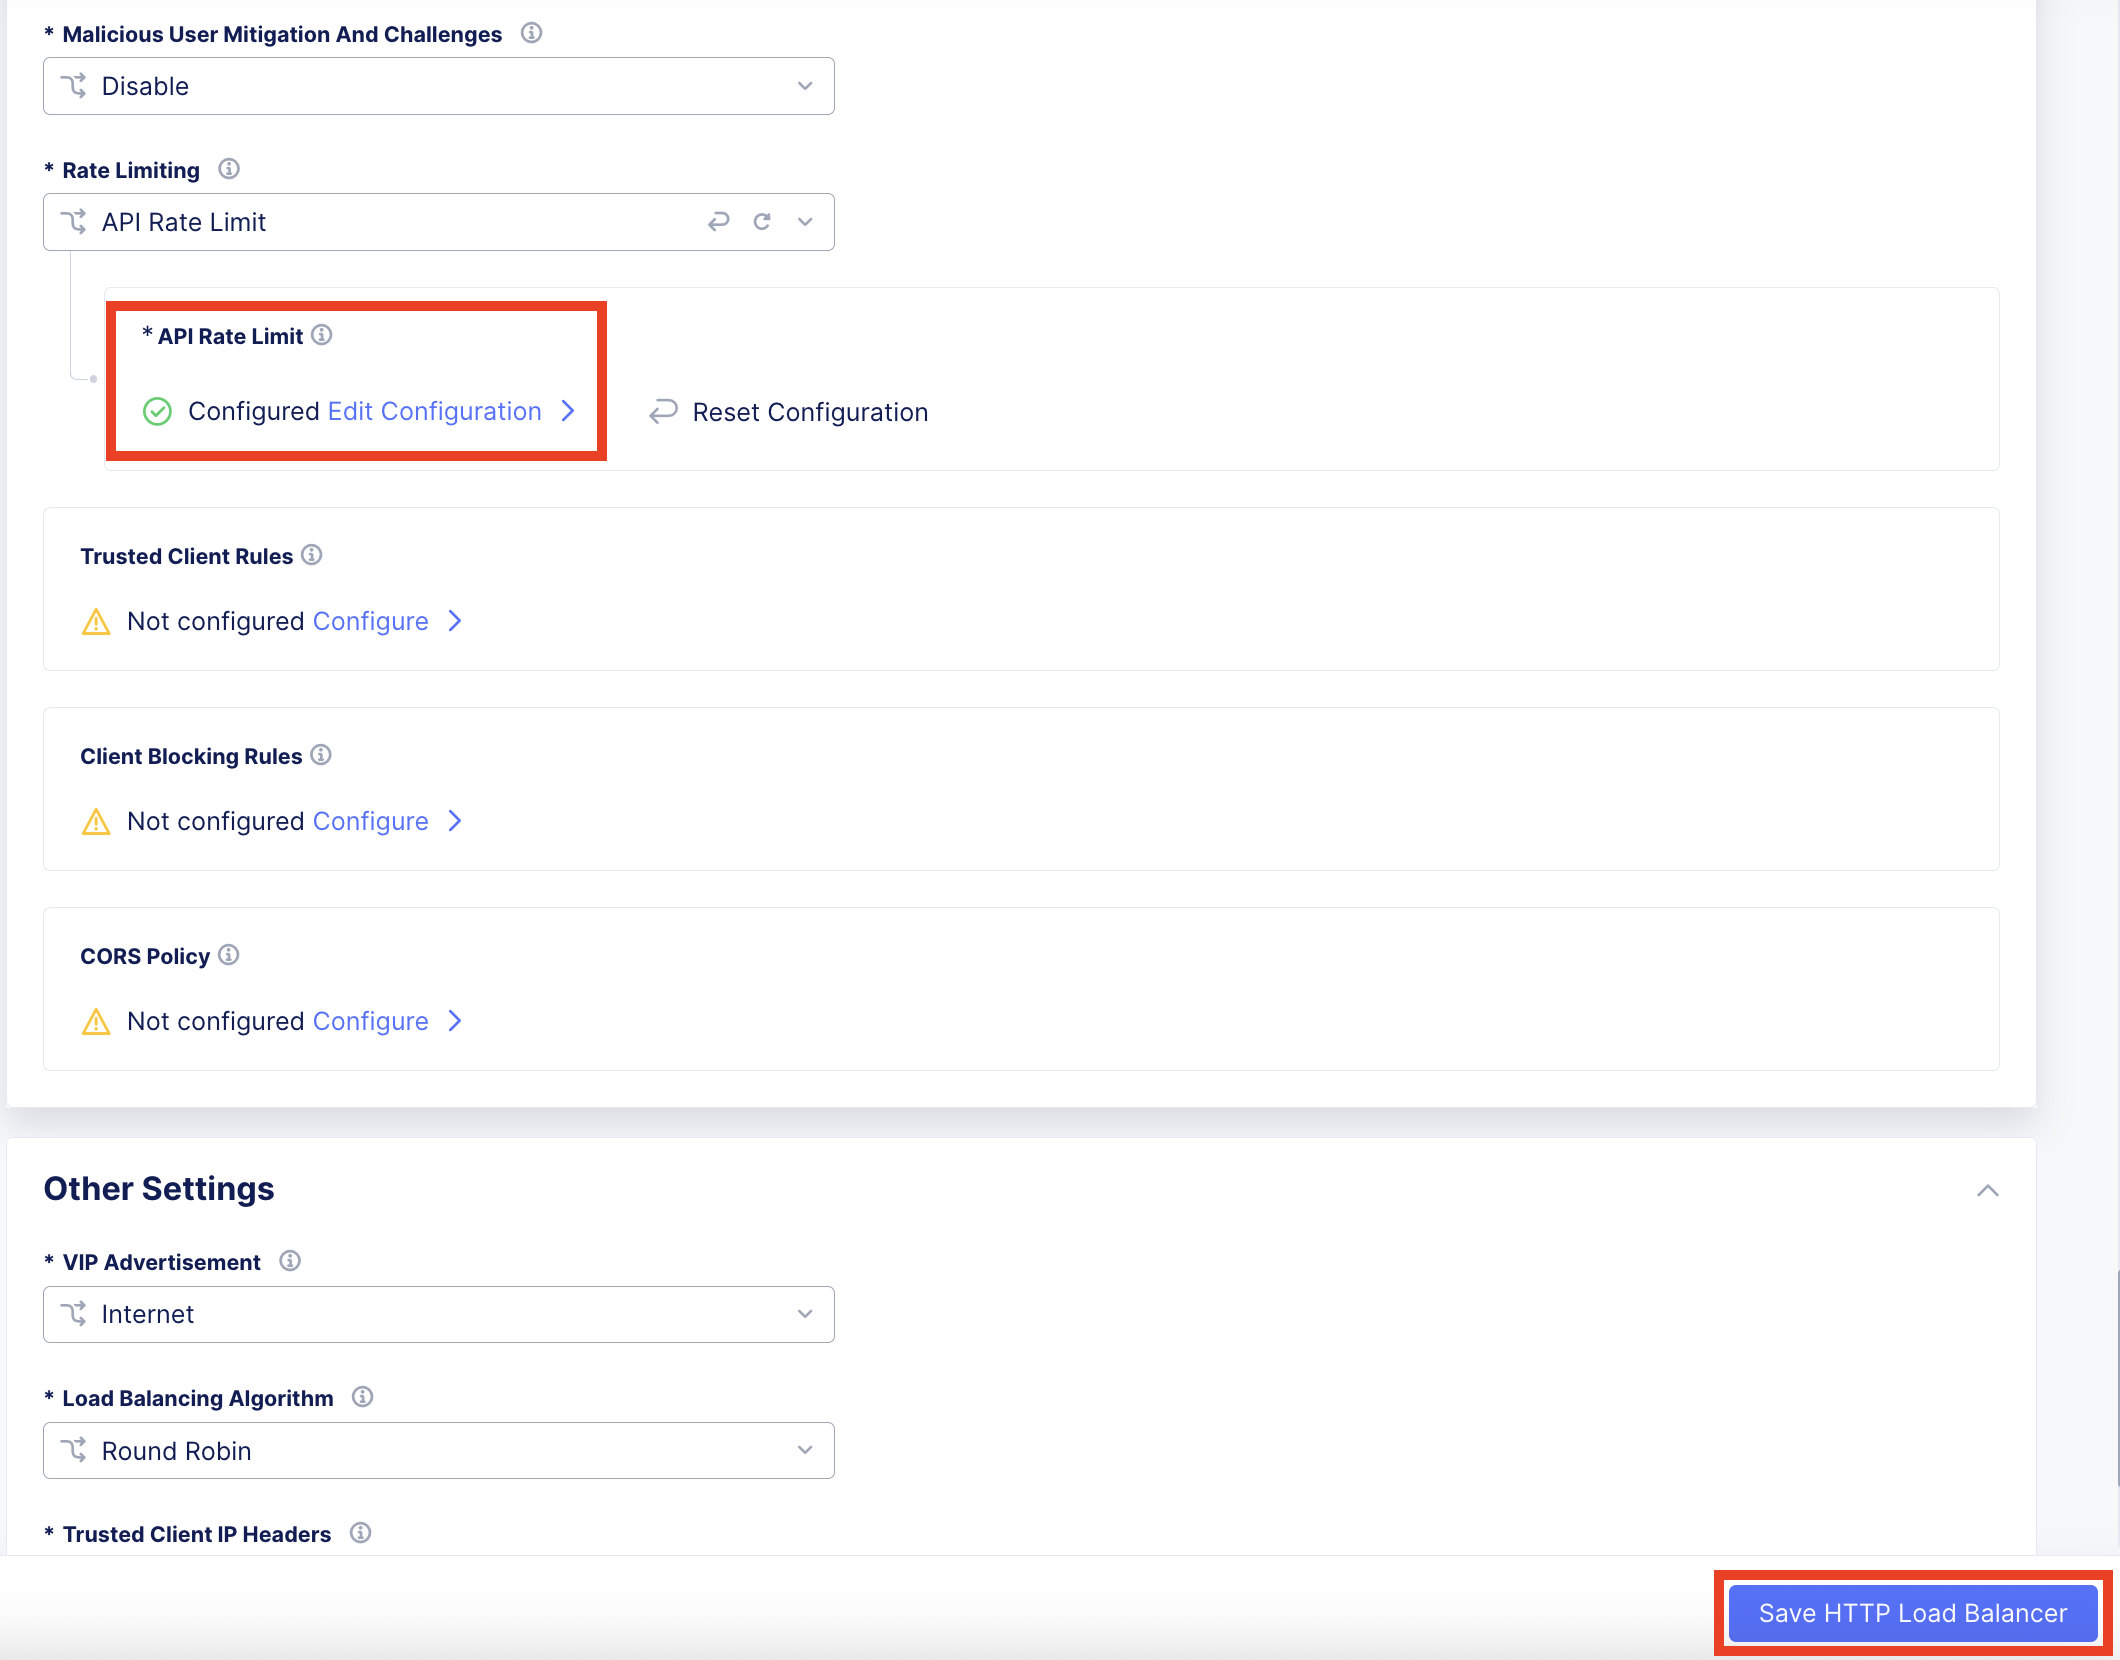
Locate the Rate Limiting area of the Common Security Controls and use the drop-down to select API Rate Limit.
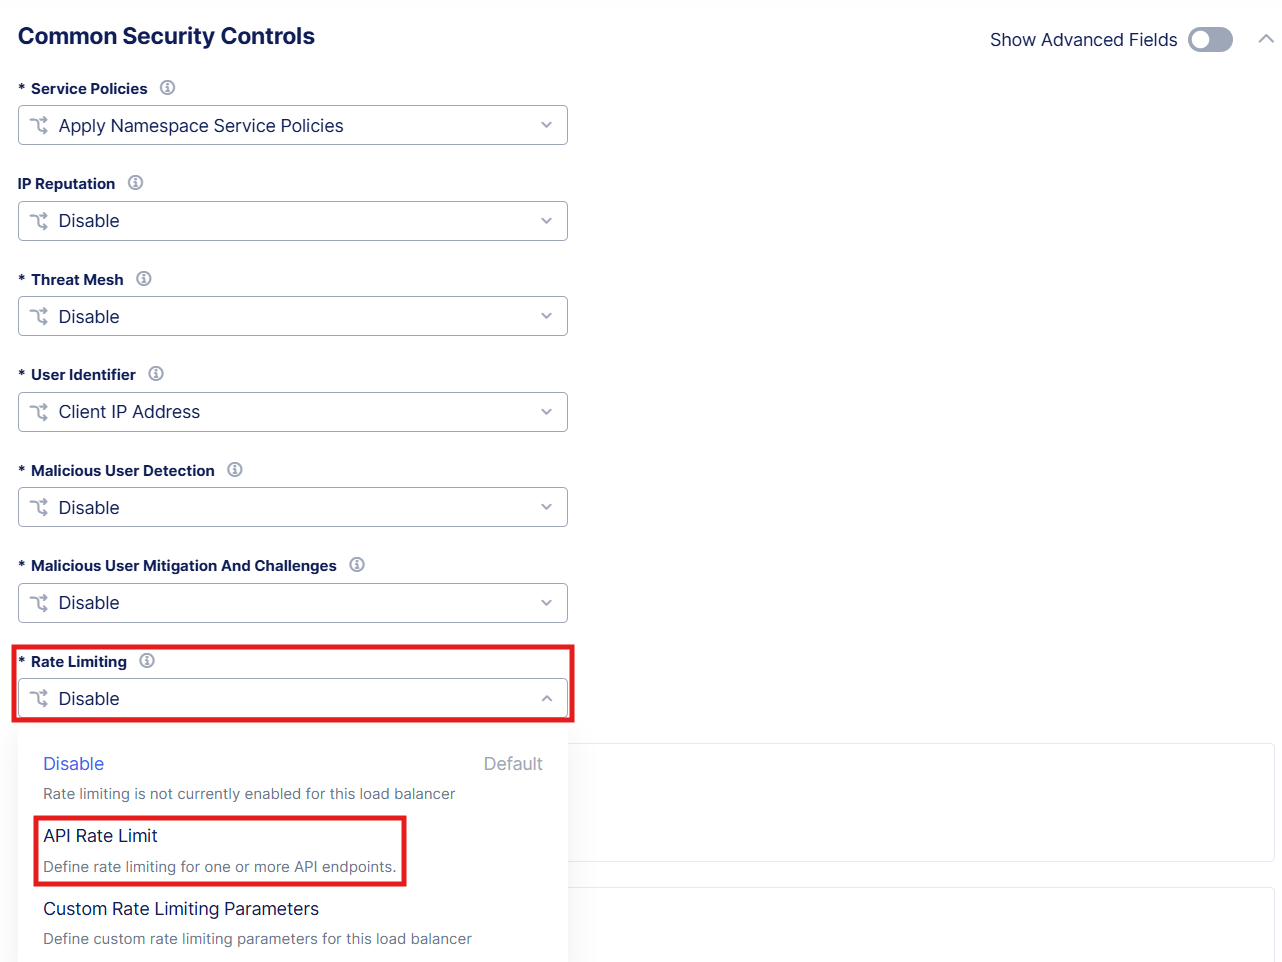
In the expanded menu under API Rate Limit, click View Configuration
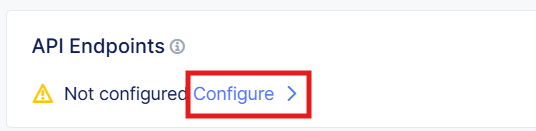
In the resulting window, under API Endpoints, click Configure.
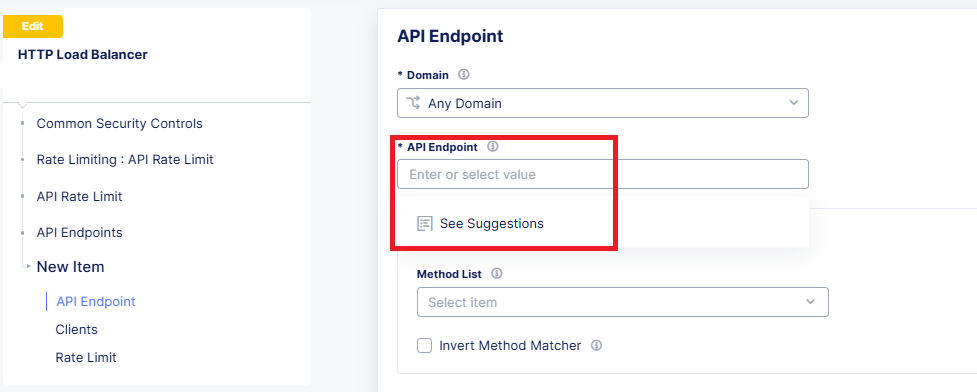
Select Add Item, within API Endpoints.

In the resulting window, use the drop-down under API Endpoint, and click See Suggestions.
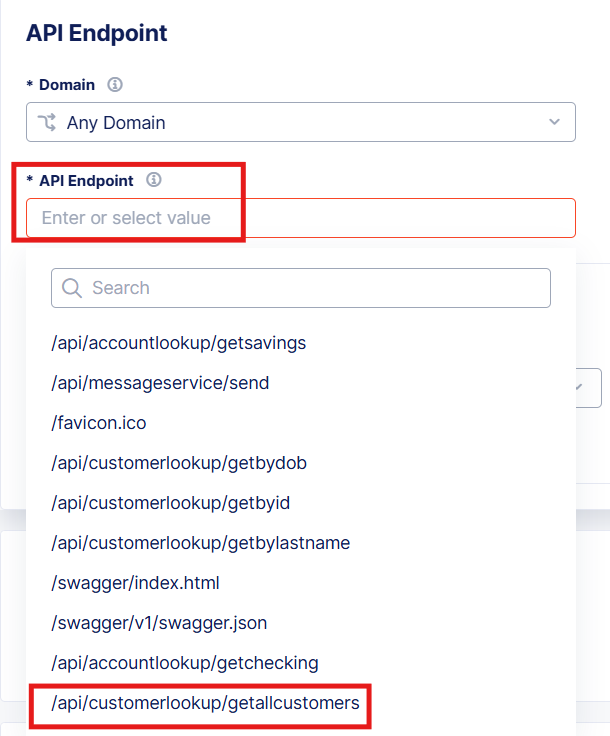
In the suggestion results, use the drop-down and select the /getallcustomers endpoint.
In the resulting configuration window, update the following fields then click Apply.
Method List:
ANYThreshold:
10Duration:
Minute
Note
This will rate limit a client after making 10 requests within 1 minute.
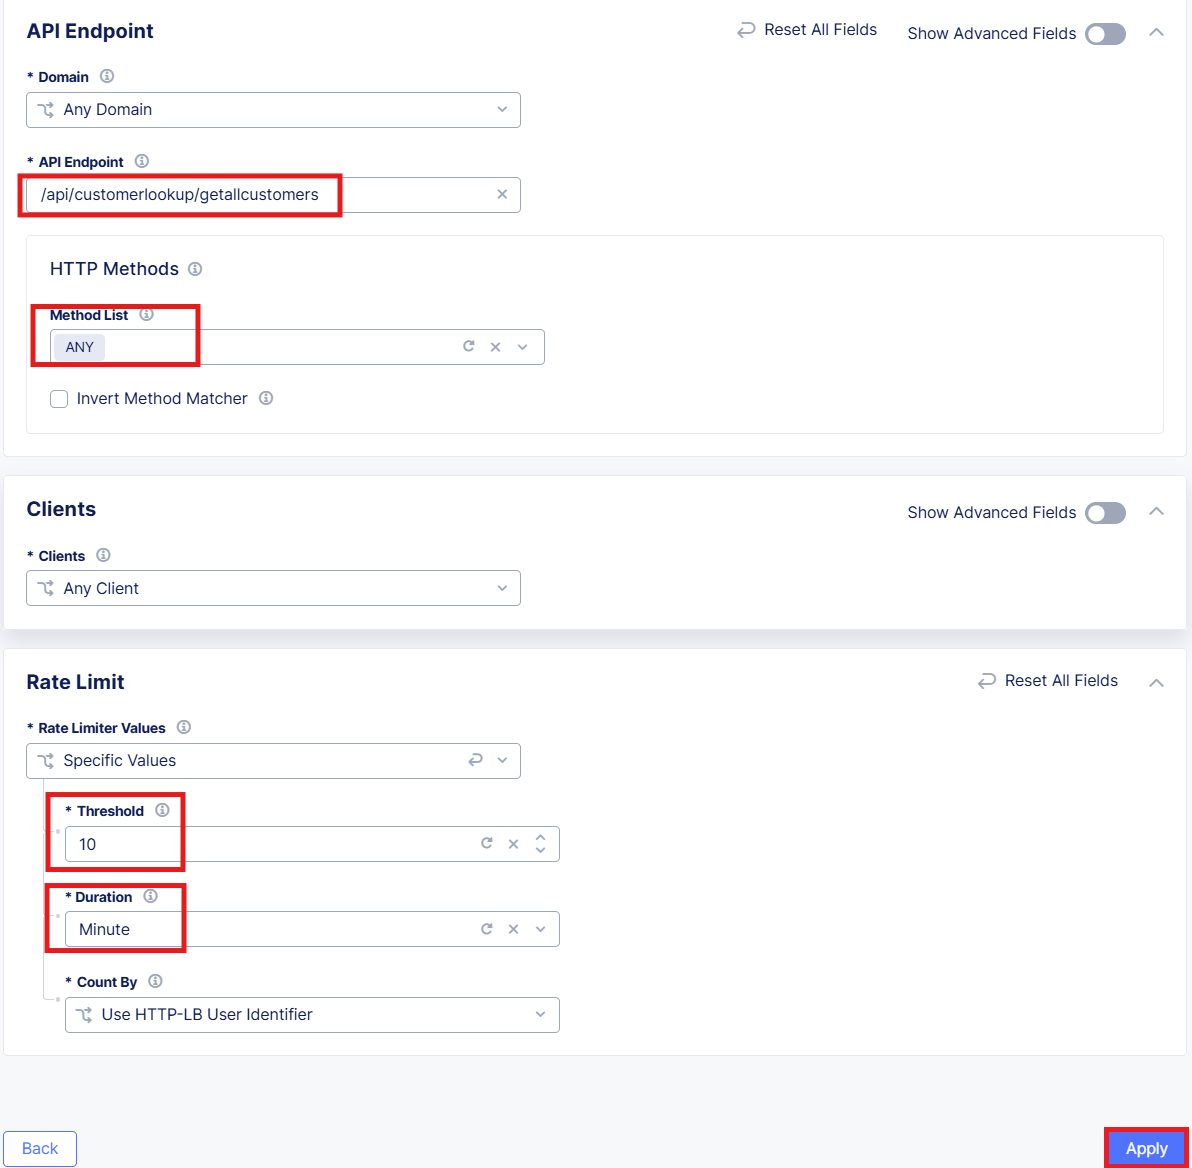
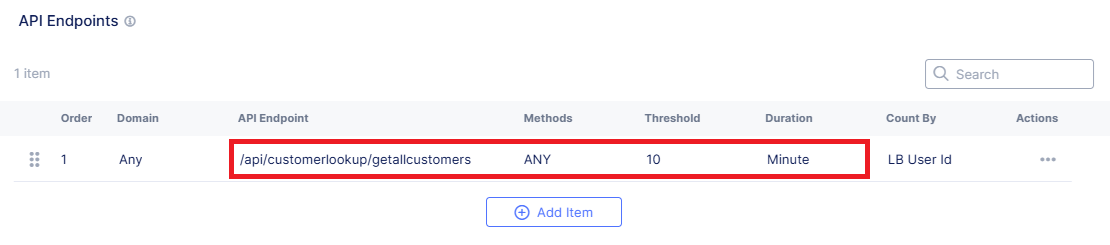
Review the API Endpoint rate limiting rule and click, the Apply button.
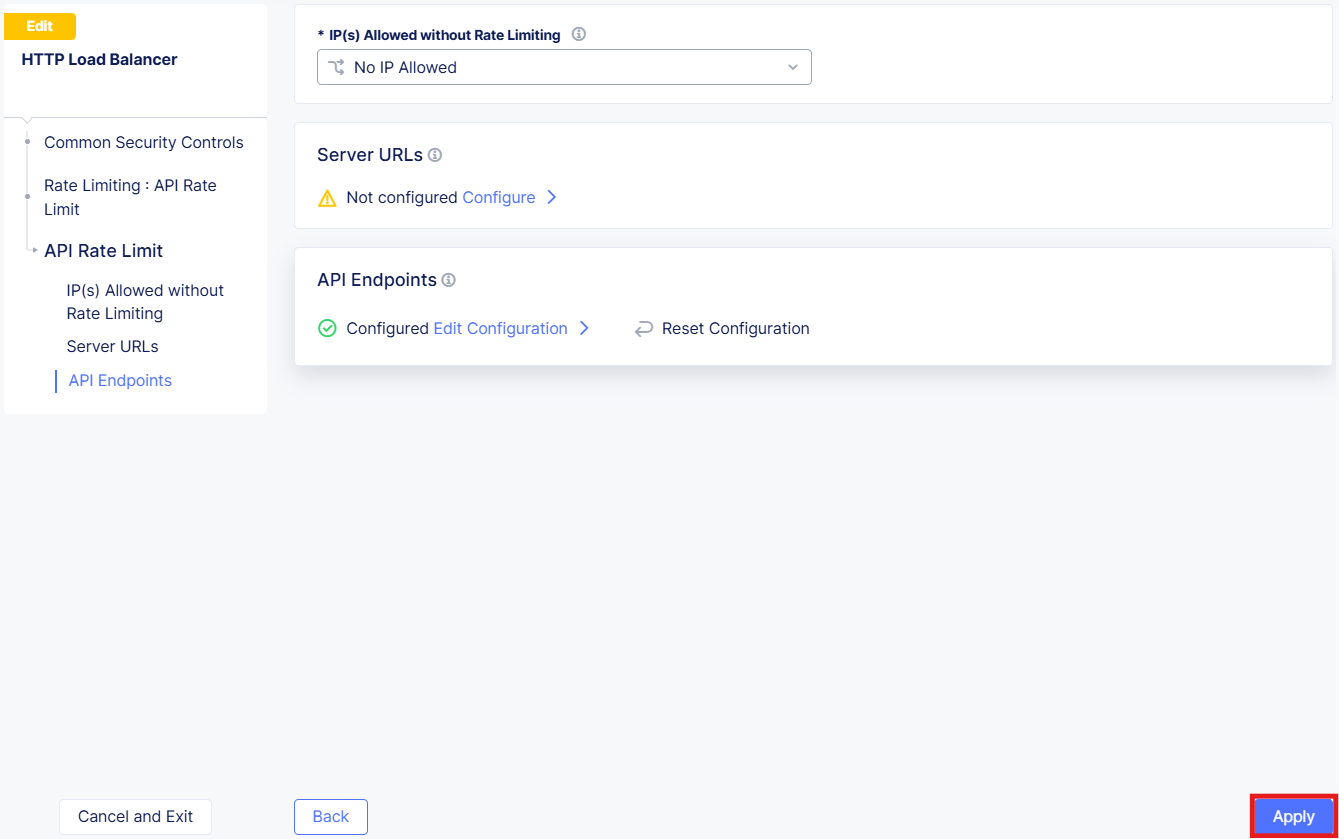
Click Apply at the API Rate Limit page.
Note the updated configuration for API Rate limiting then select Save HTTP Load Balancer at the bottom right of the window.
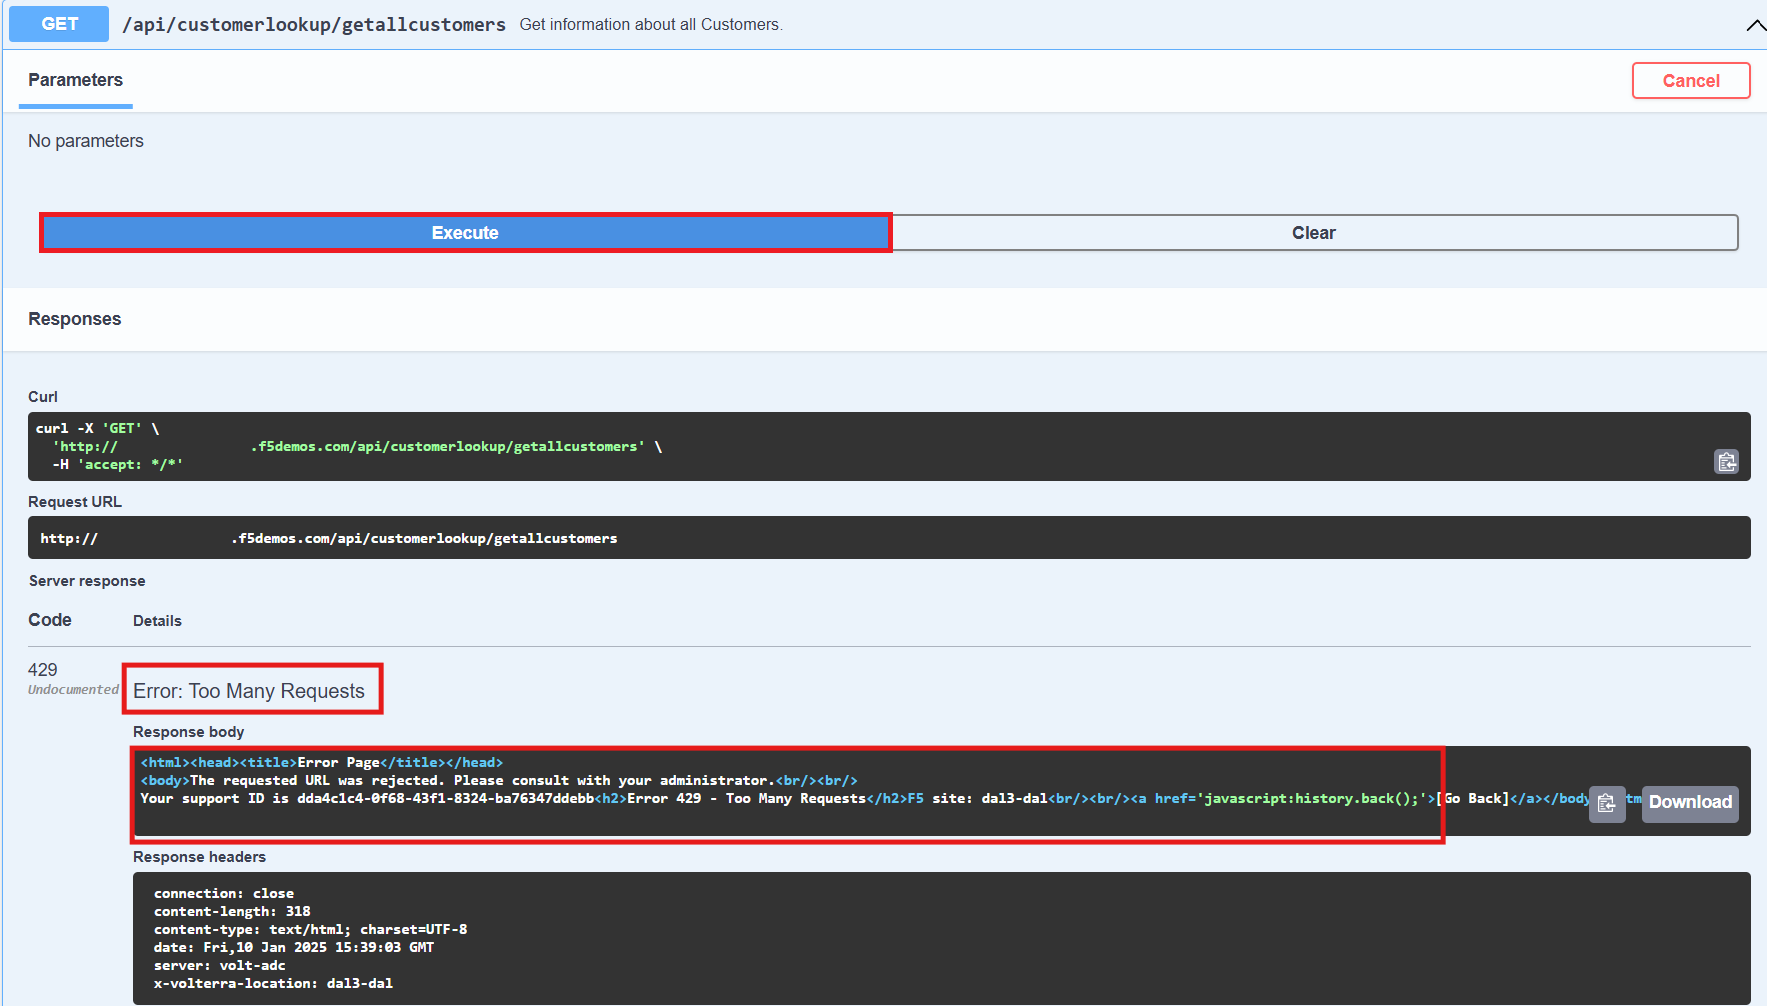
Task 3: Simulate Mitigated Excessive Requests
In this task, you will send more than 10 requests within one minute
Using another browser tab, navigate to the following URL.
http://<your-namespace>.lab-sec.f5demos.com/swagger
Within the Swagger page, navigate and expand the customerlookup/getallcustomers endpoint, and click Try it out.
Click the Execute button more than 10 times within one minute and observe the Response Body. Each request through the 10th should be allowed/accepted. Observe the Response Body once you exceed this threshold.
End of Lab