Lab 1: Explore Load Balancer and Review Traffic Dashboards

Lab 1 will focus on the deployment and security of an existing hosted application using F5 Distributed Cloud Platform and Services. This lab will be deployed in a SaaS only configuration with no on-premises (public or private cloud) elements. All configurations will be made via the F5 Distributed Cloud Console and within the F5 Distributed Cloud Global Network services architecture.

For the tasks that follow, please note your individual unique namespace. Follow the instructions below which will guide you to locate your namespace. The Delegated Domain and the F5 Distributed Cloud Tenant are listed below for your convenience as they will be the same for all lab attendees.

Following the tasks in the prior Introduction Section, you should now be able to access the F5 Distributed Cloud Console, having set your Work Domain Roles and Skill levels. If you have not done so already, please login to your tenant for this lab before proceeding to Task 1.

Scenario Lab 1

Your company recently noticed an increase in credential stuffing and bot activity on its F5 Airlines app. You are a SecOps engineer tasked with providing a security solution to address this threat. In the following labs, you will learn how to use F5’s Distributed Cloud to quickly enable an application and bot security profile to address the threat while also exploring some attack tools of your own!

Expected Lab Time: 15 minutes

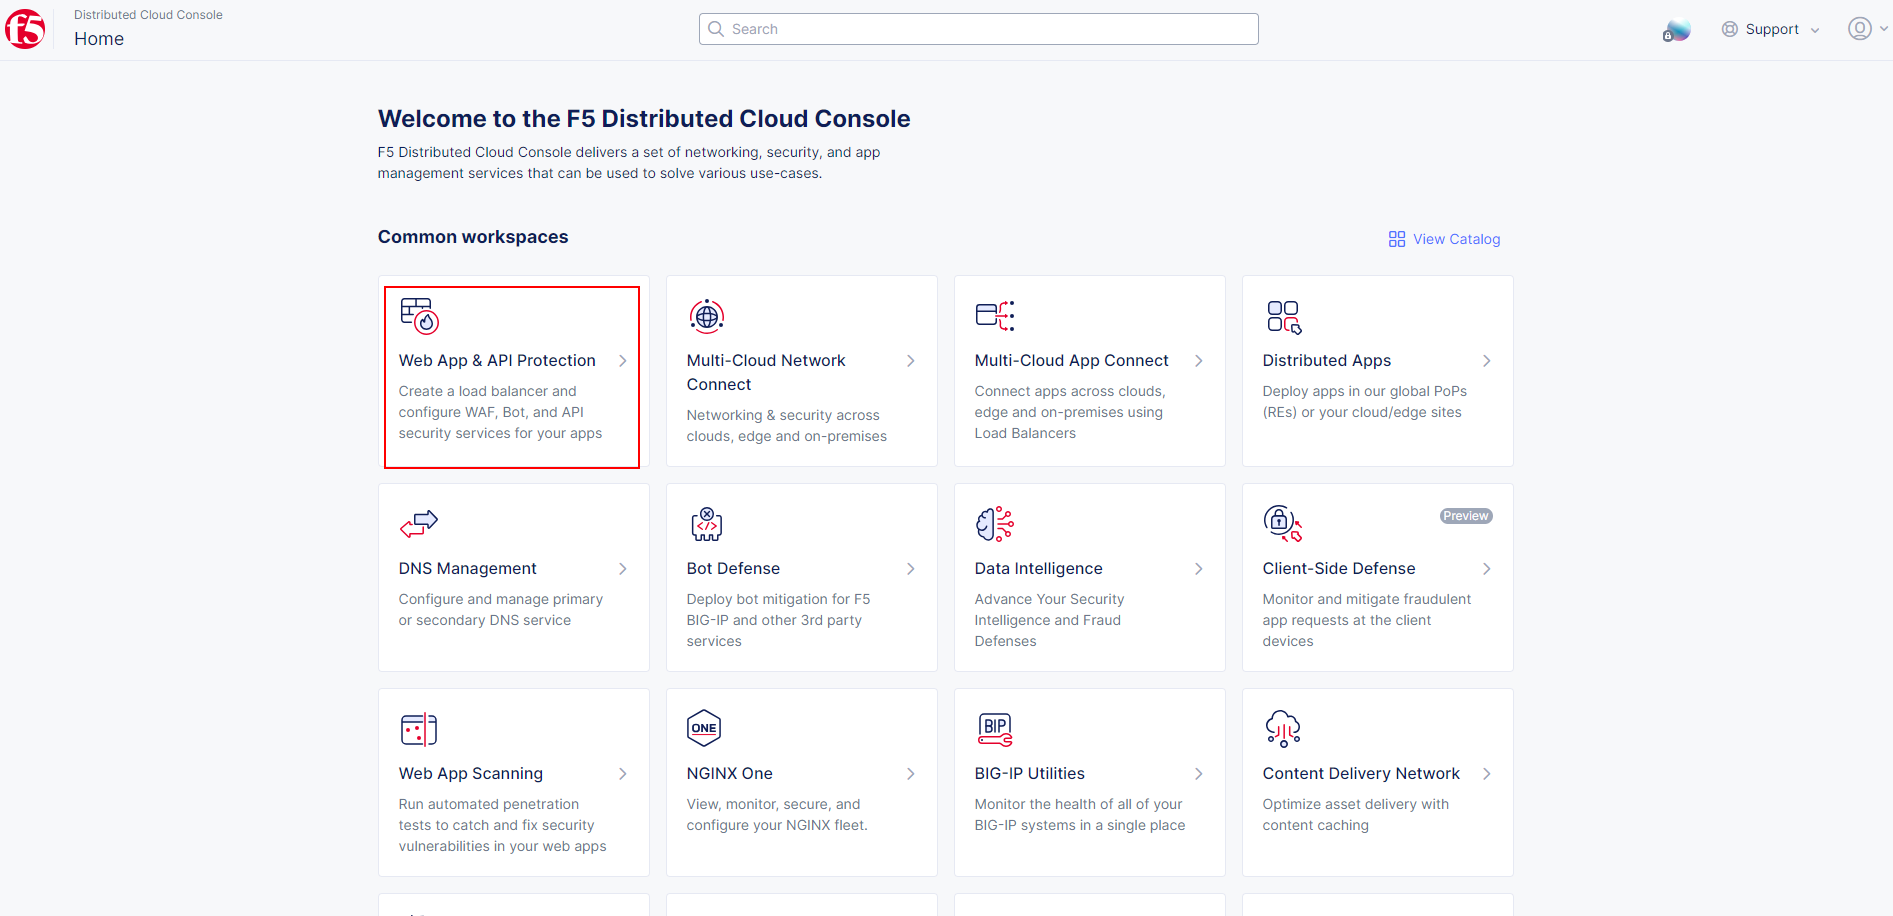
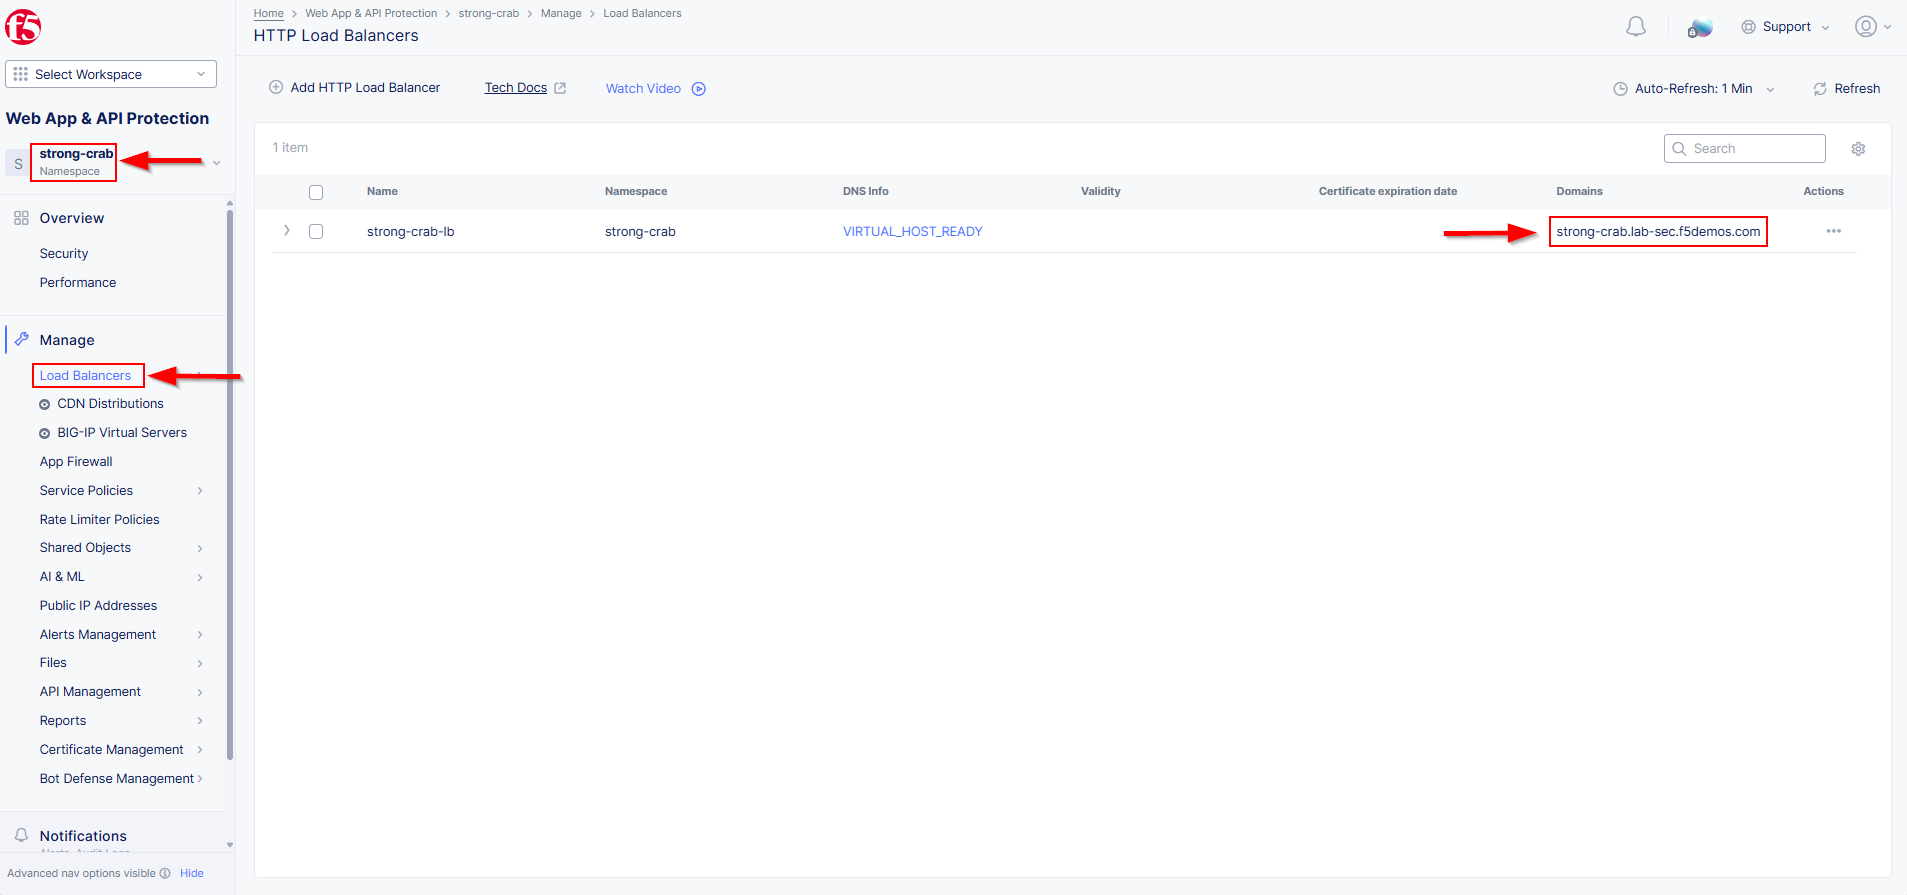
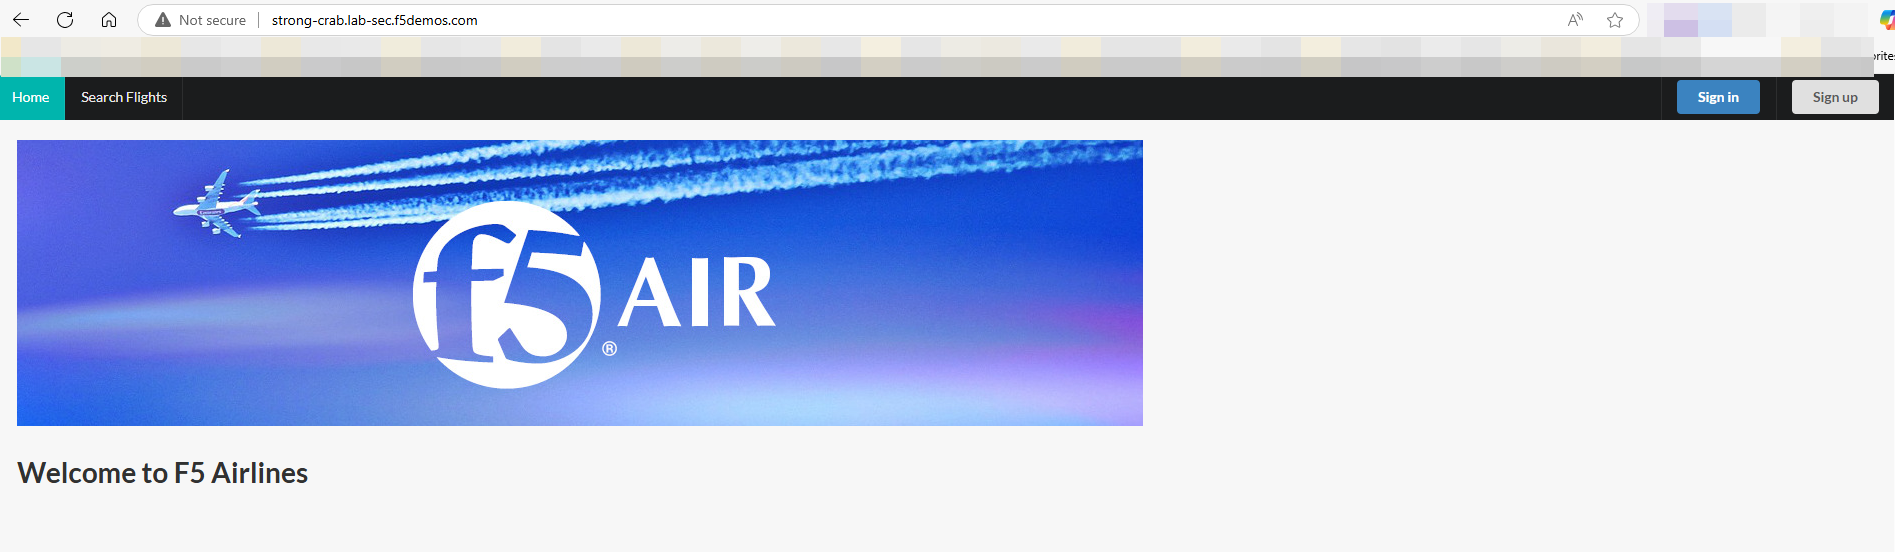
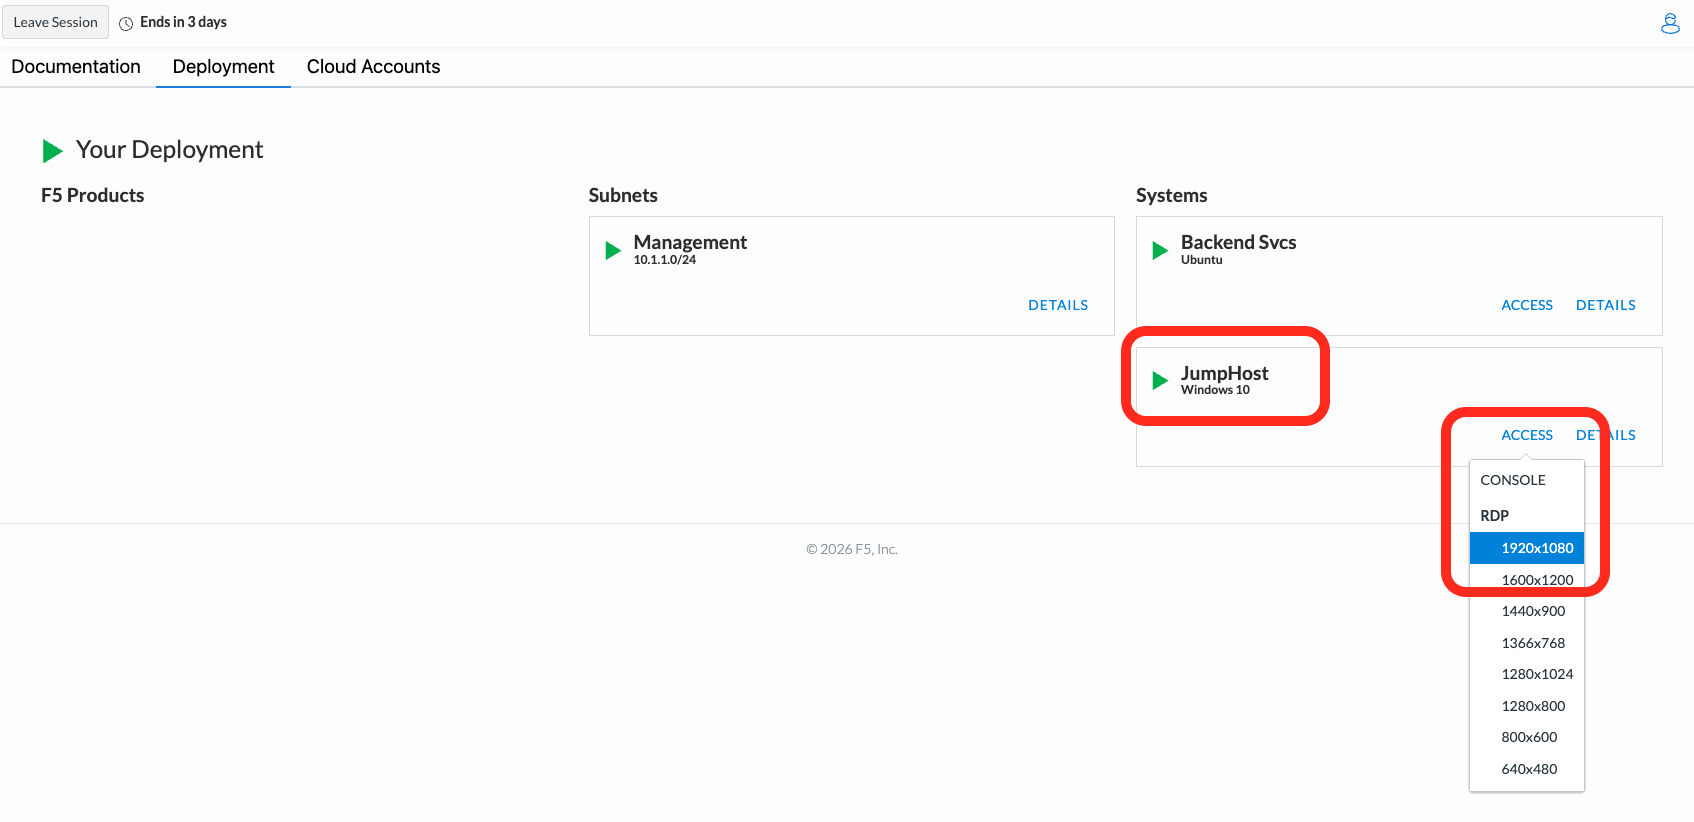
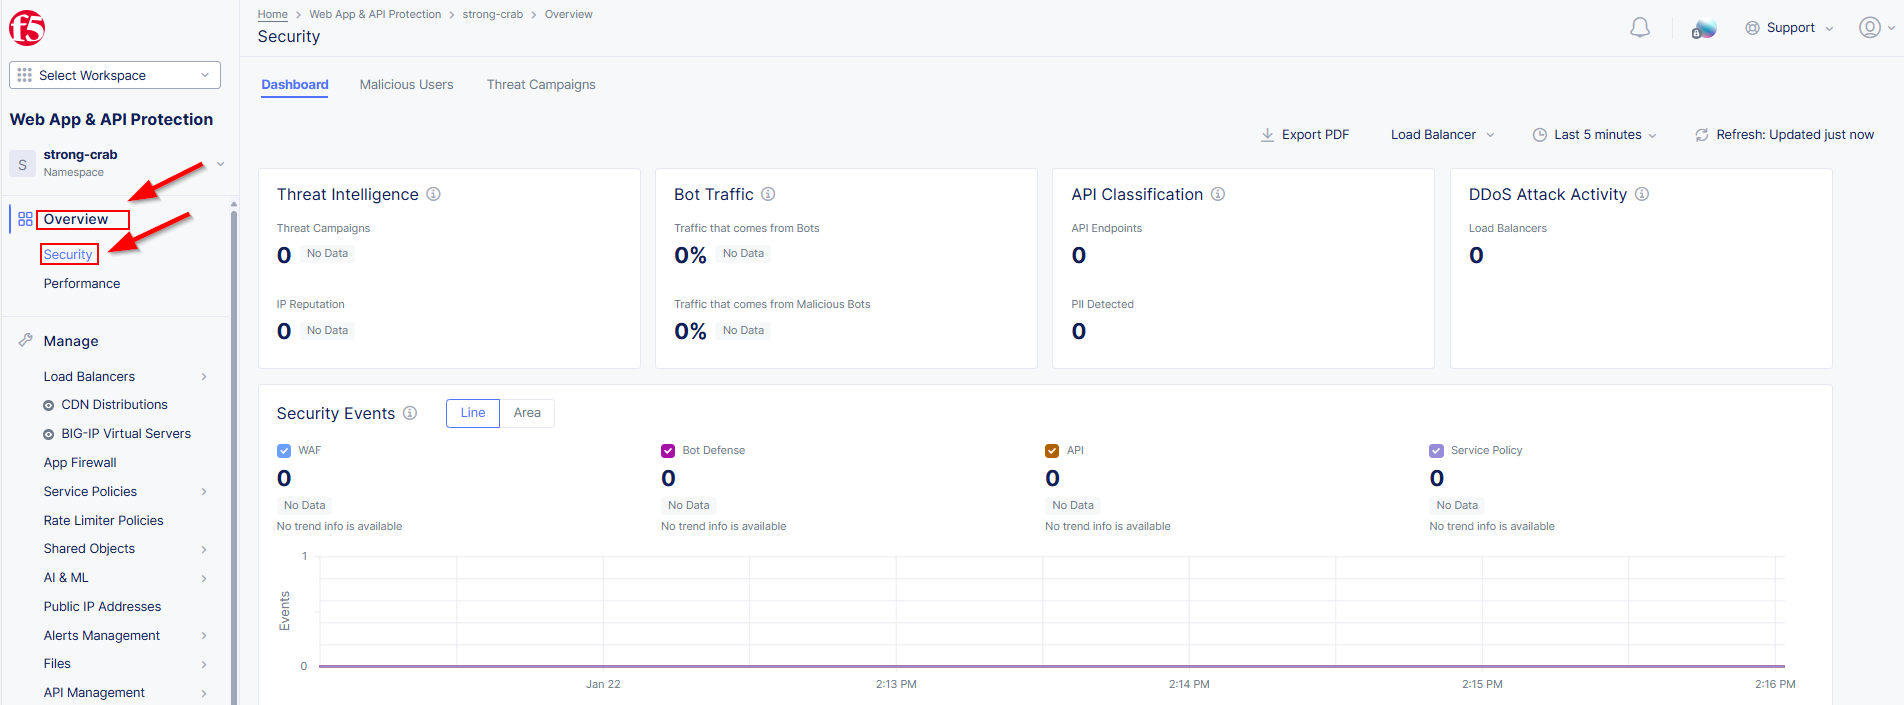
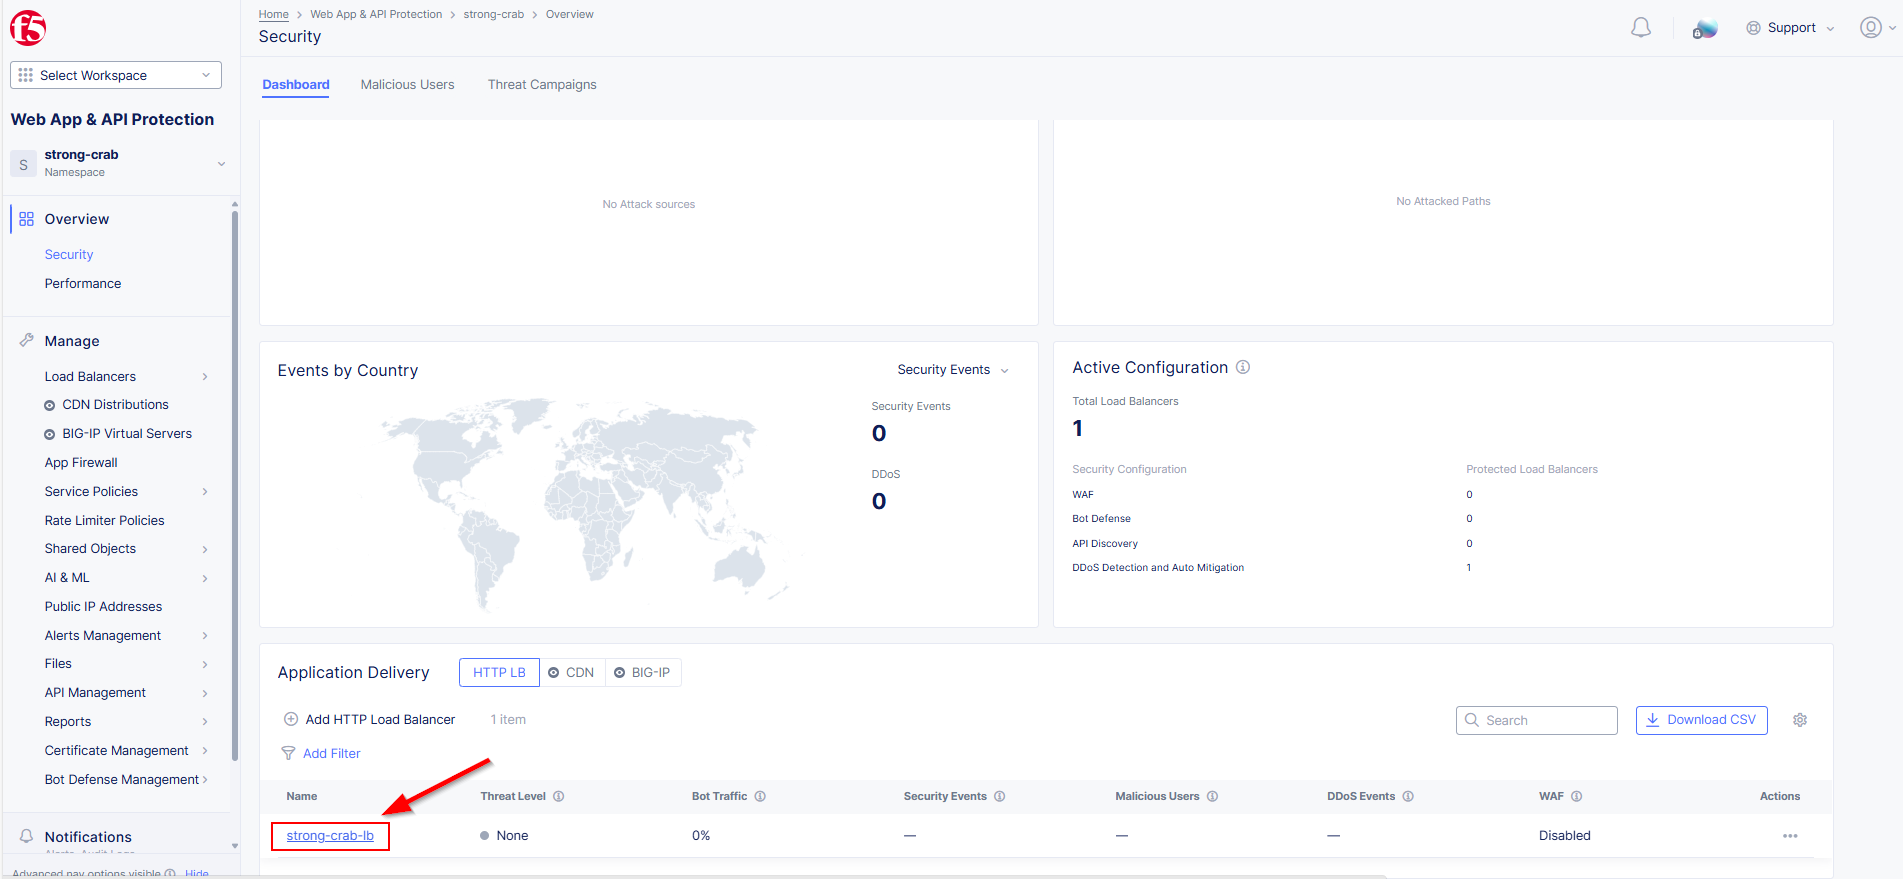
Task 1: Review your assigned Namespace and Verify the Application is Up

For this objective you will explore the Distributed Cloud Console and identify your namespace. Additionally you will ensure the F5 Air application is functioning. Application availability is a pre-requisite for all other tasks.

  1. From the Distributed Cloud (XC) Home Screen click Web App & API Protection, this will bring you into your name space.

lab1-task1-01

  1. In the upper left hand portion of the screen, note your unique Namespace, it will be used throughout this lab.

  2. Click on Manage > Load Balancers > HTTP Load Balancers. You will see a pre-configured HTTP Loadbalancer in the format of <namespace>-lb.

  3. On the right side, under Domains you should see a FQDN namespace.lab-sec.f5demos.com.

lab1-task1-02

  1. Open a browser window and navigate to http://namespace.lab-sec.f5demos.com to verify the application is up. You should see the F5 Airlines logo!

lab1-task1-03

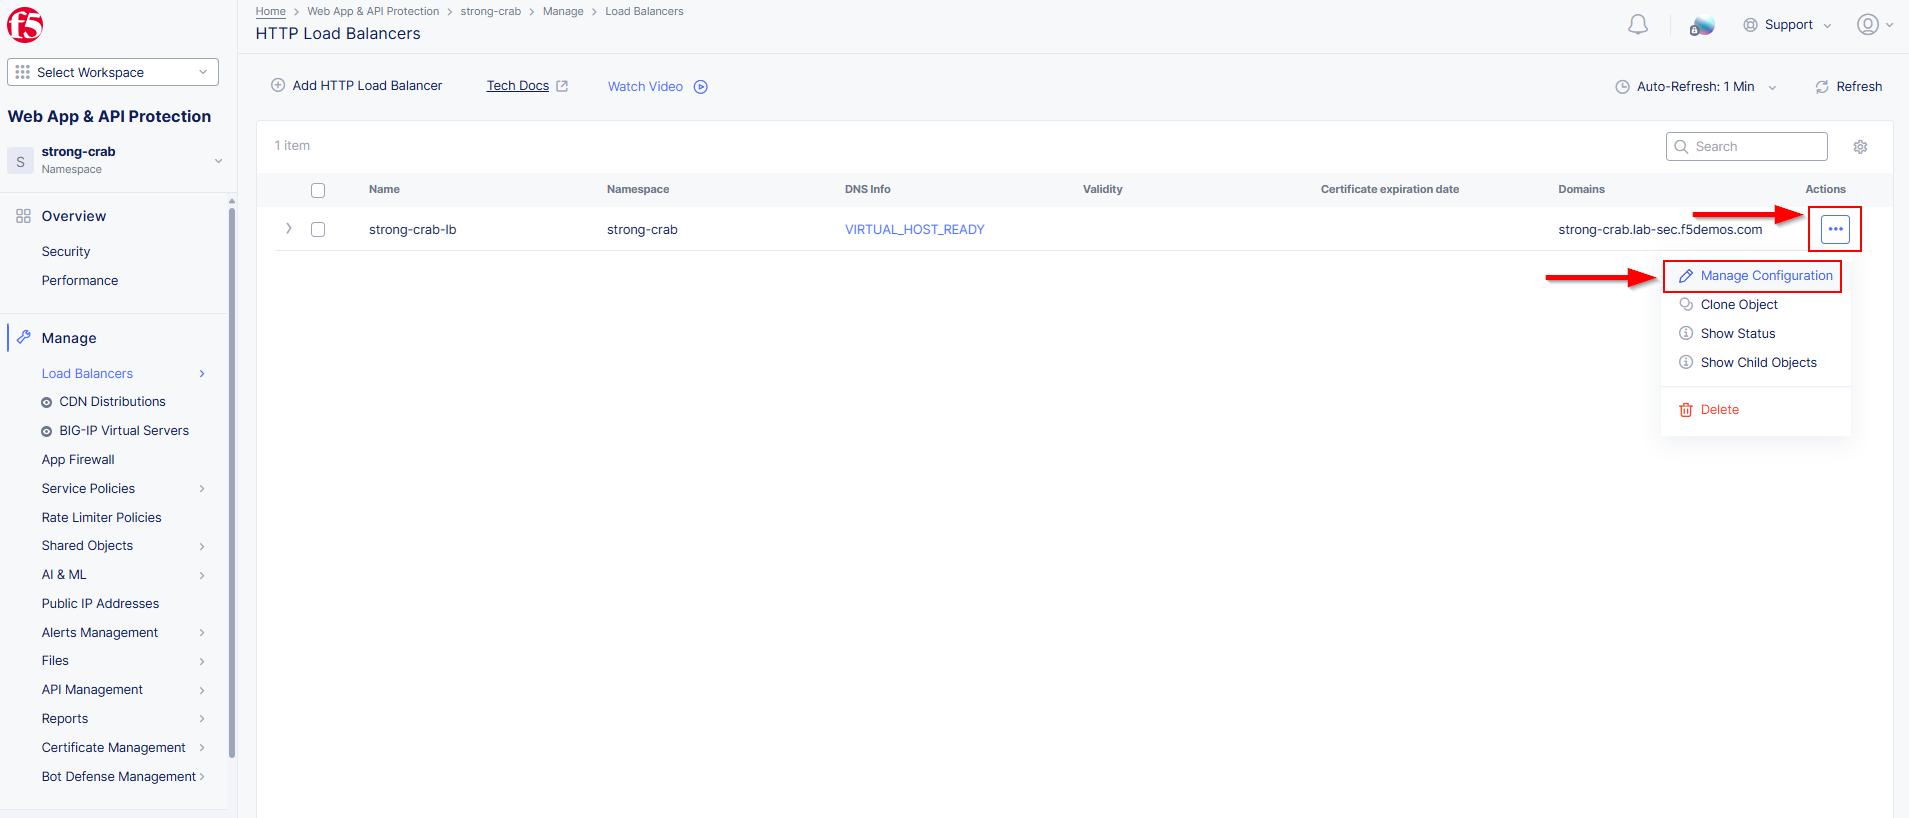
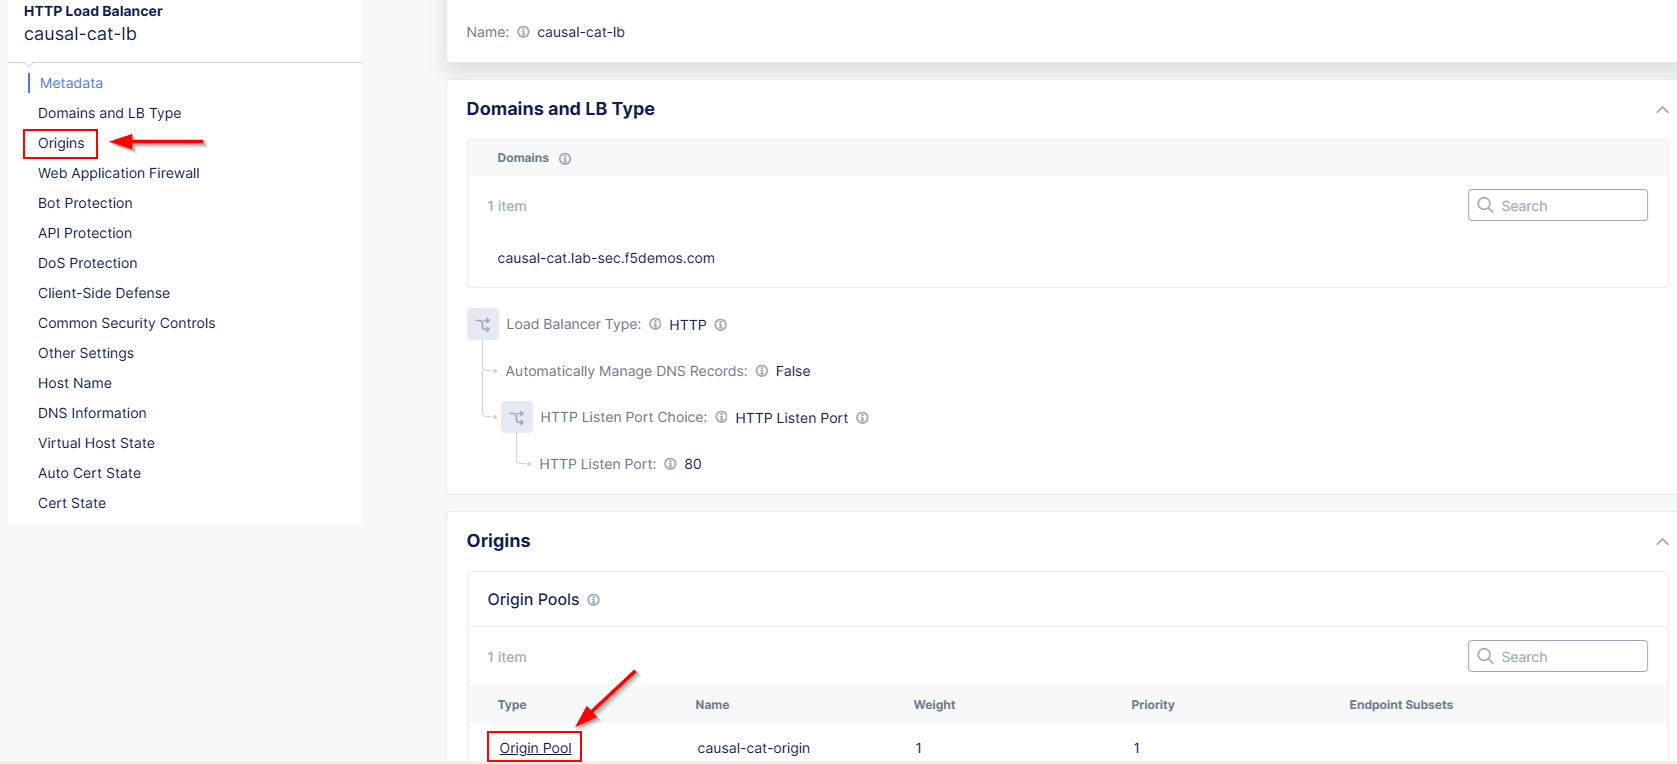
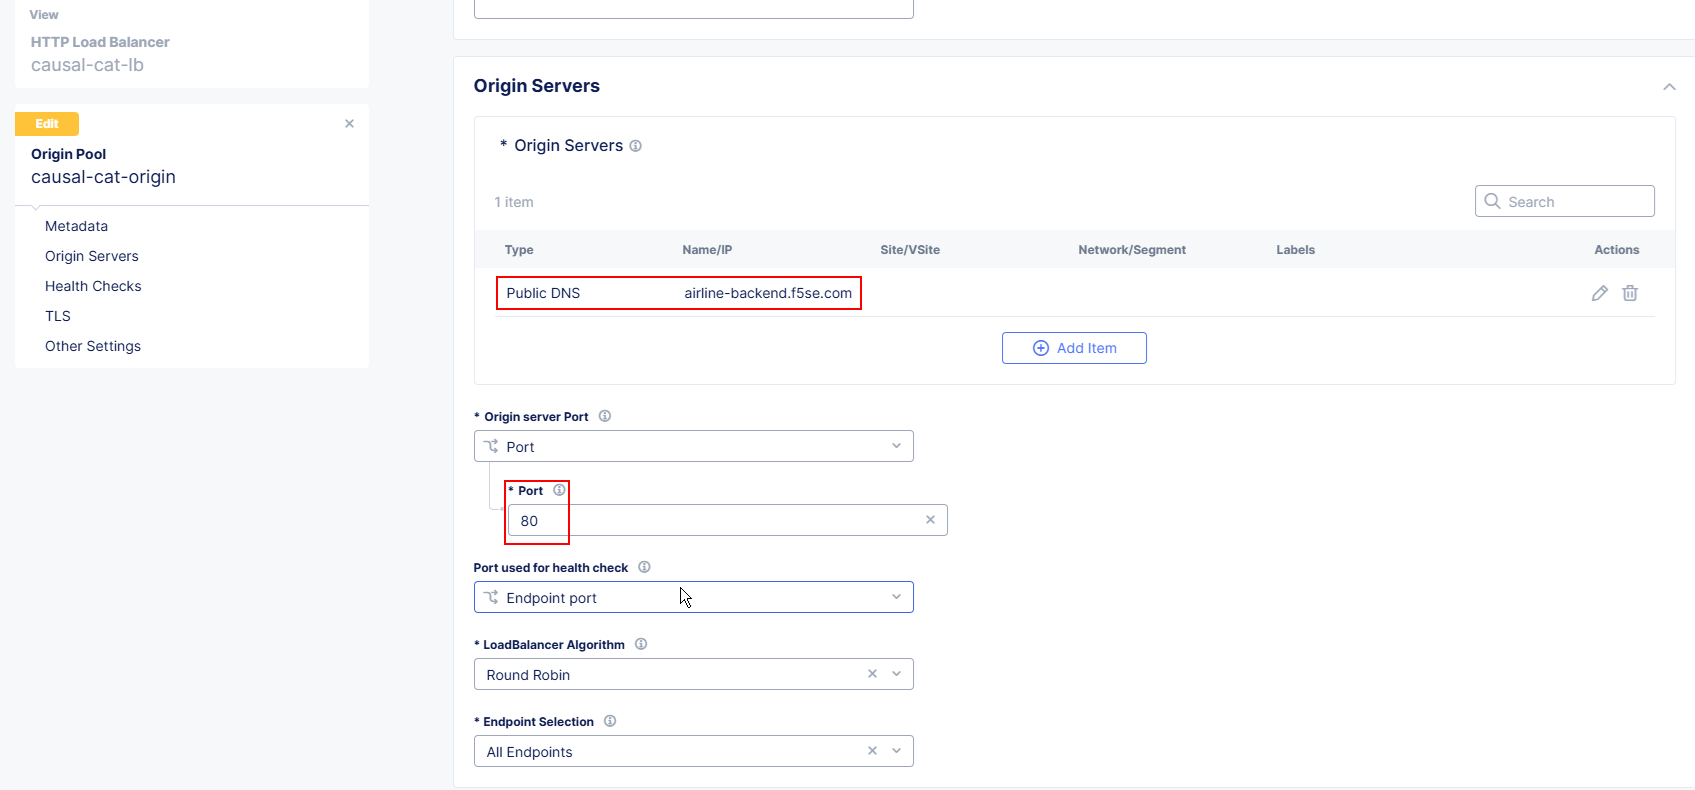
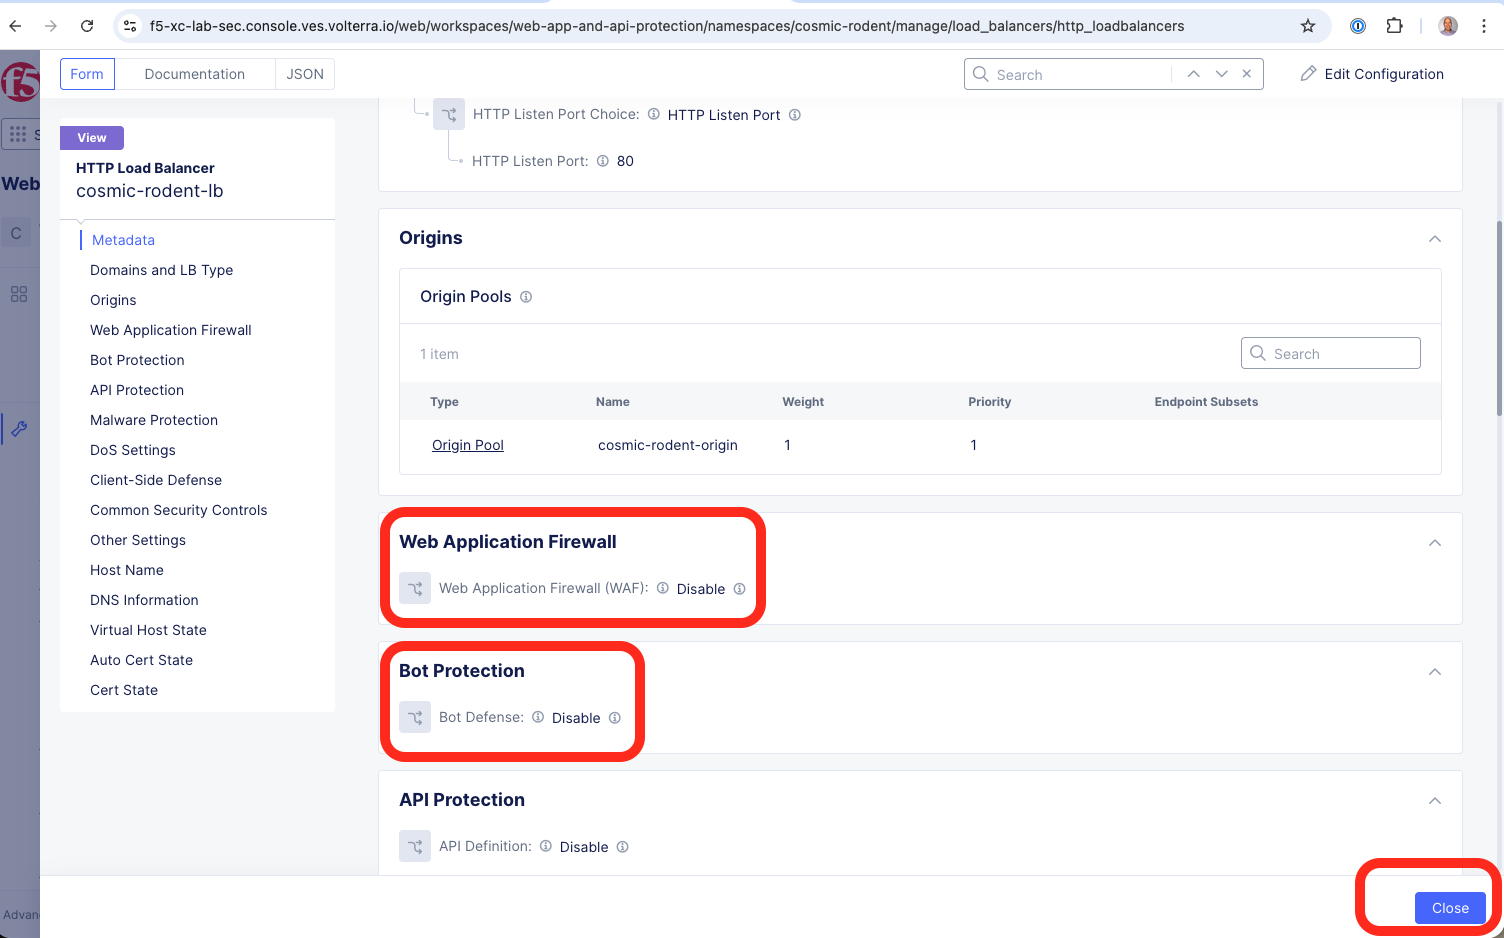
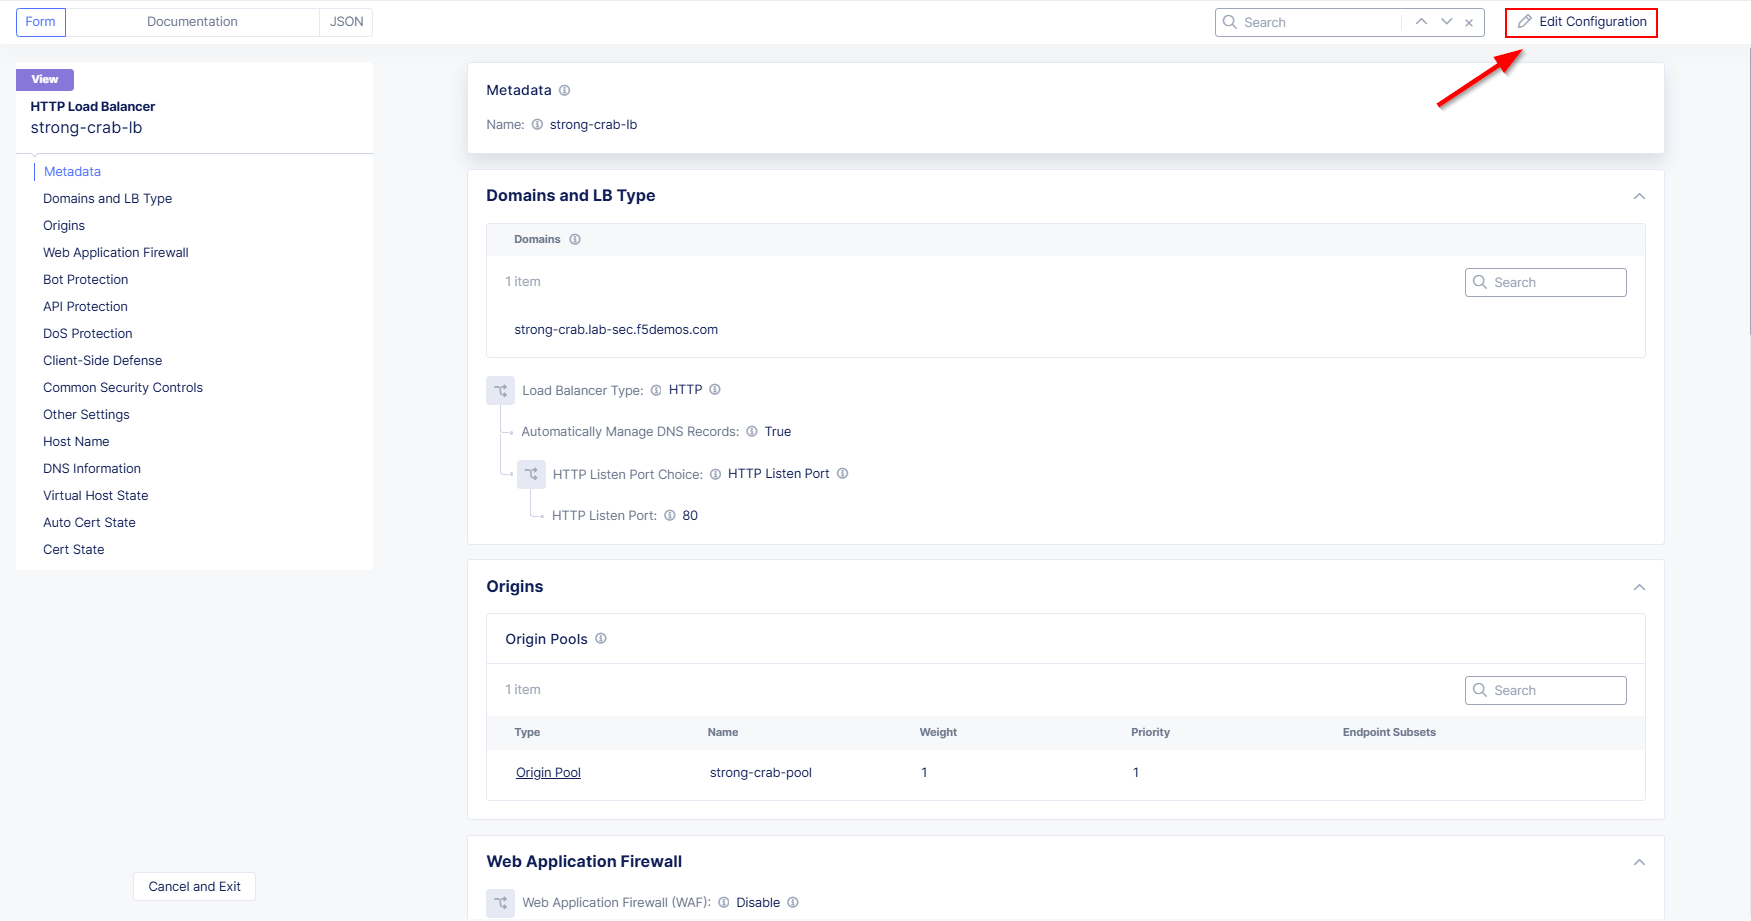
Task 2: Review the HTTP Load Balancer

For this task you will review the pre-configured Load Balancer configuration and the origin pool for the backend application. You will verify other security features that are tied to the Load Balancer and their current state.

  1. In the Distributed Cloud (XC) Console, under HTTP Loadbalancers click the three dots under the Action column and select Manage Configuration.

lab1-task2-01

  1. Explore the Backend App by selecting Origins and Origin Pool followed by Edit Configuration. You will see the backend origin pool configuration.

    Note: we are simply using a public DNS host for the backend.

    The application is directly accessibile to us, which we will explore later.

lab1-task2-02

lab1-task2-03

lab1-task2-04

  1. Click Discard then Back to return to the HTTP Load Balancer configuration page and then review the Web Application Firewall and Bot Protection status. Notice both are disabled. Click the Close button when finished.

    Well… *No wonder you’re being attacked!* Lets dig into this…

lab1-task2-05

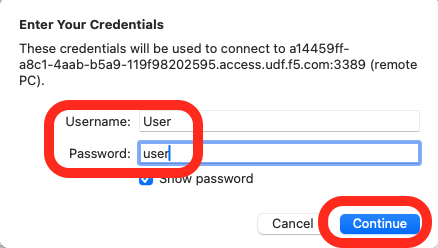
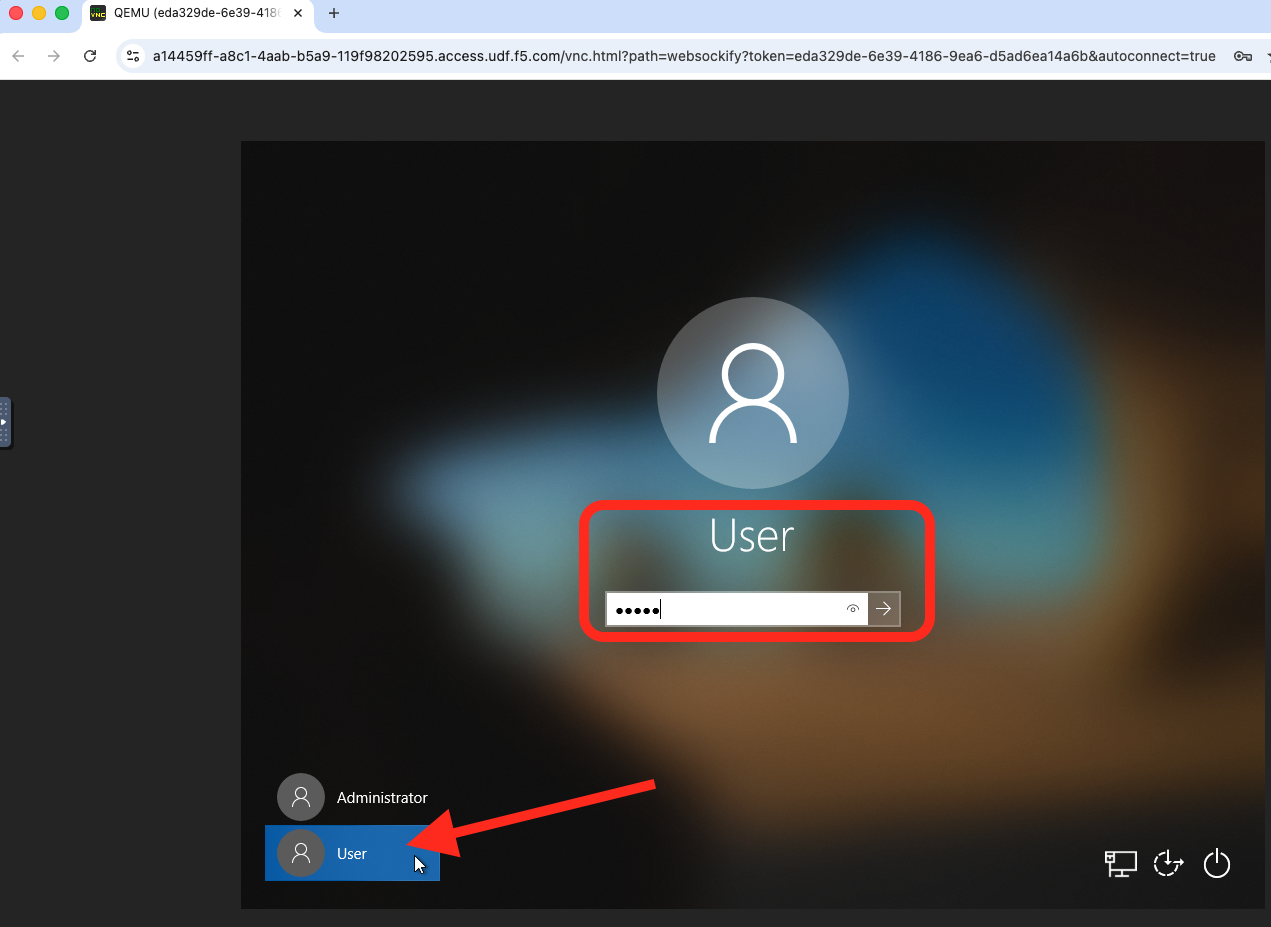
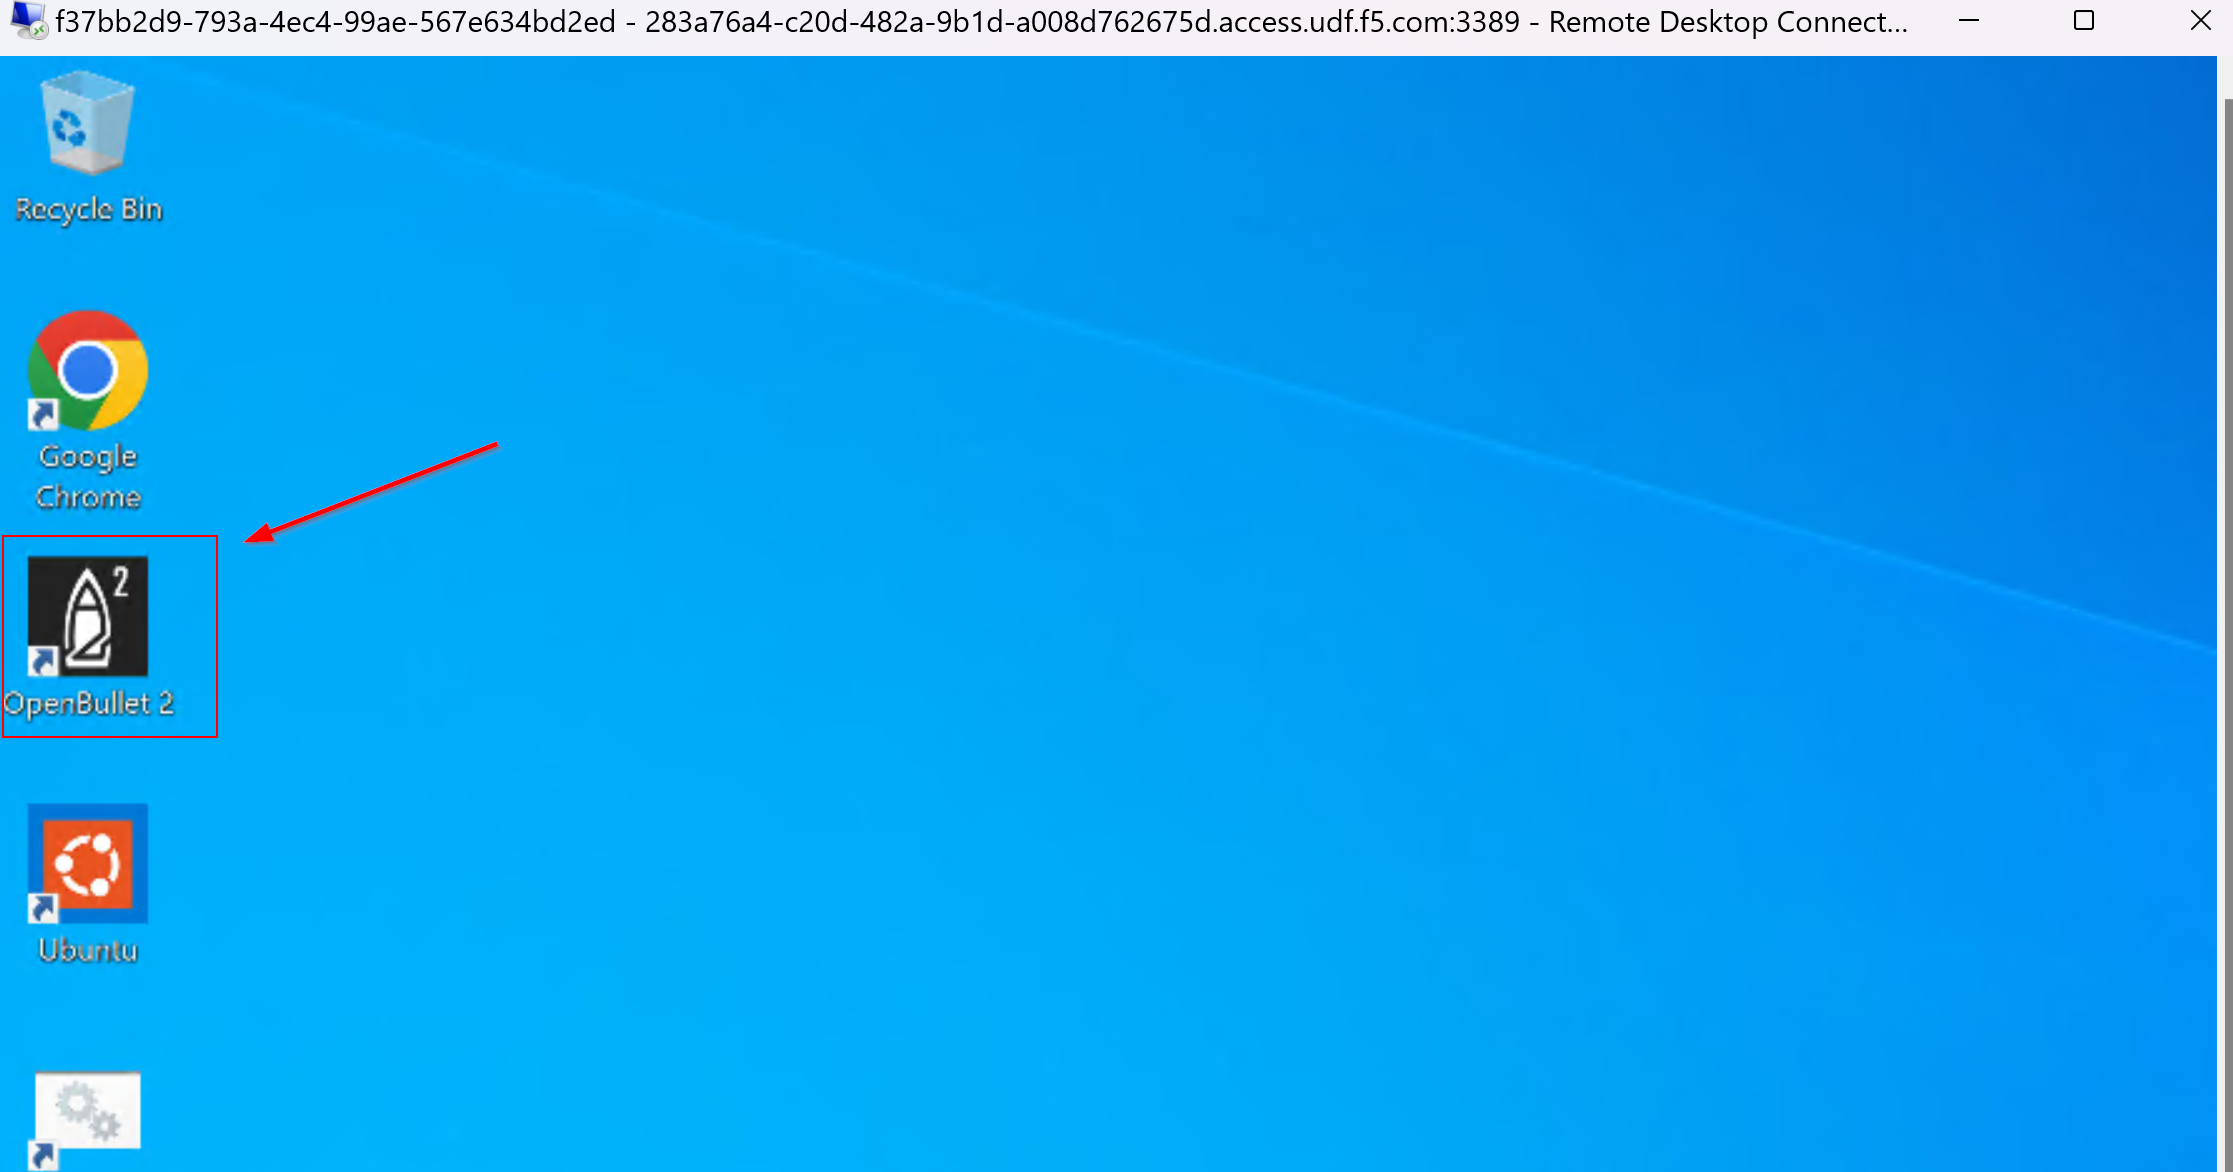
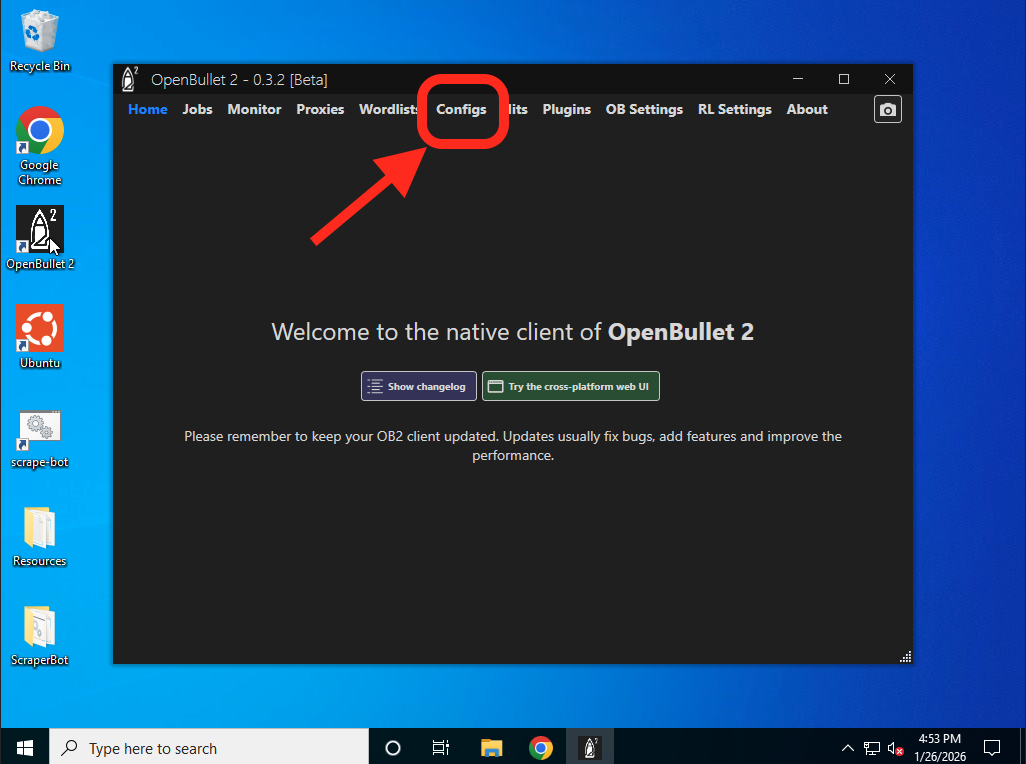
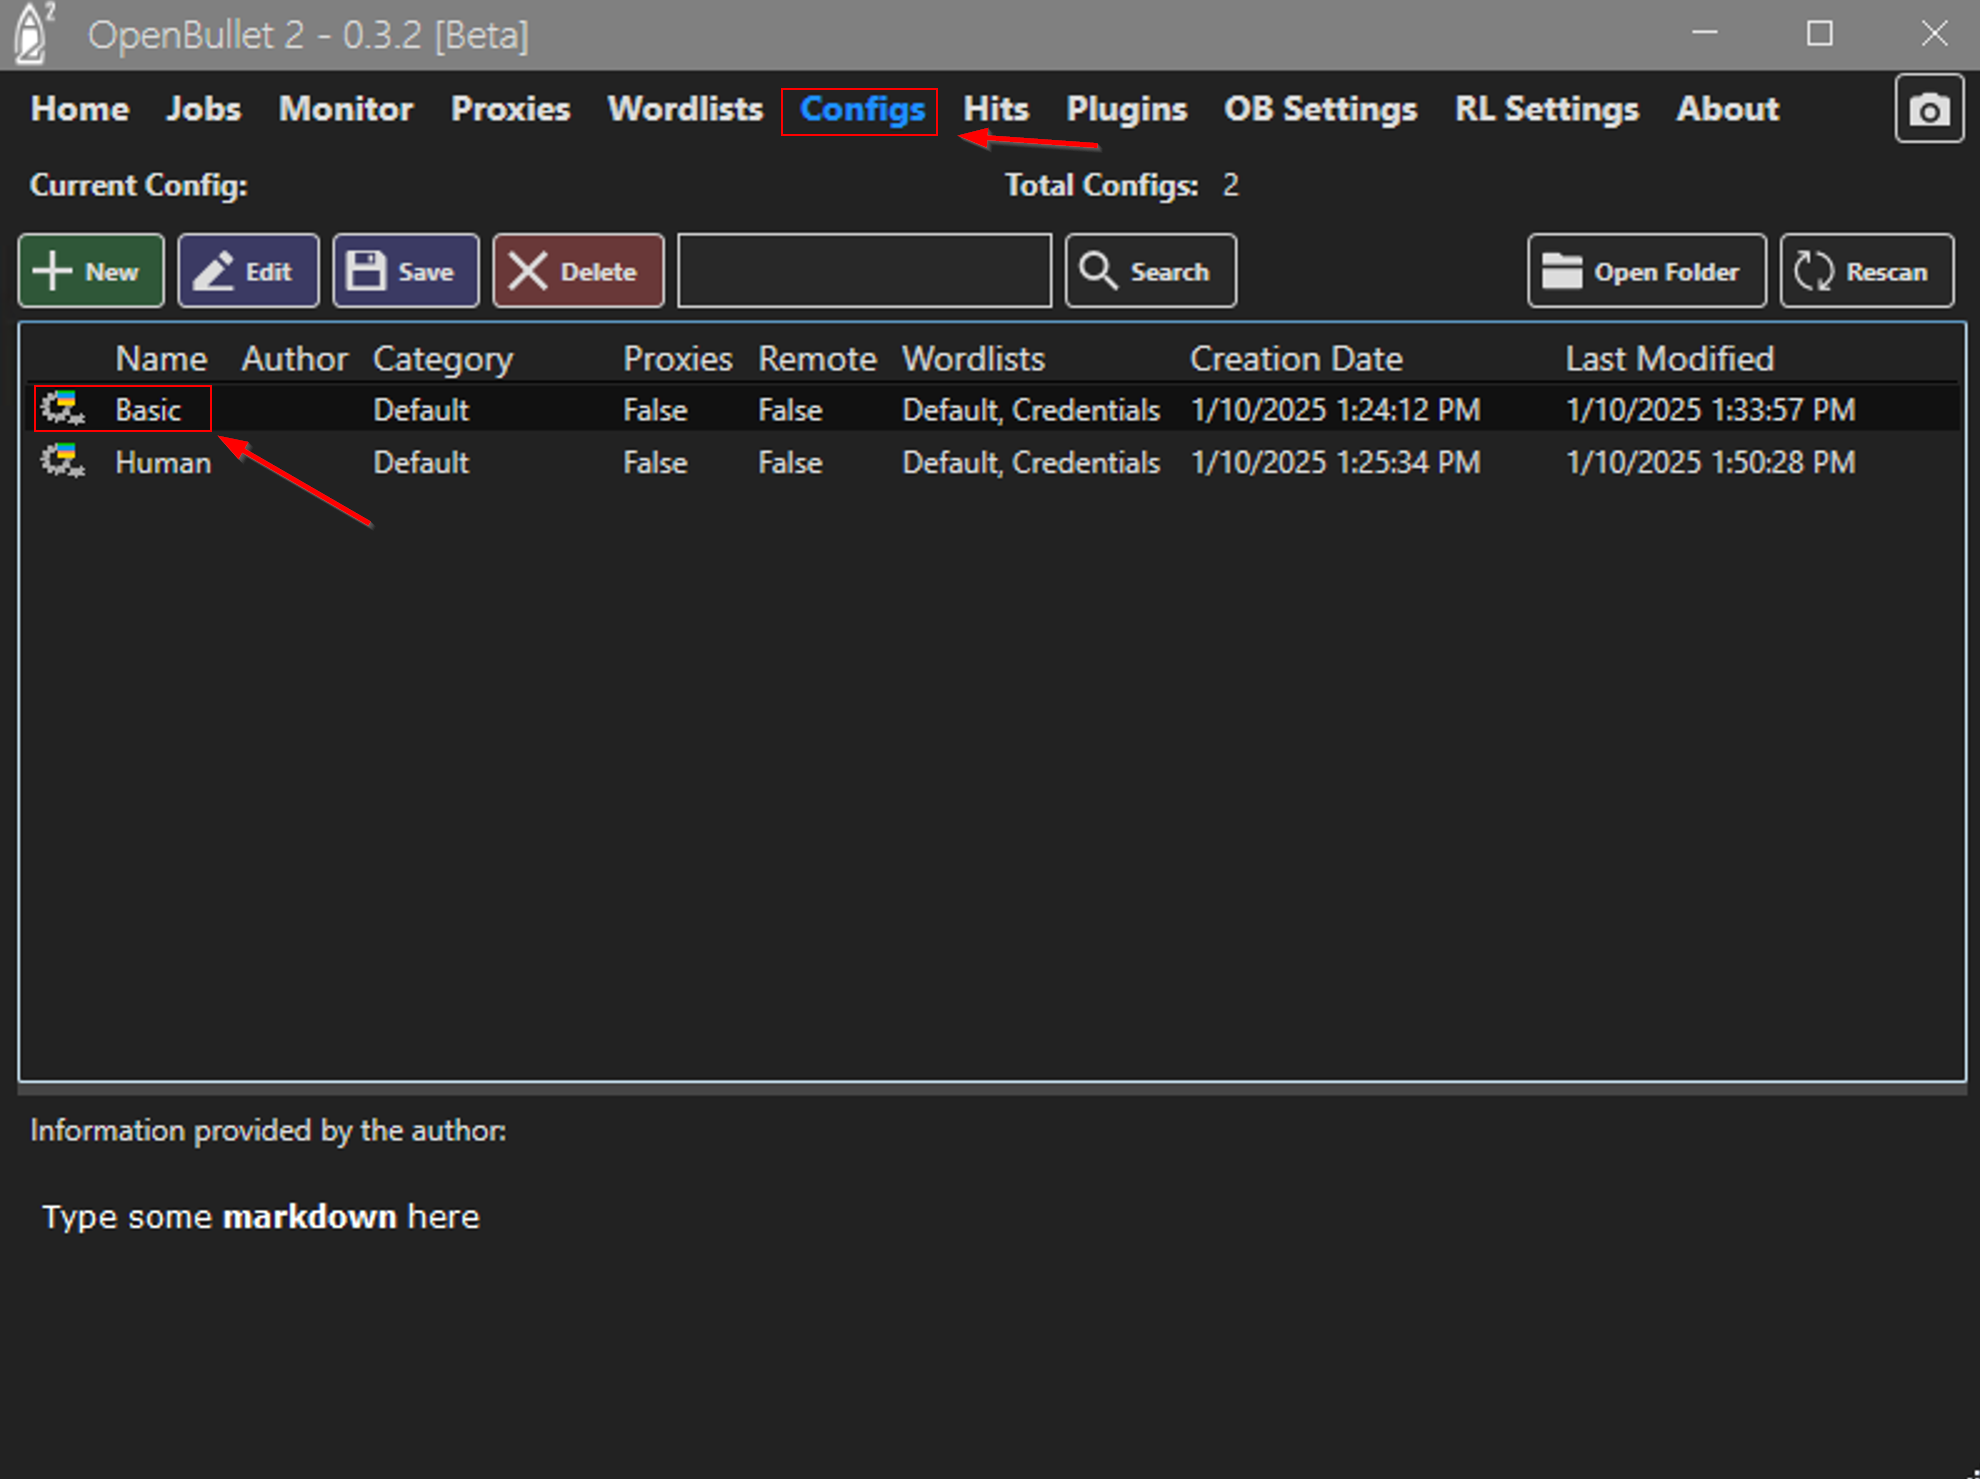
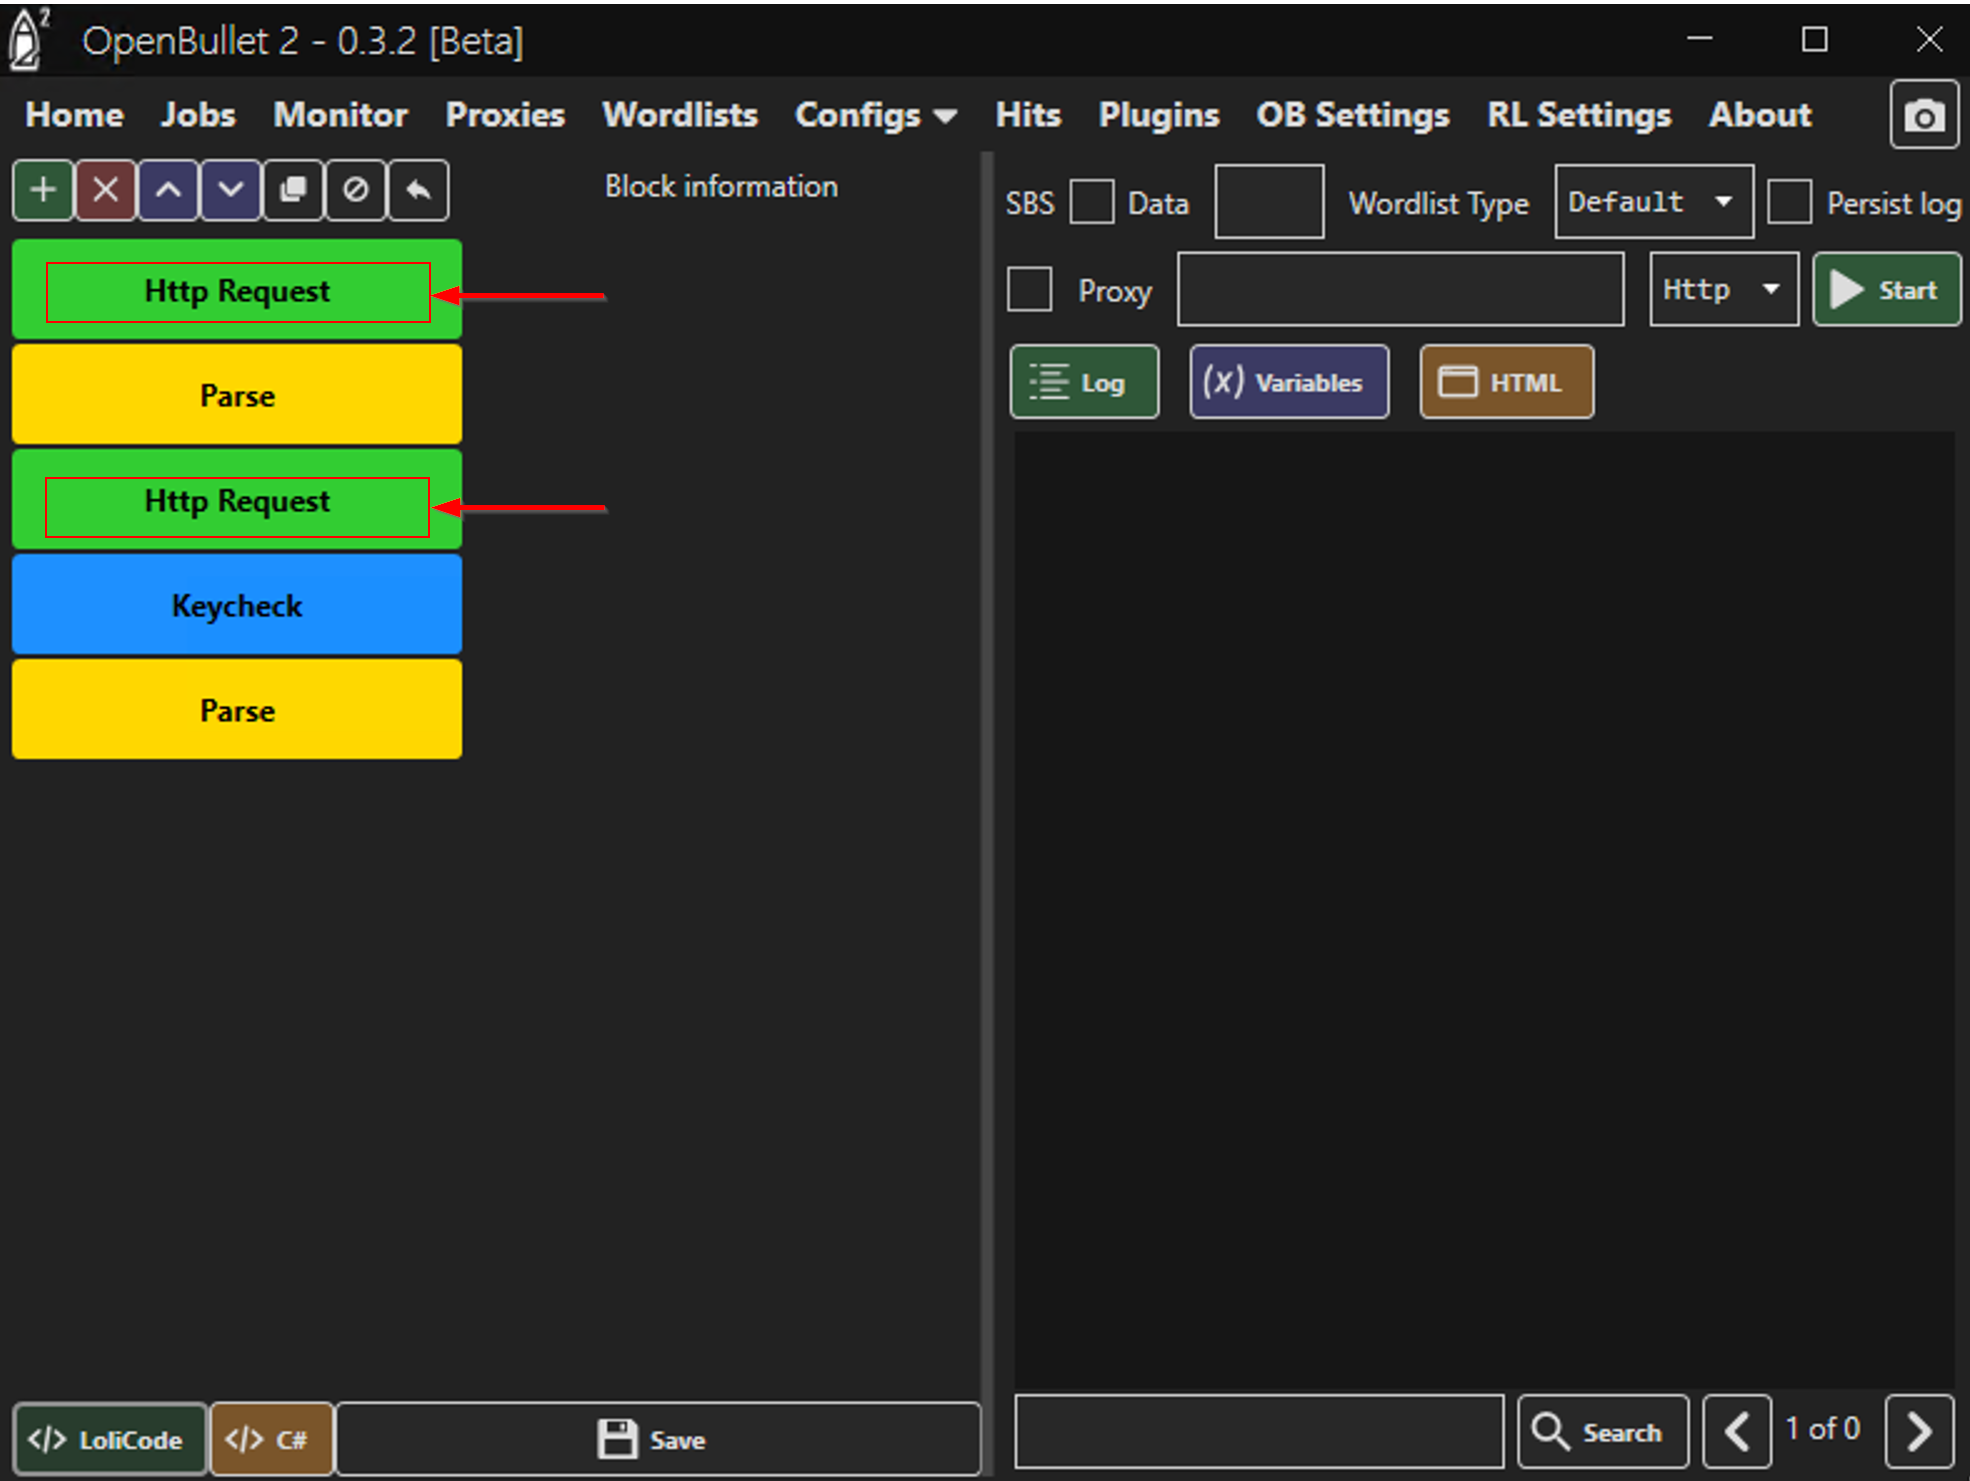
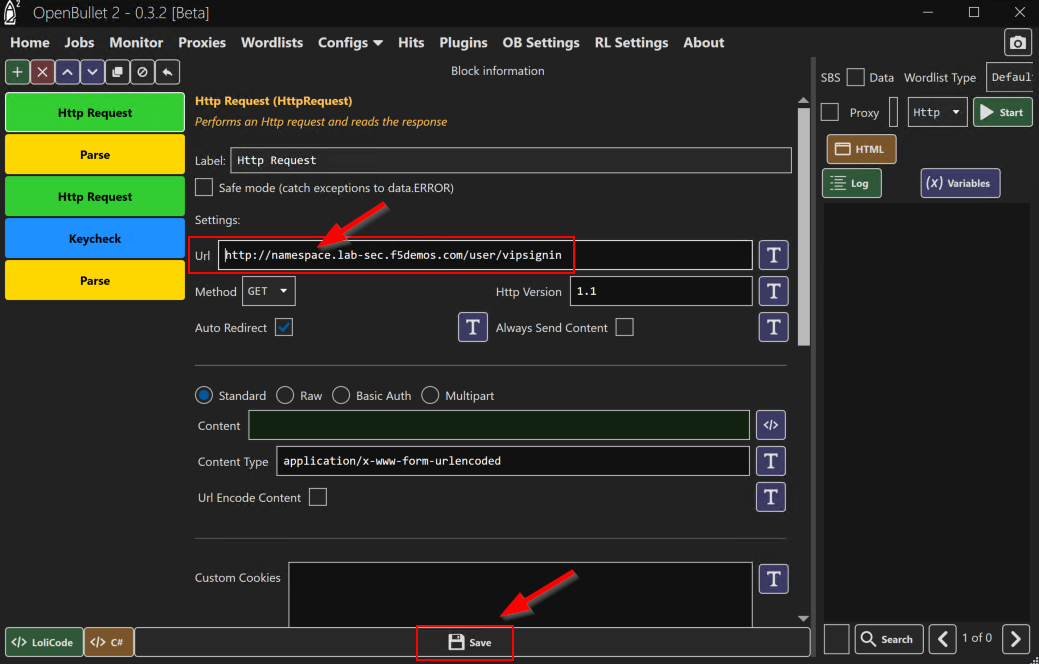
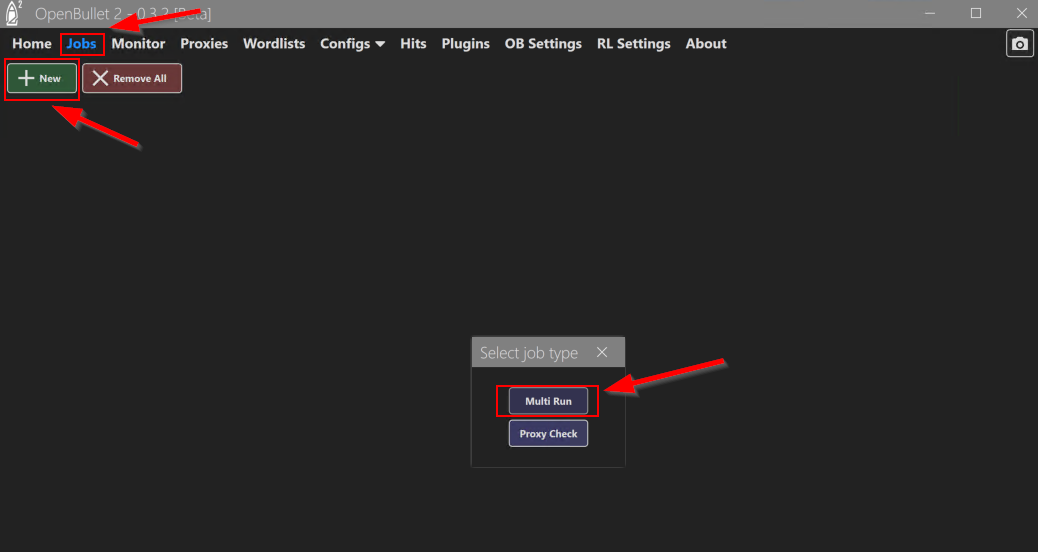
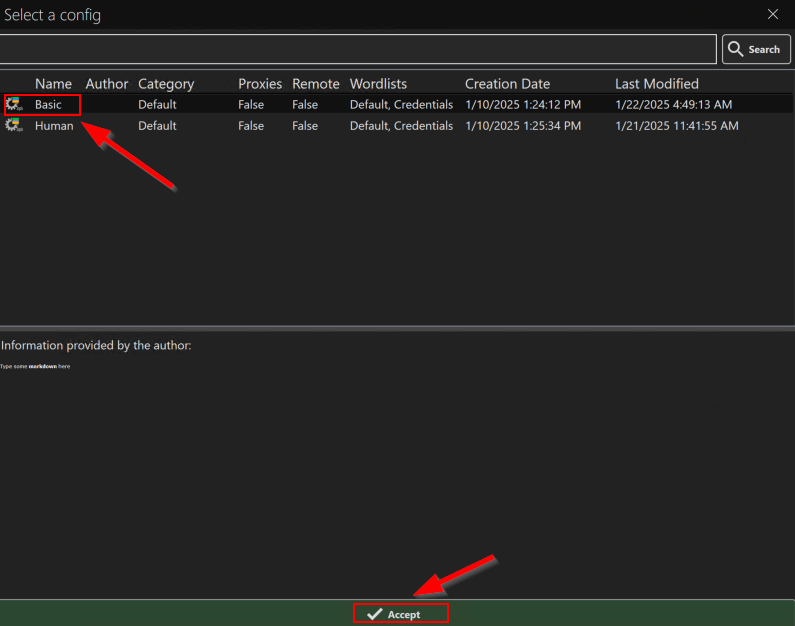
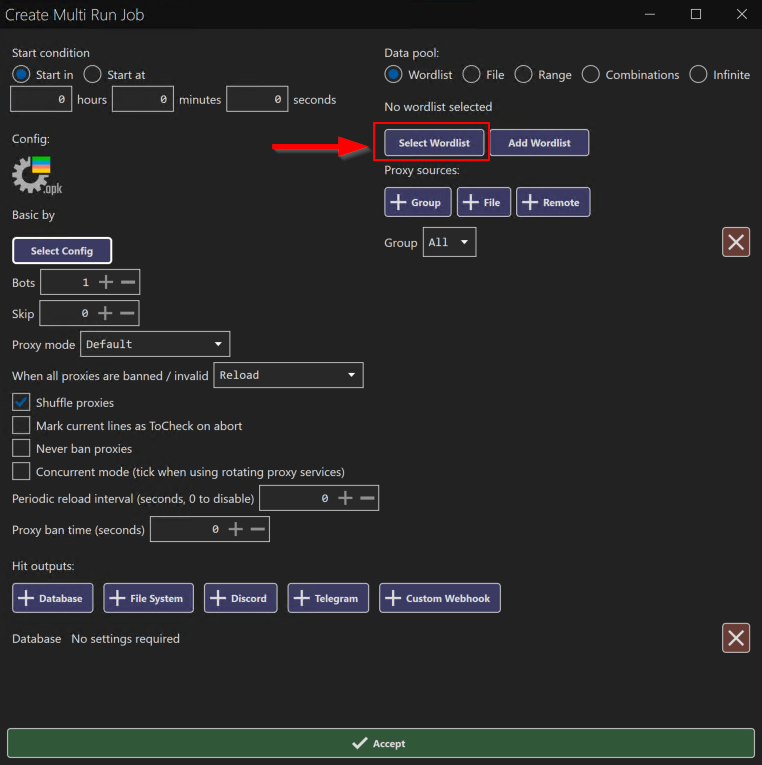
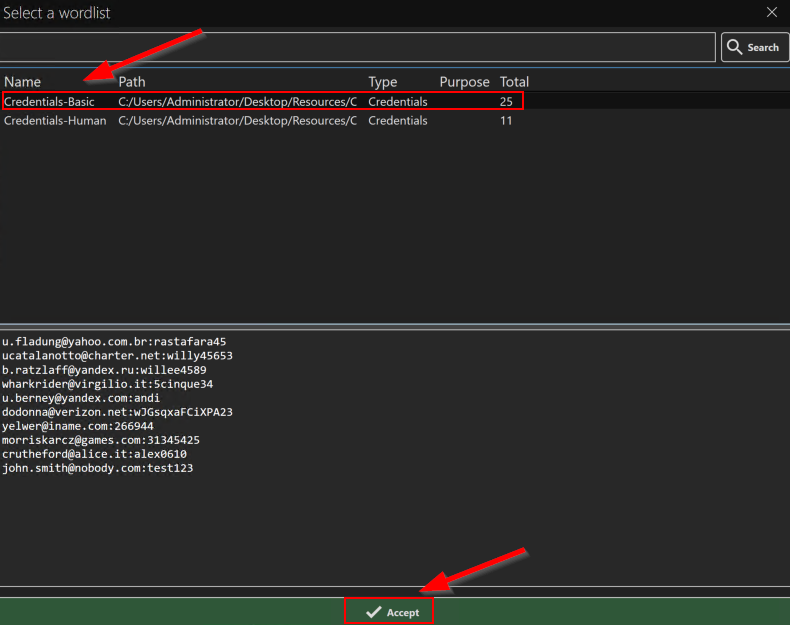
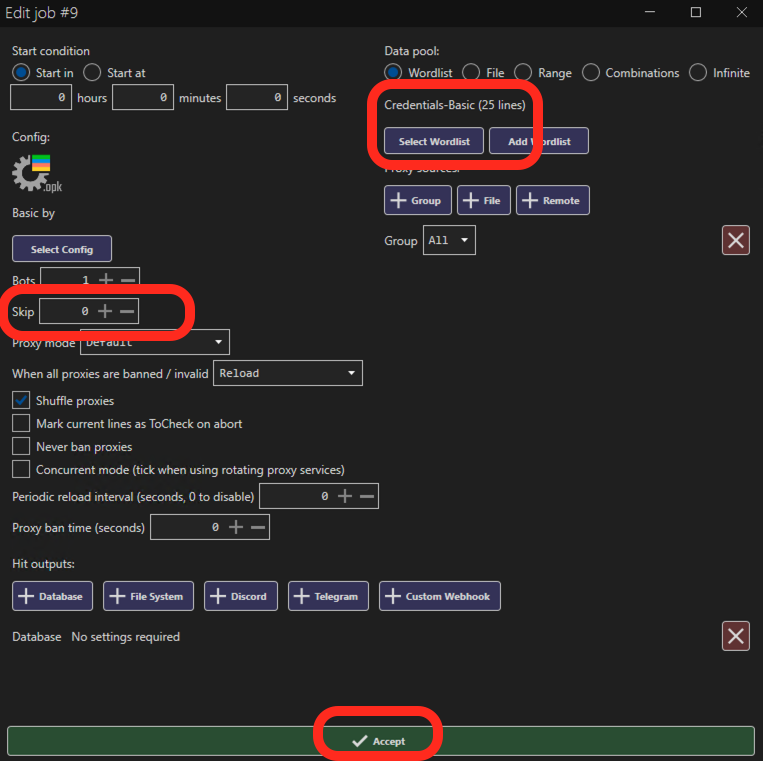
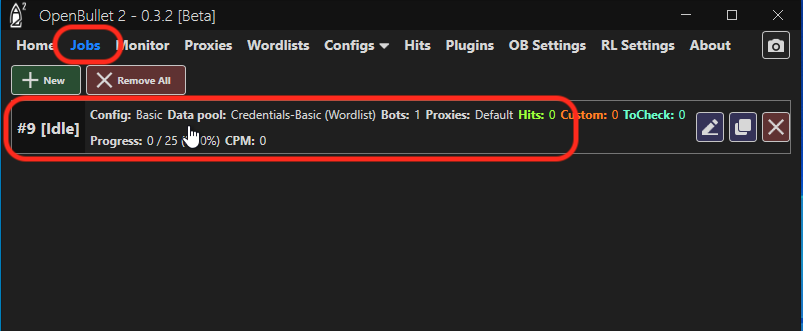
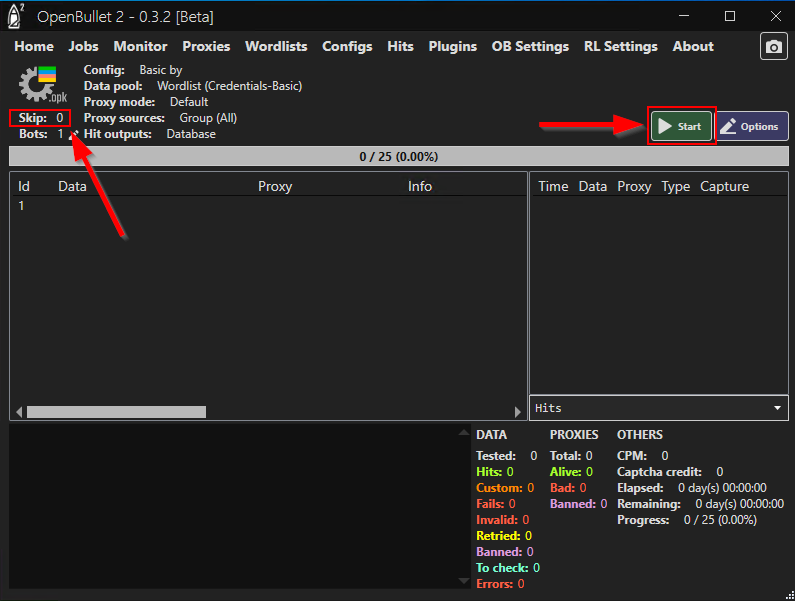
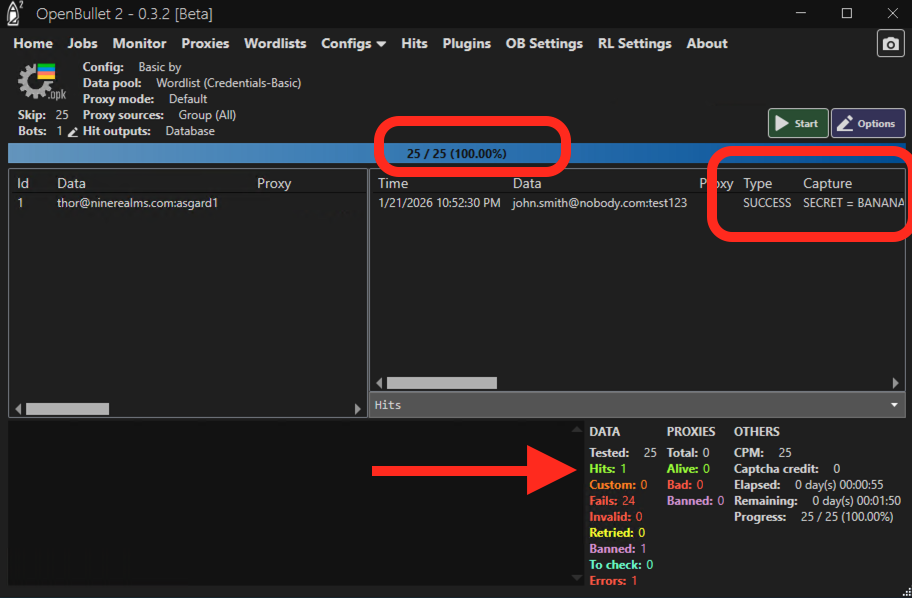
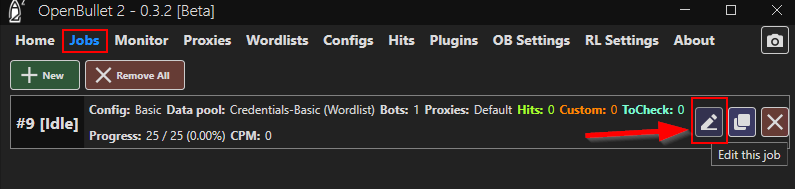
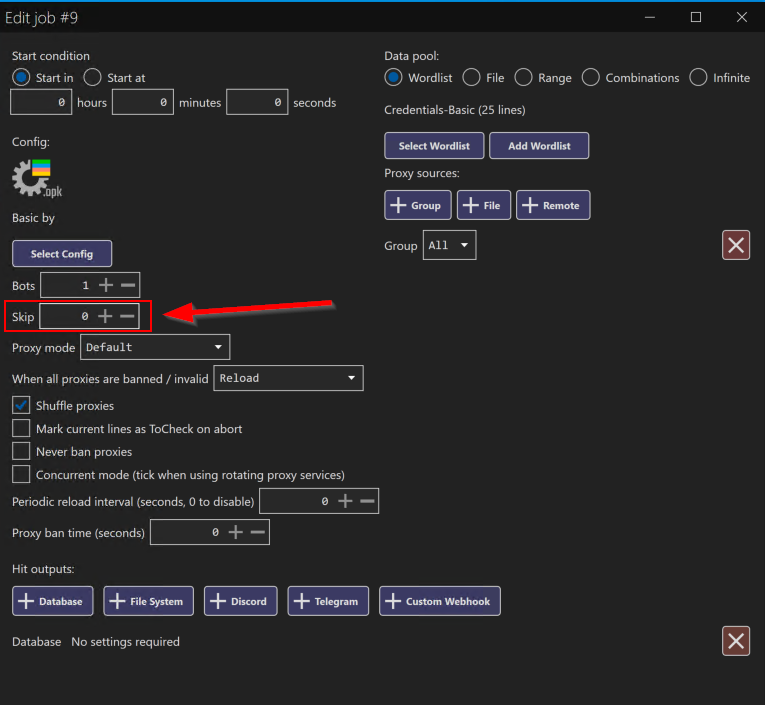
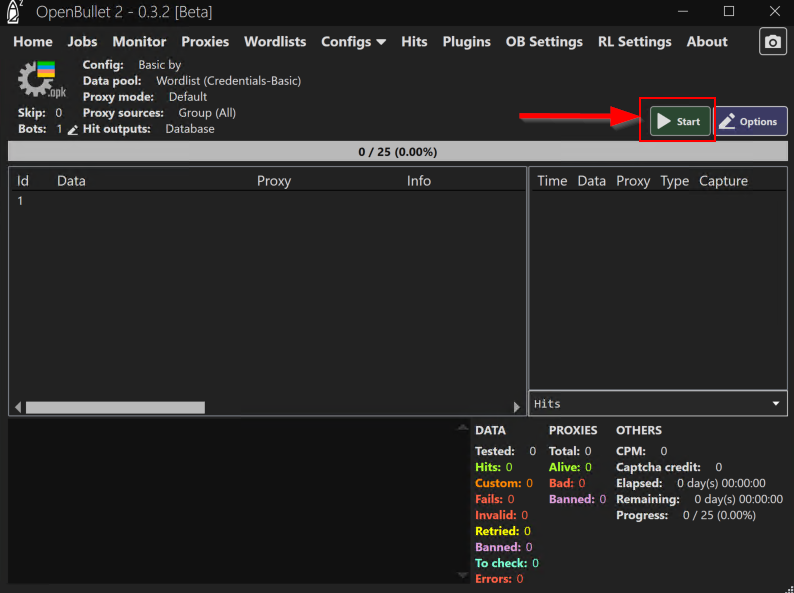
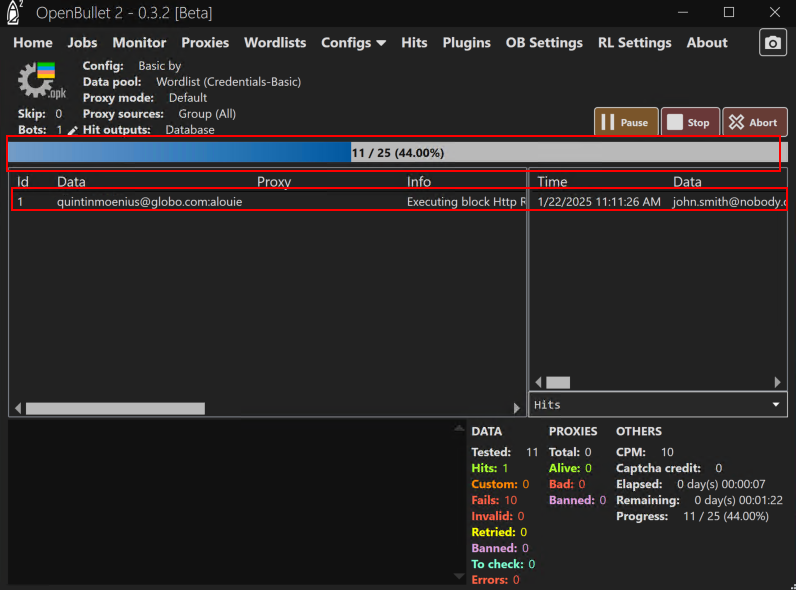
Task 3: Generate Attack Traffic with OpenBullet Automated Attack Tool

In this task, you will simulate your attacker’s behavior by using the Openbullet utility to perform a credential stuffing attack.

Note: Because each student is assigned a unique namespace, there is no way to pre-stage traffic generation. Because of that, we will play the role of an attacker and generate some interesting traffic. Before we begin, we need to configure the tool.

  1. Go back to your UDF Deployment page to initiate an RDP or Console connection into your Windows JumpHost. The username is “User” and the password is “user”.

    Click on Deployment Tab > JumpHost > ACCESS

    lab1-task3-01a

    lab1-task3-01

    lab1-task3-01b

  1. On the home screen double-click the OpenBullet 2 shortcut

lab1-task3-02

  1. Click on Configs and double-click “Basic” - this is our credential stuffing attack configuration that will simulate a basic Bot.

lab1-task3-03a lab1-task3-03

  1. Notice there are two blocks called “HTTP Request”. Click on each one and update the URL by replacing the <namespace> with your assigned namespace and then Save and OK.

lab1-task3-04

lab1-task3-05

  1. Click on Jobs and then + New and then select Multi-Run

lab1-task3-08

  1. In the new window, on the top left, click “Select Config” and then Basic.

    Click Accept once to return to the Create Multi Run Job*(*Edit job) screen.

lab1-task3-09

lab1-task3-10

  1. On the top right, click Select Wordlist, select Credentials-Basic and then click Accept once to return to the Create Multi Run Job*(*Edit job) screen.

lab1-task3-11

lab1-task3-12

  1. Change the Skip value to 0 (zero) either by typing it or using the minus button finally clicking Accept at the bottom.

    Note: Scroll down to find the Accept button if the screen is too small…

lab1-task3-16

  1. Now with the Skip value changed to “0”, we can run the job. Open the job you created above by clicking on its name (do not click its pencil/edit icon) and then click Start.

    Please be patient… It may take a minute or two for the job to start.

    The job progress indicator bar will update as it cycles through the credentials.

    If you do not see the indicator progress bar moving, ask a Lab Assistant for help

lab1-task3-17a

lab1-task3-17

  1. Were any credentials successful ? You should see one successful login attempt on the right-side Openbullet panel.

    lab1-task3-18

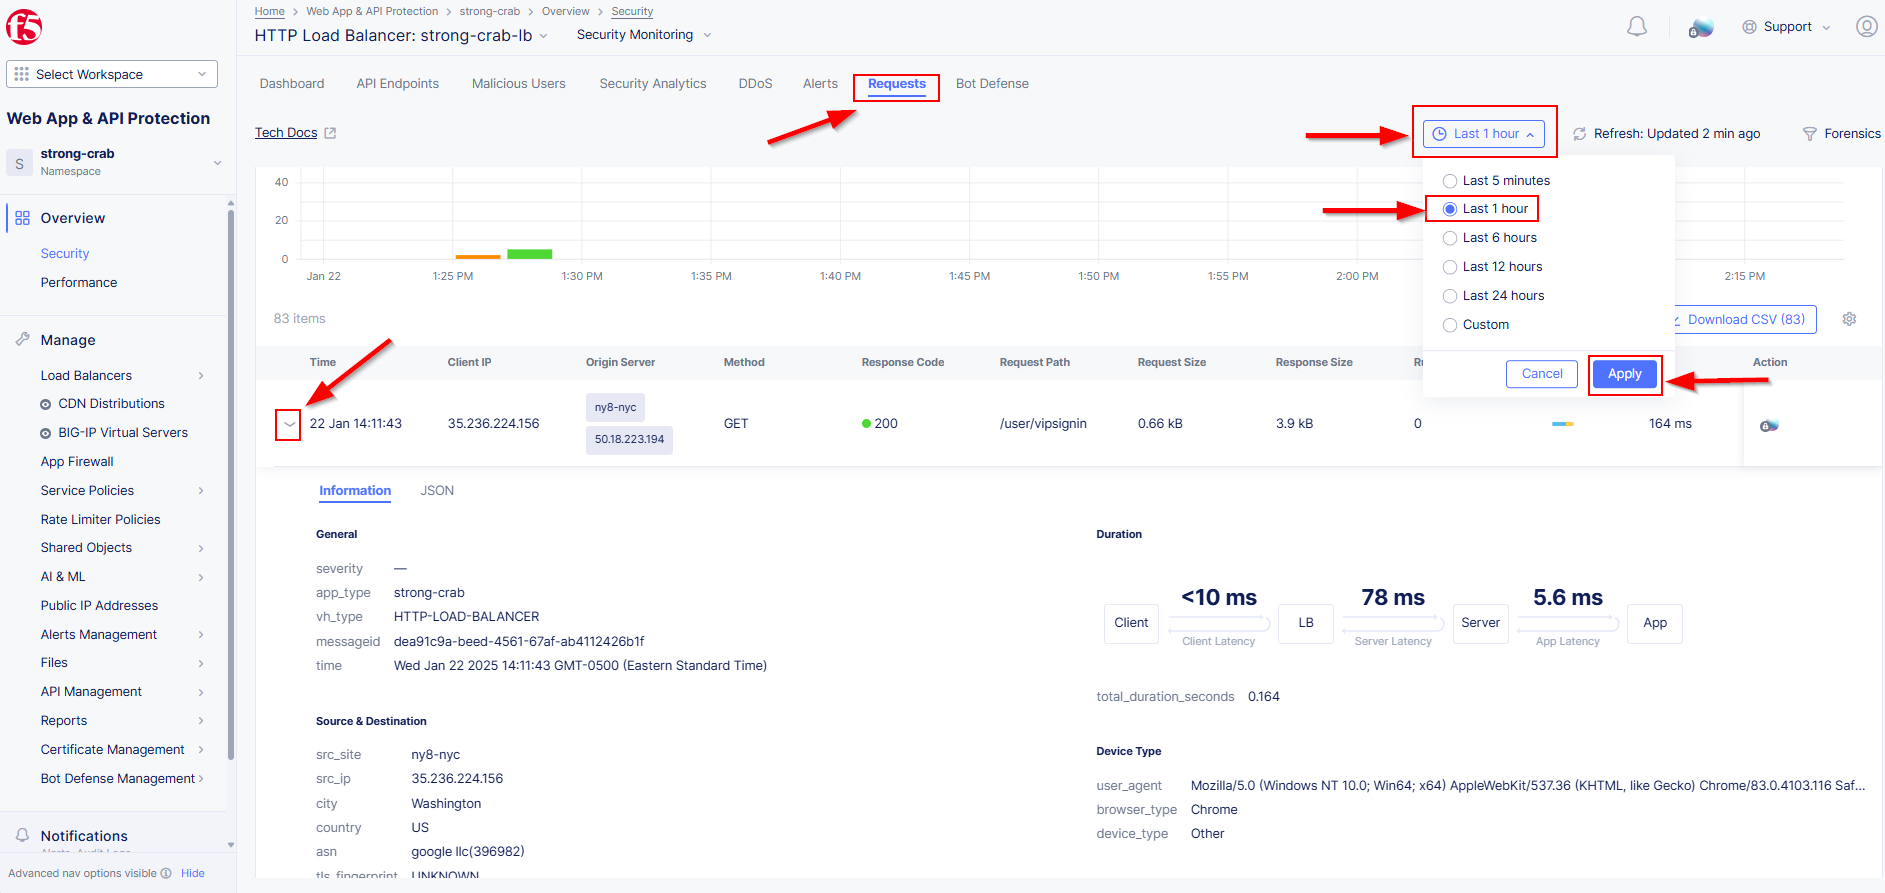
Task 4: Review the Request Logs

For this exercise you will work on filtering and identifying requests.

  1. Go back to the Web App and API Protection page in your Distributed Cloud (XC) Console then click on Overview and finally Security.

lab1-task4-01

  1. Scroll to the bottom and click on your HTTP Load Balancer.

lab1-task4-02

  1. Click the Requests tab at the top and review the POST request in the log. Click the chevron (>) icon to expand a request to see its details as shown below.

    Hint: If no requests are shown, change time interval.

lab1-task4-03

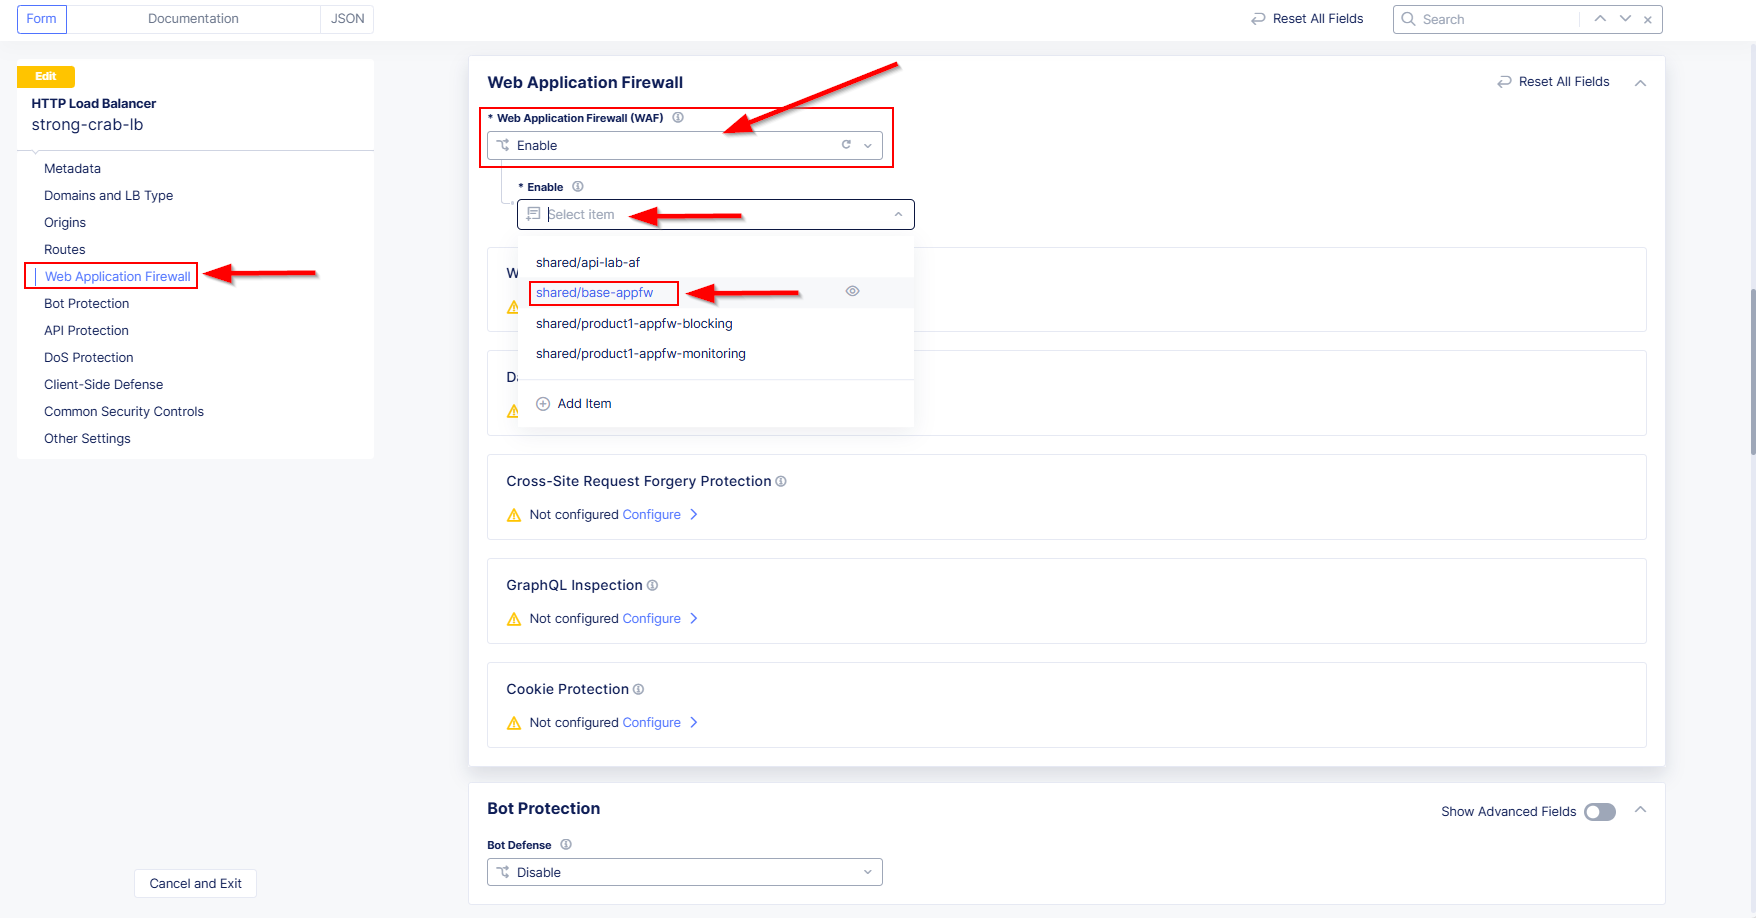
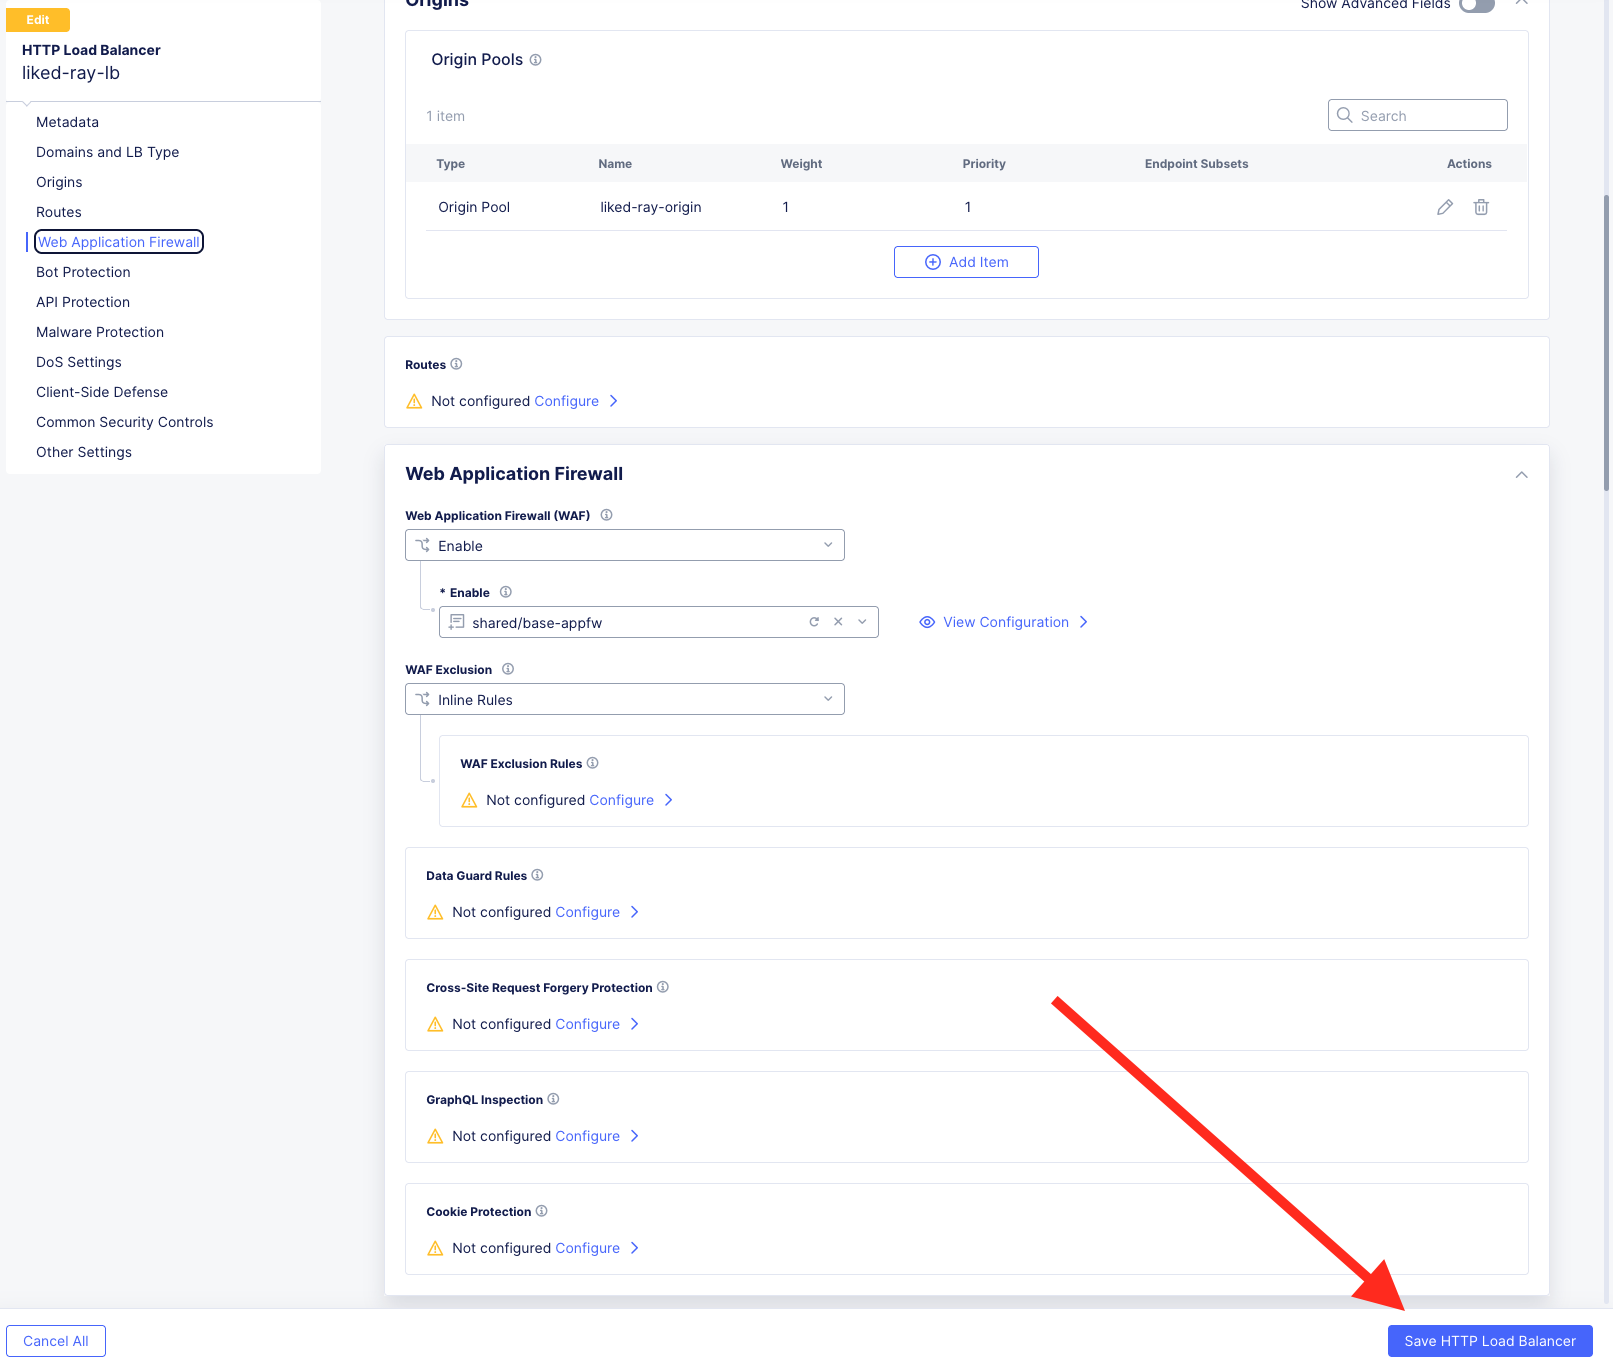
Task 5: Assign a Web Application Firewall Policy and Re-Test

For this initiative you will assign a Web Application Firewall to the Load Balancer. Finally you simulate more test traffic with OpenBullet.

  1. In the Distributed Cloud (XC) Console, go back to *Manage > Load Balancers >***

    *HTTP Loadbalancers*, then click the three dots under the Action column for your load balancer object and select Manage Configuration.

lab1-task2-01

  1. At the top right click Edit Configuration then look to the left side settings and click Web Application Firewall.

lab1-task5-01

  1. On the right side toggle Enable for the Web Application Firewall. Next, click Select Item a drop down list of pre-configured App Firewall policies will appear.

    Select “shared/base-appfw”.

lab1-task5-02

Finally click Save HTTP Load Balancer at the bottom of the screen.

lab1-task5-02b

  1. We will Re-run our credential stack from the Windows Jump Host. Go back to OpenBullet and click on Jobs to find the job previously created and them click the pencil/edit (or Options) icon to the right.

lab1-task5-03

  1. In the Skip counter, highlight the current number and type 0 (zero). You can also press and hold the minus button next to the Skip field. Click Accept when done.

lab1-task5-04

  1. Once again click on the Job and hit Start, the tool will iterate through the Credentials-Basic list and when done will be in a ready state for another test.

lab1-task5-05

lab1-task5-06

Task 6: Analyze the Request Logs after WAF Policy Enablement

For this objective you will want see what difference the Web Application Firewall has on the credential stuffing traffic.

  1. In the Distributed Cloud (XC) Console go to Web App and API Protection then click on Overview and finally Security.

lab1-task4-01

  1. Scroll to the bottom and click on your HTTP Load Balancer.

lab1-task4-02

  1. Let’s review the requests, Is anything being flagged as a violation? Why or Why Not?

    Hint: Click Requests and if needed change the time interval to a longer time slot and click Apply. You can also expand Request details by click the down button below.

lab1-task4-03

Lab 1 Summary

Since the bot requests in this lab are not violating any HTTP protocols or attack vectors, a WAF policy has no impact on mitigating traffic. In order to detect and mitigate bots that do not violate HTTP security, we need a very specialized service known as Bot Protection in Distributed Cloud. A brief presentation will be shared prior to beginning Lab 2.

labend